.jpeg)

Español
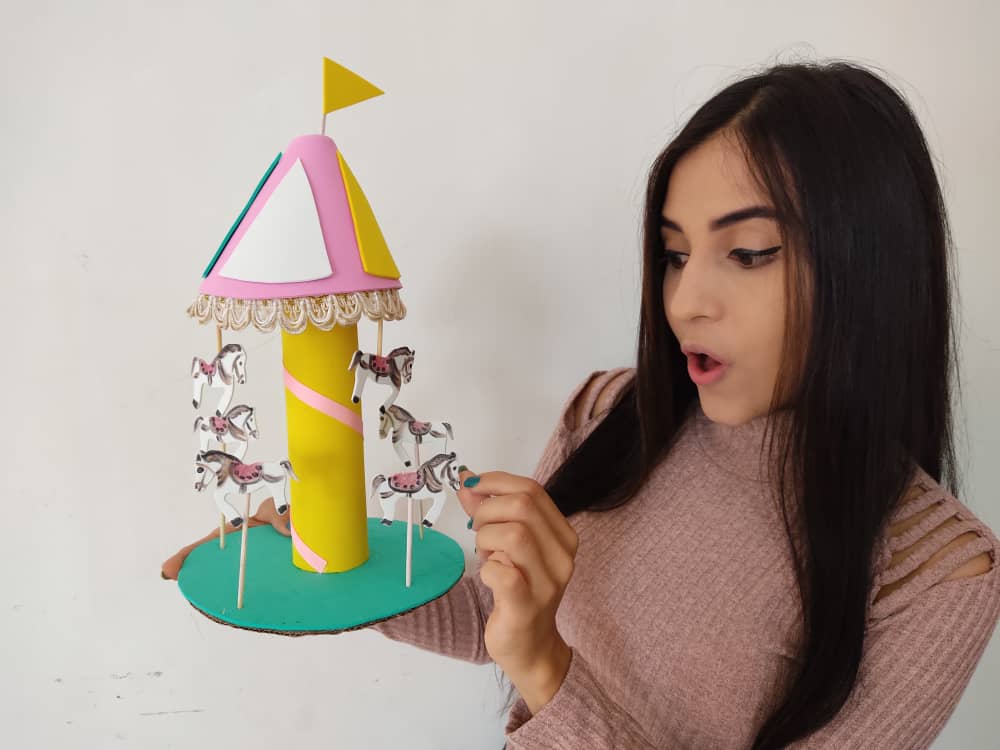
Hola querida familia de HIVE ❤️ Hoy les traigo un paso a paso muy divertido donde les mostrare como elaborar un precioso carrusel decorativo para las princesas de la casa, pues estoy segura que van a disfrutar mucho trabajando en este proyecto, ya que es súper fácil de hacer. Hagamos de esta cuarentena un mundo creativo en nuestra casa, y recuerden tengan paciencia, trabajen con mucho amor y verán que los resultados serán asombrosos.
English
Hello, dear HIVE family ❤️ Today I bring you a very fun step by step where I will show you how to make a beautiful decorative carousel for the princesses of the house because I am sure you will enjoy working on this project a lot since it is super easy to do. Let's make this quarantine a creative world in our house, and remember to be patient, work with a lot of love and you will see that the results will be amazing.
¿Qué están esperando?
Utilizar estos hermosos materiales para transformarlos en un carrusel es una idea muy original y económica para decorar nuestro entorno. Antes de comenzar no olvidemos lavarnos nuestras manos.
What are they waiting for?
Using these beautiful materials to transform them into a carousel is a very original and economical idea to decorate our environment. Before we start, let's not forget to wash our hands.
[Materiales | Materials]
Para hacer este hermoso carrusel necesitaremos:
- Moldes.
- Foami o goma eva.
- Papel vegetal o calco.
- Cilindros de Cartón.
- Lápiz.
- Tijera.
- Pincel o brocha.
- Pinturas.
- Cinta.
- Palillos de madera.
- Cúter.
- Pegamento o silicón liquido.
To make this beautiful carousel we will need:
- Molds.
- Foamy or EVA foam.
- Vegetable paper or tracing.
- Cardboard Cylinders.
- Pencil.
- Scissors.
- Brush or brush.
- Paintings.
- Tape.
- Wooden toothpicks.
- Cutter.
- Glue or liquid silicone.
Procedimiento (paso a paso)
Process (step by step)

Primero, marcamos y cortamos el cilindro de cartón a la medida que deseamos, en este caso decidí hacerlo de 24cm. Dicha medida definirá la altura que queramos que sea nuestro carrusel.
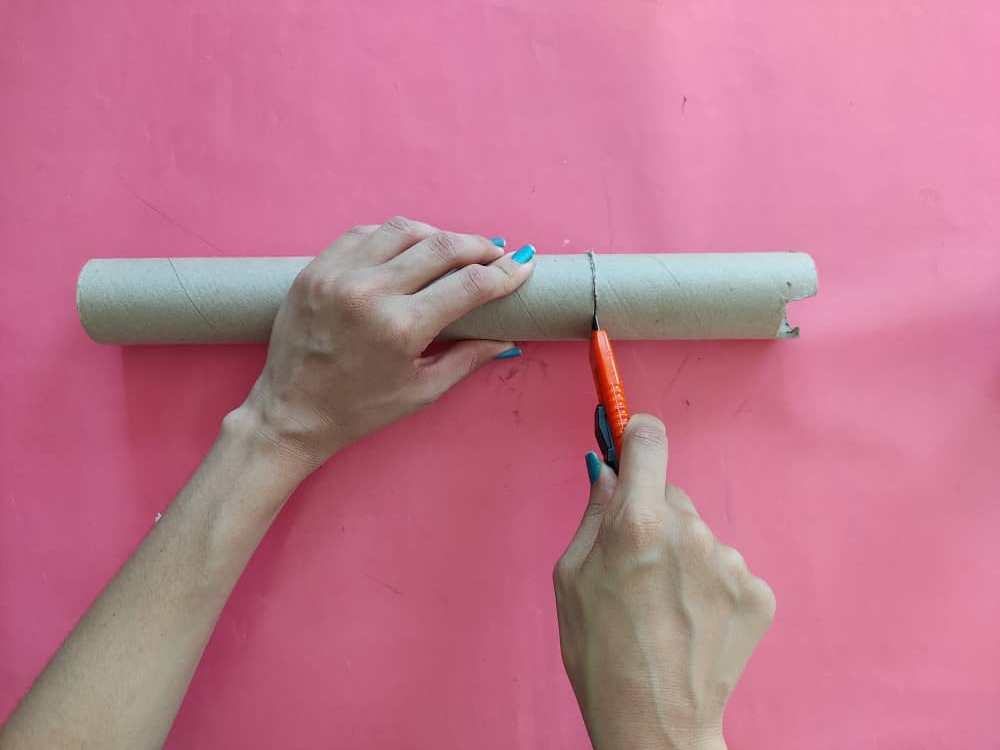
First, we mark and cut the cardboard cylinder to the size we want, in this case I decided to make it 24cm. This measure will define the height that we want our carousel to be.
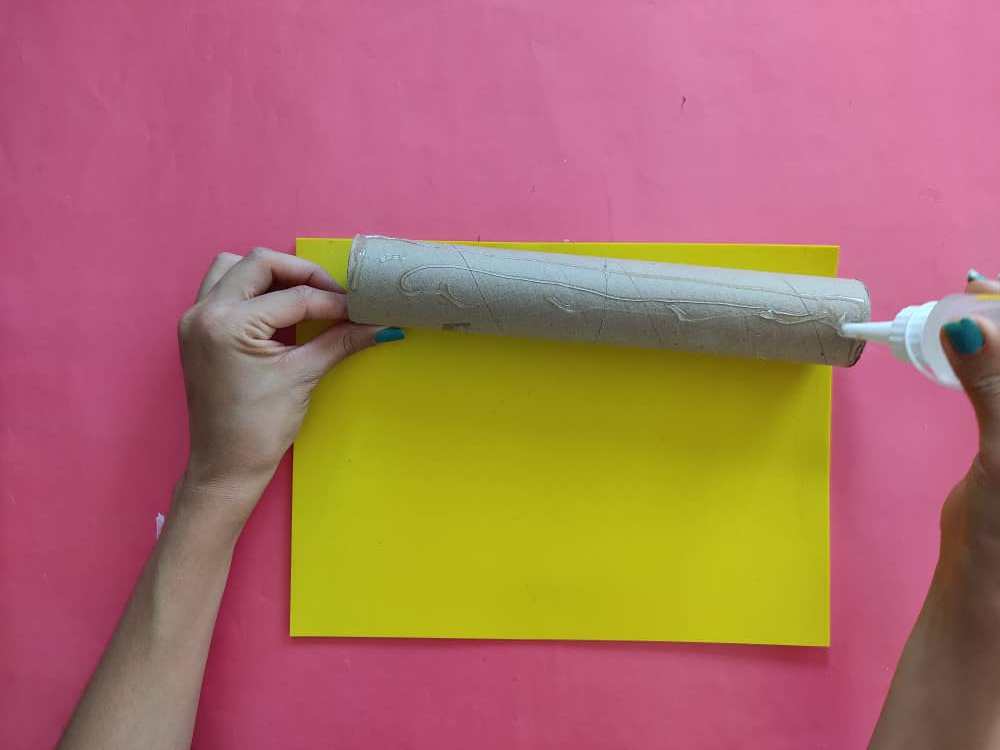
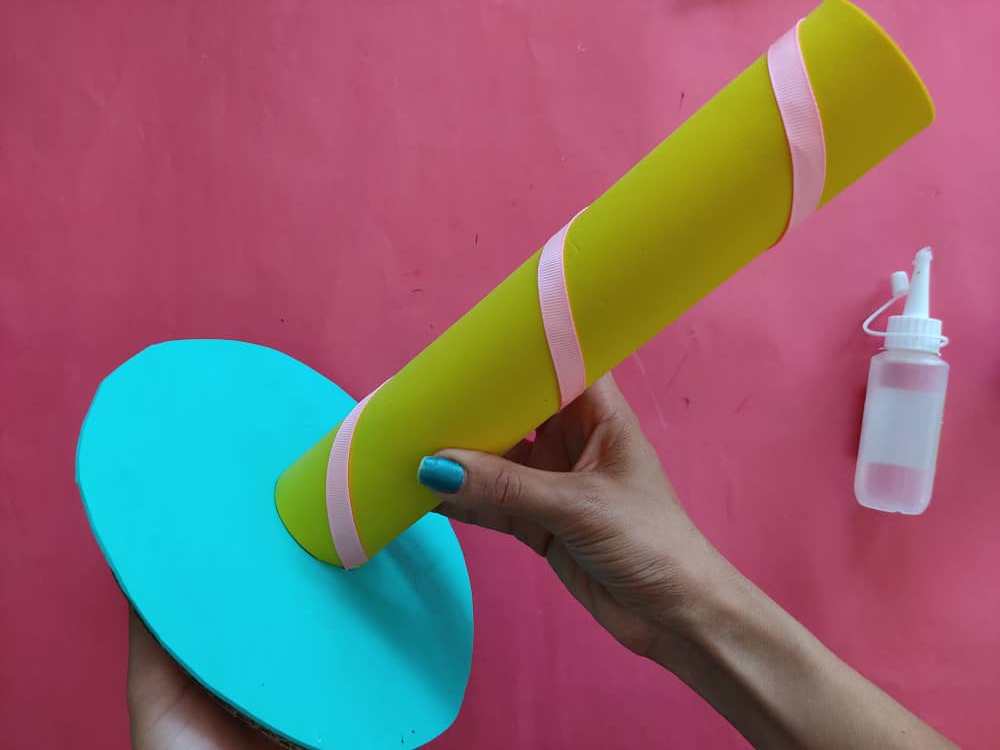
Luego, cubrimos el cilindro de cartón con foami del color que más nos guste, pero, les recomiendo utilizar colores llenos de alegría, como por ejemplo este hermoso y brillante amarillo. Seguidamente, decoramos el cilindro con un trozo de cinta.
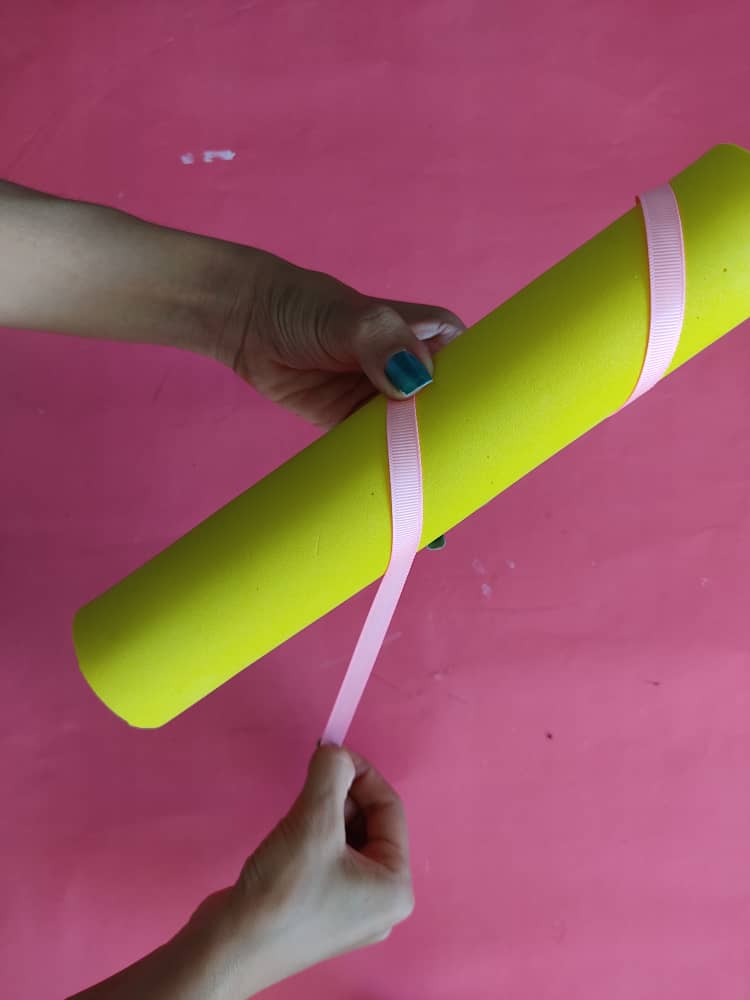
Then, we cover the cardboard cylinder with foamy of the color that we like the most, but, I recommend using colors full of joy, such as this beautiful and bright yellow. Next, we decorate the cylinder with a piece of ribbon.
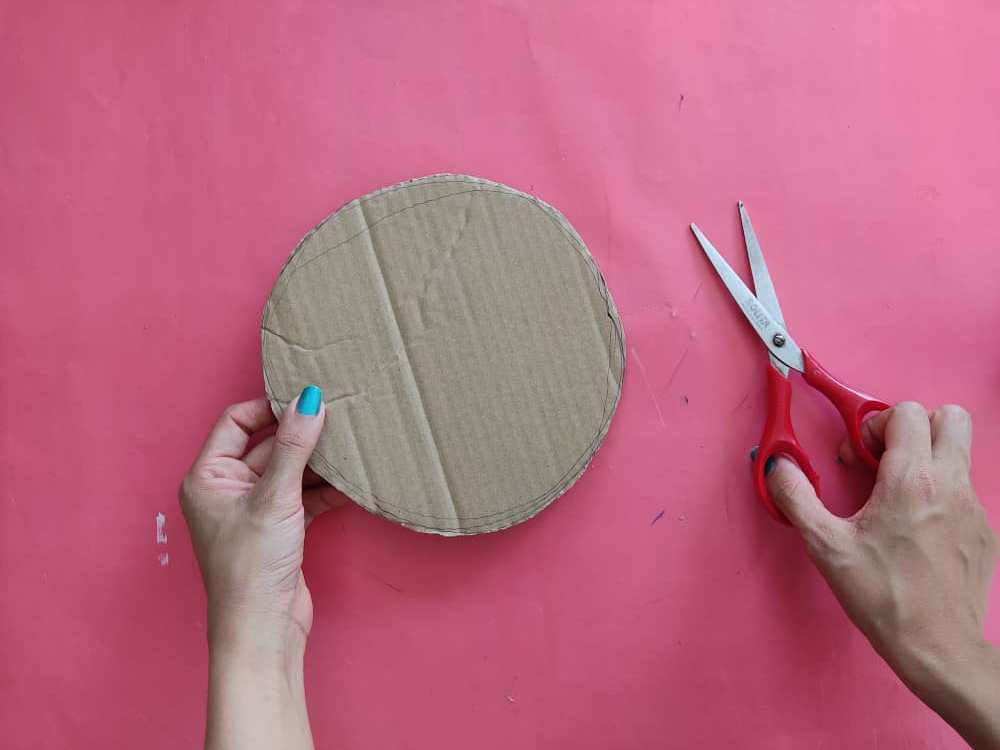
Ahora, elaboramos una base de cartón en forma de circulo con 14cm de diámetro, seguidamente lo cubrimos con foami del color que más nos guste. Recuerden hacer un poco de presión para que el foami quede bien pegado al cartón.
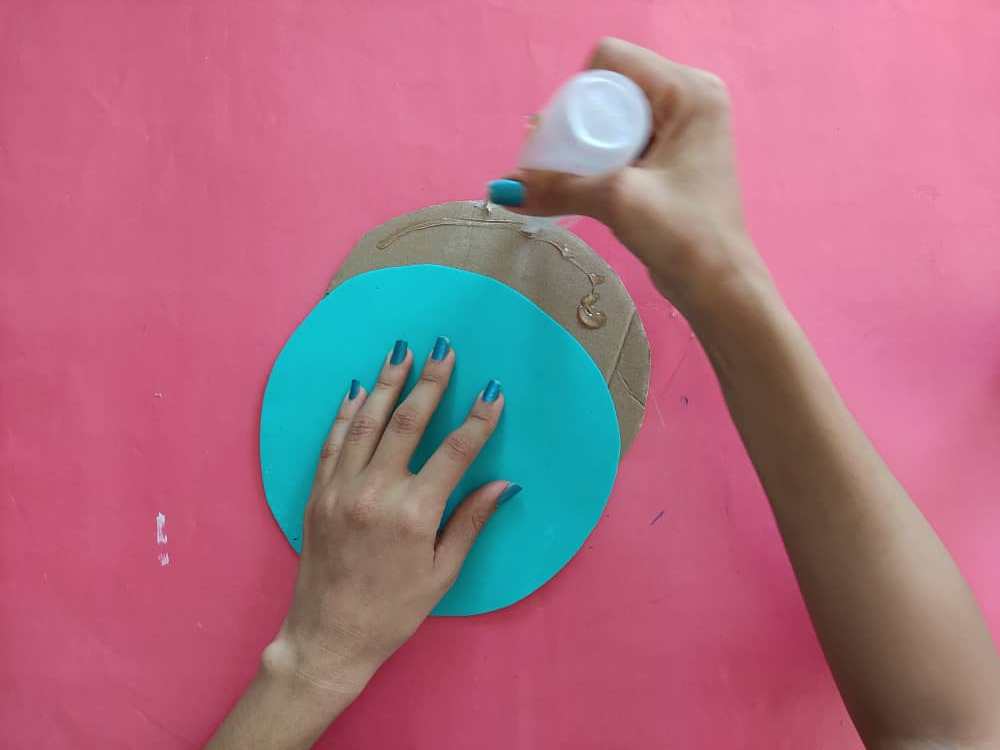
Now, we make a cardboard base in the shape of a circle with 14cm in diameter, then we cover it with foamy of the color that we like the most. Remember to apply a little pressure so that the foamy is well glued to the cardboard.
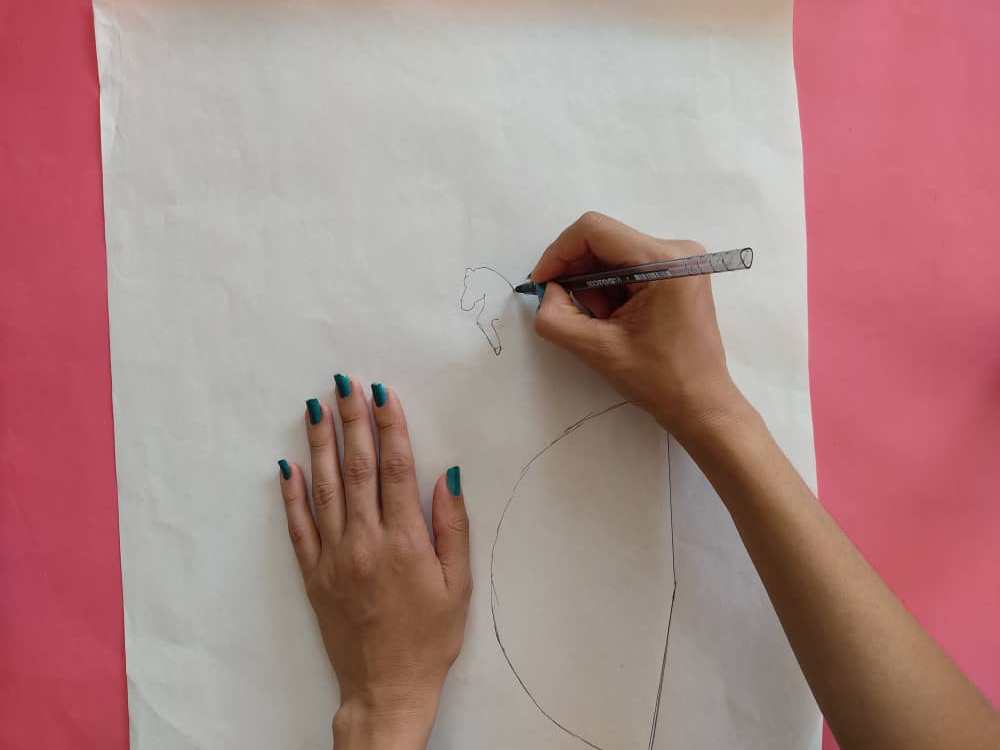
Luego, dibujamos tres figuras en una hoja de papel, un lindo caballito, una media naranja o semicírculo, y un triangulo, y posteriormente, recortamos cada figura respetando las medidas.
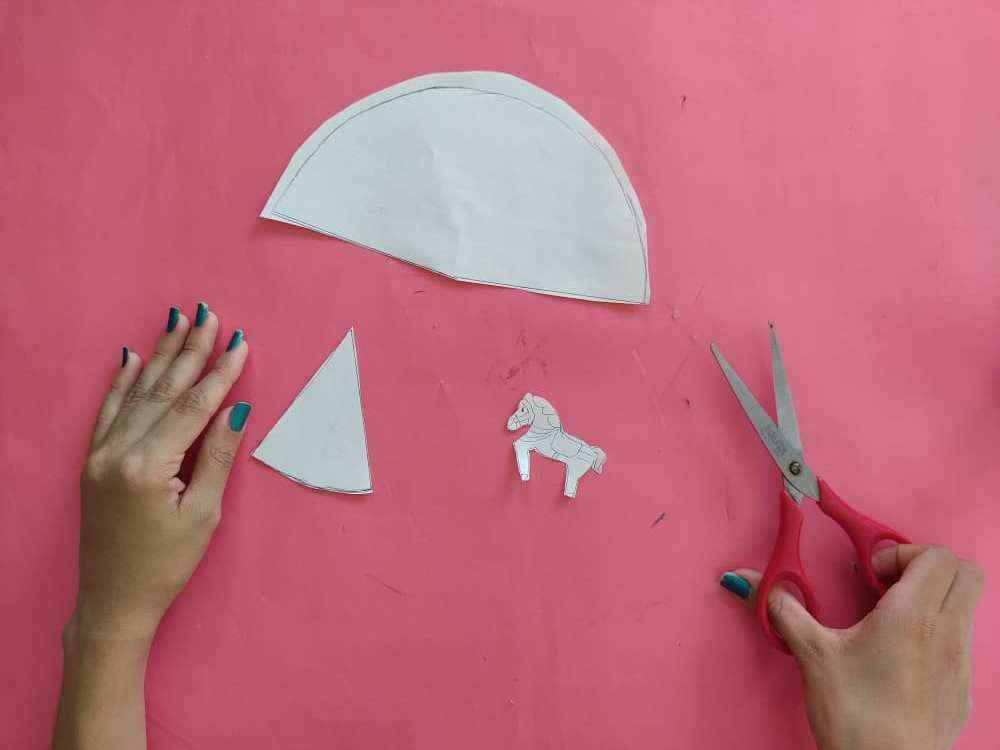
Then, we draw three figures on a sheet of paper, a cute little horse, a half orange or semicircle, and a triangle, and later, we cut each figure respecting the measurements.
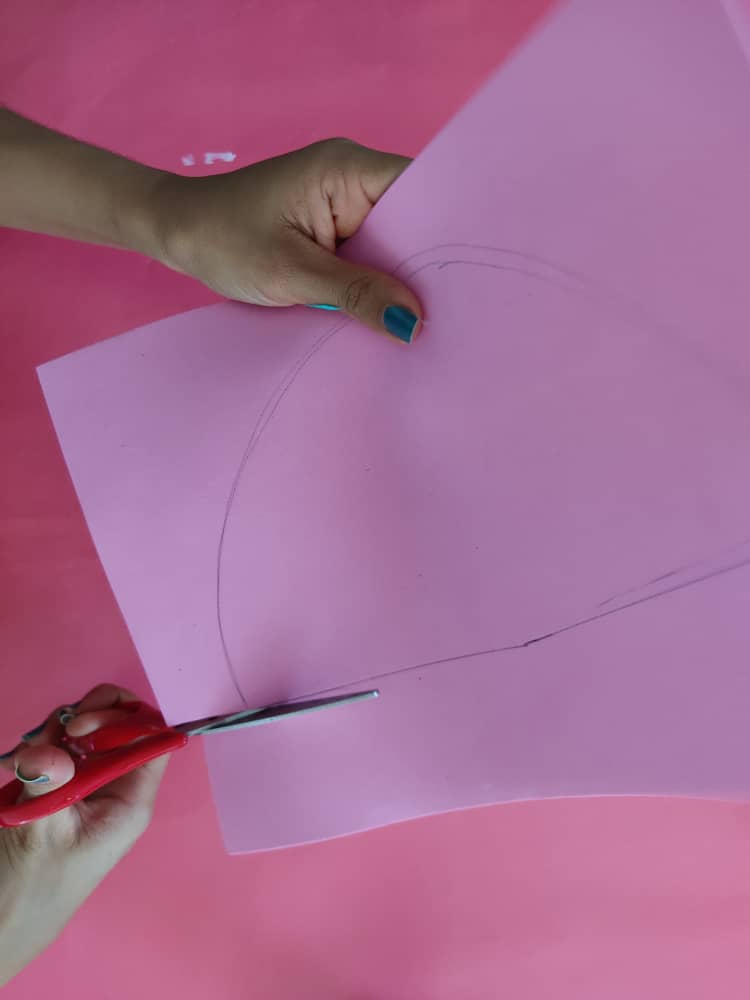
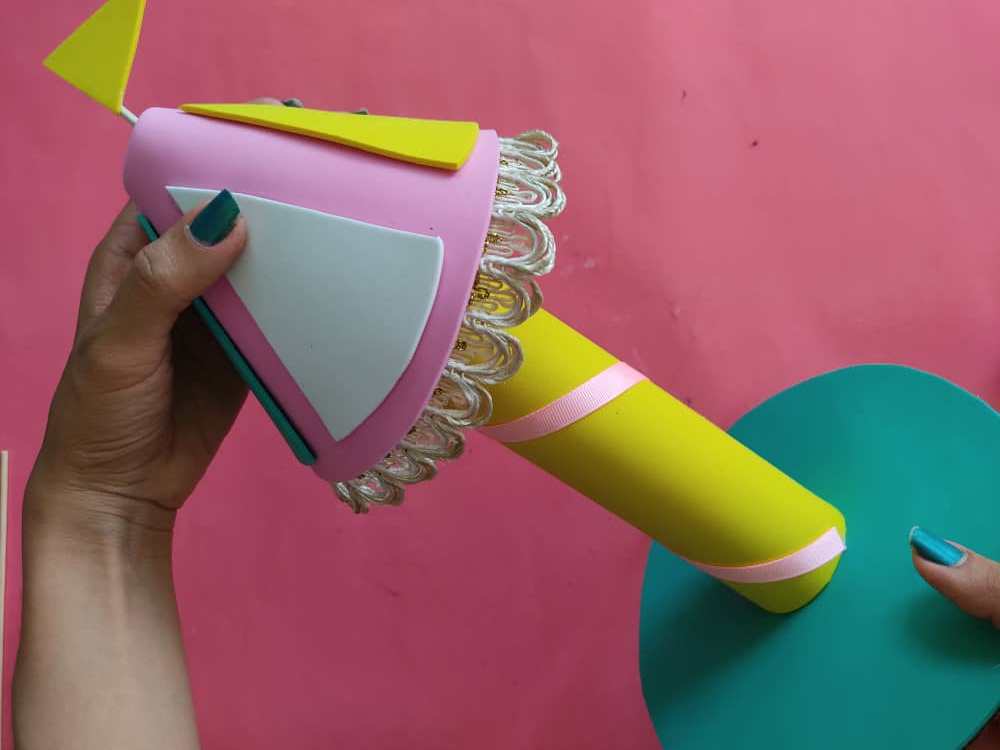
Ahora, transferimos la figura que tiene forma de media naranja al foami de color rosa y recortamos con mucho cuidado. Seguidamente formamos una especie de cono y unimos los extremos utilizando pegamento o silicona caliente, para obtener el techo de nuestro carrusel.
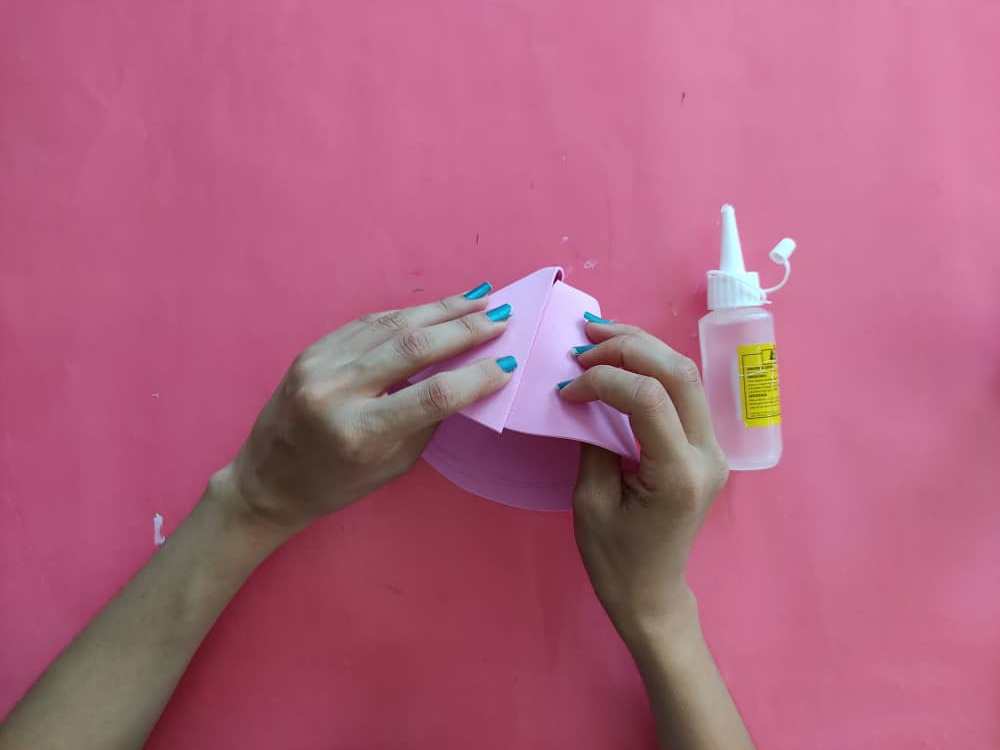
Now, we transfer the half orange figure to the pink foamy and cut with great care. Next, we form a kind of cone and join the ends using glue or hot silicone, to obtain the roof of our carousel.
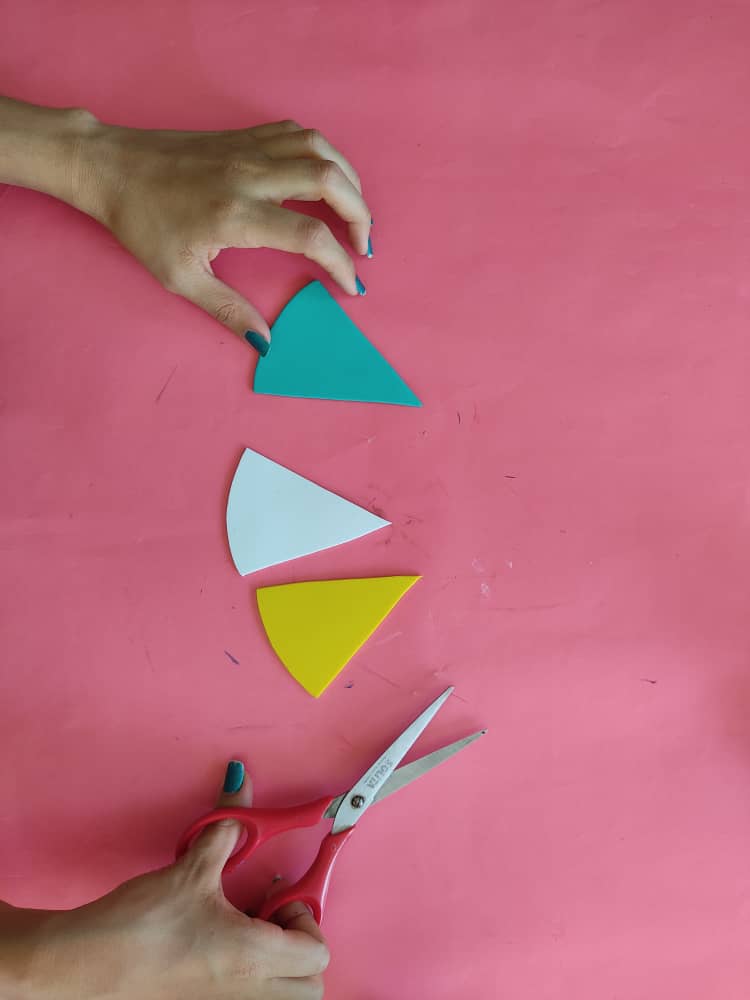
Luego, elaboramos los triángulos decorativos, y los pegamos sobre el techo, dejando una pequeña distancia entre ellos.
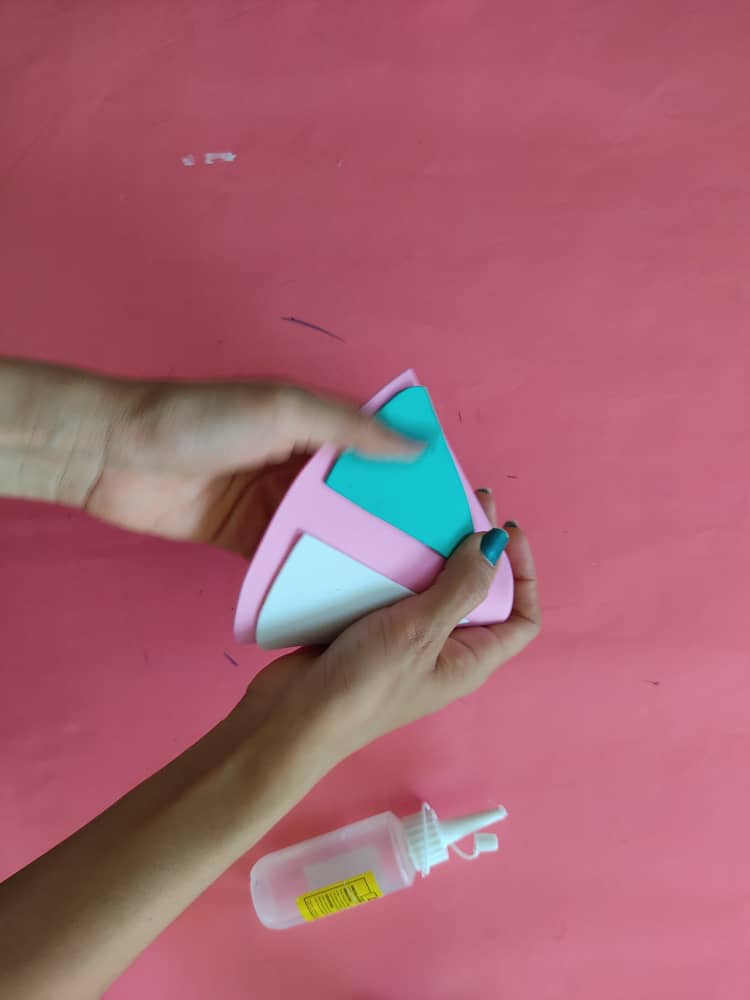
Then we make the decorative triangles, and stick them on the ceiling, leaving a small distance between them.

Seguidamente, decoramos el techo pegando una hermosa cinta en el borde inferior del techo, y una banderita en la parte de arriba. Estos detalles harán que el carrusel parezca real.
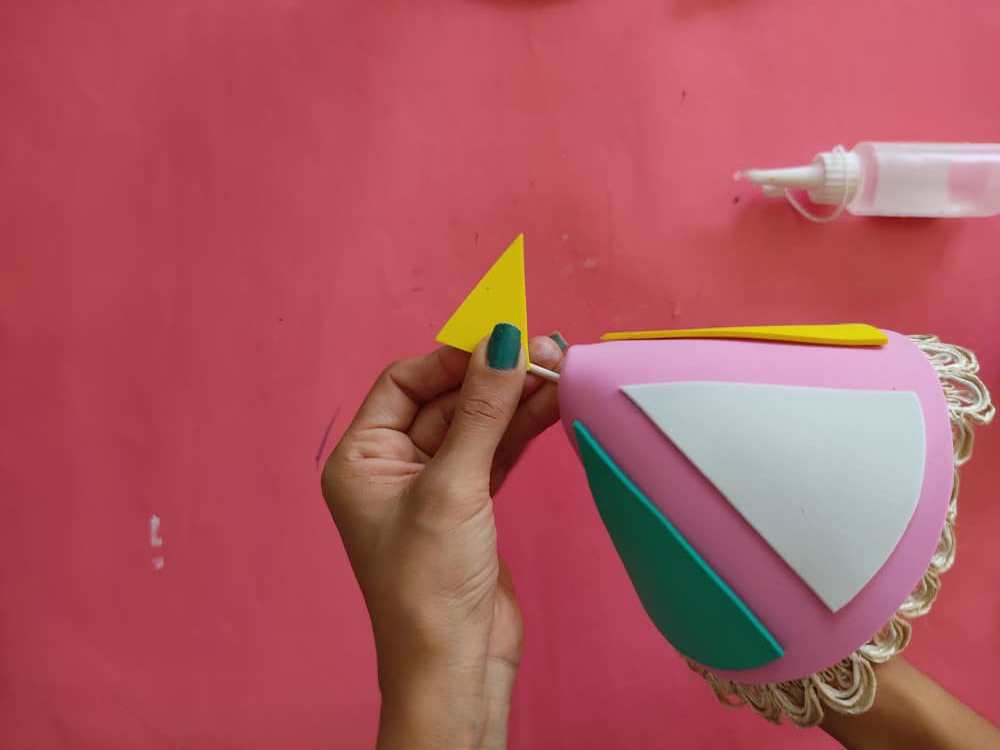
Next, we decorate the ceiling by gluing a beautiful ribbon on the bottom edge of the ceiling, and a flag at the top. These details will make the carousel look real.
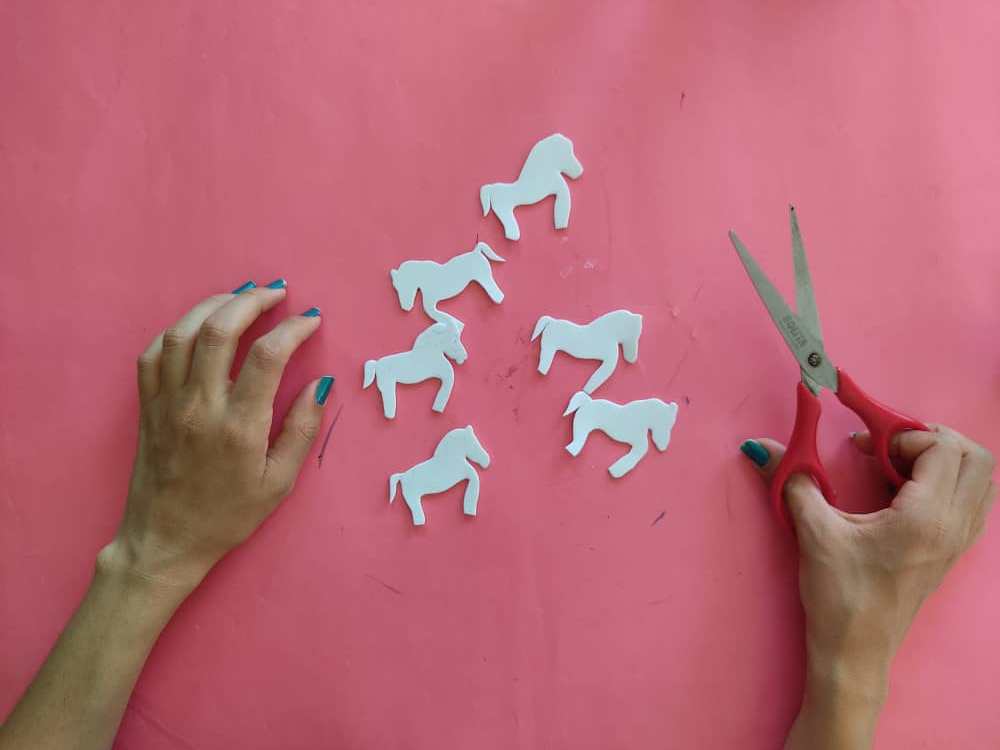
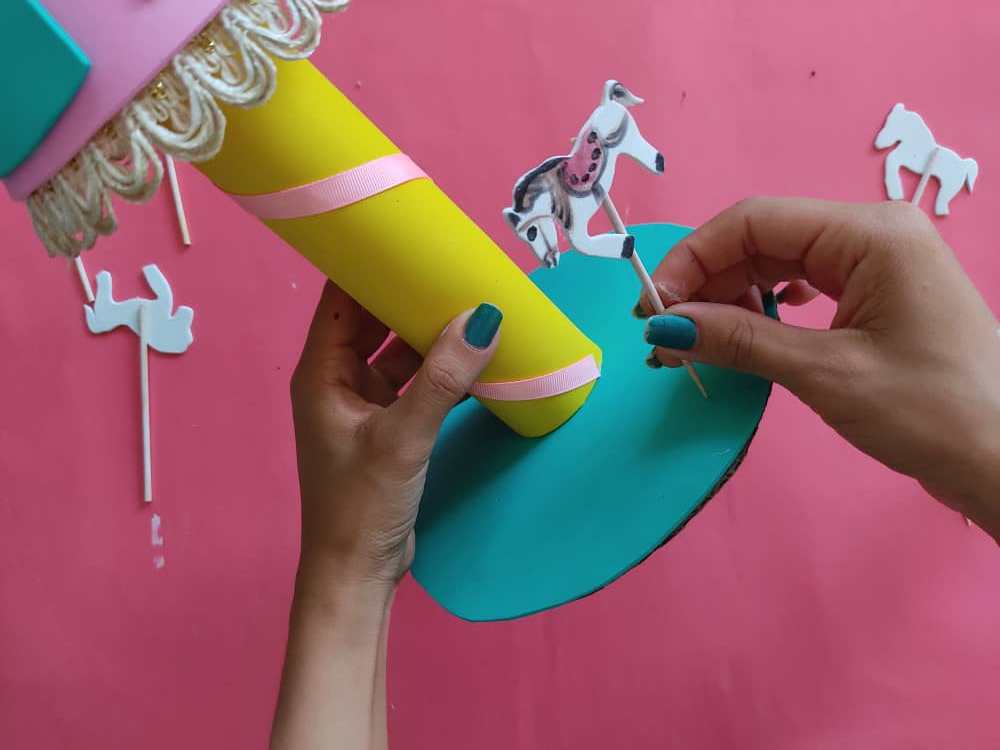
Ahora, elaboramos lindos caballitos en foami de color blanco, que serán el centro de atención de este adorno, y recortamos con mucho cuidado. Seguidamente, definimos estos lindos caballitos con un poco de pintura y marcador negro.

Now, we make beautiful white foamy horses, which will be the center of attention of this ornament, and we cut very carefully. Next, we define these cute horses with a little paint and a black marker.

Luego, pegamos los caballitos a palillos de madera, en el orden y a la altura que más nos guste.
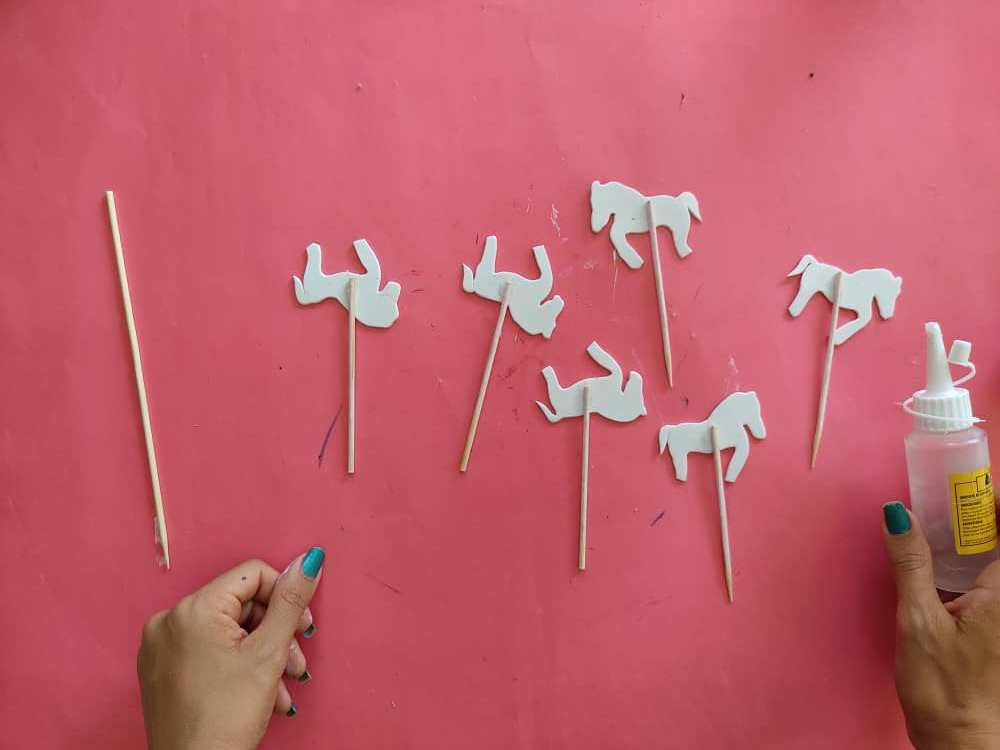
Then, we glue the wheelies to wooden sticks, in the order, and at the height that we like the most.
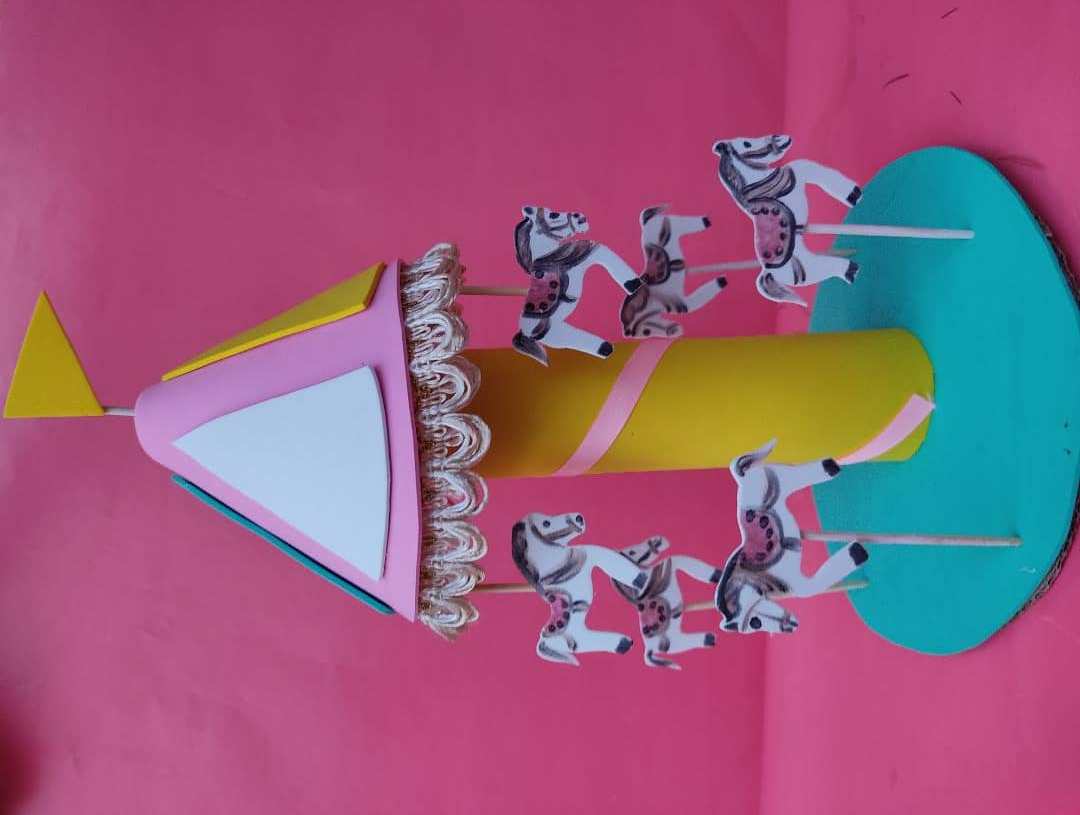
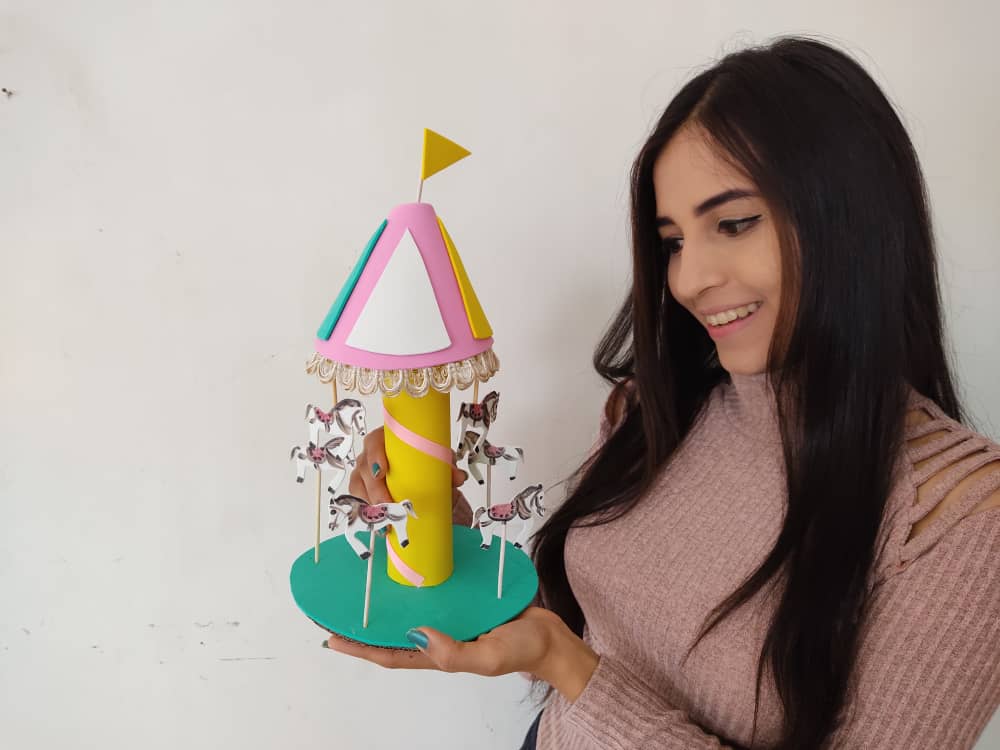
Ahora, armamos el carrusel, pegando el cilindro de cartón sobre la base, luego, y el techo de este hermoso adorno.
Now, we assemble the carousel, gluing the cardboard cylinder on the base, then, and the ceiling of this beautiful ornament.
Finalmente, pegamos los caballitos, en el orden que más nos guste, puedes pegar unos en el techo y otros en la base, deja que tú creatividad se encargue de colocar todo en su lugar, y hacer de estos materiales tan sencillos, una obra muy hermosa y original.
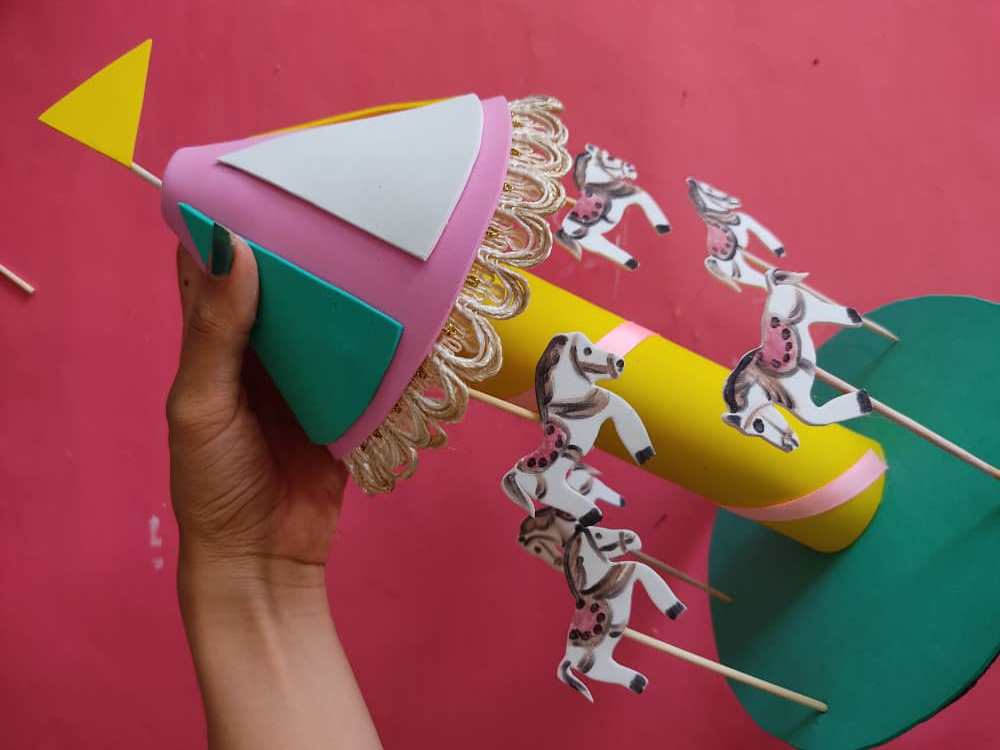
Finally, we glue the wheelies, in the order that we like the most, you can glue some on the ceiling and others on the base, let your creativity take care of putting everything in its place, and make these materials so simple, a very work beautiful and original.
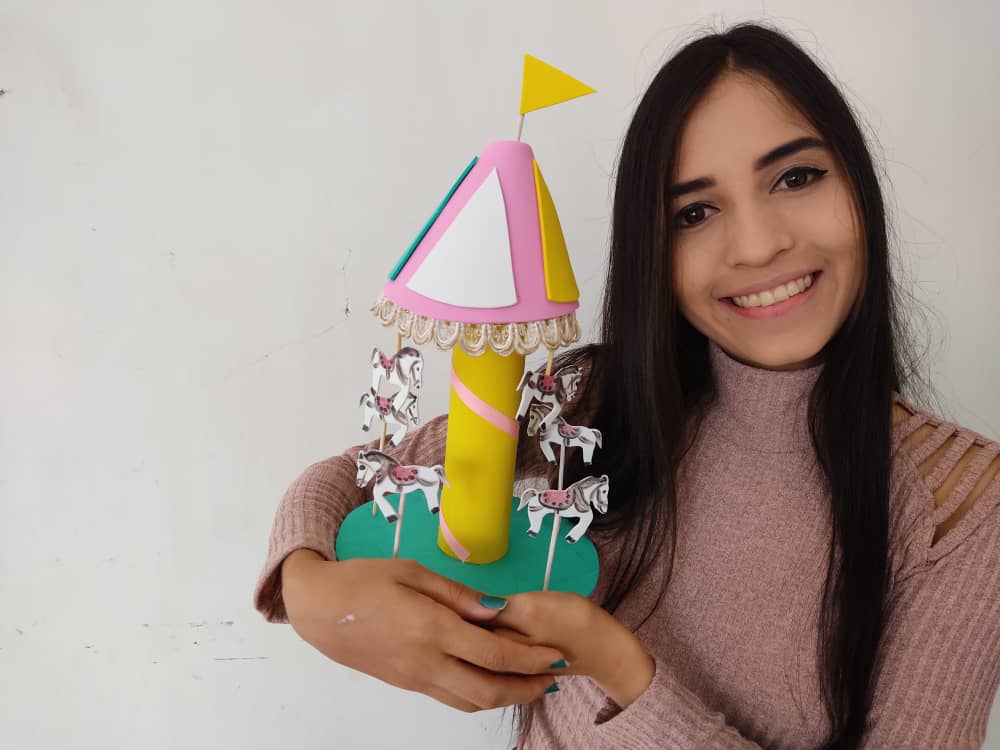
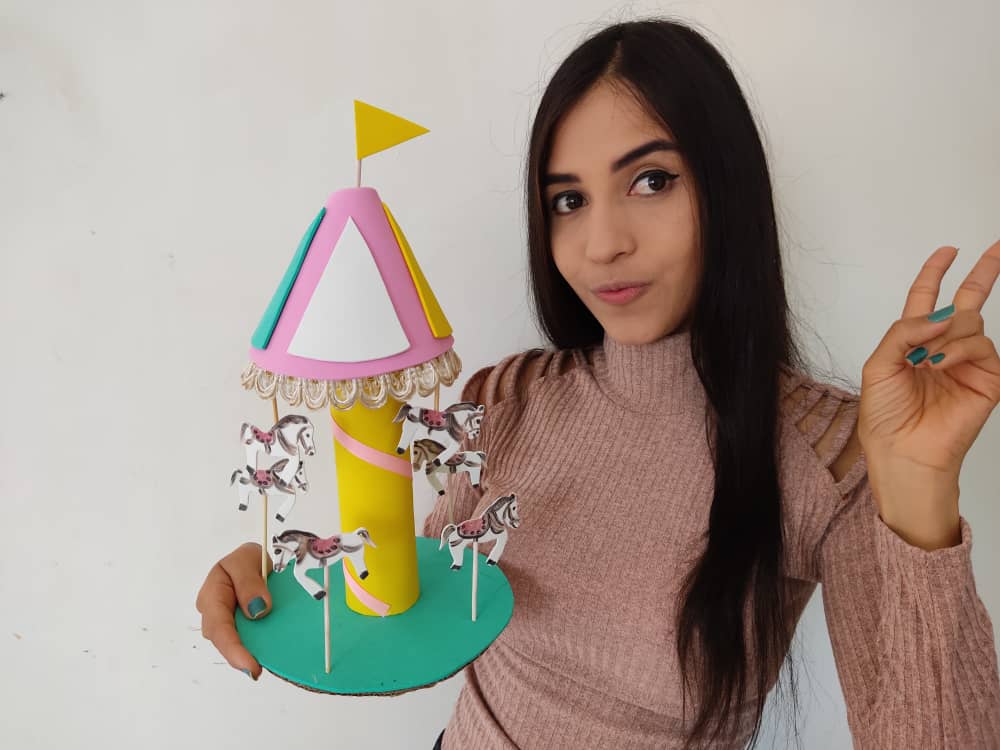
Gracias por acompañarme y espero que lo hayan disfrutado. ❤️
Thanks for joining and I hope you enjoyed it.❤️
.jpeg)
.jpeg)
.jpeg)
.jpeg)
.jpeg)
Clic para ver trabajos anteriores | Click to see previous works


My twt #posh
Great work! Your post was selected for curation by one of @curangel's dedicated curators for its contribution to quality!
...unfortunately, it had to be excluded from curation because of the use of a service (likwid) to liquify rewards.Our upvotes are reserved for content which is created with a commitment to long term growth and decentralization of Hive Power.
This exclusion only applies to this and eventually other future liquified posts and not all your publications in general.
Take care and hive five!
:(
Gracias por tu apoyo querida!
WOW! <3 <3 <3
Thanks for appreciating my work!
Looks very interesting..
Good that you like my work, greetings.
Ah ah! That is very cute and original, I bet the kids will love it... specially the girls! 😉
Thanks friend, for your support! I'm glad you like this new job!
Quiero ver el dia aquel
Que regrese a mi faena
Y salir de cuarentena
Montado en un carrusel
Que lindo amigo, muchas gracias!!
Tienes mucho talento, de verdad que te quedo muy hermoso
Muchas gracias amigo saludos!
Eres muy ingeniosa, te quedó bello.
Muchas gracias querida :D
This post earned a total payout of 28.102$ and 14.051$ worth of author reward that was liquified using @likwid.
Learn more.