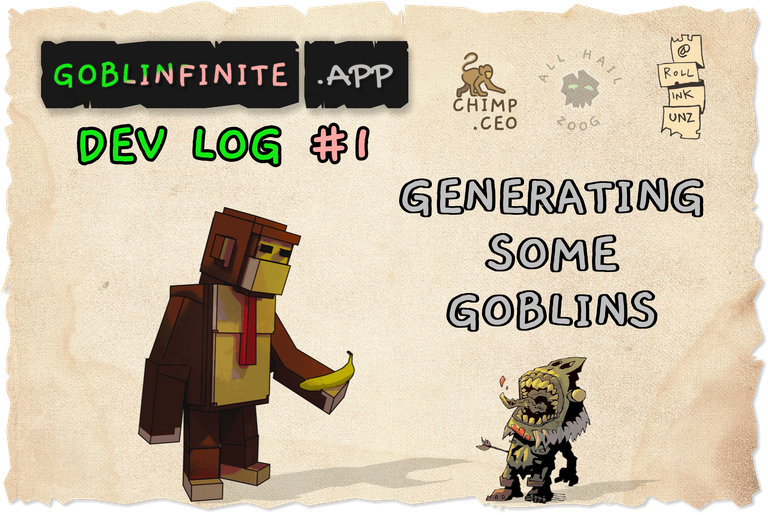
So, you wanna make some goblins...
Been there, done that. Quite recently, in fact. Which is why I've got a pretty good grasp on what you're gonna need.
First things first, let's set up the context in which the rest of this post will build from:
- The following code was made to work in Godot Engine, specifically version 3.3.2. Your mileage may vary.
- The code is using GDScript, but I'll do my best to explain things in an open way so you can freely adapt it to whatever language you're most familiar with.
- I'm not suggesting this is the best way to generate this stuff, but rather I'm showing it is one way to do so.
- This one is going to be rather long, but I'll be breaking it up into 4 sections that cover each individual aspect of the goblin generation in GOBLINFINITE.
With that out of the way, shall we begin?


What's A Goblin Without A Body?
a pile of goopy guts...
The first thing to do when making goblins... Is to make a goblin. Who would've thought, huh? Getting the graphical element out of the way not only makes the rest of the development a little more fun (because you get to stare at random goblin guys all day long), but also gives you a better chance to track down bugs.
I'm not making an exaggeration when I say: There are over a trillion unique combinations within GOBLINFINITE.app. With so many variations, it would be an incredible chore to sit there for hours straight trying out every combination to catch an error. If we put together the graphics generation upfront, then while we're working on the later parts & debugging them, we may run across a bug in this first part.
What Do You Need To Make Goblin Bodies?
Why, goblin parts of course! This is where our super-talented artist, ROLLINKUNZ comes in. He drew up tons & tons & tons of different goblin body parts.
As of writing, this version of GOBLINFINITE.app has:
- 8 different arms (each arm being a separate sprite)
- 12 different brows
- 32 different ears (each ear being a separate sprite)
- 6 different eyebrows
- 24 different eyes (each eye being a separate sprite + chance of only having 1 eye)
- 32 different hairstyles
- 18 different heads
- 8 different pairs of legs
- 48 different mouths
- 25 different noses
- 4 different shoulders (each shoulder being a separate sprite)
- 12 different torsos
I mean... Jesus. That's a lot of sprites. In order not to set your game engine on fire, I highly recommend importing these sprites as sprite atlases.
What The Hell Is A Sprite Atlas?
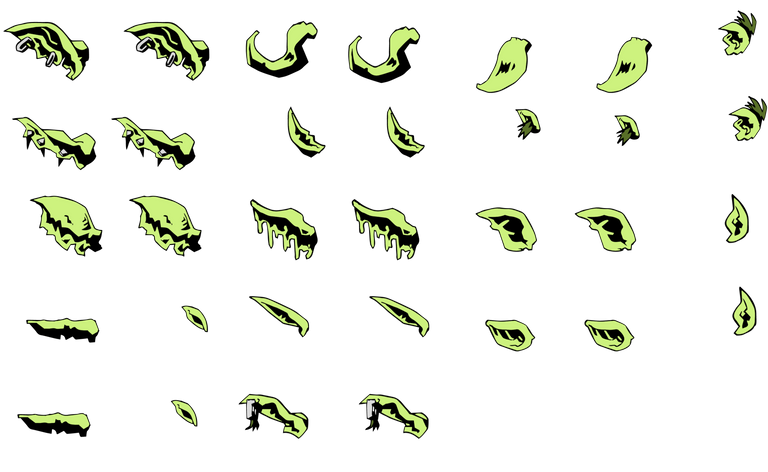
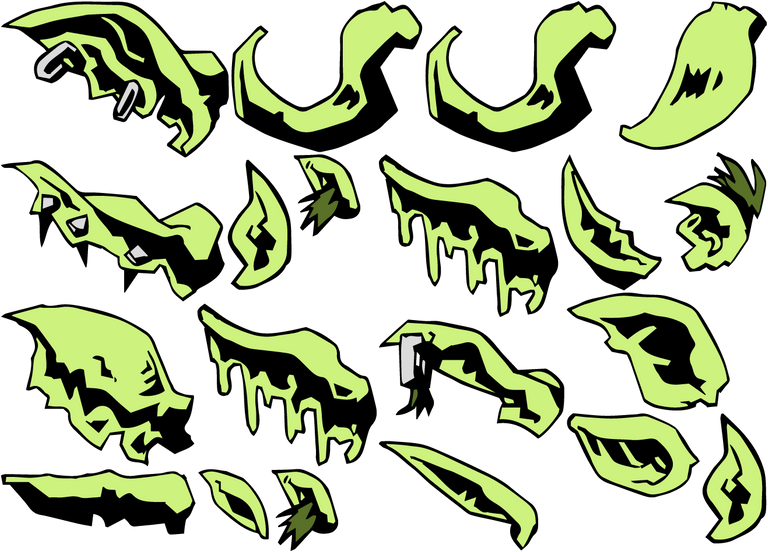
Rather than importing each different body part as one image, like arm-1.png, arm-2.png, etc., a sprite atlas puts those separate images into one image.
Isn't that called a sprite sheet? Almost! The difference is, sprite sheets are usually referring to images where each sprite takes up a "cell" in a grid. Each cell is the same width & height, and these cells usually form an animation, or different character states, things like that. A sprite atlas, on the other hand, crams all the sprites into an image as close as they can fit next to each other, and then uses a reference sheet (usually JSON) to tell your game engine where each sprite is, with a sort of "key:value lookup" method.
TO BE CLEAR: These are the definitions I'll be referring to in these dev logs. This is how I like to think about this stuff, but, like with most terms nowadays, they are usually applied a million different ways. Some people refer to sprite sheets as images containing sprites, and that's it. They don't care about the cells or grids or anything else. In an effort to be as clear as possible, this is what I mean when I make a distinction between the two:
 |  |
| notice how each sprite is placed with a cell of a grid, and all those cells are the same size, determined by the largest sprite within the image | an atlas, however, doesn't use cells, instead opting to pack in the sprites as close as they can, and then marking their coordinates within the overall image so you can crop & draw them later |
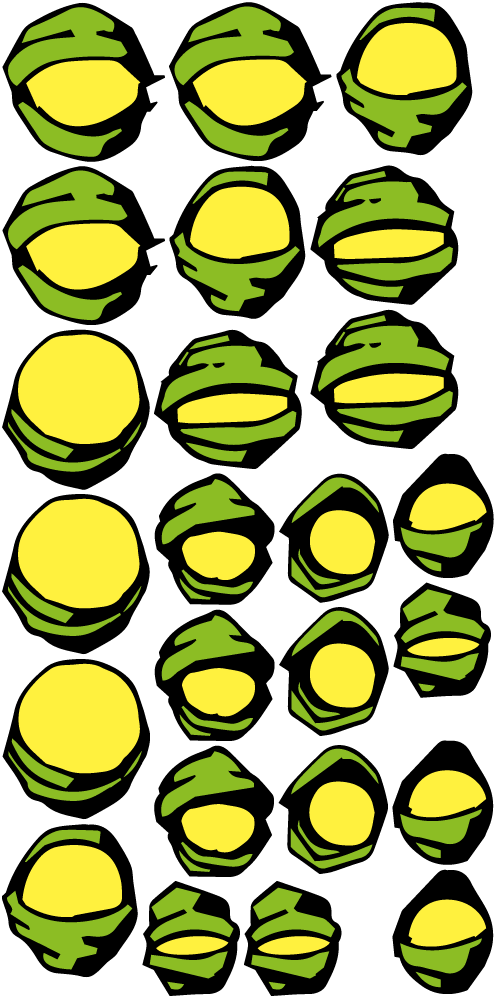
Notice how much more space-efficient the sprite atlas is compared to the sprite sheet? You may also notice there are more duplicated ears in the sprite sheet image vs the sprite atlas image. This is context-specific to GOBLINFINITE.app, but the reason we have duplicates here is to fit different head sizes. Some goblin heads are "small", others are "wide". On the wide heads, the ears need to be pushed out slightly so they don't look like they're placed on their forehead or something. Thanks to the sprite atlas magical space-saving specs, we can throw out quite a few of these duplicates and rely on the generated atlas data file to know how our game engine should crop, place, and draw these ears.
There's also another HUGE advantage of using atlases: No need to individually place each ear! This saves about a billion years of effort. Let me explain.
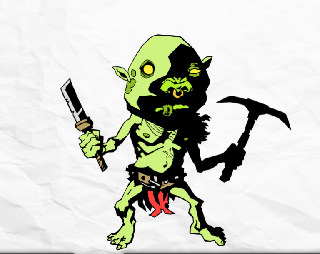
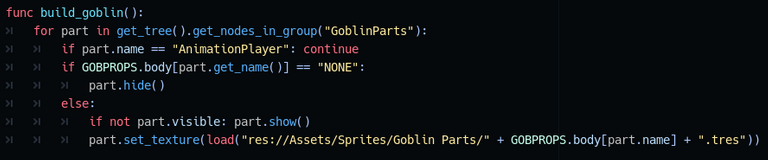
Here's a goblin:
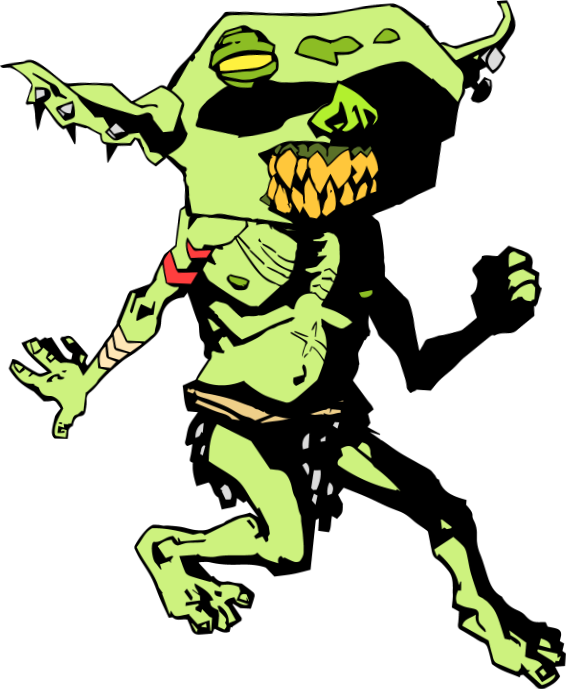
Neat, right? Notice each body part on him. Those are all different sprites, as we've explored. The left arm is one, the right arm is a different one, each ear is a different sprite, same with the head, eye, mouth, nose, etc. How do we ensure, when we have all these different variations of parts, that they all will "fit" together, and we won't end up with an arm floating off his torso, or an eye that's too high up, or a mouth that's too big for a tiny head, etc.?
Well, normally you'd want to go in & place each sprite. And then, you'd want to write code to check for various conditions and make changes to each sprite based on those conditions.
Is this ear a small ear? Place it at x: 500, y: 500, unless the head is wide, then place the ear at x: 400: y: 450
Does that sound fun? Is that what you dream about doing for the rest of your life? Of course not. Which is, yet again, where atlases save us.
The way ROLLINKUNZ drew the images is by using layers. He would draw the torso, then draw an arm on a new layer on top of the torso to make sure it looked right. He did this with all the arms, then drew some more torsos, and made sure they all fit & aligned with each other. When he gave me the exported images, all 297 of them, they were all the same size. A big ass square image, with the parts placed exactly where he drew them. So that sprite sheet I showed you earlier with the ears? Yeah, that's a lie. I cropped the ears close to where the actual drawings were. But using that image means we'd have to place each ear. If you wanted to skip that, but still use a sprite sheet, well, here's what you'd be looking at:

Fun fact: That image is scaled down by 25%, and it's still massive. This is why sprite sheets just don't work for something like this.
So, I keep talking about this "atlas data file" thing. What the fuck is that? Well, I think they come in a few different shapes & sizes & colors & flavors, so I'll just go over what mine looks like.
For my sprite atlases, I used a program called "Texture Packer". I'm not going to give an in-depth review of it, because I've only used it a little bit. I've also only chosen it because I got a key for it a long long time ago, and thus I never felt the need to try out alternatives. I'm sure there are other programs out there that do the same thing, maybe even better, maybe even free-er, have fun exploring them and choose the one that works for your workflow. For me, Texture Packer works just fine, plus they have a Godot asset that enables easier importing of the sprite atlases, so that was a plus.
You load all your separate images into Texture Packer, click a button, and it'll spit out a sprite atlas like so:
In order for Godot to know what's what, here's the .tpsheet that Texture Packer would generate for the above atlas:
{
"textures": [
{
"image": "spritesheet.png",
"size": {
"w": 496,
"h": 998
},
"sprites": [
{
"filename": "frog-8.png",
"region": {
"x": 1,
"y": 1,
"w": 165,
"h": 162
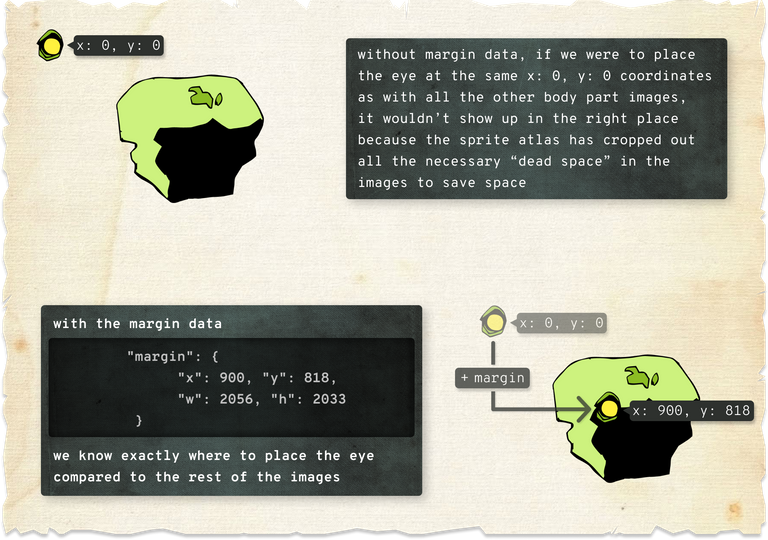
},
"margin": {
"x": 932,
"y": 622,
"w": 1995,
"h": 1998
}
},
{
"filename": "low-8.png",
"region": {
"x": 1,
"y": 165,
"w": 165,
"h": 161
},
"margin": {
"x": 884,
"y": 792,
"w": 1995,
"h": 1999
}
},
...
Well, there's part of the file. The actual file is 378 lines long. The above snippet should give you a good idea of what's going on here. It's just a standard JSON structure that lays out each sprite using the image name it had when we imported it into Texture Packer (I think there's an option to change this to something else within the program, if you wanted to), and then it maps where that individual sprite is using X and Y coordinates. It also tells us the Width and Height of that sprite. There's also some margin data, which is how we can tell where to draw the image. This margin data is what I'm talking about when I mention "placing" each sprite individually. Thanks to this margin data, and thanks to how ROLLINKUNZ chose to draw the body parts, all you have to do is place all the images at the same world/screen coordinates within your engine, and the margins will take care of the rest.
I made 1 sprite atlas image for each body part. That's one image containing all the left arms, one image containing all the right arms, one image containing all the heads, and so on. 297 images down to 16. That's roughly a 95% reduction. Hot damn? Hot damn.
So, that's the magic of sprite atlases... Cool, great, fantastic... Hey Chimp, we still don't have any goblins...
Time To Build
You've got your sprites, you've made your atlases, you've had a hearty breakfast, it's now time to put all that shit together & make a goblin... How?
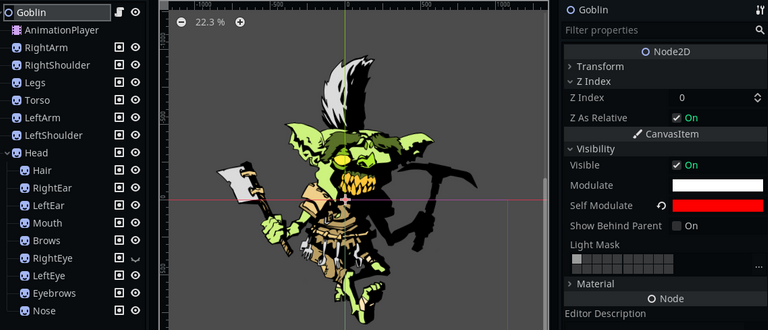
In Godot, I decided to make the goblin body its own scene. This will come in handy since we can isolate all the goblin body stuff to one scene, and then just import that scene into any other scenes later on. That's how I got it to show 4 different versions of the body on the image output screen in GOBLINFINITE.app, each image section just inherits the main goblin scene. That main goblin scene has the following structure:
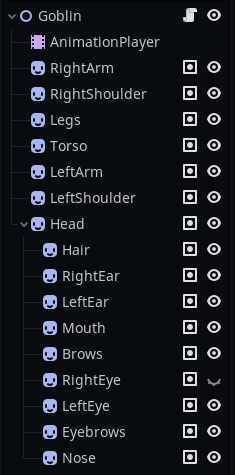
For those unfamiliar with Godot, each of those blue smiley faces represents a 2D Sprite node. That node is responsible for drawing sprites. The top node, or the parent node, called Goblin is a Node2D. This is the base node for all 2D nodes in Godot. Nodes tend to build off each other, so the Sprite nodes all inherit properties & methods from the Node2D node.
You can think of nodes sorta like building blocks. Instead of having this large ass cumbersome item that you're forced to use for everything, you can pick & choose which feature set you need. For the goblin body parts, I don't need them to be a tilemap, or have physics, or play music, etc. So I stick with just a Sprite node which lets me load in the sprite atlas we made, draw just one part from that image, and then render it on screen.
The parent node is a Node2D node because it provides properties such as position, visibility, sizing, and other 2D-related functions that we can use to manipulate all the child nodes if need be. For instance, here you'll notice that node has a property called Modulate:
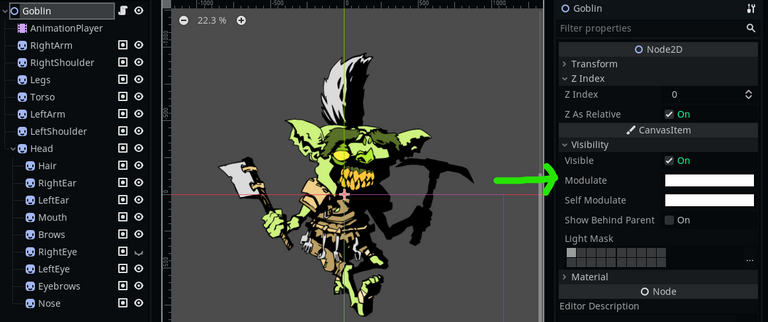
You'll notice that below it is a virtually identical property, but with the name Self Modulate. Both of these properties can be used to change the rendering color of this node. Like adding a colored overlay to whatever sprite it's displaying. So what's the difference between the Modulate property and the Self Modulate property, and what do I mean when I say parent nodes can manipulate child nodes?
Changing the Self Modulate property will only apply the color filter to that specific node, and won't render down the child tree. Changing the Modulate property, will affect the child tree, like so:
Self Modulate | Modulate |
|---|---|
 |  |
So that's the relation between parent nodes & child nodes. Also, moving the parent node around will move all the child nodes with it, so we can change the position of just the parent node (named Goblin in this example), and all the body parts will be repositioned exactly how we want them to be. This is obviously more ideal than manually moving each body part individually... Unless you're trying to repent from a bad sin or something & like to self-inflict punishment...
The ordering of these nodes is also important. The last node is a list is rendered... Can you guess? Last, that's right! Good job, here's a cookie 🍪 That means these will appear on top of other images. Last one rendered == first on top. With that in mind, it's important to order your sprite in a way that ensures things overlap in a way that makes sense. An eyeball being rendered on top of a foot? A mouth being rendered behind a head? Right ear being rendered behind the left arm? Fix your rendering, yo!
Wait a minute... If that's the case... Then how is the hair, which is being rendered after the head, being placed behind the head? WITCHCRAFT? ILLEGAL BLACKMARKET RENDERING? COPIOUS DRUG USE? Relax friend, only one of those is true, but it has nothing to do with this trick. Godot has thankfully provided us a feature for this:

Make sure that box is checked, and the hair will render behind its parent, in this case the head. That allows us to use the parent -> child relationship as a "grouping" feature, and still get our desired rendering 👍
So, parent node -> child nodes -> place body part sprite atlases into each child node -> manipulate all body parts by using parent node... But, what about the randomization?
Random This, Random That
Part of me wants to just dump the whole random generation script in here, but considering it's over 150 lines long with a good chunk of it devoted to dealing with Godot-specific stuff, I doubt that would be much fun to read. Instead, let's break down the important bits and do a bit of pseudo-code at the end to wrap it all together.
First, we create ourselves a helpful little reminder of how many different sprites we're working with for each body part:
var part_range = {
    "arms": {"left": 8, "right": 8},
    "shoulders": {"left": 4, "right": 4},
    "legs": 8,
    "torso": 12,
    "hairs": {"gray": 8, "green": 8, "red": 8, "yellow": 8},
    "ears": {"left": {"small": 16, "wide": 16}, "right": {"small": 16, "wide": 16}},
    "heads": {"small": 10, "wide": 8},
    "mouths": {"small": 24, "wide": 24},
    "brows": 12,
    "eyes": {"left": {"frog": 8, "low": 8, "regular": 8}, "right": {"frog": 8, "low": 8, "regular": 8}},
    "eyebrows": 6,
    "noses": 25,
}
This will be useful as we can now use a random number generator for each body part, in a range of 0 -> whatever the number from part_range we're looking for. For instance, to generate a random head image, we'd write:
return "Noses/spritesheet.sprites/" + str(rng.randi_range(1, part_range.noses))
The rng.randi_range(x, y) lets us generate a random integer between X & Y, inclusive. Setting x as 1, and y as part_range.noses which will get interpreted as 25 thanks to our part_range object, we can now generate a random number that matches one of our nose sprites in our nose sprite atlas.
The str() that wraps around rng.randi_range just converts this random integer into a string, which we need since we're adding it onto the end of "Noses/spritesheet.sprites/". That's the file location of our nose sprites, so we're just telling Godot at this point to look here for this specific nose sprite. Pretty straightforward.
NOTE: The way the Texture Packer add-on for Godot works is that it detects sprite atlases, and then separates each sprite within that atlas into their own
.tresresource. A.tresfile is a Godot-specific file that defines resources in a plaintext way. This is Godot-specific and will be glossed over in this tutorial, but the general way we're handling getting the random sprites more or less follows with any other engine.
If you wanted to grab a random sprite from something like the heads category, which you'll see has 2 keys within it, since there are both small & wide heads available to us, we can write a nice little helper function to do that.
func _random_dict_item(dict):
    var items = dict.keys()
    var item = items[randi() % items.size()]
    return item
Now we can make use of our big brain function writing and do the following:
var size = _random_dict_item(part_range.heads)
return "Heads/spritesheet.sprites/" + size + "-" + str(rng.randi_range(1, part_range.heads[size]))
And that's how we look up random images to draw. BUT! Not all body parts are compatible with other body parts, and I'm not trying to give you an impromptu sex education lesson here. What I'm talking about is that, for these goblin guys, not all ears fit on all heads, not all eyes work with all heads, sometimes we only wanna display one eye, sometimes we want hair, sometimes their baldies, sometimes we want brows, other times eyebrows, other times no-brows... There's lots of conditional checking to be done!
For us, but maybe not for you. If you're making something that doesn't need to do so much checking, then you're pretty much ready to render out your sprites. And if you do need to do checking, it's going to be very specific for your situation, so I feel it's best just to quickly touch on some of the checks GOBLINFINITE.app makes during its generation. Here's just a tidbit:
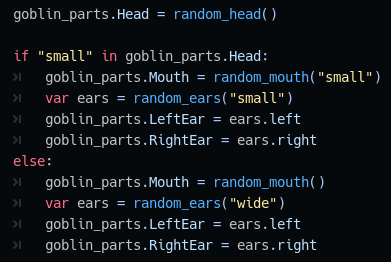 |  | 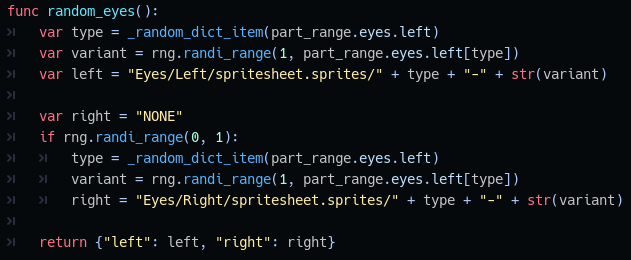 |
|---|---|---|
| using the size of the randomly generated head to determine if we want small ears or wide ears | figuring out if we want to display any type of brows or not based on the eyes | generating a left eye and then flipping a virtual coin to see if this goblin boy is lucky enough to get a right one as well |
Now let's bust out our crayons and start to actually draw these bitches (oh wow, over 3,000 words in and we're just now getting to drawing some god damn sprites, I sure do love how much Chimp rambled on about fucking sprite atlases).
Draw Da Dudes
You've got your sprites set up, you got the parts chosen, now how do you go from this:

To this:
...I don't know.
No, really, I can't answer that for you. Unless, of course, you happen to be using Godot, in which case, this is how I did it:
Wait... what? Really? All that code for the generation, but then drawing it is, what... 7 lines?
I know, pretty based right? 💙 Godot 💙
Since it's only 7 lines long, and I've spent plenty of time talking about fucking file formats (awesome alliteration), I think it's fair to go over each line & explain its purpose.
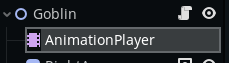
for part in get_tree().get_nodes_in_group("GoblinParts"):
Godot allows us to put various nodes in a scene into a group. We can then call upon this group in our code. This saves us time from having to call upon each node individually, as instead, we can just refer to the whole group.
Using for x in y will create a loop where we can access in element in y with x. I called those elements part.
if part.name == "AnimationPlayer": continue
If this element is the AnimationPlayer node, then ignore the rest of this code & skip on to the next element. Why did I include the AnimationPlayer node in the GoblinParts group? Fun fact, I just checked while writing this, and turns out I didn't. But I'm too afraid to remove that line in case it was secretly the keystone holding all this shit together. Meh, now you know how to skip over stuff, win-win.
if GOBPROPS.body[part.get_name()] == "NONE":
    part.hide()
GOBPROPS is what Godot refers to as a "Singleton". In Godot, when you write scripts, it can sometimes be cumbersome to pass data between things. Especially if you want data from one scene to show up in another. Singletons help us by acting as a sort of "universal" script, that everything can reference.
I made a singleton called GOBPROPS which stores all the PROPerties of our GOBlin. Pretty clever name, I know.
When I randomly generated the various sprites, I stored them into an object inside GOBPROPS. So what we're doing with these two lines is a quick check to see if we actually need to render anything for this element. Remember, some goblins don't have right eyes, some don't have hair, others don't have any brows. If there's nothing there, we may as well hide the Sprite node so nothing gets rendered.
else:
    if not part.visible: part.show()
Maybe the goblin before this one didn't have hair. If that's the case, we hid the Hair node. If this new goblin does have hair, then we should unhide said node.
part.set_texture(load("res://Assets/Sprites/Goblin Parts/" + GOBPROPS.body[part.name] + ".tres"))
Remember, the .tres file is just how we're handling these sprites in Godot. The GOBPROPS.body[part.name] looks up the randomly generated path + number that we set, and then attaches it to where we store our goblin body part sprites.
WOW
Would you look at that? It all came together in the end! Slap that shit into Godot & press F5, and you'll be shittin' out goblins like it's two-dollar taco Tuesday!
 |  |  |  |
|---|
But wait... Something's not right... They're just standing there...
GOBLINS DON'T JUST STAND! THEY TWITCH!
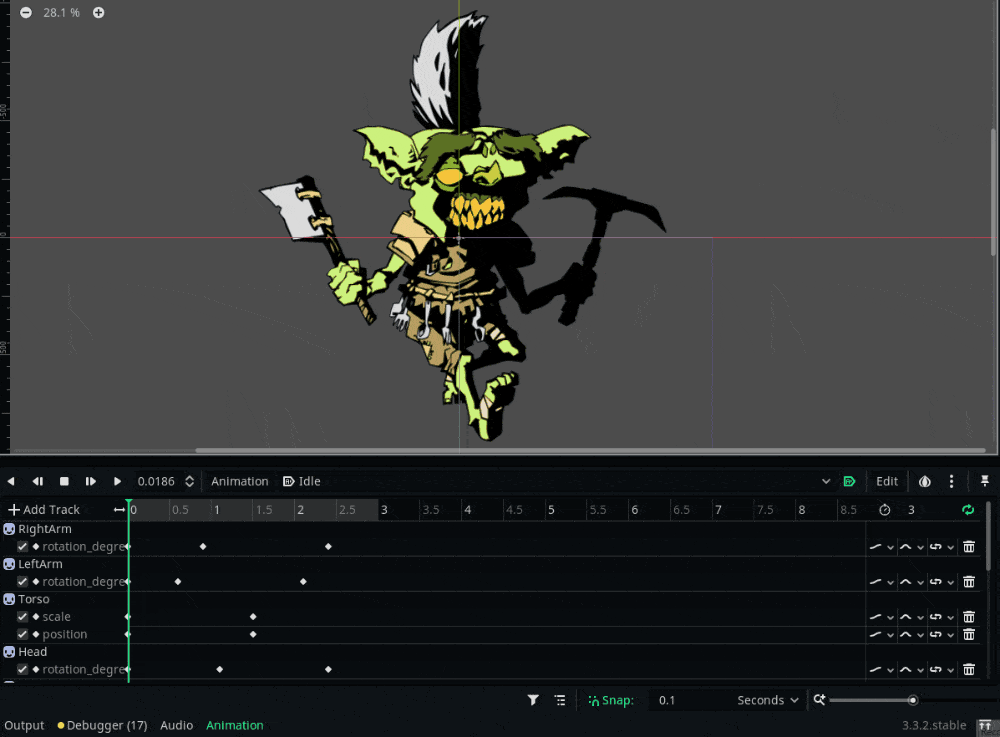
Remember this bitch?
Welcome to Godot's crazy powerful animation feature. Anything you can draw, you can animate. You could probably animate your grandma in this thing. What does that even mean? Fuck around and find out.
With a few keyframes, a few tweaks to said keyframes, and a few squishes & some squashes, you've got yourself a twitchy little goblin boi:
What's that? You want an in-depth tutorial about the animation node?


...Uh ...Maybe some other time...
if you'd actually like to get a less monkey-brained overview of Godot, I'd recommend looking up tutorials that fit your preference. If you're a video-viewer, GDQuest, Code With Tom, Godot Tutorials, PlayWithFurcifer, and CodingKaiju are some good resources. If you're a text-tickler, nothing beats the Godot Docs to cover everything you need, plus they even have a huge list of tutorial resources there you can check out.
Welp, this took longer than expected. What started in the morning as a plan to cover 50% of GOBLINFINITE.app development in 1 dev log, turned into having to split up the original planned parts into other posts. I was going to tackle the random name generation in this one, but I think it's best to separate everything out, especially considering how long this one already is.
I hope, though, that it's long with a purpose. I've tried to detail the little things that often get overlooked, and then give broader strokes to the things that are too engine specific or should be general knowledge.
Next 2 dev logs we'll cover random generation. Then we'll move on to UI stuff.
Until then, stay safe, keep healthy, and get cozy. See you all soon!
- Chimp CEO 🐒
| check out goblinfinite 👉 GOBLINFINITE.APP | ||
|---|---|---|
Huh, Godot seems quite impressive. I had been wondering how you'd designed the app so seeing this dev log show up was a nice surprise this morning! As stated before, great work!
Thanks! Yeah, Godot is mega powerful when you really start to dig into it. This is just scratching the surface.
Damn, that is a well put together goblin and tutorial. And I love all the movement to go with it! That's an impressive amount of detail.
Do you have a way to customise the goblin, such as with different shades of green, or different teeth?
Thanks!
So far, the customization only occurs at the major limb level, which means each goblin generates with a random head, torso, leg, arms, etc.
As for deeper customization, that is not only doable, but is actually something I'm currently working on for the next version of GOBLINFINITE. You'll be able to reroll specific parts, as well as change the goblin's colors, and more.
Using a system like this, you're only really limited with the amount of art you have. Thankfully we have ROLLINKUNZ who busts out an amazing amount of artwork.
Congratulations @chimp.ceo! You have completed the following achievement on the Hive blockchain and have been rewarded with new badge(s) :
Your next target is to reach 1250 upvotes.
Your next target is to reach 800 upvotes.
You can view your badges on your board and compare yourself to others in the Ranking
If you no longer want to receive notifications, reply to this comment with the word
STOP