Author's Notes: This brief is in both English and Spanish. If you speak Spanish, scroll down to the Spanish section.
Summary:
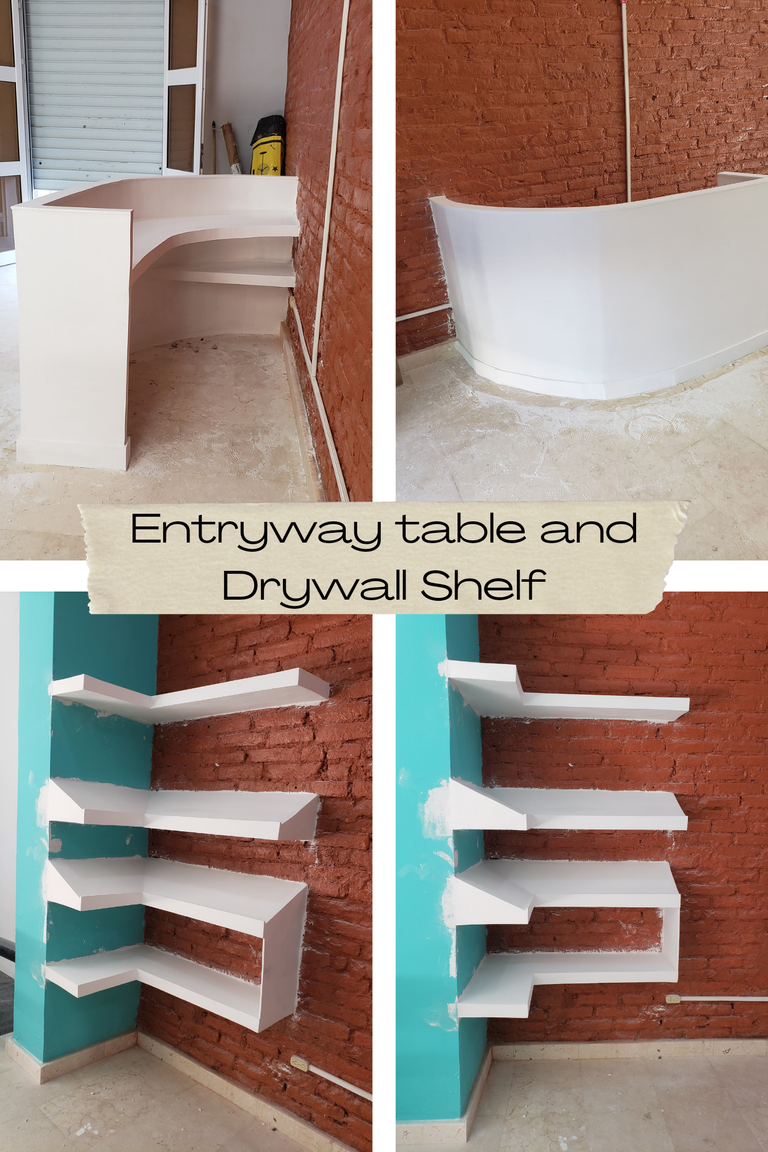
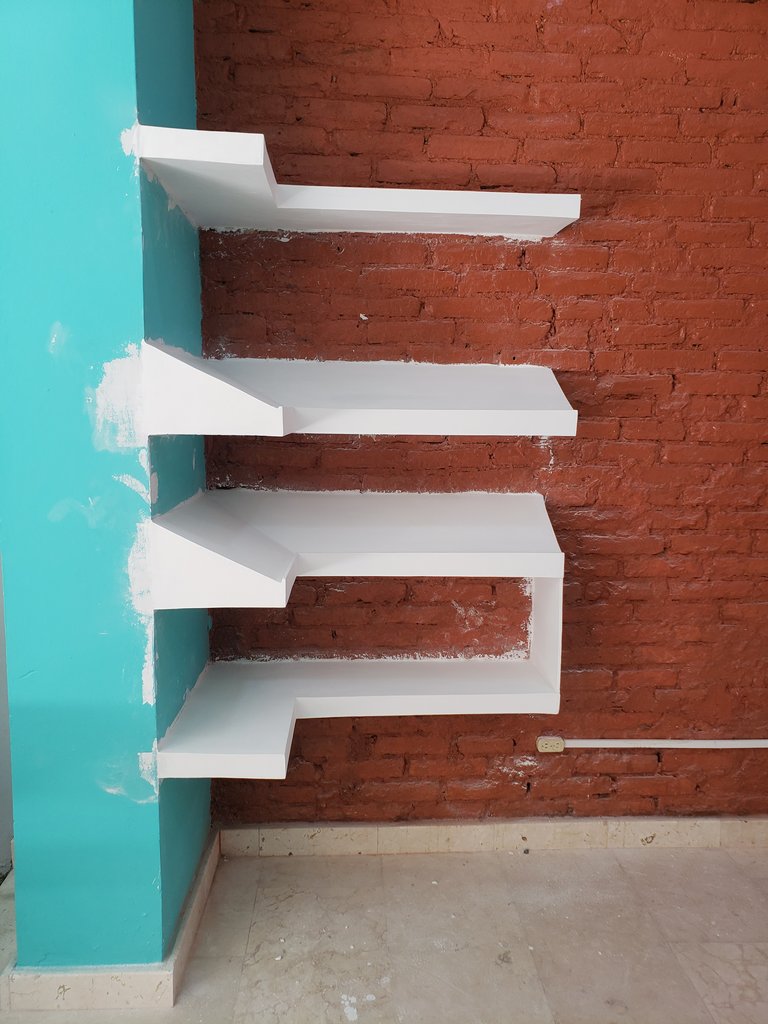
We built two projects made entirely with the drywall system. One was a foyer for the receptionist and the other was a shelf that will serve as a display where they will put products for sale in the store.
Stay until the end to read and see how the result was obtained.
A week ago we were hired by the owner of a gym here in my town to do two drywall jobs (I can not publish photos of the gym because it is a new place that will open soon and for privacy issues on behalf of the client's business I can not upload photos of the place). But if I show you the construction process that we did at the end of the day I took pictures of where the work was going.
To tell you about the design of the two pieces that we had to make. The same client provided them from one of his designers. We only put our ingenuity to achieve it, the materials and the tools.
After analyzing the design and reaching an adjustment of the price of the two works. We got to work. The two projects were built at the same time. We were doing one side and the other, the client wanted them to be finished within 7 days. We worked every day since we started from 8:00am to 7:00pm, about 12 hours of work per day.
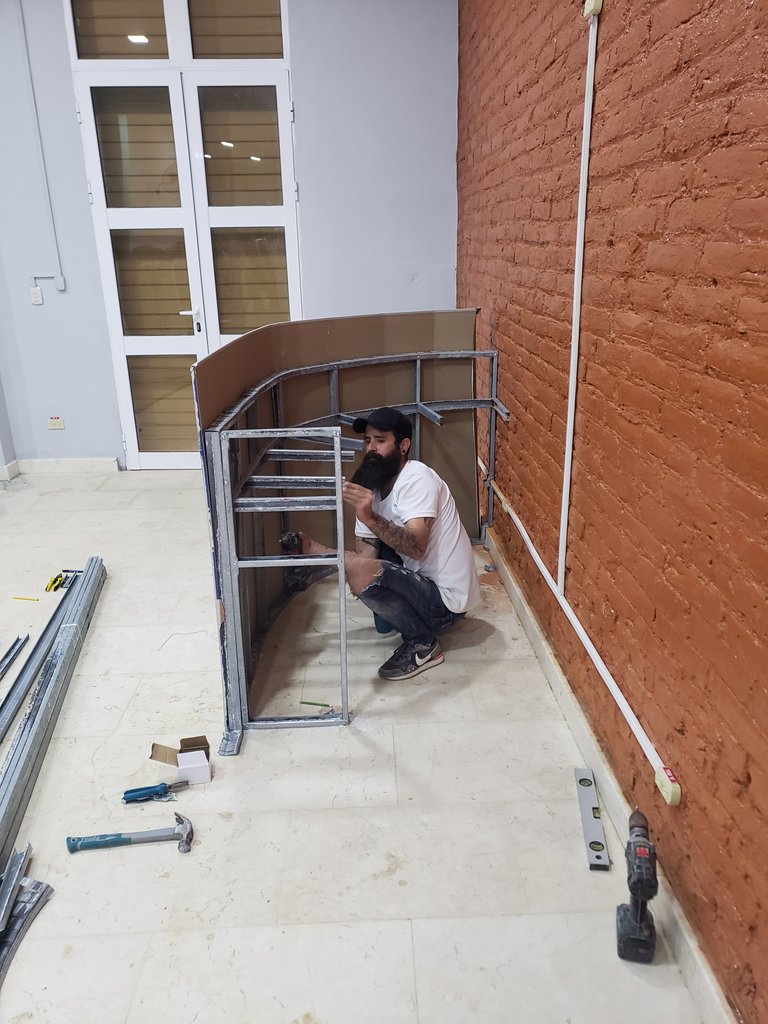
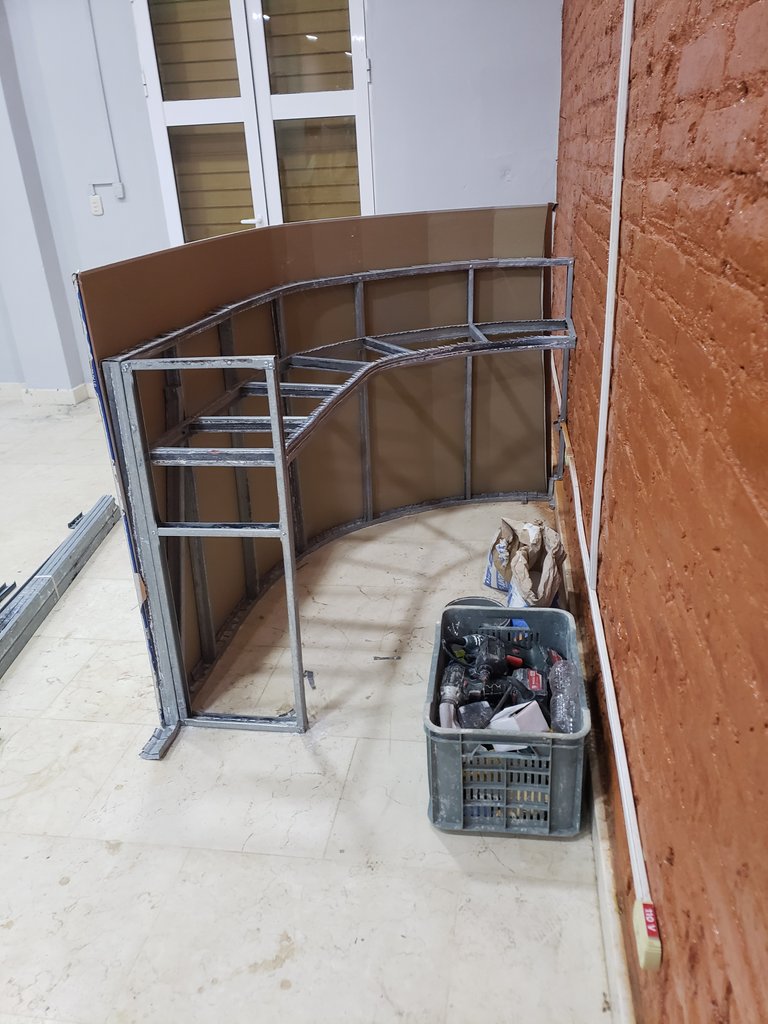
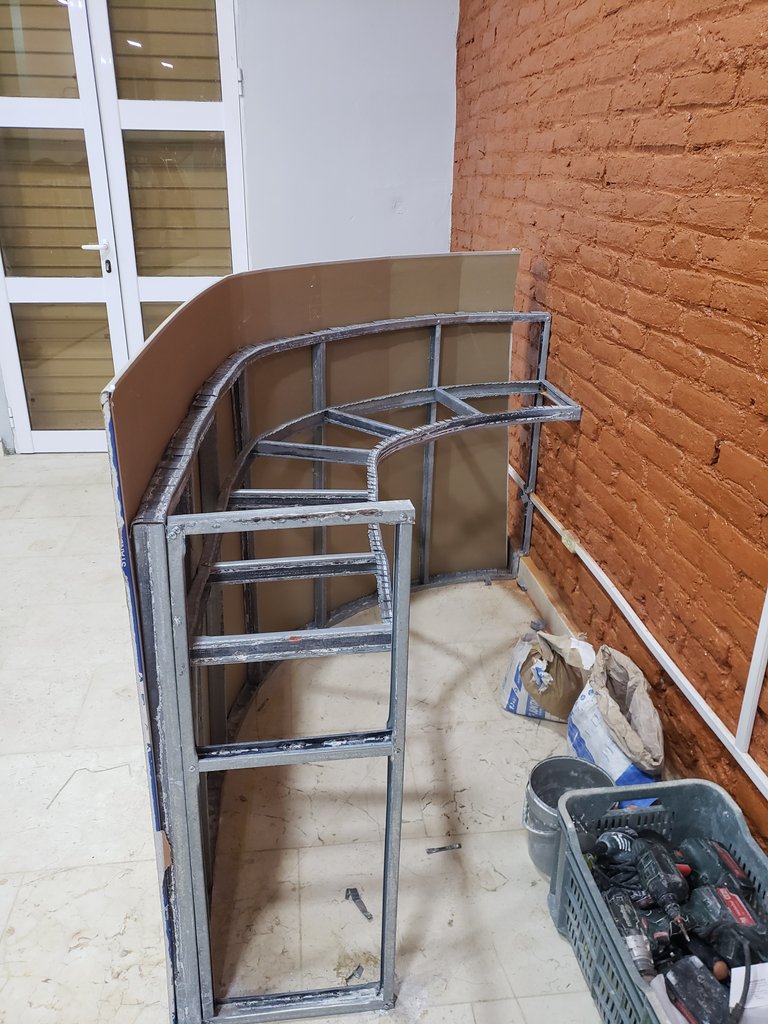
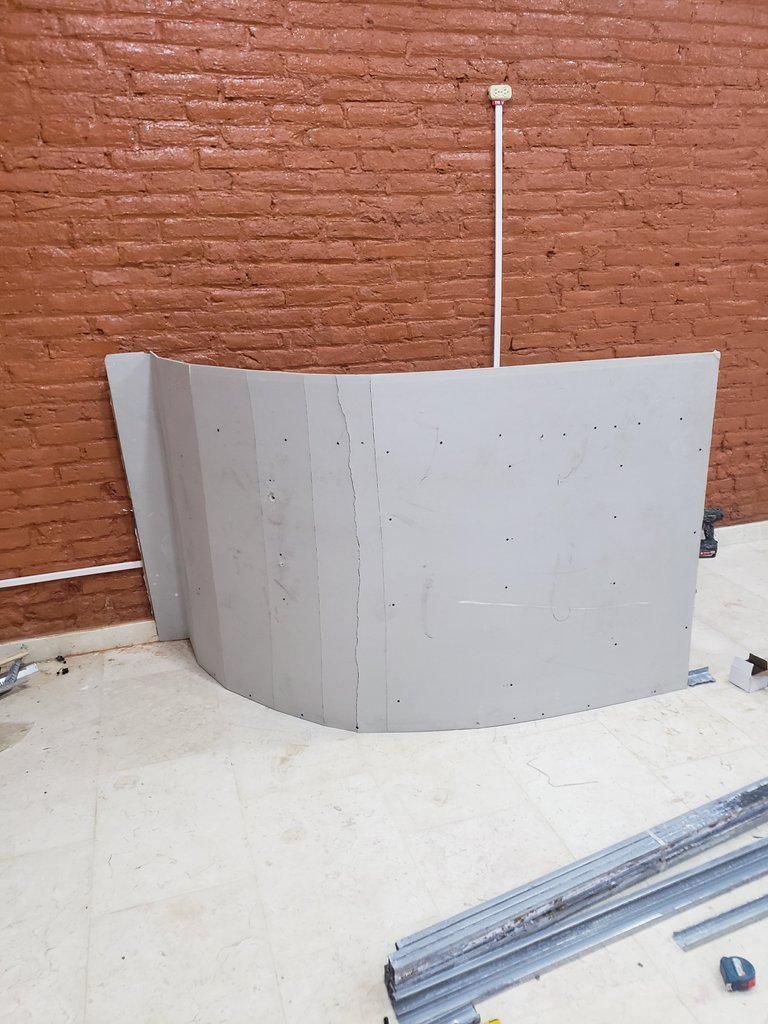
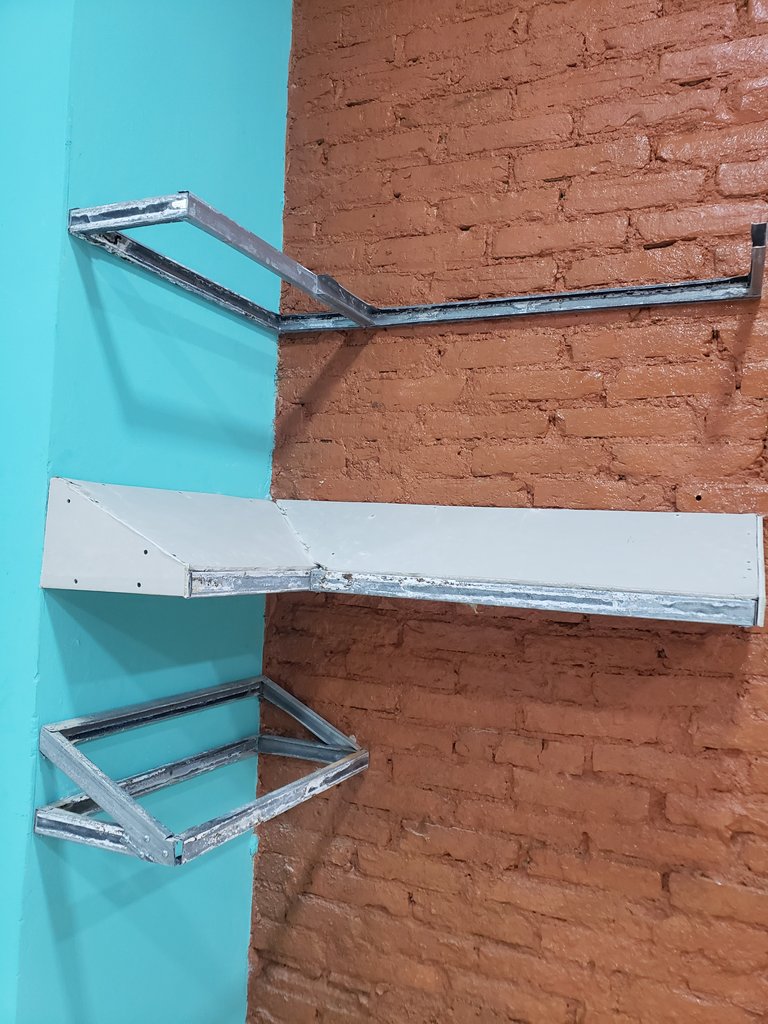
We started on Friday to work on the part of designing the bases of both projects which were going to function as the skeleton and fortress. At the end of the day, both projects looked like this.
Photos of the hall day 1
Photos of the Shelf day 1

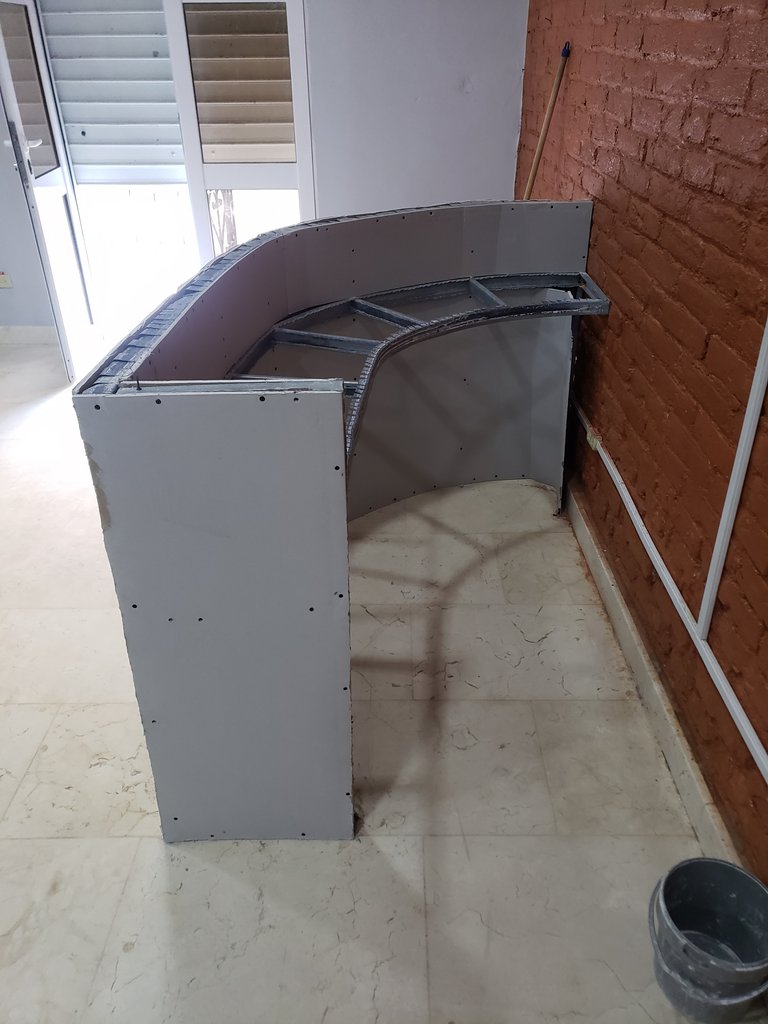
The next day we arrived to continue dressing with the drywall sheets both works and to continue putting the profiles. We had to stop for about 2 hours because the electricity was cut off. But that did not stop us and while we were waiting we were cutting by hand the missing profiles and the gears from pieces of the sheets. At the end of the day both works were looking like this.
Photos of the hall day 2


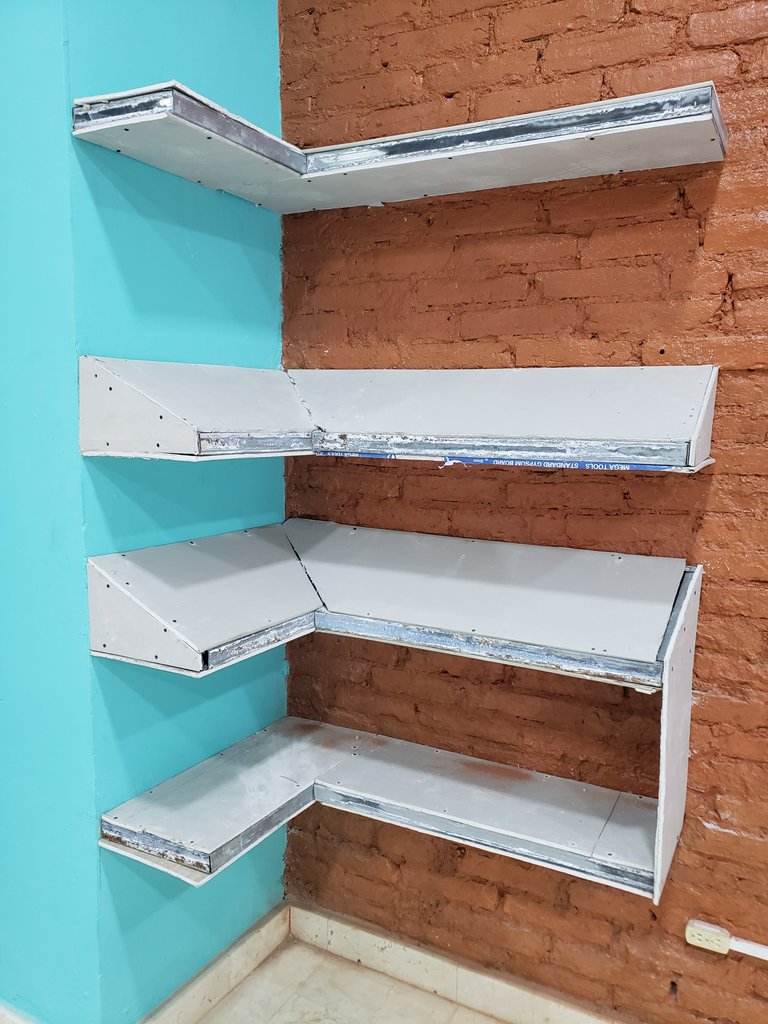
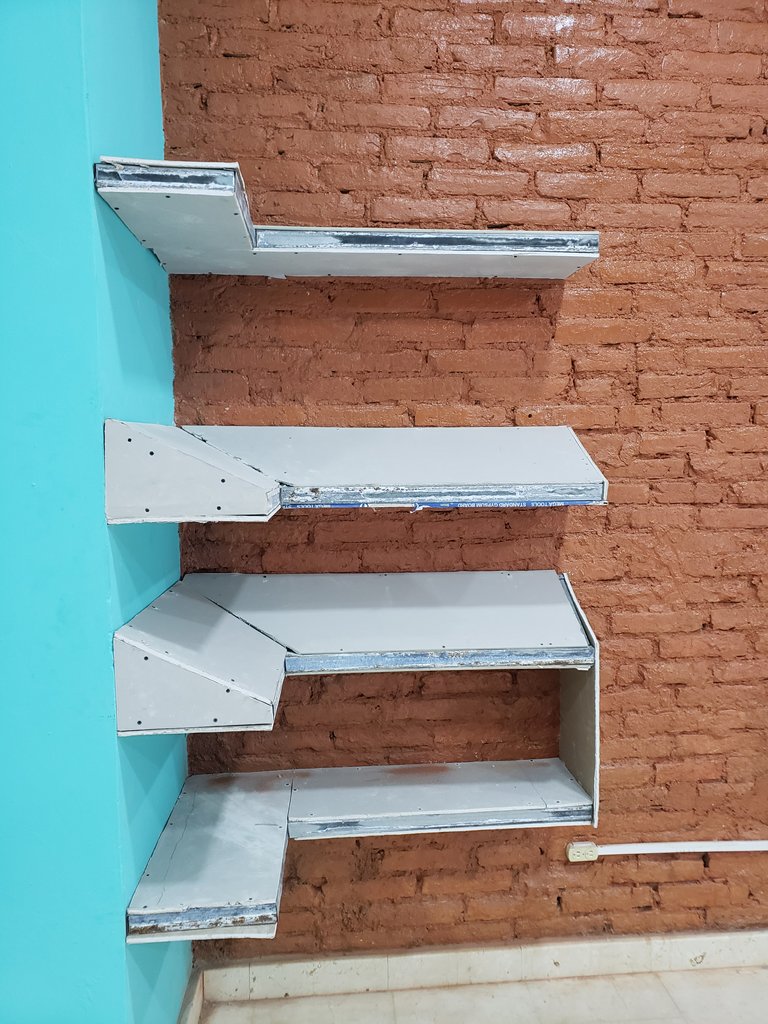
Photos of the Shelf day 2

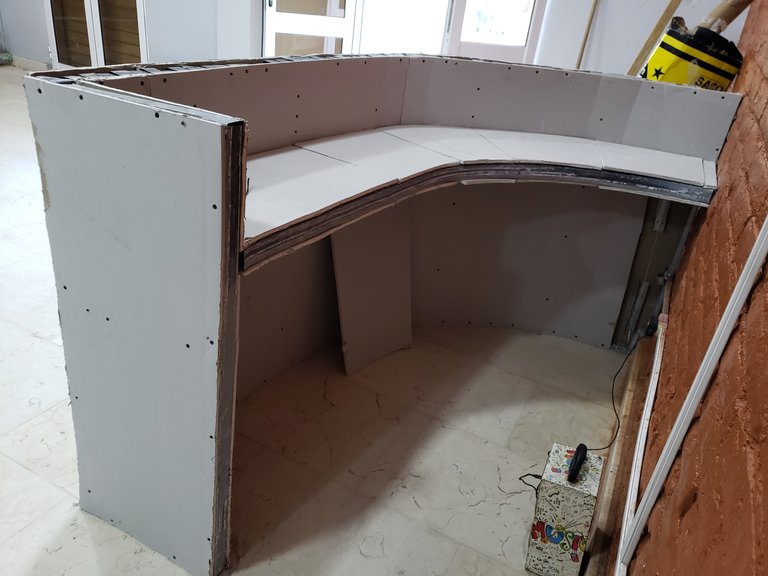
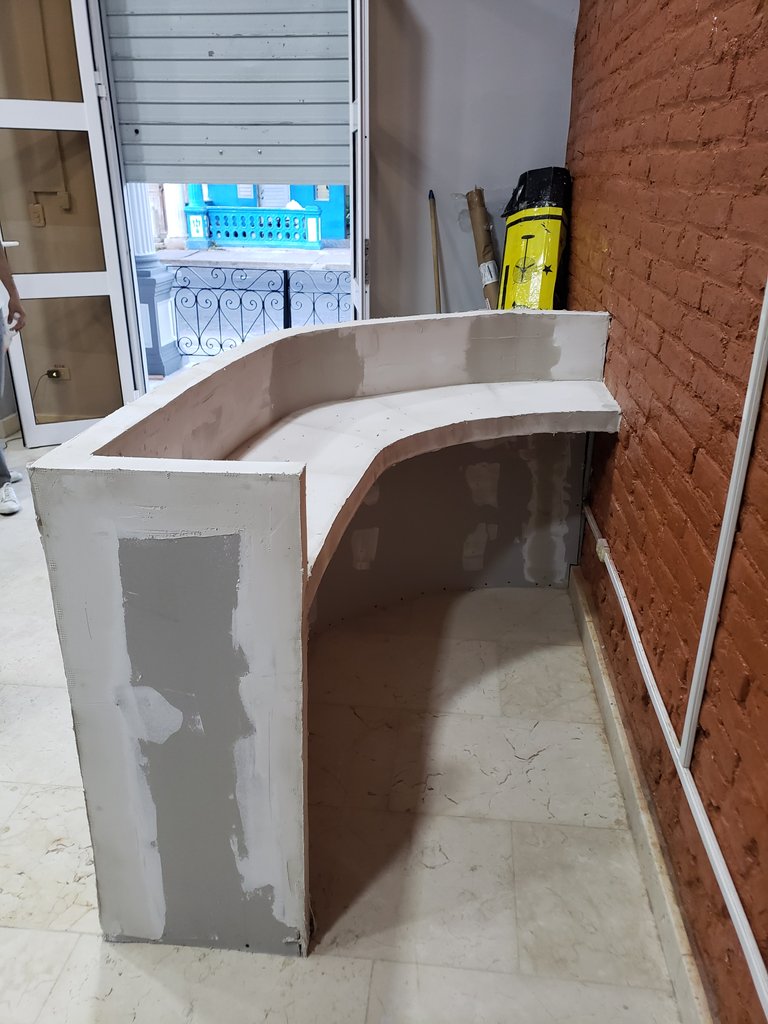
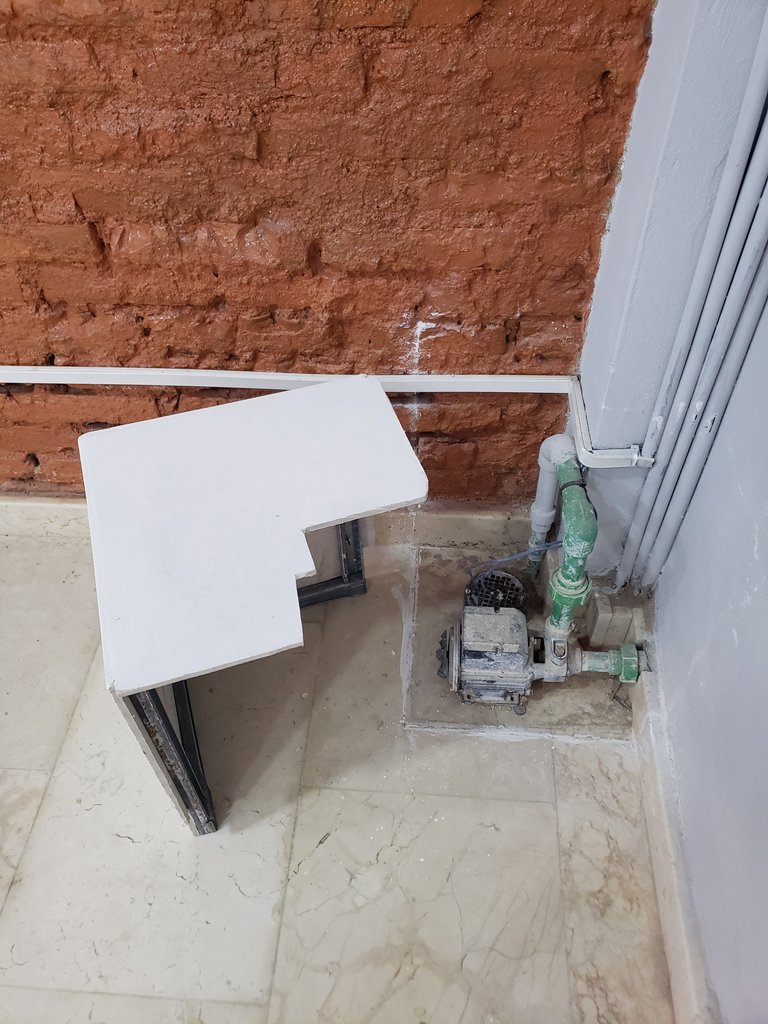
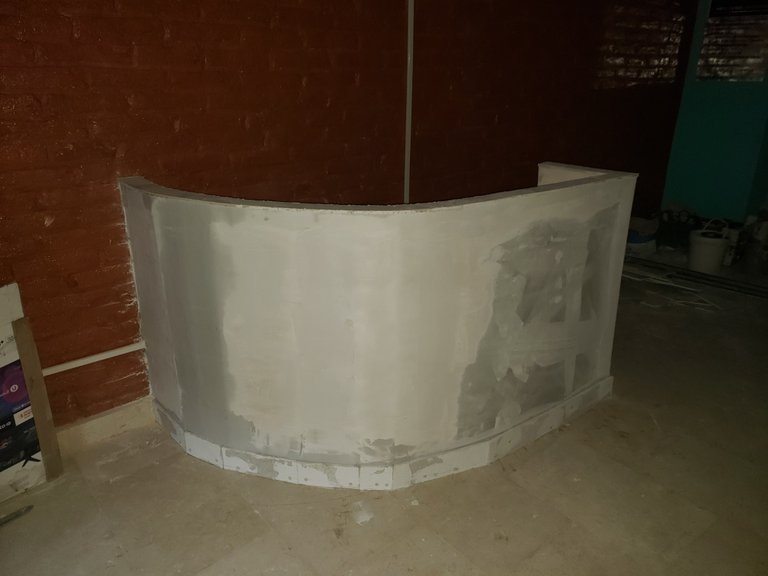
On the third day we got to putty the shelf, which was the quickest thing to do, and then we focused on the hallway. That same day the client wanted us to add something to protect the water pump that was uncovered and we made a drywall box for it to be mobile and he could remove it whenever he wanted. At the end of the day the work was looking like this.
Photos of the hall day 3

Photos of the shelf day 3

Photos of the protection for the water pump


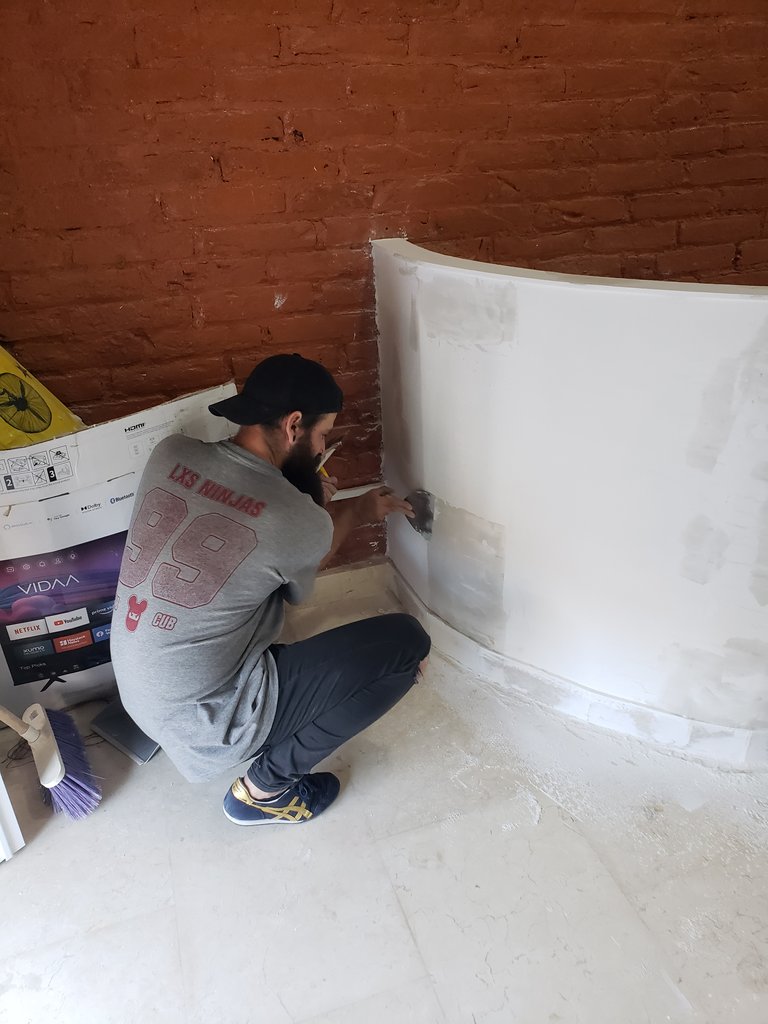
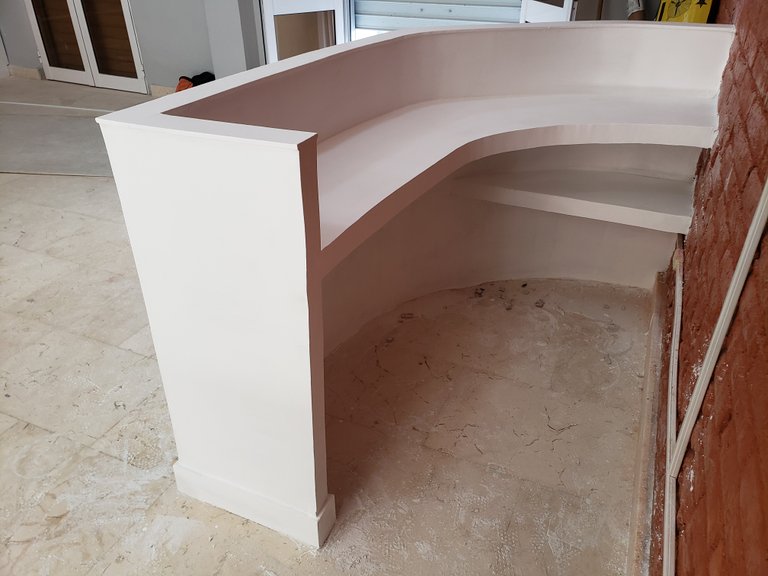
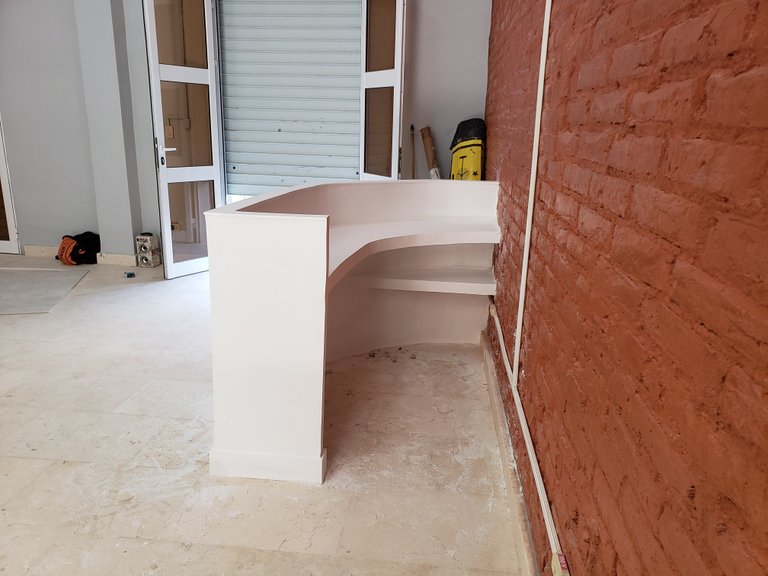
On the fourth day we sanded the shelf while my co-worker was finishing caulking the foyer. I had to wait until the afternoon to sand the foyer while waiting for the new putty that was put on the foyer to finish setting. Finishing the day and leaving everything like this.
Photos of the foyer

Photos of the shelf

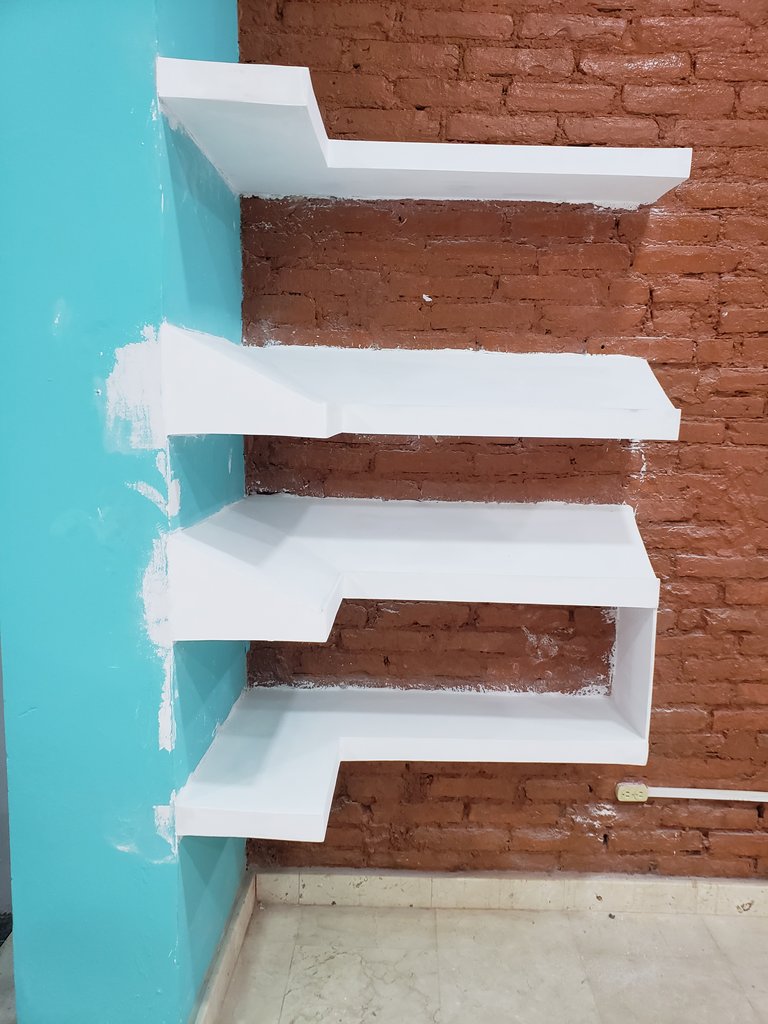
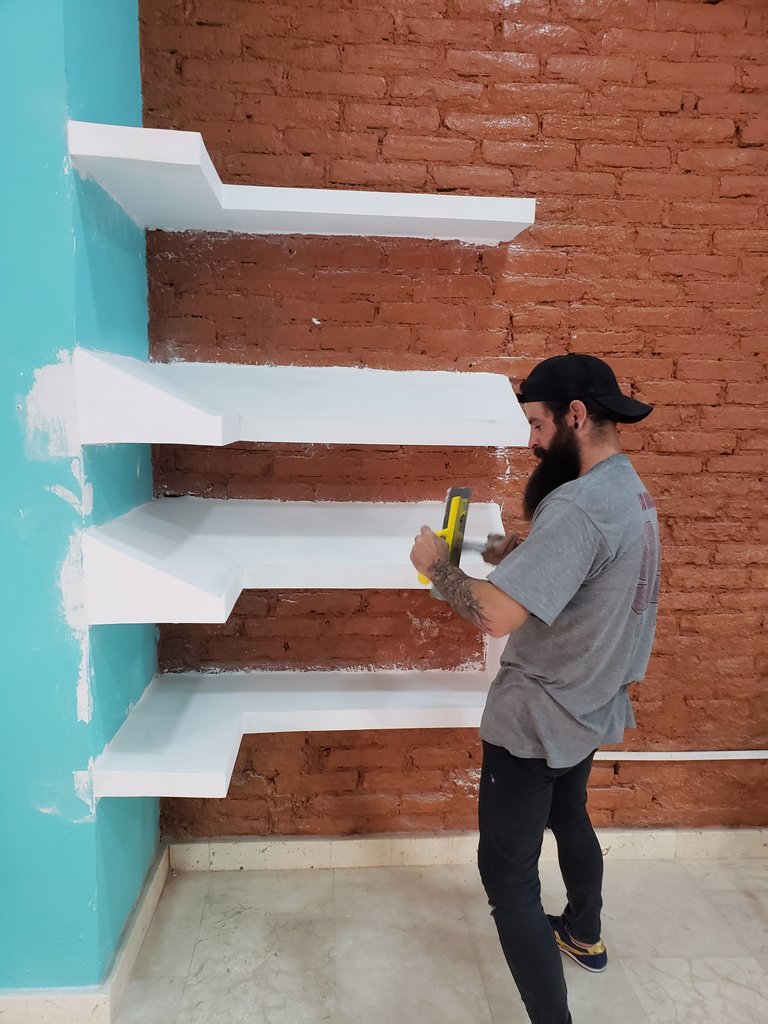
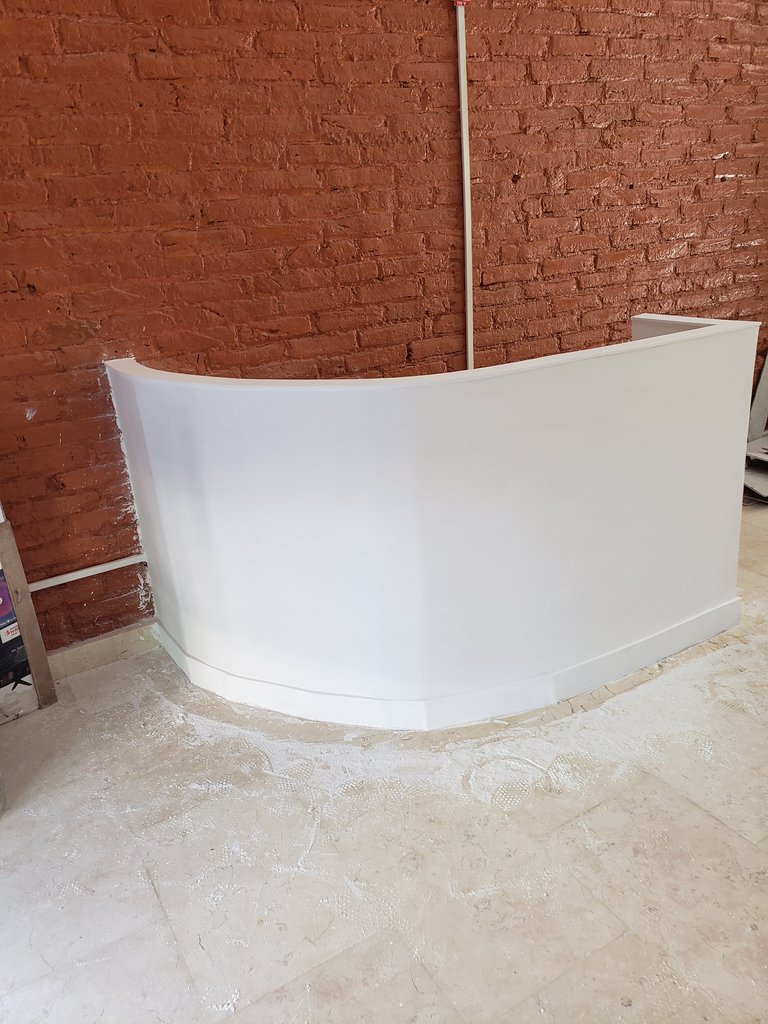
For the fifth day I went to paint both jobs and after the paint dried at the end of the day we putty the small details of each job. Like scratches in the putty. Covering some other little holes that were left. For a perfect polishing of the work.At the end of the day we had finished the work. I only had to go back the next day to sand and paint again to give the final finish to the projects.
The work looked like this:
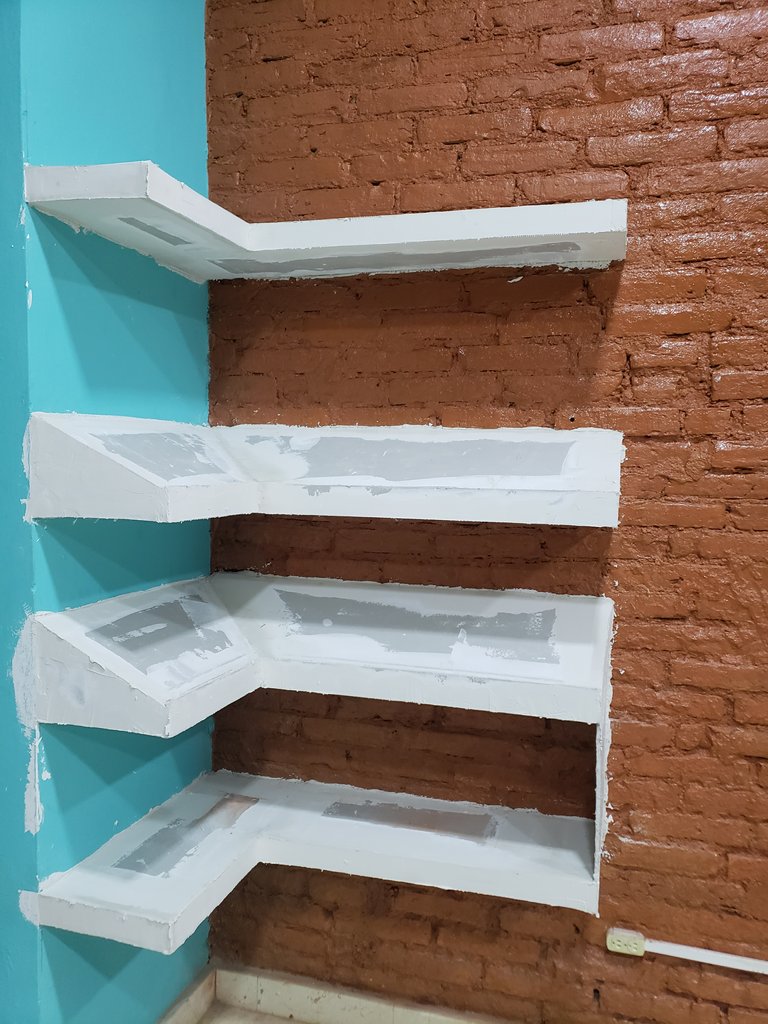
Photos of the hallway
Photos of the shelf

Let me know in the comments what you thought of these projects. Rate our work by leaving a like either as a comment or upVote.
See you next time. Greetings and have a great day machines and interior design lovers.
*** Credits ***
All photos were taken with my Samsung Galaxys note 9 cell phone. And they are my absolute property.
Sección en Español
Resumen:
Construimos dos proyectos echos completamente con el sistema drywall. Uno fue un recibidor para la recepcionista y el otro fue una Estantería que hará la función de excibidor donde pondrán productos en venta del local.
Quédate hasta el final para que leas y veas como fue el resultado obtenido.
Hace una semana fuimos contratados por el dueño de un gimnasio acá en mi localidad para que le hiciéramos dos trabajos de drywall. (No puedo publicar fotos del gimnasio porque es un local nuevo que van a abrir pronto y por temas de privacidad de parte del negocio del cliente no puedo subir fotos del local). Pero si les muestro el proceso de construcción que hicimos al final del día le tomaba fotos por donde iba quedando los trabajos.
Para hablarles del diseño de las dos piezas que teníamos que realizar. El mismo cliente las proporcionó de parte de uno de sus diseñadores. Nosotros solo pusimos nuestro ingenio para lograrlo, los materiales y las herramientas.
Luego de analizar el diseño y llegar a un ajuste del precio de los dos trabajos. Nos pusimos a trabajar. Los dos proyectos se fueron construyendo a la par. Íbamos haciendo un lado y el otro, el cliente quería que se terminaran en un plazo de 7 días. Trabajamos todos los días desde que empezamos desde las 8:00am hasta las 7:00pm, alrededor de 12 horas de trabajo por día.
Comenzamos el viernes a trabajar en la parte de diseñar las bases de ambos proyectos las cuales iban a funcionar como el esquelo y fortaleza. Al finalizar el día ambos trabajos nos quedaron así.
Fotos del Recibidor día 1
Fotos del Estante día 1
Al siguiente día llegamos a seguir vistiendo con las planchas de drywall ambos trabajos y a seguir poniéndole los perfiles. Tuvimos que parar por unas 2 horas aproximadamente porque nos cortaron el fluido eléctrico. Pero eso no nos detuvo y en lo que esperábamos fuimos cortando a mano perfiles que nos faltaban y los engranajes de pedazos de las planchas. Al finalizar el día ambos trabajos iban quedando así.
Fotos del Recibidor día 2
Fotos del Estante día 2
El tercer día llegamos a enmasillar la estantería que era lo más rápido para después enfocarnos en el recibidor. Ese mismo día el cliente quiso que le agregaremos algo para que protegiera la bomba de agua que estaba al descubierto y le hicimos una caja de drywall para que fuera movil y pudiera quitarlo cuando quisiera. Al finalizar el día los trabajos iban quedando así.
Fotos del recibidor día 3
Fotos del estante día 3
Fotos de la protección para la bomba de agua
Para el cuarto día llegamos a lijar el estante en lo que mi compañero de trabajo iba terminando de enmasillar el recibidor. Tuve que esperar a la tarde para poder lijar el recibidor esperando que terminara de fraguar la masilla nueva que se dio en el recibidor. Terminando el día y quedando todo así.
Fotos del recibidor
Fotos del estante
Para el quinto día fui a pintar ambos trabajos y después de secada la pintura al final del día re enmasillamos los pequeños detalles de cada trabajo. Como rayones en la masilla. Tapando algún que otro huequito que fuese quedando. Para un pulido perfecto del trabajo. Al final del día ya habíamos terminado los trabajos. Solo me restaba volver a ir al otro día para volver a lijar y a volver a pintar para darle el acabo final a los proyectos.
Los trabajos quedaron así:
Fotos del recibidor
Fotos del estante
Déjeme saber en los comentarios que tal les pareció estos proyectos. Valore nuestro trabajo apoyandonos dejando un like ya sea como comentario o upVote.
Nos vemos en una próxima oportunidad. Saludos y que tengan un excelente día máquinas y amantes del diseño de interiores.
Créditos
Todas las fotos fueron tomadas con mi teléfono móvil Samsung Galaxys note 9. Y son de mi propiedad absoluta.
Traducido con DeepL https://www.deepl.com/app/?utm_source=android&utm_medium=app&utm_campaign=share-translation
Un excelente trabajo. Felicidades.
Muchísimas Gracias 😊
Hi! Let's start messaging privately. Join here https://ecency.com/chats