
¡Hola, queridos amigos!
Me llamo Elena y es la primera vez que escribo en la comunidad "Jewelry". Estoy muy contenta de que haya muchos participantes de España y que sea posible publicar artículos en inglés y español. Vivo en Ucrania, pero tengo sangre española en las venas, ya que mi tatarabuelo era español.


Desde mi infancia me encanta crear joyas con mis propias manos. Tejía abalorios, bordaba, tejía, hacía flores de foamiran y muchas otras cosas. Pero lo más universal e interesante para mí es la creación de joyas con arcilla polimérica, o como se llama el plástico. Puedes crear con tus propias manos joyas en una variedad de estilos y formas, no hay límite a la imaginación. Las decoraciones de arcilla polimérica se llevan durante mucho tiempo (ya comprobado por mí personalmente, ya que tengo mis obras que tienen unos diez años y no han perdido su aspecto y calidad).
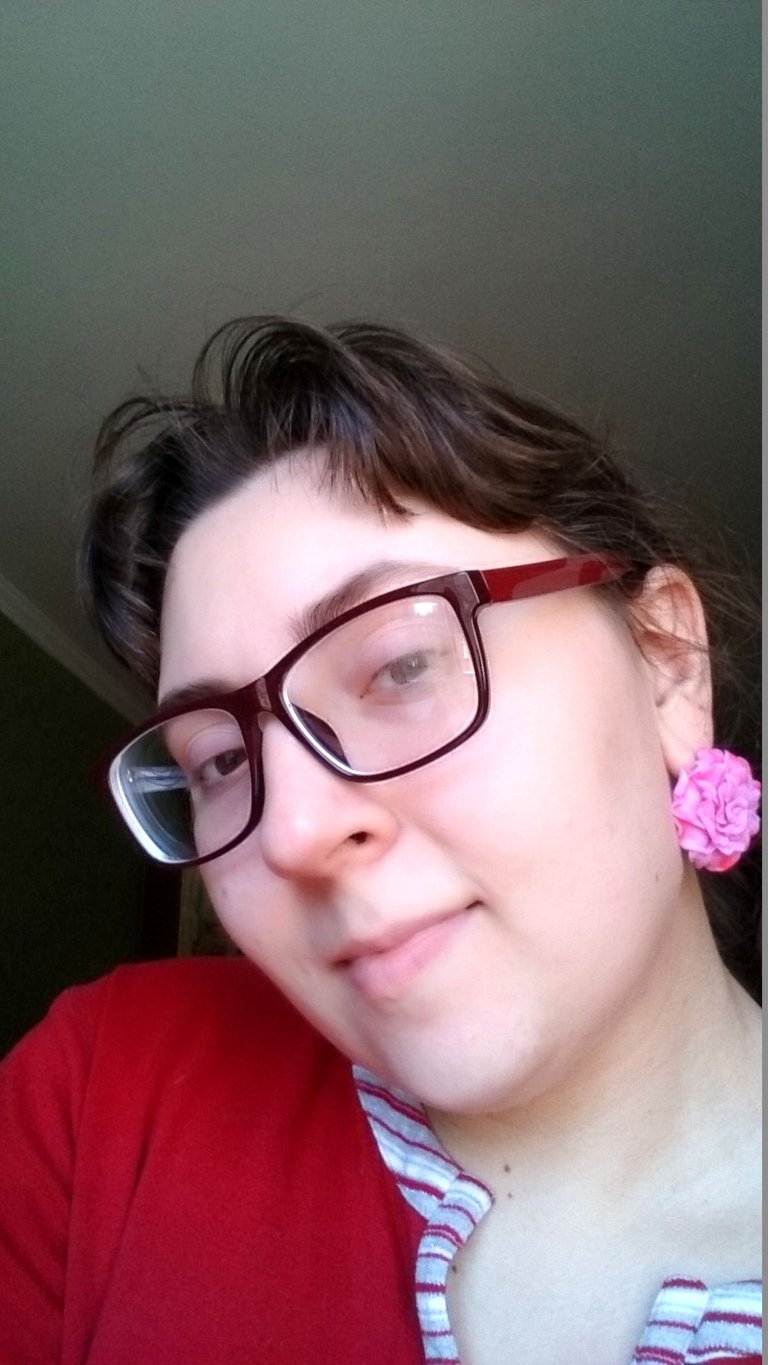
Hoy quiero mostrarles uno de los métodos para moldear rosas de arcilla polimérica. Este método es bastante simple y para un maestro principiante puede ser dominado rápidamente. Estas rosas siempre resultan muy bonitas y vivas. Se puede hacer un anillo con una rosa de este tipo, o pendientes, colgante, pulsera - hay muchas maneras de utilizar las flores de polímero.
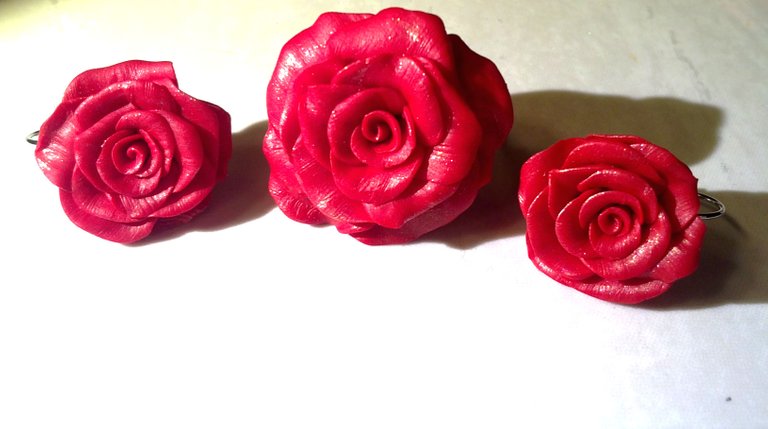
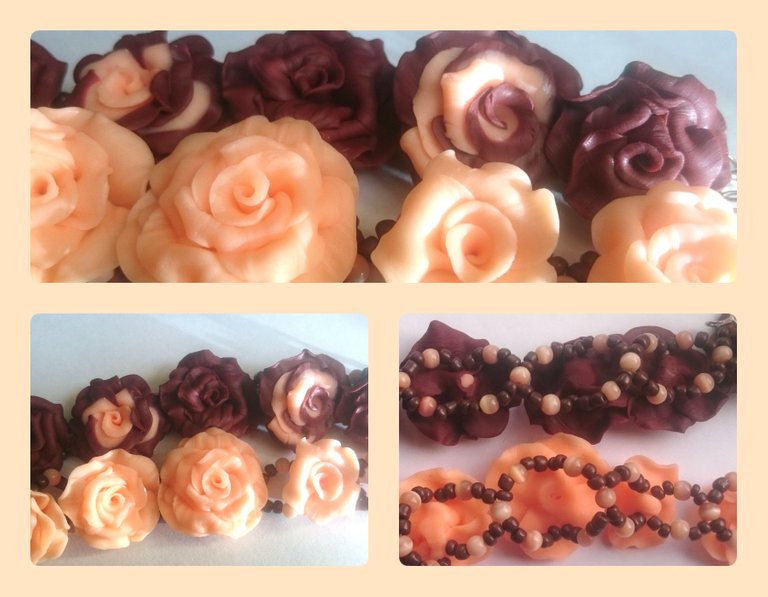
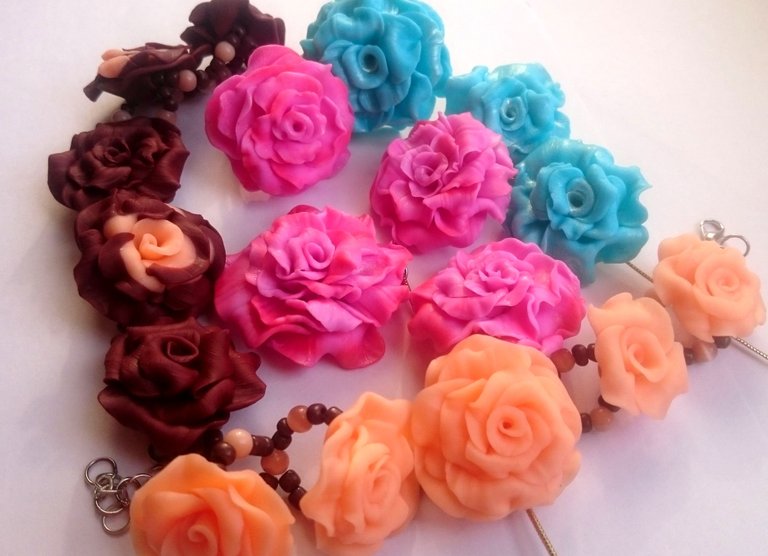
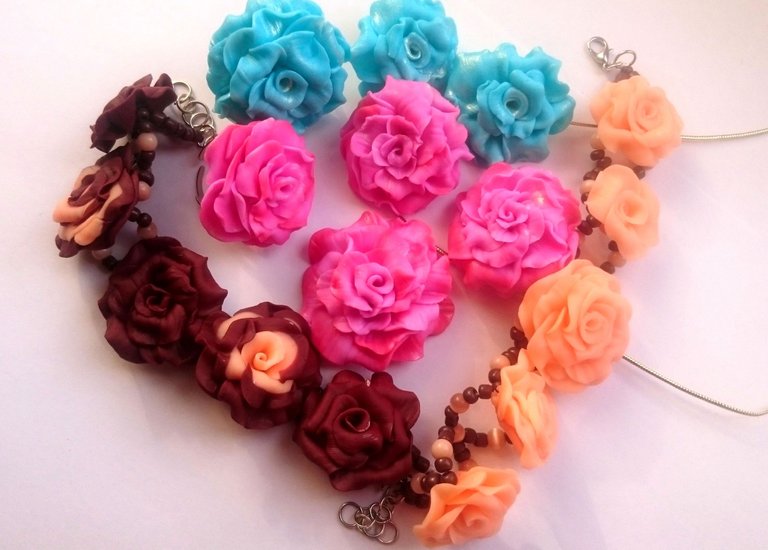
Quiero mostrar un ejemplo de rosas, que moldeé con esta técnica:

Ahora déjame mostrarte paso a paso cómo moldear esta belleza).
Herramientas y materiales:
- arcilla polimérica
- Palillos
- superficie de trabajo (un azulejo, una hoja de papel o el cristal de un marco de fotos)
- Cuchillo o cuchilla de papelería
- Film alimentario
- accesorios (base para anillo, colgante y alfileres)
- Pasteles secos
- pinceles
- sombra de ojos dorada
- horno
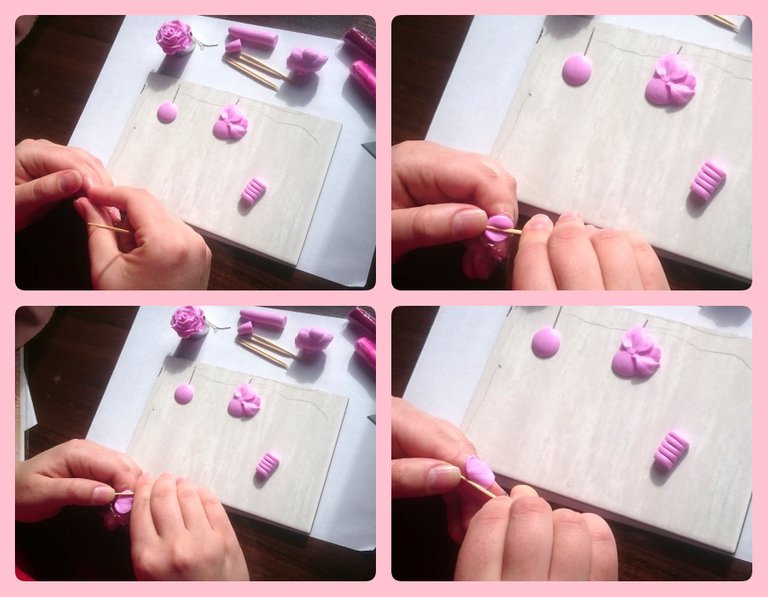
Primero hay que amasar bien la arcilla polimérica en las manos para que esté blanda y lista para trabajar. La foto muestra cómo corto un trocito de arcilla polimérica en pequeñas tiras, que serán pétalos de rosa.
Hago dos piezas en bruto para pendientes - presiono dos círculos idénticos de arcilla polimérica sobre la baldosa, y en ellos inserto alfileres-pasadores (se doblarán más tarde y serán ganchos, que se insertan en las orejas).


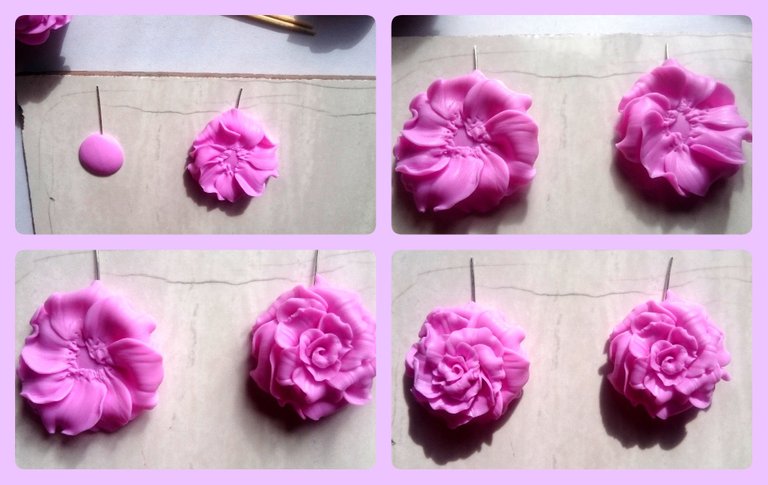
Fíjate en cómo hay que moldear el pétalo.
Para evitar las huellas dactilares, envuelvo el dedo en film alimentario. Cojo una de las piezas de arcilla polimérica y uso un palillo de dientes para enrollarla alrededor del dedo. El palillo es perfecto para este trabajo porque deja una huella de su textura, que es muy parecida a las venas de un pétalo de verdad.
Siempre esculpo elementos emparejados al mismo tiempo. Por ejemplo, los pendientes. La foto muestra cómo he distribuido los pétalos en las bases. Hay que apretarlos a la base con un palillo para que el pétalo quede bien pegado a la base, así te aseguras de que tu producto será resistente.
Quise decorar las rosas utilizando tinte. Lo hago con pasteles artísticos secos, antes de cocer la pieza en el horno. Desmenuzo ligeramente pasteles de varios colores con una cuchilla y los aplico en las puntas de los pétalos con un pincel seco. También quise añadir algo de brillo a estas rosas, así que también las teñí con sombra de ojos dorada en seco

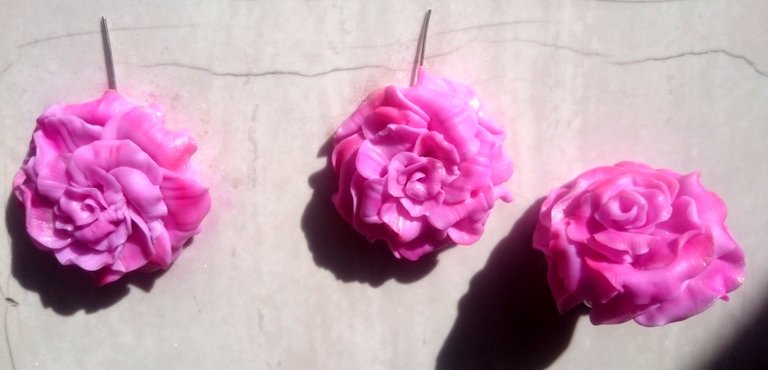


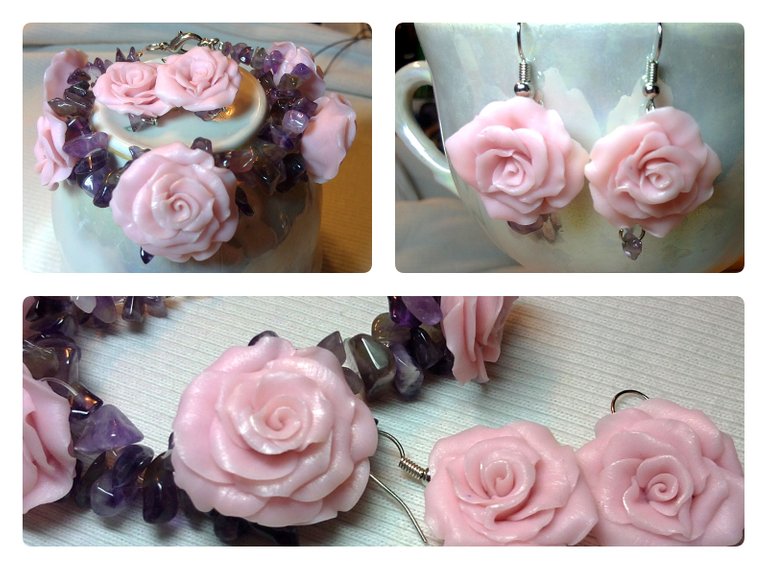
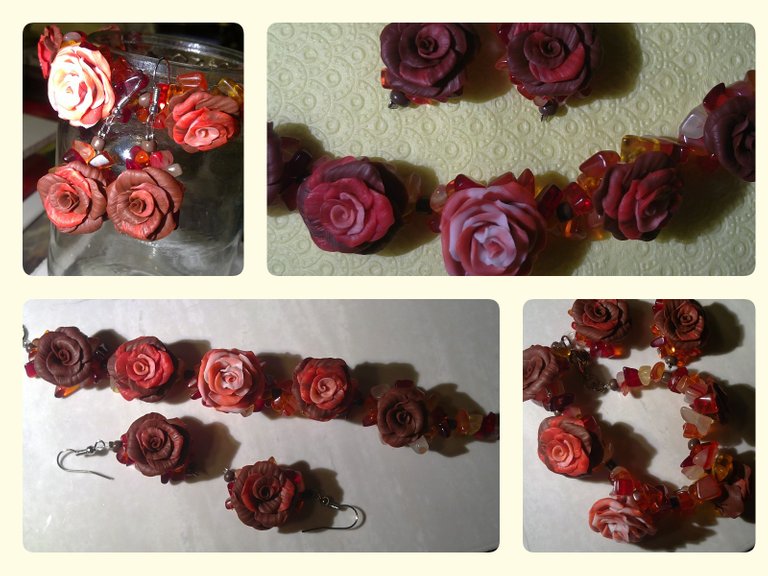
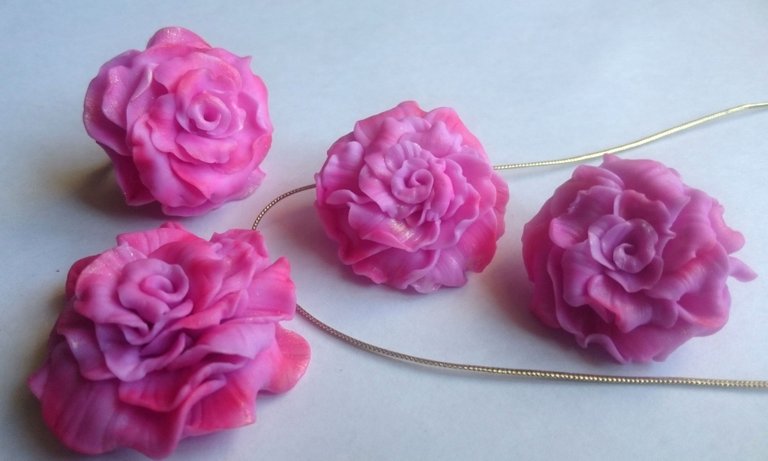
Para estos pendientes también modelé un colgante y un anillo.
Cuando estés contenta con el resultado, hay que cocer las joyas en el horno. Las piezas de arcilla polimérica se cuecen en el horno, después de lo cual se endurecen y se pueden llevar puestas. Aquí hay que tener cuidado y observar atentamente la temperatura y el tiempo de cocción (es diferente para las distintas marcas de arcilla polimérica).
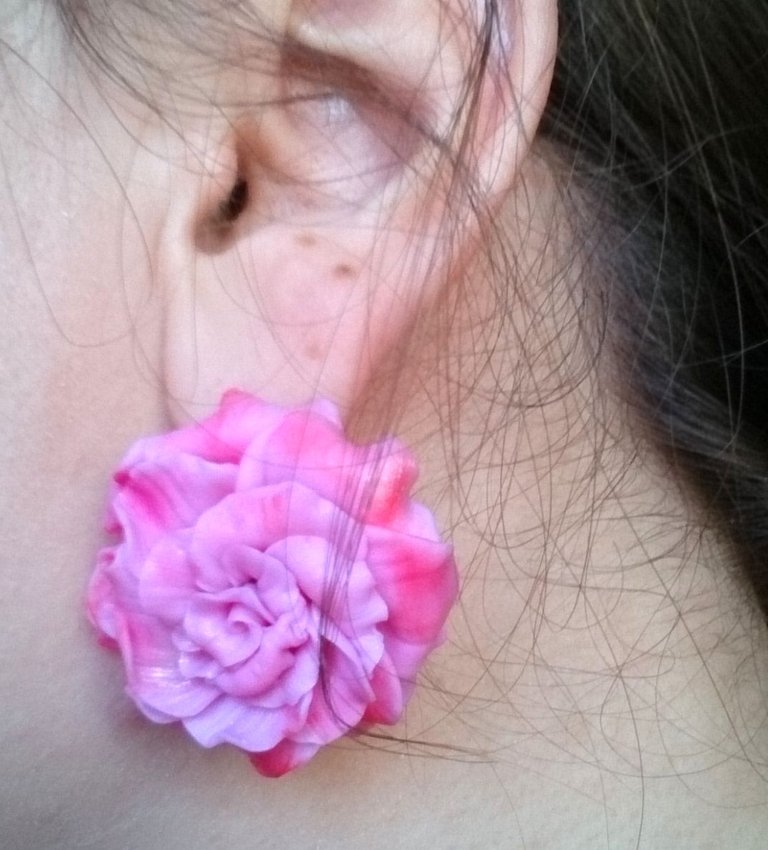
Ahora el producto está listo para usar.

La parte trasera tiene este aspecto:


Gracias a todos por vuestra atención y apoyo!
Les deseo mucho éxito!

Molding beautiful roses from polymer clay
Hello, dear friends!
My name is Elena and this is the first time I write in the community "Jewelry". I am very pleased that there are a lot of participants from Spain and that it is possible to publish articles in English and Spanish. I live in Ukraine, but I have Spanish blood in my veins, as my great-great-grandfather was Spanish.
Since my childhood I love to create jewelry with my own hands. I weaved beads, embroidered, knitted, made flowers from foamiran and many other things. But the most universal and interesting for me is the creation of jewelry from polymer clay, or as it is called plastic. You can create with your own hands jewelry in a variety of styles and shapes, there is no limit to imagination. Jewelry made of polymer clay are worn for a long time (already checked by me personally, as I have my work which is about ten years old and they have not lost their appearance and quality).
Today I want to show you one of the methods of molding roses from polymer clay. This method is quite simple and for a beginner master it can be quickly mastered. Such roses always turn out very beautiful and lively. You can make a ring with such a rose, or earrings, pendant, bracelet - there are many uses for polymer flowers.
I want to show an example of roses, which I molded in this technique.
Now let me show you step-by-step how to mold such beauty)
Tools and materials:
- polymer clay
- toothpicks
- work surface (a tile, a sheet of paper or a glass from a photo frame)
- stationery knife or blade
- food film
- hardware (base for ring, pendant and pins)
- dry pastels
- brushes
- golden eye shadow
- oven
First, you need to knead the polymer clay well in your hands to make it soft and ready to work. The photo shows how I cut a small piece of polymer clay into small strips - these will be rose petals.
I make two blanks for earrings - on the tile I press two identical circles of polymer clay, and in them I insert pins-pins (they will later bend and will be hooks, which are inserted into the ears).
Note how the petal needs to be molded.
To avoid fingerprints, I wrap food wrap around my finger. I take one of the polymer clay pieces and use a toothpick to roll it around my finger. The toothpick is perfect for this work because it leaves an imprint of its texture, which is very similar to the veins of a real petal.
I always sculpt paired elements at the same time. For example, earrings. The photo shows how I distributed the petals on the bases. You need to press them to the base with a toothpick so that the petal is well glued to the base, you need to make sure that your product will be strong.
I wanted to decorate the roses using tinting. I do this with dry art pastels, before baking the piece in the oven. I lightly crumble pastels of several colors with a blade and apply to the tips of the petals with a dry brush. I also wanted to add some sparkle to these roses, so I tinted with gold dry eye shadow as well
To these earrings I also molded a pendant and a ring.
When you are satisfied with the result of molding, the jewelry should be baked in the oven. Products made of polymer clay are baked in the oven, after which they harden and become wearable. Here you need to be careful and carefully observe the temperature and time of baking (it is different for different brands of polymer clay).
Now the product is completely ready for use!
The back side looks like this:
Big thanks to everyone for your attention and support!
Wishing you success!!!
I don't know polymer clay 🧱 can go the same way fabrics fo for jewelry. Such a lovely 🌹 flowers 🌺
Thanks a lot! I am glad that you liked my work) I wish you a great mood!🌺🌺🌺
Greetings @elena welcome to the community, it is a pleasure to have you among us and that you can delight us with these beautiful accessories with polymer clay, I love how.cas giving shape and color as you can give it, and waoo from the ring, tendril and even the necklace. Great job and look forward to seeing more tutorials 😉.
Thank you very much for such a warm welcome! 😊I really appreciate your praise and support. I will try to publish my work in this wonderful community. I wish success and wonderful creative mood to all participants!!!
Wuaoh que hermoso todo tu trabajo, bienvenida a esta hermsoa comunidad. Se que te va a ir muy bien y aprenderemos mucho de tus tutoriales. saludos !
Saludos a ti también) ¡¡¡Muchas gracias por tus elogios y apoyo!!! Estoy muy complacido)
¡También te deseo éxito en tu trabajo y en tu vida!
Nice work. On a headband for a little girl they must look beautiful.
Thank you very much for the compliment! Yes, I think that such roses are also suitable for a headband) I didn’t have such an idea
I wish you good mood!!!