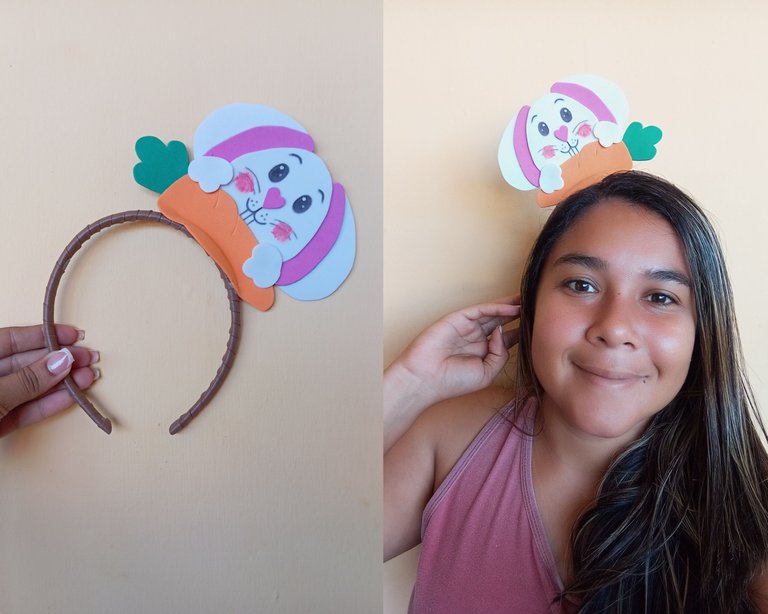
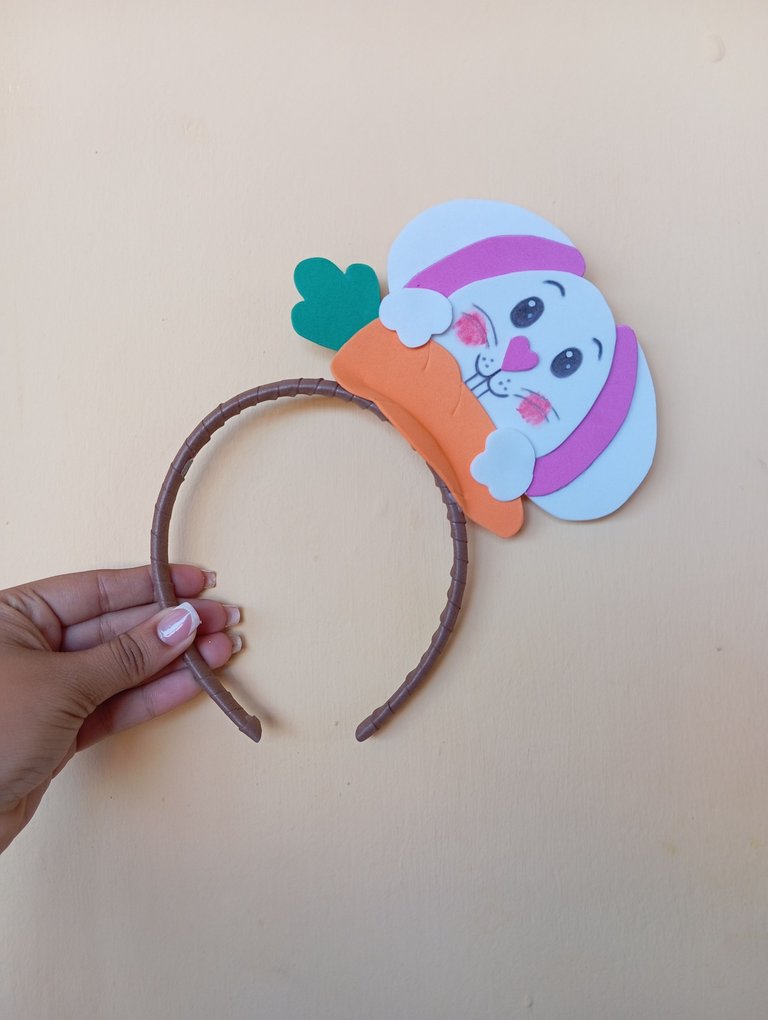
Hola muy buenos dias apreciados amigos, espero que se encuentren bien , llenos de abundante salud , les quiero compartir un tutorial para elaborar un cintillo con temática de una linda coneja comiendo zanahoria, un cintillo sencillo y muy llamativo que toda niña le gustaría
Hello very good morning dear friends, I hope you are well, full of abundant health, I want to share a tutorial to make a headband with the theme of a cute bunny eating carrot, a simple and very striking headband that every girl would like
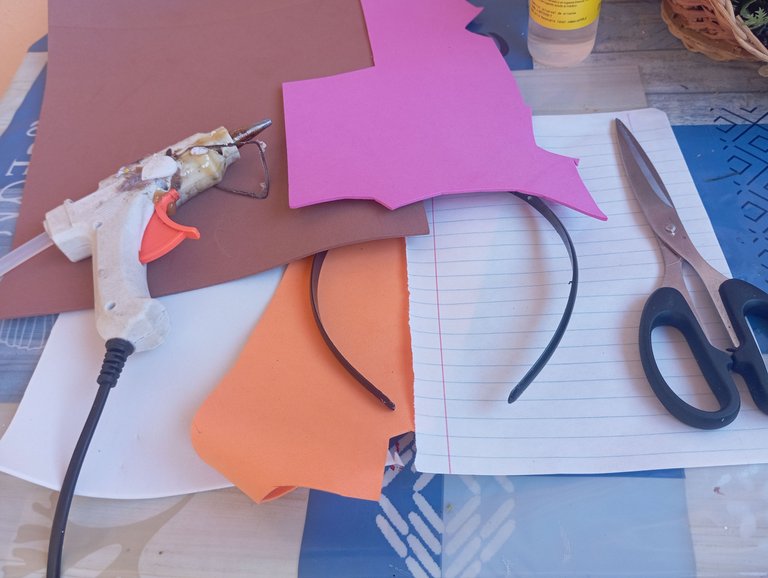
Materiales qué utilice para elaborar mi cintillo:
-Cintillo
-Foamis
-Tijera
-Silicon
-Lapiz y papel
Materials what to use to make my headband:
-Cintillo
-Foamis
-Scissors
-Silicon
-Paper and paper
A continuación los pasos a seguir:
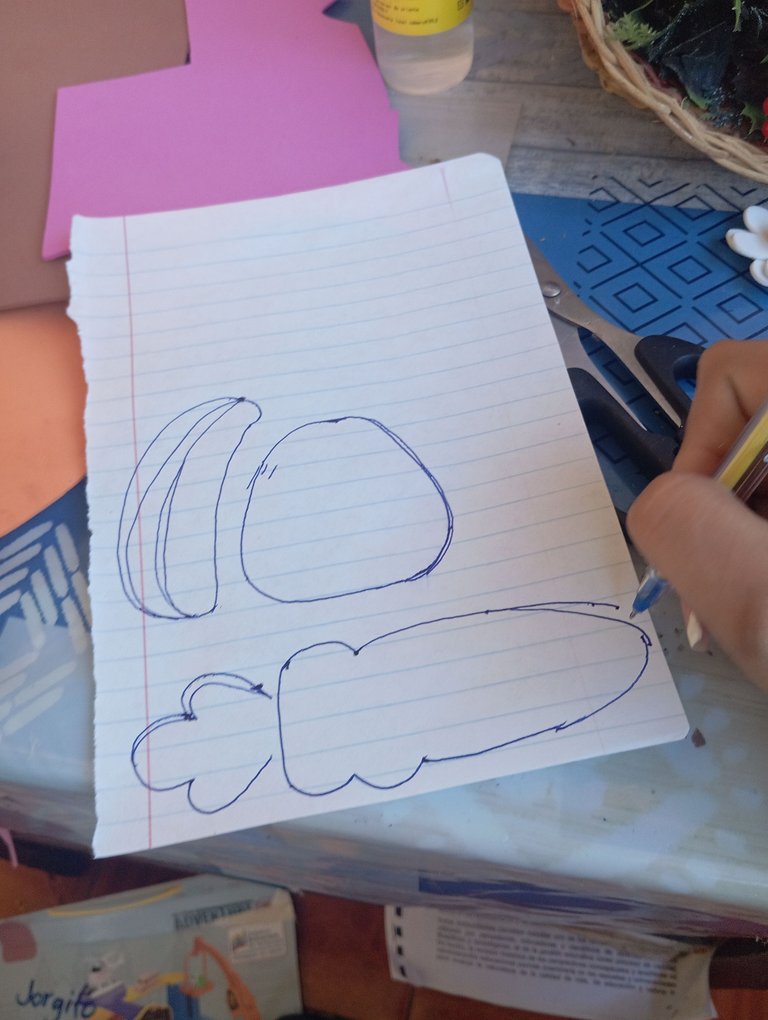
Primer paso : iniciaremos primeramente dibujando nuestro patrón para trabajar por piezas ,es más seguro y quedan mejor los diseños, en esta ocasión realizaremos la cabeza de una conejita y una zanahoria, ya que ella estará comiendo esa zanahoria
Here are the steps to follow:
First step: we will start first drawing our pattern to work by pieces, it is safer and the designs are better, this time we will make the head of a bunny and a carrot, as she will be eating that carrot
Segundo paso: a continuación iniciaremos marcando nuestro patrón, comenzaremos primeramente con la cabeza de nuestra coneja , marcaremos su cabeza y sus orejas en el foamis blanco y una parte en el rosado que llevara en su oreja
Second step: then we will start marking our pattern, we will start first with the head of our rabbit, we will mark her head and ears in the white foamis and a part in the pink that will be in her ear
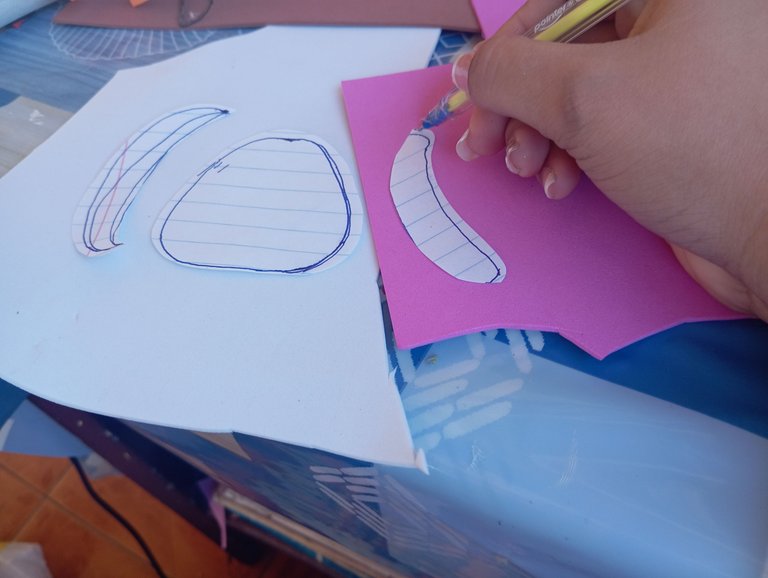
Tercer paso: a continuación en nuestro tercer paso vamos a proceder recortando las piezas que marcamos en el paso anterior (cabeza y orejas)
Third step: then in our third step we will proceed cutting out the pieces we marked in the previous step (head and ears)
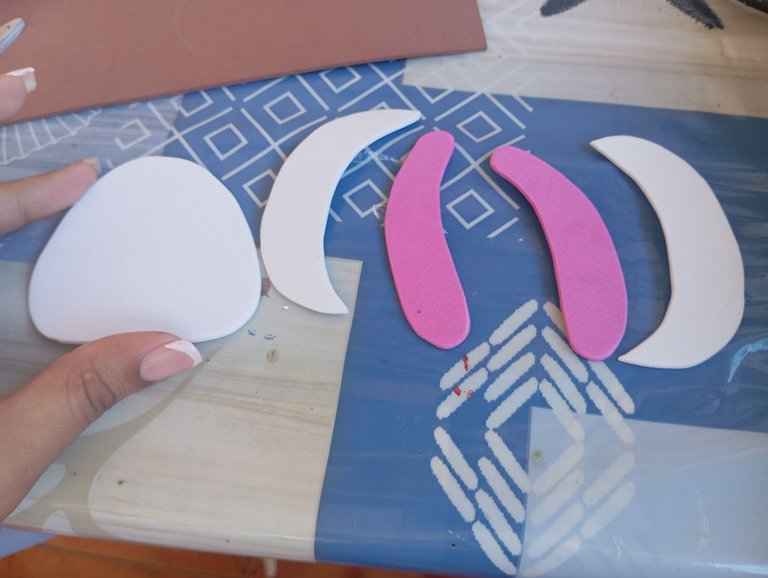
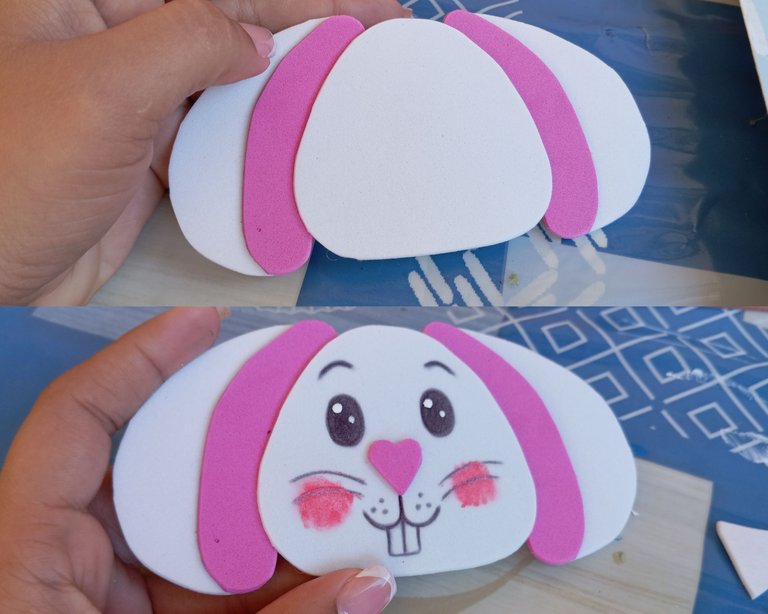
Cuarto paso : seguidamente vamos a continuar pegando y formando nuestra coneja , iniciaremos primeramente pegando sus orejas a los lados de su cabeza , luego continuaremos realizando su rostro, en el centro pegaremos su nariz en forma de corazon, así mismo realizaremos sus ojos , su sonrisa con dos enormes dientes adelante y por último sus mejillas sonrojadas las cuales pinte con labial
Fourth step: then we will continue gluing and forming our rabbit, we will start by first gluing her ears to the sides of her head, then we will continue making her face, in the center we will glue her nose in the shape of a heart, we will also make her eyes, her smile with two huge teeth in front and finally her blushing cheeks which we will paint with lipstick
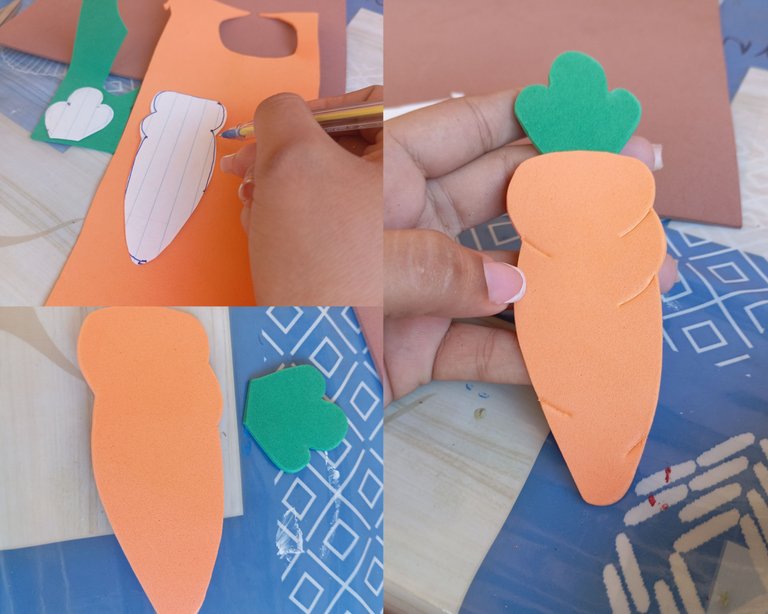
Quinto paso : a continuación en nuestro quinto paso vamos a proceder realizando nuestra zanahoria, iniciaremos marcando nuestra zanahoria y sus hojas , una vez marcadas procedemos recortando con la ayuda de una tijera , seguidamente vamos a tomar nuestro silicón agregamos y pegamos la hoja en la parte de arriba
Fifth step: we will continue making her face, in the center we will glue her nose in the shape of a heart, in the same way we will make her eyes, her smile with two huge teeth in front and finally her blushing cheeks which we will paint with lipstick
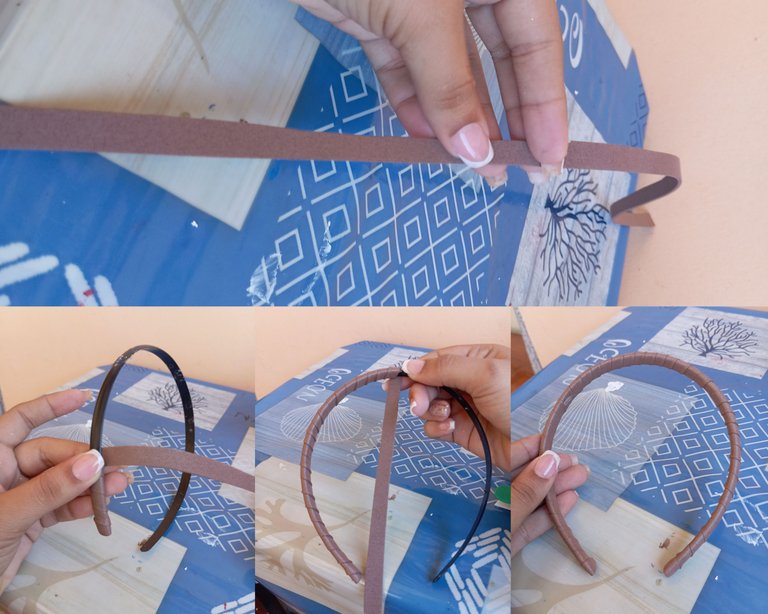
Sexto paso : a continuación vamos a decorar nuestro Cintillo, Iniciaremos tomando una tira de foamis , agregamos silicón en la punta y pegamos desde una punta de nuestro cintillo , seguidamente vamos a continuar enrollando hasta llegar al otro extremo de la punta finalizando nuestro cintillo
Sixth step : Next we are going to decorate our headband, we will start by taking a strip of foamis, add silicone on the tip and glue from one end of our headband, then we will continue rolling until we reach the other end of the tip ending our headband
Séptimo paso : luego que tengamos nuestra temática lista y nuestro cintillo decorado vamos a continuar tomando ambas piezas y la pegaremos, en una esquina de nuestro cintillo pegaremos nuestro conejo culminando nuestro accesorio, de esta manera podrán lucir nuestras pequeñas un lindo Diadema o cintillo de coneja comelona de zanahoria
Créditos: las fotos las tomé con mi redmi 12 y traduje los textos con el traductor deepl , feliz día para todos amigos
Seventh step : after we have our theme ready and our headband decorated we will continue taking both pieces and glue it, in one corner of our headband we will glue our bunny culminating our accessory, this way our little ones can wear a cute Carrot bunny headband
Credits: the photos were taken with my redmi 12 and I translated the texts with the deepl translator, happy day to all friends
Es lo más tierno que he visto hoy. Hermoso trabajo, querida amiga
Muchas gracias linda