Buenas noches, amigos de jewelry tenia dias sin poder publicar ya que andaba haciendo una pulserita que me dió algo de trabajo hacer, quise hacerla con la tecnica peyote pero no supe, me enrredé mucho, asi que usé la tecnica ladrillo que domino bastante bien gracias a Dios y quiero mostrarles el paso a paso y como me quedó espero les guste.
Good night, friends of jewelry I had days without being able to publish because I was making a bracelet that gave me some work to do I wanted to do it with the peyote technique but I did not know, I got tangled a lot, so I used the brick technique that I dominate quite well thank God and I want to show you the step by step and how I got it I hope you like it.

Materiales 🔷 | Materials 🔷
- Hilo chino blanco, 1 m
- Hilo chino rosado, 1.5 m
- Hilo nylon de 0.25 , 1.5 m
- Canutillos azules, blancos, rosados, y azul oscuro
- Dos mostacillones
- Dos critales "biconos"
- Yesquero
- White Chinese thread, 1 m
- Chinese thread pink, 1.5 m
- Nylon thread 0.25 , 1.5 m
- Blue, white, pink, pink, and dark blue beads
- Two beads
- Two "bicone" crystals
- Tinder
Procedimiento 🔷 | Procedure 🔷
Antes de empezar les digo que se necesita bastante paciencia, es un proceso que se van agregando los canutillos uno por uno el proceso es un poco largo pero no es dificil, eso si requieres una buena cantidad de nylon y siquieres el ojo mas alargado sugiero agregar un poco mas de medio metro para anudar y esconder el hilo. Tampoco es bueno usar agujar , ya que el canutillo es muy deilicado y se parte de nada (ya me paso 😅).
También que con delicas miyuki 11/0 se va a ver mucho mas bonito y será mas facil porque el agujero de las miyuki es mas grande y también porque las miyuki vienen perfectamente calibradas, el canutillo aunque se ve precioso no esta calibrado en su mayoria, entonces toca batallar un poco para encontrar los canutillos que sean lo mas similares en tamaño, lo que hizo que me tardara un poco mas haciendo el diseño.
Before you start I tell you that you need a lot of patience, it is a process that is adding the canutillos one by one the process is a little long but it is not difficult, that if you require a good amount of nylon and if you want the eye more elongated I suggest adding a little more than half a meter to knot and hide the thread.
It is also not good to use needlepunching, because the comb is very delicate and it breaks in no time (it already happened to me 😅). Also that with 11/0 miyuki delicas it will look much nicer and it will be easier because the hole of the miyuki is bigger and also because the miyuki come perfectly calibrated, the canutillo although it looks beautiful is not calibrated in its majority, then it is necessary to struggle a little to find the canutillos that are the most similar in size, which made it take me a little more time to make the design.
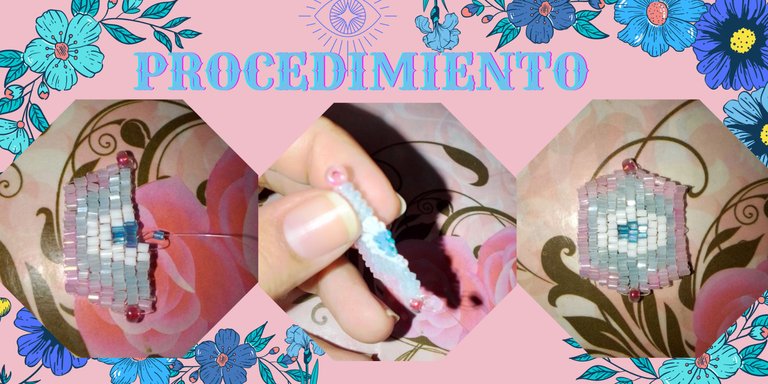
Paso 1 🔷 | Step 1 🔷
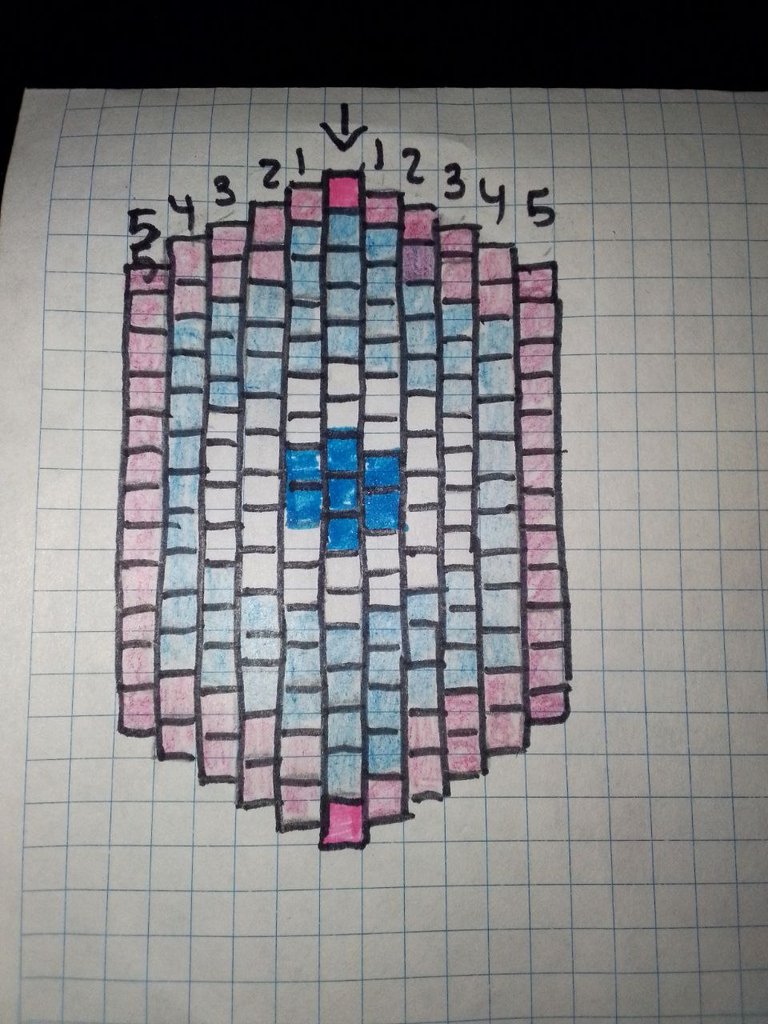
Debemos tener nuestro diseño dibujado en papel o en un programa como sea porque si no se nos hará muy dificl ubicarnos y saber para donde vamos, que fue exactamente lo que me paso😅.
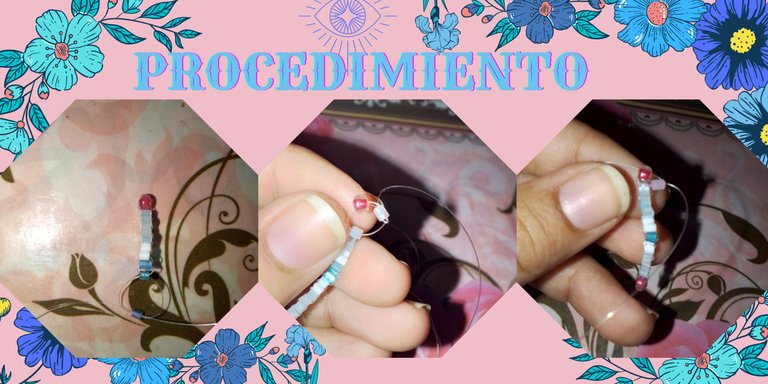
Empezamos diviendo el hilo a la mitad, un lado del hilo irá haia un lado y el otrro lado del hilo hacia el otro lado, entonces agregamos un mostacilló de un color muy difrente a los canutillos para que destaque,luego agregamos un canutillo y cruzamos ambos hilos por el canutillo, la parte por la que empezaremos será por la mitad del diseño, el renglón mas largo y luego iremos disminuyendo el patrón de dos canutillos en dos cada vez que cambiamos de fila.
We must have our design drawn on paper or in a program because otherwise it will be very difficult to locate us and know where we are going, which was exactly what happened to me😅.
We start by dividing the thread in half, one side of the thread will go to one side and the other side of the thread to the other side, then we add a bead of a very different color to the beads to make it stand out, then we add a bead and cross both threads through the bead, the part where we will start will be in the middle of the design, the longest line and then we will decrease the pattern of two beads in two each time we change the row.
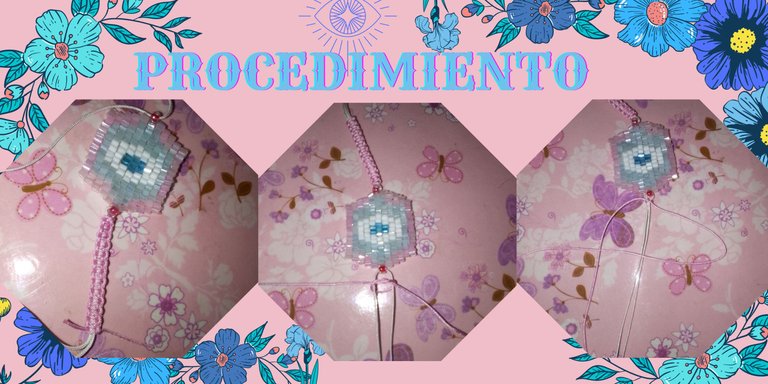
Paso 2 🔷 | Step 2 🔷
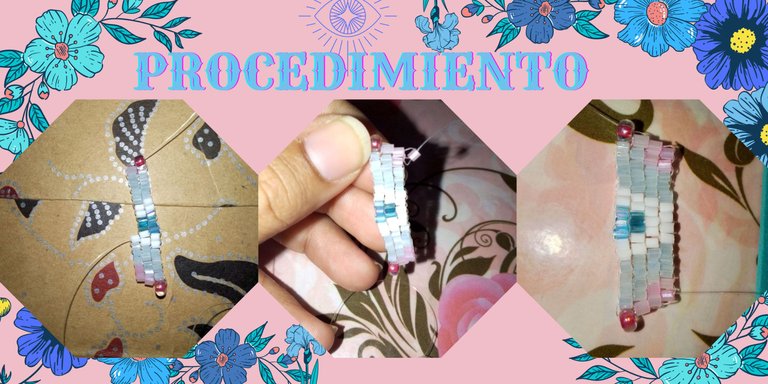
Ya a partir de las siguientes filas, se va a ir pasando el hilo, se saca de un canutillo y se pasa por el tejido que queda arriba (sin pasar el hilo por dentro del canutillo) y luego se pasa el hilo por dentro del canutillo que se va ingresando.
From the next rows onwards, the yarn is passed through, it is taken out of a comb and passed through the fabric above (without passing the yarn through the inside of the comb) and then the yarn is passed through the inside of the comb that is being introduced.
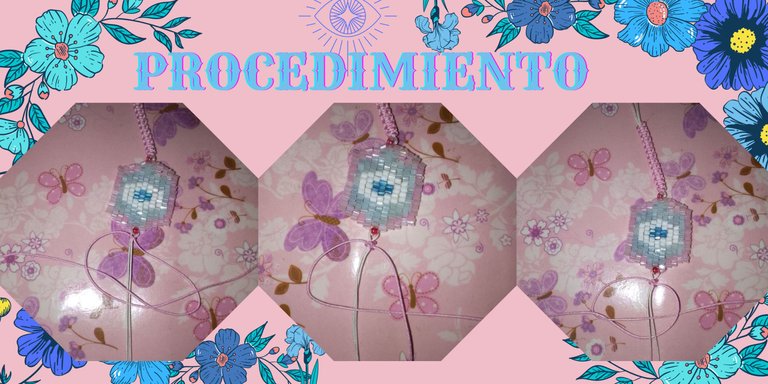
Paso 3 🔷 | Step 3 🔷
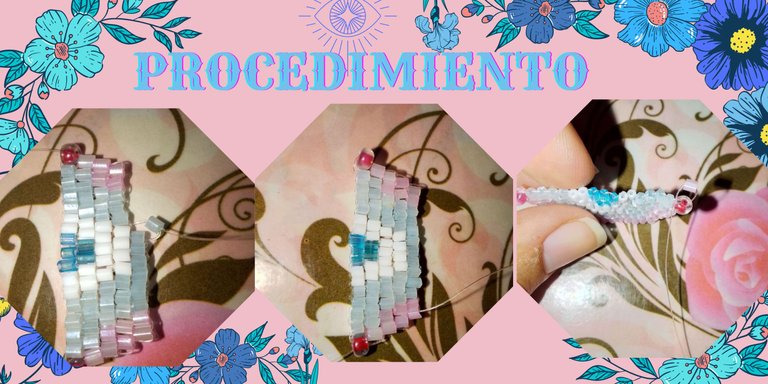
Este proceso de pasar el hilo, a través del tejido, lo hacemos a lo largo de todo el diseño siguiente, no hay que hacer nada especial como aumentos o disminuciones. Luego tomamos un trozo de hilo chino y hacemos el famoso nudo plano a ambos lados de la pulsera y luego el nudo plano corredizo para hacer el cierre de la pulsera.
This process of passing the thread, through the weave, we do it all along the following design, we don't have to do anything special like increases or decreases. Then we take a piece of Chinese thread and make the famous flat knot on both sides of the bracelet and then the flat slip knot to make the closure of the bracelet.
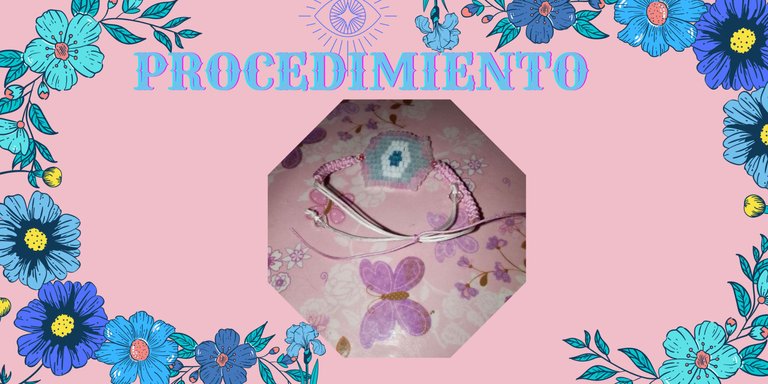
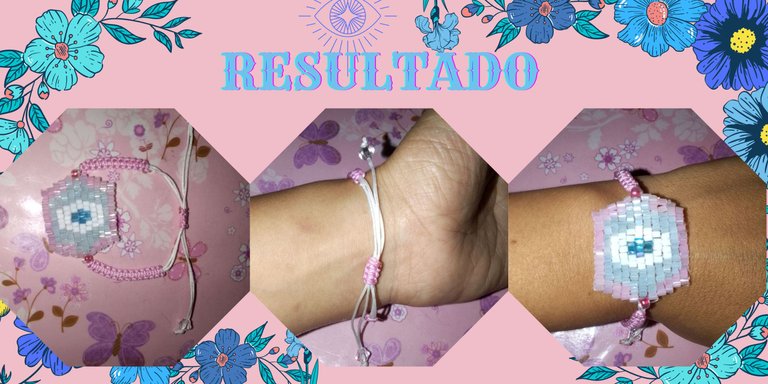
Resultado 🔷 | Result 🔷
Bueno amigos, asi es como se ve a mi me gustó mucho, espero que a mi clienta le guste.
Well friends, this is how it looks like I really liked it, I hope my client likes it.
Gracias por visitar mi blog
Thanks for visiting my blog
No te detengas, no dejes de creer en ti y de buscar ideas y opciones para salir adelante.
Don't stop, don't stop believing in yourself and looking for ideas and options to get ahead.
Créditos | Credits
Utilicé Canva para editar imágenes y personalicé un poco una plantilla de Canva.
I used Canva to edit images and customize a Canva template a bit.
Utilicé https://www.deepl.com/es/translator para la traducción
I used https://www.deepl.com/es/translator to traduction.
Las imagenes son propias.
The images are my own.
Está bellísima, me encanta el diseño y los colores de esta pulsera 👍
Gracias amiga por tu comentario!
https://inleo.io/threads/lismarcarolina2/re-leothreads-edmlqbcg
The rewards earned on this comment will go directly to the people ( lismarcarolina2 ) sharing the post on LeoThreads,LikeTu,dBuzz.
Está bonita, pero como dices si hay que tener paciencia 😅 hiciste muy bien trabajo ☺️
Gracias, si me dio bastantes dolores de cabeza pero a la clienta le gusto😁
The top watch style of design for the bracelet makes it more cool.
Hehehe, I had not seen it that way, thank you
Te quedó espectacular amiga me encantó el resultado felicitaciones.
Gracias amiga saludos!!
Hola @lismarcarolina2 de verdad que quedo muy hermosa... Te felicito💕
gracias❤️
Oyeee pero que hermosa te quedó. Felicidades!
Gracias amiga por tu comentario