
(Imagen elaborada en Picksart)
Hola, después de un tiempo inactivo, hoy le muestro como elabore este dije de calavera totalmente a mano con técnicas de orfebrería, como lo son el calado, que corte de una lamia de metal por medio de una segueta y de un toque de soldadura.
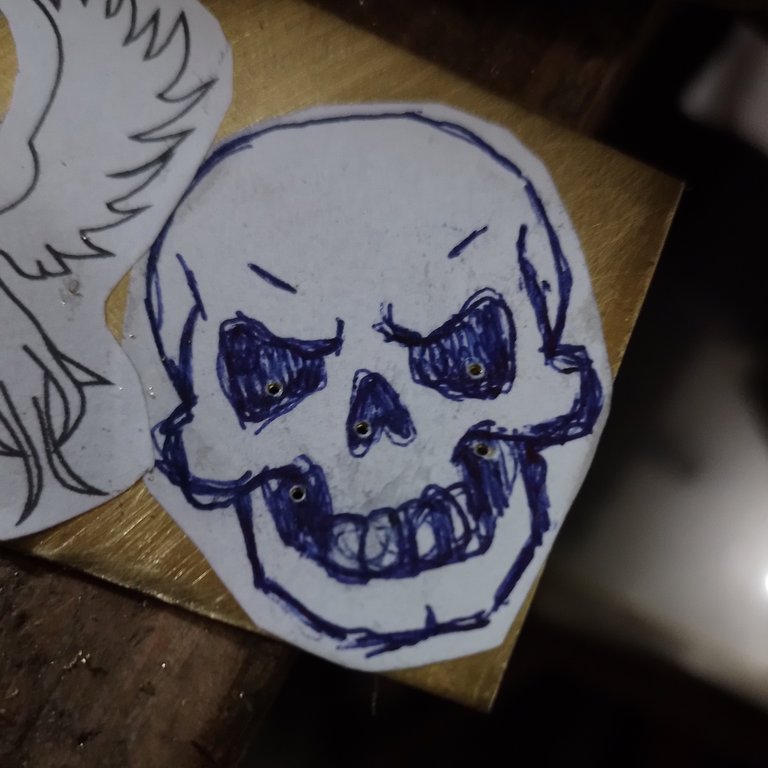
Lo primero que hice antes de elaborar esta pieza en metal fue buscar algún diseño de referencia en internet, específicamente en Google; pero como quería hacerlo rápido, lo que hice fue aumentar la imagen de cómo se veía la página de búsqueda en el navegador para darle el tamaño que necesitaba; luego calque en papel y lápiz la figura directamente de la pantalla del computador, después corregí con bolígrafo que era lo que tenía más a mano, este método le da una gran diferencia al diseño original y además hará de esta una pieza única.
Los materiales, herramientas e insumos usados son los siguientes:
❤️ Lámina de latón de 0,5 mm e hilo de cobre de 1 mm
❤️ Arco de segueta y sierra o pelo de segueta 2/0.
❤️ Pinzas de joyería.
❤️ Dremel
❤️fresas de 0.75 mm para abrir los huecos.
❤️ Lija 3M 280, 360 y 400
❤️ Motor de banco, cera de pulir, mopa de pulir.
❤️ Soplete, soldadura Harris 5% plata
Proceso:

Pegue el dibujo de la calavera en una lámina de latón de 0.5 mm, ahora estoy usando pega blanca, en este caso dejo que seque un poco y coloco la hoja con el dibujo.
Con el Diesel y una fresa de 0.75 mm abro huecos para los cortes internos.

Con el arco de segueta y la sierra 2/0 Aprovechando los huecos y corto las áreas internas.
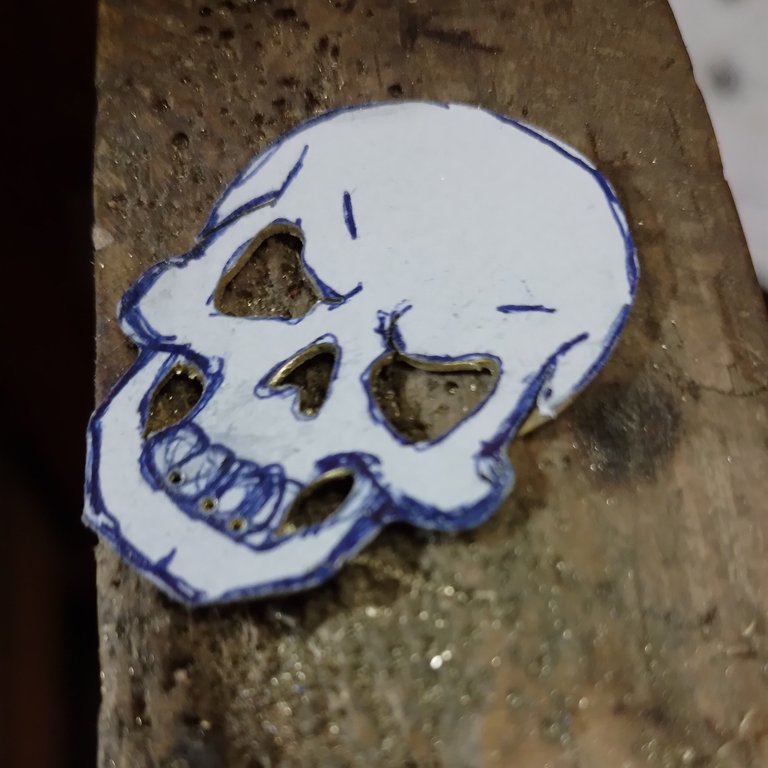
Del mismo modo con la segueta y la sierra 2/0 corto la silueta exterior, analizo y abro varios huecos en el sector de la dentadura del dibujo de la calavera.

Corto un poco en el área de los dientes, pero por el hecho de que las líneas no eran lo suficientemente claras para servirme de guía decido quitar el papel de la figura.

Con la ayuda de un marcador muy fino marco la parte de los dientes y la corto con más precisión.
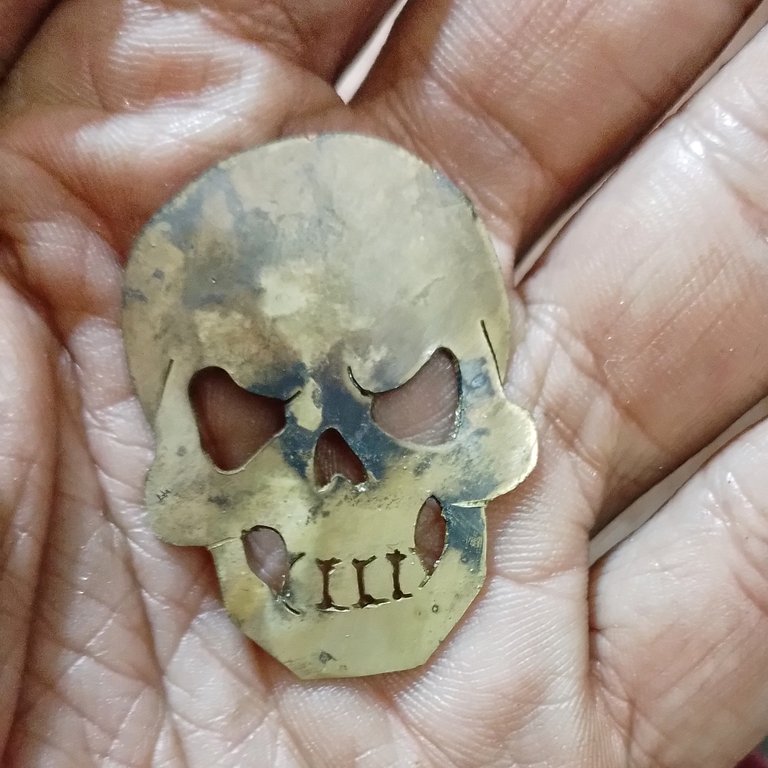
Como logran apreciar aún no es perfecto el corte ni el acabado, paso la figura por fuego para ablandar el metal y quitarle los restos de pega y papel; con mis dedos moldeo un poco la figura, para darle un pequeño toque de volumen.
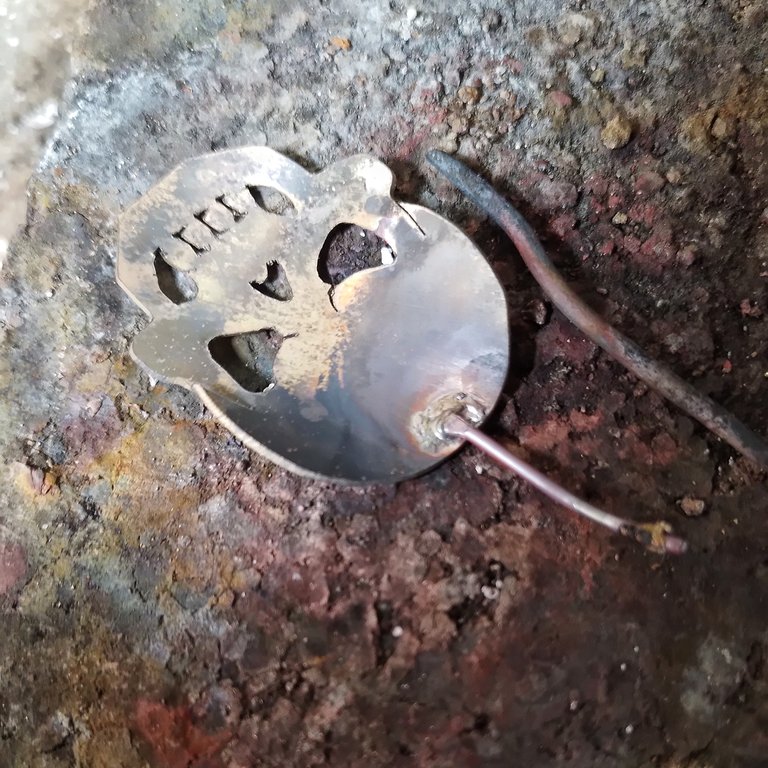
Soldé un hilo de cobre de 1 mm a la pieza por detrás usando el soplete y soldadura Harris 5% plata, luego con una pinza redonda se le da forma a este alambre para que por allí pase el cordón y por último pase a corta el excedente con una pinza de corte.
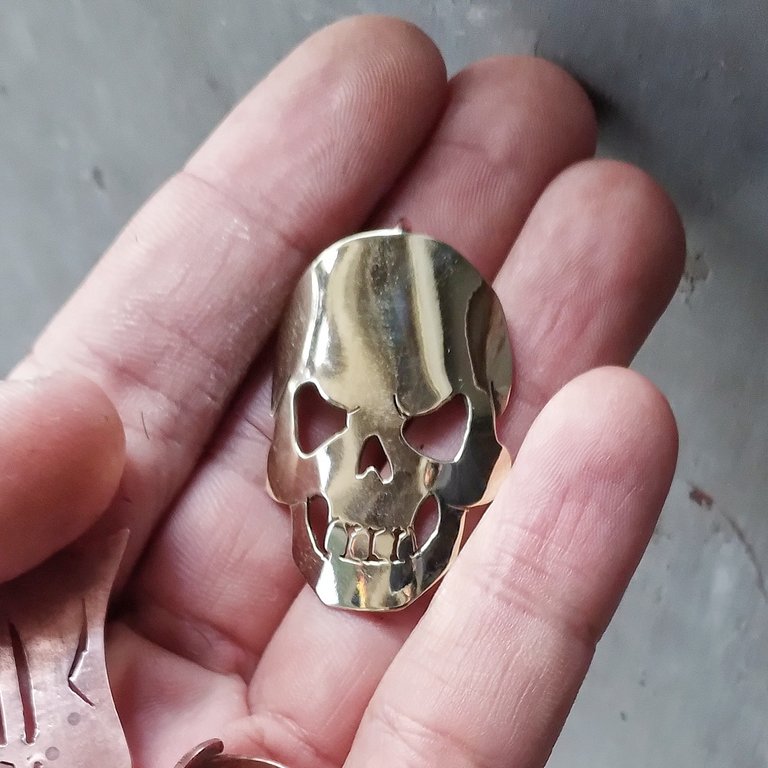
En esta etapa final se le pasa lija a la pieza, empezando por el grano más grueso que es el número 280, después 360 y por último 400, posteriormente se pule en el motor de banco con los discos de tela y la cera para pulir. El resultado antes de mandar a darle un baño de plata; en la foto se logra apreciar antes de enviar a darle el recubrimiento plateado.
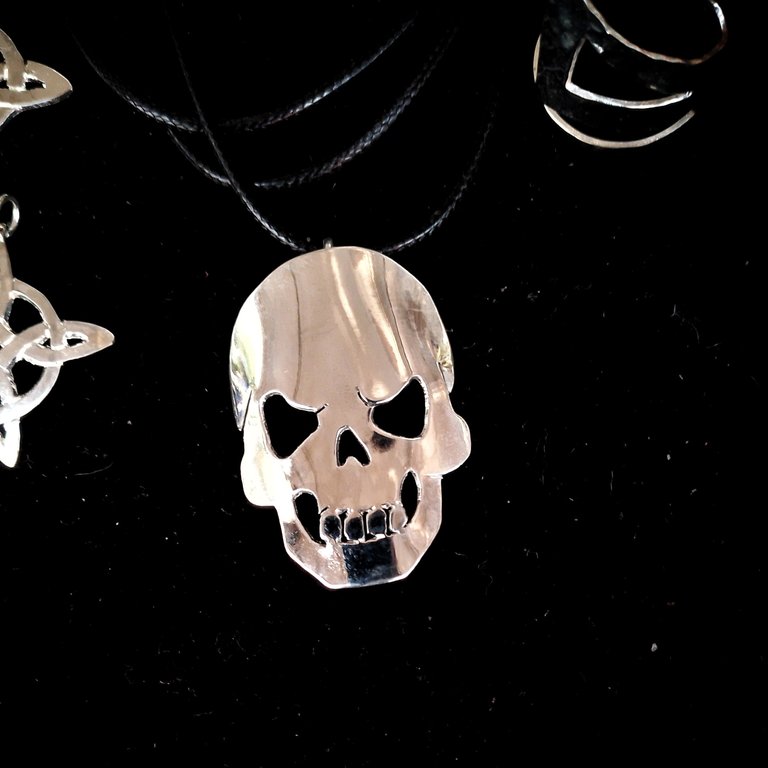
Este es el resultado final, después de recibirlo plateado, le inserté un cordón y está listo.
Espero les haya gustado el proceso y el resultado.
Si gustan este pueden seguirme por:
https://www.instagram.com/m16ueljoyas
+++++++++++++++
ENGLISH /Google Translate
(Image made in Picksart)
Hello, after some inactive time, today I show you how I made this skull pendant completely by hand with goldsmithing techniques, such as openwork, cutting a sheet of metal using a saw and a touch of soldering.
The first thing I did before making this metal piece was to look for a reference design on the internet, specifically on Google; but since I wanted to do it quickly, what I did was enlarge the image of what the search page looked like in the browser to give it the size I needed; Then I traced the figure directly from the computer screen on paper and pencil, then I corrected with a pen what was most at hand. This method gives a great difference to the original design and will also make this a unique piece.
The materials, tools and supplies used are the following:
❤️ 0.5mm brass sheet and 1mm copper wire
❤️ Saw bow and saw or saw hair 2/0.
❤️ Jewelry tweezers.
❤️ Dremel
❤️0.75 mm burs to open the gaps.
❤️ 3M sandpaper 280, 360 and 400
❤️ Bench motor, polishing wax, polishing mop.
❤️ Torch, Harris 5% silver solder
Process:
I glued the drawing of the skull on a 0.5 mm sheet of brass, now I am using white glue, in this case I let it dry a little and place the sheet with the drawing.
With the Diesel and a 0.75 mm milling cutter I open holes for the internal cuts.
With the hacksaw bow and the 2/0 saw I take advantage of the gaps and cut the internal areas.
In the same way, with the saw and the 2/0 saw I cut the exterior silhouette, analyze and open several holes in the teeth sector of the skull drawing.
I cut a little in the area of the teeth, but because the lines were not clear enough to serve as a guide I decide to remove the paper from the figure.
With the help of a very fine marker I mark the part of the teeth and cut it more precisely.
As you can see, the cut and finish are not yet perfect, I put the figure through fire to soften the metal and remove the remains of glue and paper; With my fingers I shape the figure a little, to give it a small touch of volume.
I soldered a 1 mm copper wire to the piece from behind using the torch and Harris 5% silver solder, then with a round tweezer this wire is shaped so that the cord passes through it and finally cuts off the excess. with a cutting pliers.
In this final stage, the piece is sanded, starting with the coarsest grain, which is number 280, then 360 and finally 400, then it is polished on the bench motor with cloth discs and polishing wax. The result before having it given a silver bath; In the photo you can see it before sending it to be given the silver coating.
This is the final result, after receiving it silver, I inserted a bead and it is ready.
I hope you liked the process and the result.
If you like this you can follow me on:
https://www.instagram.com/m16ueljoyas
Gracias 🫂
You can query your personal balance by
!DIYSTATSMuy buen trabajo, quedo brutal 👏
Gracias amigo
Felicitaciones! Un trabajo fino y sólido. Ya revisé tu perfil en Instagram y le di seguir. Me gusta muchísimo la orfebrería. Vi que tienes diseños hermosos y originales. Muchos éxitos en tu emprendimiento.
Gracias y aún estamos en proceso de evolución, este año abran cambios positivos
Hermoso trabajo amigo, siempre regalándonos cosas tan hermosas. Bello día, bendiciones, y éxitos para ti...
!DIY
Gracias lindura
Wow, que genial 😲✨
Gracias ☺️
Gran trabajo amigo está pieza quedo increíble 👏 👌
!discovery 30
a community encouraging first-hand content, and each individual living their best life.
This post was shared and voted inside the discord by the curators team of discovery-it
Join our Community and follow our Curation Trail
Discovery-it is also a Witness, vote for us here
Delegate to us for passive income. Check our 80% fee-back Program