Greetings my beautiful people.

Bienvenidos a mi blog, es un placer para mi compartir una nueva idea con todos ustedes, pues en esta ocasión quiero mostrarles como hacer hermosos aretes, para hacerlos usaré alambre de cobre delgado y chaquiras; puedes usar las cuentas del color que más te convenga. Usaré estos celestes ya que son los que tenía a la mano, ya que los estuve recopilando de trabajos anteriores, y aproveché para reutilizarlos en la elaboración de este hermoso accesorio; porque un dicho muy particular dice que la practica hace al maestro y doy gracias a Dios por darme la paciencia necesaria y es que en cada trabajo doy lo mejor de mi, porque cada dia trato de mejorar las diversas tecnicas de trabajo y poco a poco voy aprendiendo y aunque aún no soy el más experto en este arte, ya empiezo a ver los resultados, así que confieso que también me alegra saber que cuento con su apoyo.
Welcome to my blog, it is a pleasure for me to share a new idea with all of you, because this time I want to show you how to make beautiful earrings, to make them I will use thin copper wire and beads; you can use the beads of the color that suits you best. I will use these light blue ones since they are the ones I had on hand, since I was collecting them from previous works, and I took the opportunity to reuse them in the elaboration of this beautiful accessory; because a very particular saying says that practice makes perfect and I thank God for giving me the necessary patience and that is that in each job I give my best, because every day I try to improve the various work techniques and little by little I am learning and although I am not yet the most expert in this art, I am already beginning to see the results, so I confess that I am also glad to know that I have your support.

Sin más preámbulos, los invito a disfrutar del siguiente material, espero que sea de su agrado.
Without further ado, I invite you to enjoy the following material, I hope you like it.
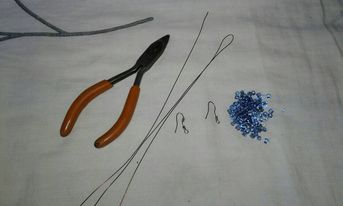
Para hacer este accesorio necesitarás:
- Alambre de cobre.
- Cuentas.
- Pinza.
- Gancho de joyería.
To make this accessory you will need:
- Copper wire.
- Beads.
- Gripper.
- Jewelry hook.
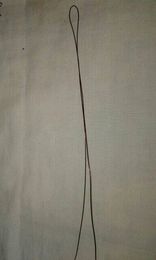
Como observaste en los materiales, necesitarás dos pedazos de alambre de cobre, uno largo doblado por la mitad y otro un poco más corto, este último lo vas a torcer encima del alambre ya doblado, haciendo una especie de espiral, dejando un pequeño agujero en el medio. centro, como se muestra en las imágenes, de esta manera tendrás tres extremos, uno en el centro y otro en cada lado.
Let's start:
As you observed in the materials, you will need two pieces of copper wire, a long one folded in half and another a little shorter, the latter is going to be twisted on top of the already folded wire, making a kind of spiral, leaving a small hole in the middle. center, as shown in the images, in this way you will have three ends, one in the center and one on each side.
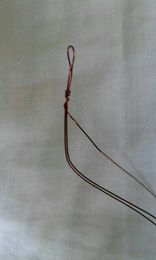
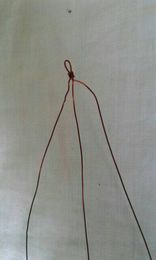
Comience a insertar las cuentas en el alambre del medio y tome el extremo derecho y páselo por el alambre donde insertó las cuentas, luego tome el extremo izquierdo y páselo por el alambre del medio y del extremo derecho haciendo una especie de trenza o trenza, ( mira las fotos). Después de esto te quedarás así.
Second step:
Begin to insert the beads into the middle wire and take the right end and pass it over the wire where you inserted the beads, then take the left end and pass it over the middle and right end wire making a kind of braid or braid, (look the photos). After this you will stay like this.
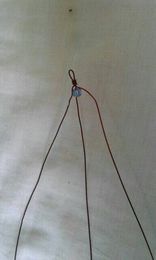
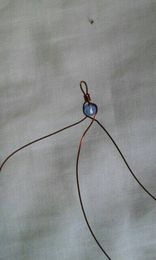
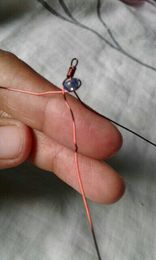
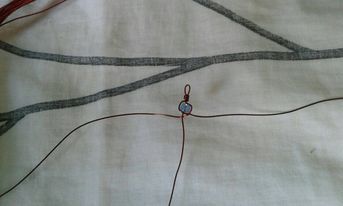
Repite el procedimiento con las demas hasta llegar a la medida que desees.
Third step:
Repeat the procedure with the others until you reach the size you want.
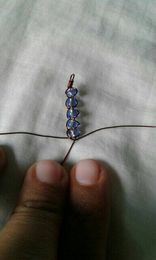
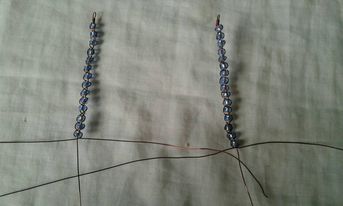
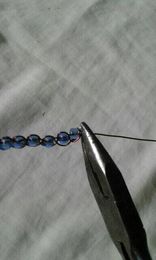
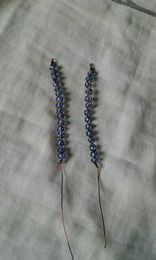
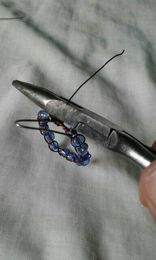
Cuando hayas terminado con el trenzado, procede a cortar el extremo derecho y el extremo izquierdo, dejando solo el alambre en el medio, luego con ayuda de las pinzas procede a torcer los extremos previamente cortados, deben quedar así.
Fourth step:
When you have finished the braiding, proceed to cut the right end and the left end, leaving only the wire in the middle, then with the help of the pliers proceed to twist the previously cut ends, they should look like this.
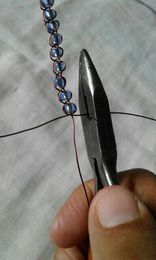
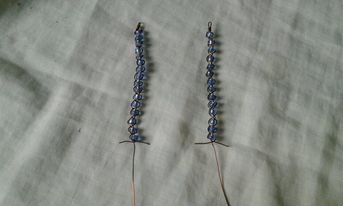
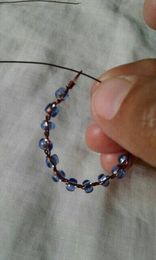
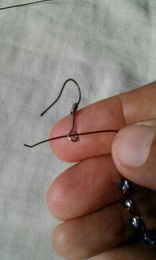
Introduce el alambre en el hueco que dejaste al principio, luego introduce el gancho de bisutería y procede a atarlo apretándolo muy bien con la ayuda de los alicates para que no se suelte y finalmente corta el alambre sobrante.
Fifth step:
Introduce the wire in the hole that you left at the beginning, then introduce the jewelry hook and proceed to tie it, tightening it very well with the help of the pliers so that it does not come loose and finally cut the excess wire.
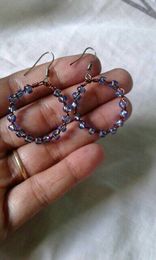
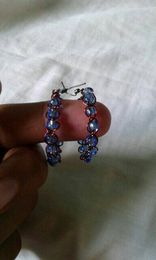
Resultado final.
Final result.

Gracias por leer hasta el final, feliz tarde.
Thanks for reading until the end, have a happy afternoon.
Nota: Estas fotos fueron tomadas por mi celular Samsung ace J1.
Note: These photos were taken by my Samsung ace J1 cell phone.
These rings turned out great, we love how you were able to make them with the copper wire, great job 🎊.
Thank you very much for your support, I'm glad you liked it.
Has sido votado por
PROYECTO ENLACE
'Conectando Ideas y Comunidades'
PROYECTO ENLACE es un proyecto de curación de habla hispana enfocado en recompensar contenido de calidad y apoyar autores en su proceso de crecimiento en HIVE.
Creemos y apostamos por el futuro de esta gran plataforma, y estamos muy emocionados de poder hacerla crecer junto a esta comunidad. Así que te invitamos a publicar en nuestra COMUNIDAD y estar atento a todas las actividades que tenemos preparadas y que estaremos publicando en breve.
¿QUIERES AUTOMATIZAR TUS GANANCIAS DE CURACIÓN? SE PARTE DEL PROYECTO ENLACE APOYANDO A NUESTRO TRAIL EN HIVE.VOTE INGRESA AQUÍ PARA CONOCER LOS DETALLES.
¿QUIERES INVERTIR ENLACE? DESCUBRE COMO HACERLO Y GENERAR INGRESOS DE FORMA SEMANAL MEDIANTE TU DELEGACIÓN DE HP AQUÍ TE EXPLICAMOS COMO.
Te invitamos a participar en nuestro servidor de Discord: https://discord.gg/3S9y7BbWfS
Atentamente
EQUIPO ENLACE 2023
Congratulations @sergimarmartinez! You have completed the following achievement on the Hive blockchain And have been rewarded with New badge(s)
Your next target is to reach 250 posts.
You can view your badges on your board and compare yourself to others in the Ranking
If you no longer want to receive notifications, reply to this comment with the word
STOPTo support your work, I also upvoted your post!
Check out our last posts:
Support the HiveBuzz project. Vote for our proposal!
Me encanta el diseño, están muy lindo los zarcillos.
Muchas gracias amiga.