Saludos amigos creativos, ya llego el viernes y les deseo un feliz fin de semana, que la pasen increible rodeados de familiares, amigos y conocidos, espero que les vaya muy bien.
Greetings creative friends, Friday has arrived and I wish you a happy weekend, have an incredible time surrounded by family, friends and acquaintances, I hope you do well.

Estoy aquí nuevamente para mostrarles un nuevo trabajo, porque sigo usando alambre de cobre ya que este material es muy flexible y fácil de manipular, esta vez decidí hacer unos zarcillos y les confieso que es la primera vez que lo hago. hice este tipo de bisutería, pero como era la primera vez me encantó el resultado y quería compartir con ustedes mi paso a paso, para su elaboración voy a utilizar la técnica de macramé con el nudo llamado "josefina" la verdad que este tipo de tejido queda muy bonito ya sea en pulseras, collares u otras piezas de bisutería. Bueno, se ven geniales y se pueden combinar con diferentes auofits.
Y es que cada día me enamoran más los diferentes modelos y técnicas para realizar cualquier accesorio, pues se trata de piezas que no pueden faltar a la hora de vestirse para cualquier ocasión ya que hay variedades para todos los gustos y colores.
I'm here again to show you a new job, because I continue to use copper wire since this material is very flexible and easy to manipulate, this time I decided to make some tendrils and I confess that this is the first time I've made this type of jewelry , but because it was the first time I loved the result and I wanted to share with you my step by step, for its elaboration I am going to use the macrame technique with the knot called "josefina" the truth is that this type of fabric is very beautiful already whether in bracelets, necklaces or other pieces of jewelry. Well, they look great and can be combined with different auofits.
And it is that every day I fall more in love with the different models and techniques to make any accessory, because these are pieces that cannot be missing when dressing up for any occasion since there are varieties for any taste and color.

Para ello necesitarás los siguientes materiales:
- Alambre de cobre.
- Pinzas.
- perlas.
- Gancho de joyería.
For this you will need the following materials:
- Copper wire.
- Tweezers.
- beads.
- Jewelry hook.
.jpg)
Acompáñame en la elaboración de estos hermosos zarcillos.
Join me in the elaboration of these beautiful tendrils.
Paso 1:
Toma un trozo de alambre de cobre de aproximadamente un metro de largo, luego doblalo a mitad y vuelve a doblar hasta obtener 4 puntas.
Step 1:
Take a piece of copper wire about a meter long, then fold it in half and fold again until you get 4 points.
.jpg)
.jpg)
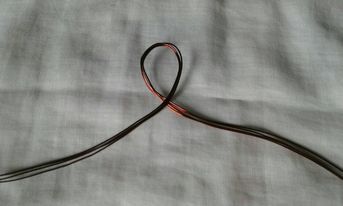
Paso 2:
Comienza a hacer una especie de circulo este debe quedar en el centro del alambre de cobre, (observa la aimagen).
Step 2:
Begin to make a kind of circle, this should be in the center of the copper wire, (see the image).
Paso 3:
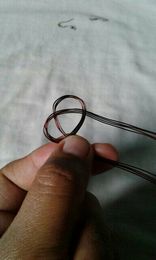
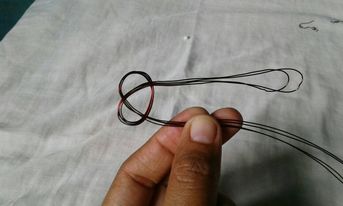
Toma el extremo derecho y procede a pasarlo por encima del circulo anteriormente hecho.
Step 3:
Take the right end and proceed to pass it over the previously made circle.
Paso 4:
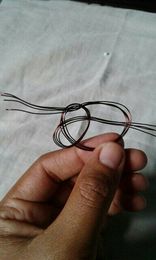
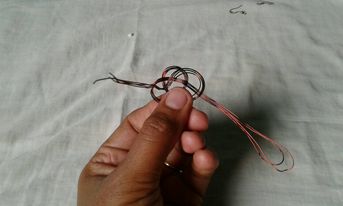
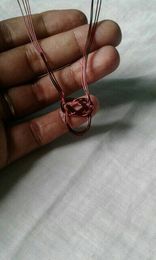
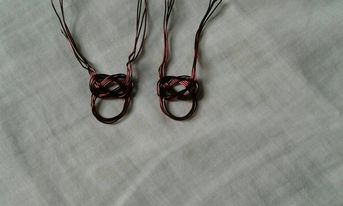
Luego de esto, toma el extremo izquierdo y pasalo por encima del extremo derecho, despues pasalo por el centro del circulo y vuelve a pasarlo por encima del extremo derecho. ahora procede a jalar ambos extremos para asi dar forma al nudo, repite el procedimiento para realizar la otra base del zarcillo.(mira las imagenes).
Step 4:
After this, take the left end and pass it over the right end, then pass it through the center of the circle and pass it over the right end again. now proceed to pull both ends to shape the knot, repeat the procedure to make the other base of the tendril. (look at the images).
Paso 5:
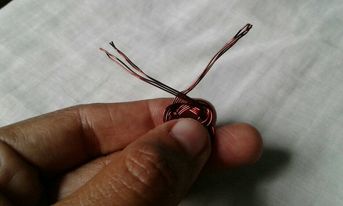
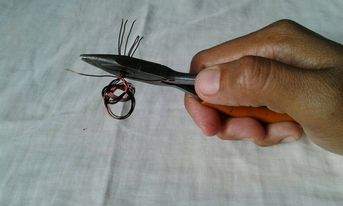
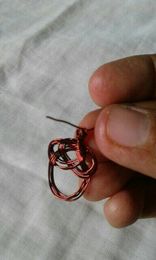
Corta un poco los hilos de cobre sobrantes para que sea un poco más fácil hacer el doblez, ahora vuelve a cortar los hilos dejando solo 2 extremos.
Estos nos servirán para añadir los últimos detalles a nuestra pieza de joyería.
Step 5:
Cut the excess copper wires a little to make it a little easier to make the bend, now cut the wires again leaving only 2 ends.
These will serve to add the last details to our piece of jewelry.
Paso 6:
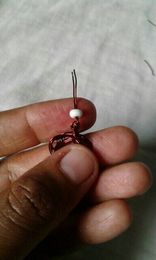
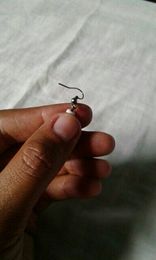
Procede a introducir la mostacilla o pidra decorativa de tu eleccion, yo elegi una mostacilla blanca y finalmente colocale el gancho que sujetara el zarcillo.
Step 6:
Proceed to introduce the bead or decorative stone of your choice, I chose a white bead and finally place the hook that will hold the tendril.
RESULTADO.
RESULT.
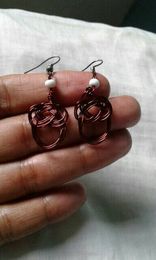


Gracias por visitar mi blog.
Thank you for visiting my blog.
Las fotos fueron tomadas por mi telefono Samsung ace J1.
The photos were taken by my Samsung ace J1 phone.
Thank you for sharing this post on HIVE!
Your content got selected by our fellow curator stevenson7 & you just received a little thank you upvote from us for your great work! Your post will be featured in one of our recurring compilations which are aiming to offer you a stage to widen your audience within the DIY scene of Hive. Stay creative & HIVE ON!
Please vote for our hive witness <3
Realmente se ve hermosos esos zarcillos, el alambre de cobre es muy moldeable y salio muy bien el nudo de Josefina, un buen paso a paso, gran trabajo 🤩
Despite being your first attempt at making the tendril earring, it still turned good.