| Esp | Eng |
|---|---|
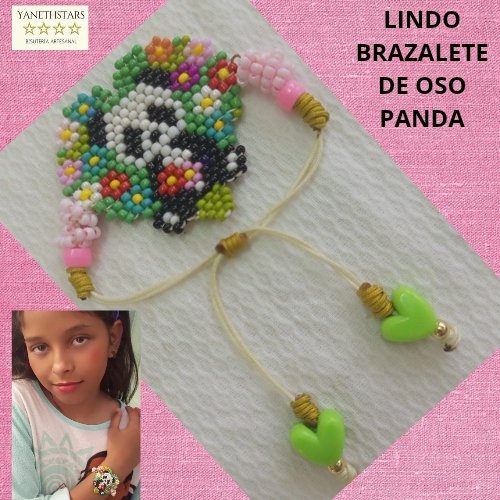
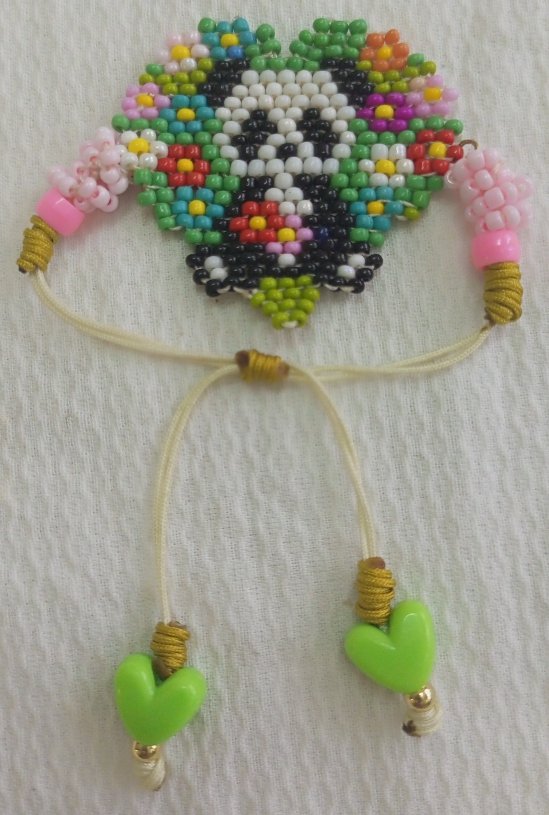
| Hola amigos creativos, el día de hoy traigo para ustedes esté LINDO BRAZALETE DE OSITO PANDA. El protagonista principal de este brazalete es el lindo conector de corazón de Osito Panda en un jardin. Este conector fue hecho con la Técnica Peyote o ladrillo y esté conector es una replica de un dije de la creadora de contenido Rachel Genosar por lo que no me pertenecen los derechos de autor. A continuación lista de materiales y procedimientos. | Hello creative friends, today I bring for you this CUTE PANDA BEAR BRACELET. The main protagonist of this bracelet is the cute Panda Bear heart connector in a garden. This connector was made with the Peyote Technique or brick and this connector is a replica of a charm from the content creator Rachel Genosar so I do not own the copyright. Below is a list of materials and procedures. |

https://in.pinterest.com/racheldbusar/

| Materiales: | Materials: |
|---|---|
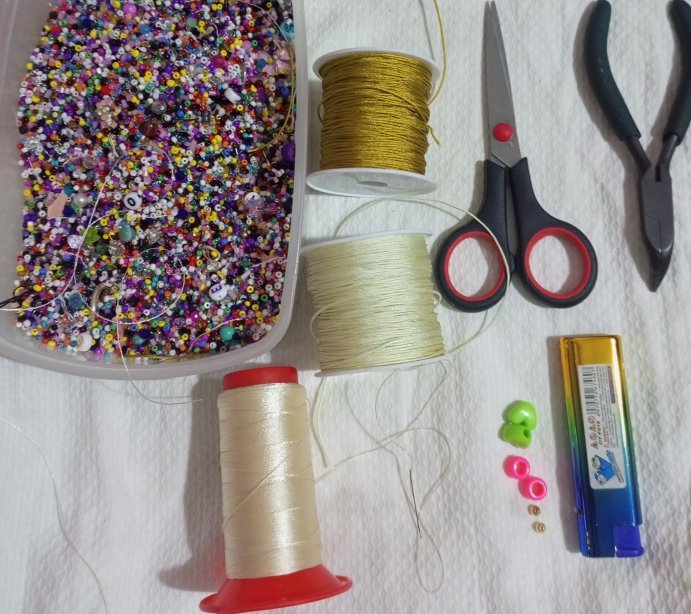
| Mostacillas: blancas, negras, verdes, verde manzana, verde turquesa, rosadas, fucsias, amarillas, naranjas, rojas, hilo mostacillero beige, hilo chino beige y dorado, tijeras, 2 aros pequeños, 2 cuentas redondas rosadas, 2 corazones verdes, aguja mostacillera, yesquero, 2 balines número 0,03 mm. | Beads: white, black, green, apple green, turquoise green, pink, fuchsia, yellow, orange, red, beige beading thread, beige and gold Chinese thread, scissors, 2 small rings, 2 pink round beads, 2 green hearts, beading needle, tinder, 2 pellets number 0.03 mm. |
| Instrucciones: | Instructions: |
|---|
| Paso 1 | Step 1 |
|---|---|
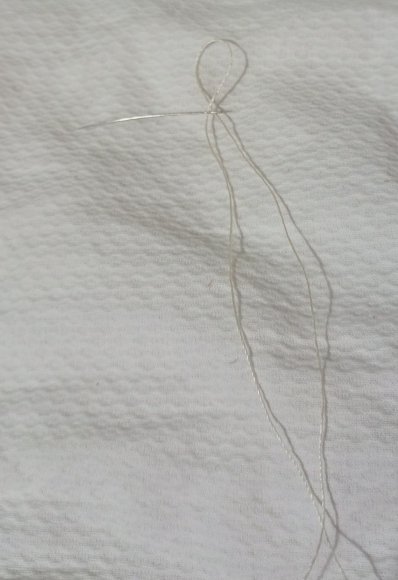
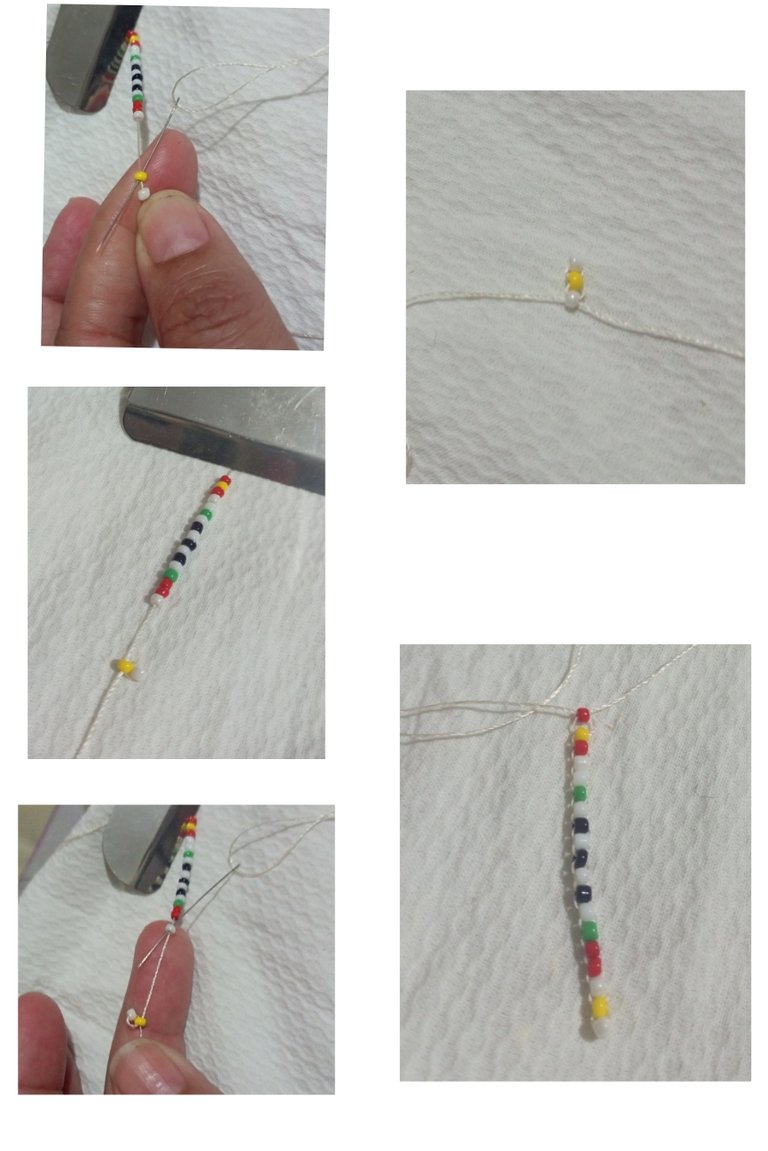
| Corté un metro y medio de hilo mostacillero y enhebre en la aguja mostacillera. | I cut a meter and a half of mustard thread and threaded it on the mustard needle. |
| Paso 2 | Step 2 |
|---|---|
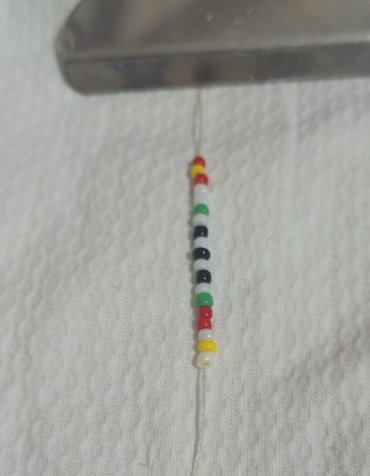
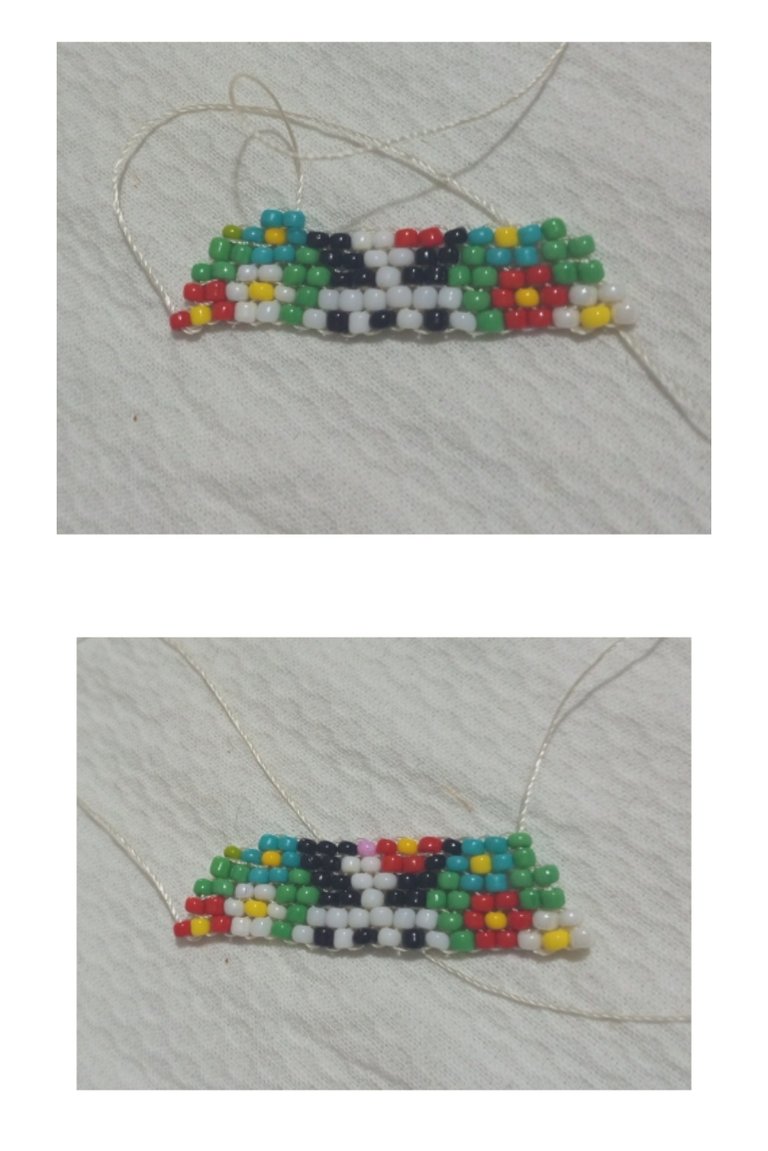
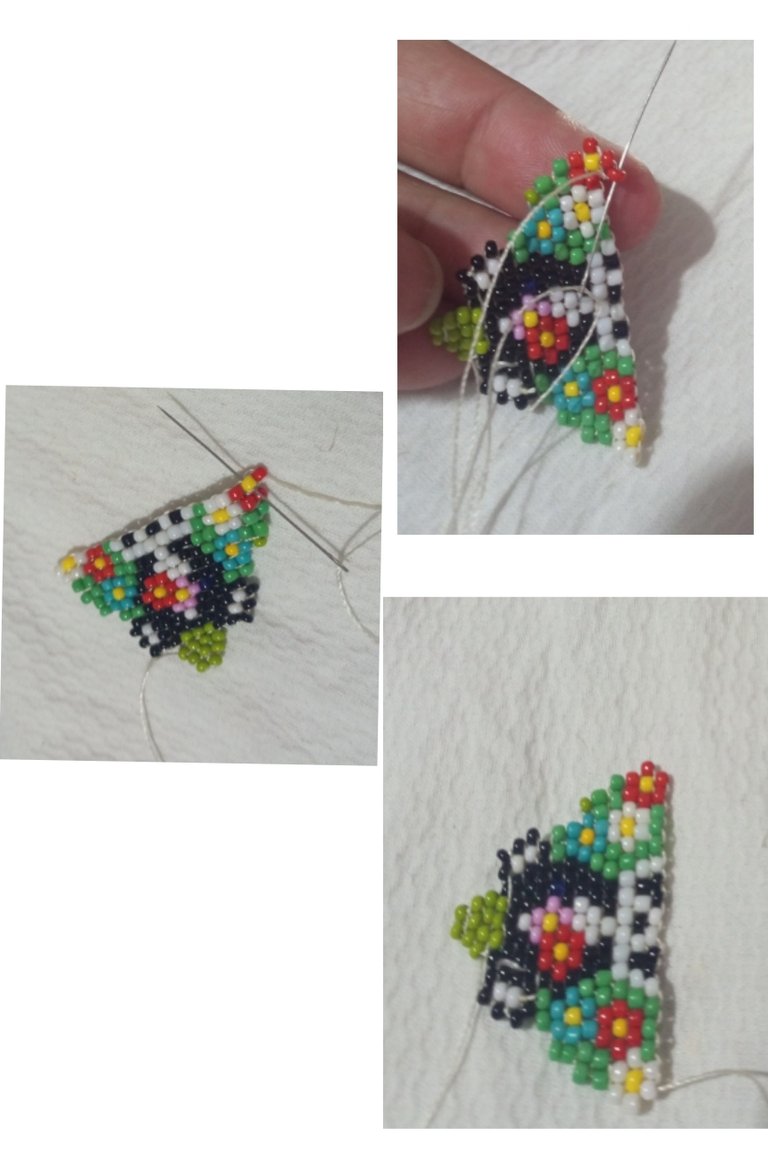
| Enhebre en la aguja mostacillera diecinueve mostacilla en el orden de colores que observamos en la imágen y con estás mostacillas construí la primera línea que es la base principal de la figura que construiré. | I threaded nineteen beads on the beading needle in the order of colors shown in the image and with these beads I built the first line which is the main base of the figure I will build. |
| Paso 3 | Step 3 |
|---|---|
| Para construir la primera columna enhebramos la aguja en la segunda mostacillas y luego vamos construyendo introduciendo la aguja en cada mostacilla. | To build the first column we thread the needle into the second bead and then we build by inserting the needle into each bead. |
| Paso 4 | Step 4 |
|---|---|
| Está tercera fila inicia con una reducción para eso llevamos las aguja hacía las mostacillas de abajo y luego subimos a las mostacillas de arriba posicionando en la segunda mostacilla de la segunda línea. Luego tomé dos mostacillas e introduje la aguja en el primer puente de unión de hilo y fuí añadiendo mostacillas hasta culminar la tercera línea en reducción. | This third row starts with a reduction for that we take the needle to the lower beads and then we go up to the upper beads positioning the needle in the second bead of the second row. Then I took two beads and introduced the needle in the first bridge of thread union and I was adding beads until the third row was completed in reduction. |
| Paso 5 | Step 5 |
|---|---|
| Para la cuarta fila coloqué el hilo en la segunda mostacilla verde porque está línea también es en reducción y tomé dos mostacillas verdes e introduje la aguja en el primer puente de unión y seguí colocando mostacillas hasta culminar está cuarta línea. Como estoy trabajando en la parte inferior del diseño que es un corazón está primera parte siempre estaremos haciendo reducciones en inicio y terminación. | For the fourth row I placed the thread in the second green bead because this line is also in reduction and I took two green beads and introduced the needle in the first bridge of union and continued placing beads until I finished this fourth row. As I am working on the lower part of the design which is a heart this first part we will always be making reductions at the beginning and end. |
| Paso 6 | Step 6 |
|---|---|
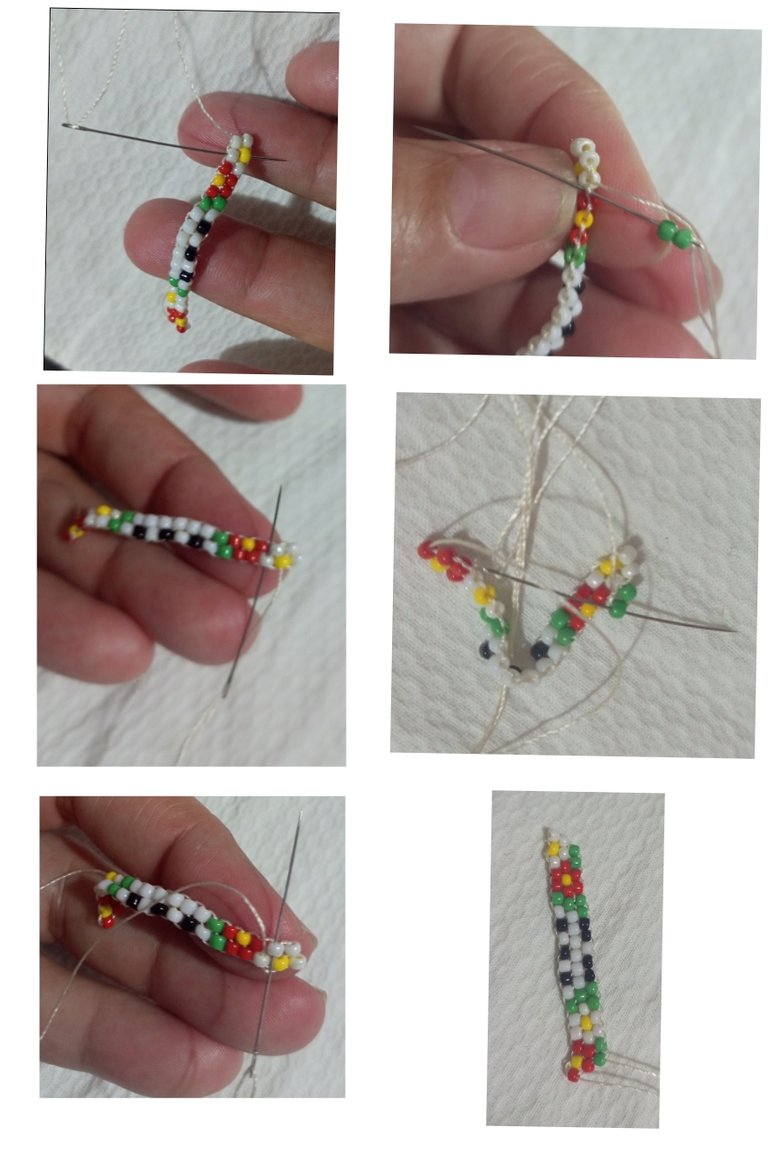
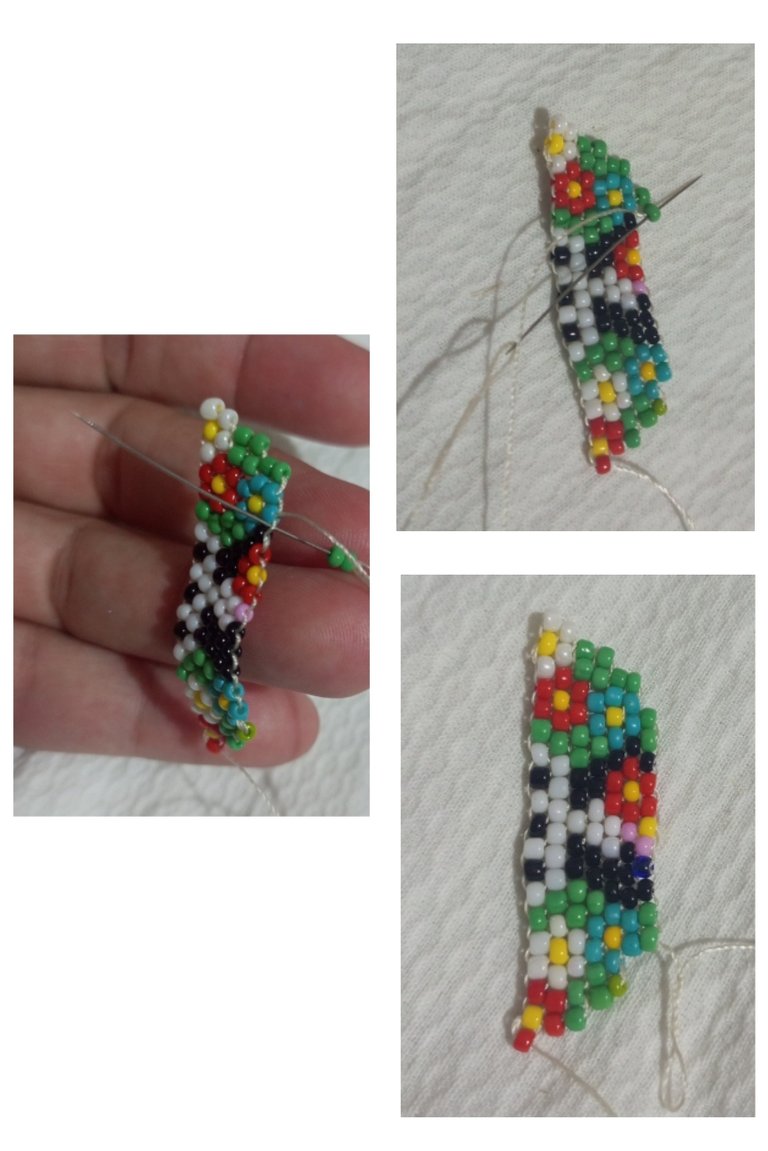
| Coloqué la aguja en la segunda mostacilla de la cuarta fila y tomé dos mostacillas y luego seguí colocando el resto de las mostacillas de está quinta fila. | I placed the needle in the second bead of the fourth row and took two beads and then continued placing the rest of the beads of this fifth row. |
| Paso 7 | Step 7 |
|---|---|
| Para la sexta fila inicié en la tercera mostacillas y construí la fila, está fila no tiene reducción al finalizar. | For the sixth row I started at the third beads and built the row, this row has no reduction at the end. |
| Paso 8 | Step 8 |
|---|---|
| Para la septima fila inicie en la tercera mostacilla y luego fue colocando el resto de las mostacillas hasta culminar toda la fila. | For the seventh row, I started on the third bead and then placed the rest of the beads until the entire row was completed. |
| Paso 9 | Step 9 |
|---|---|
| En las siguientes imágenes observamos la construcción del resto de las filas para concluir la parte inferior del diseño. | In the following images we observe the construction of the rest of the rows to conclude the lower part of the design. |
| Paso 10 | Step 10 |
|---|---|
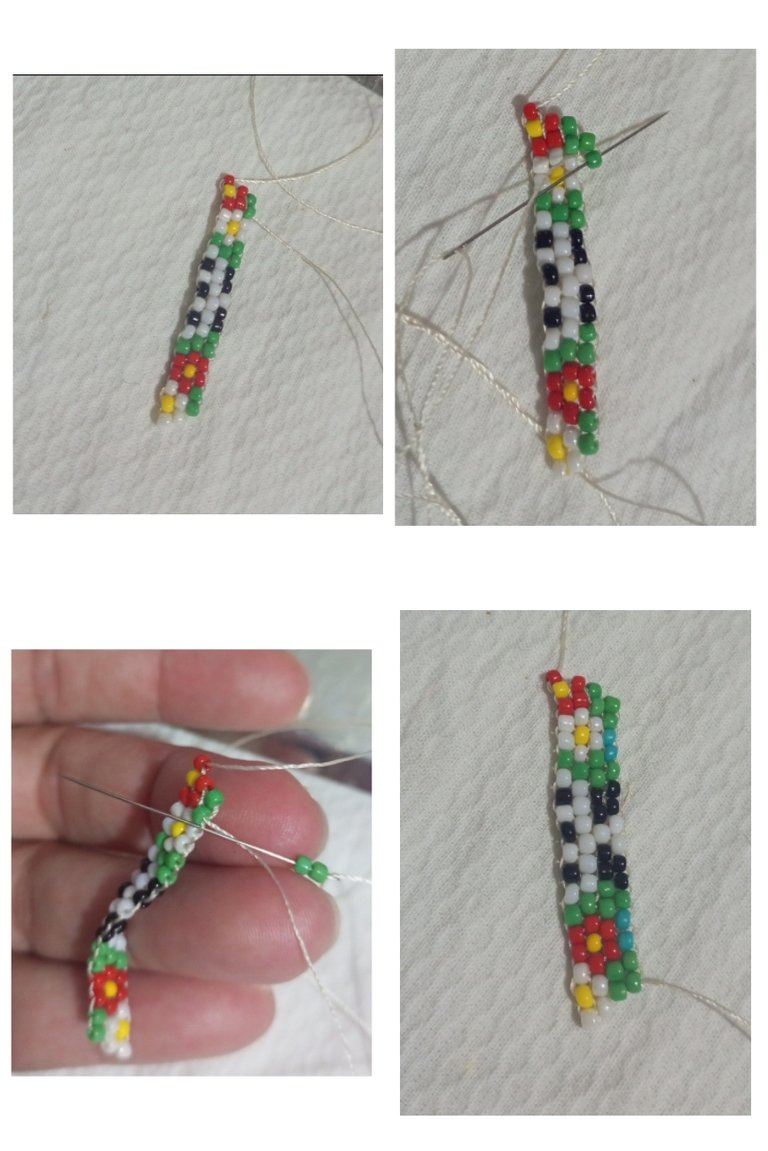
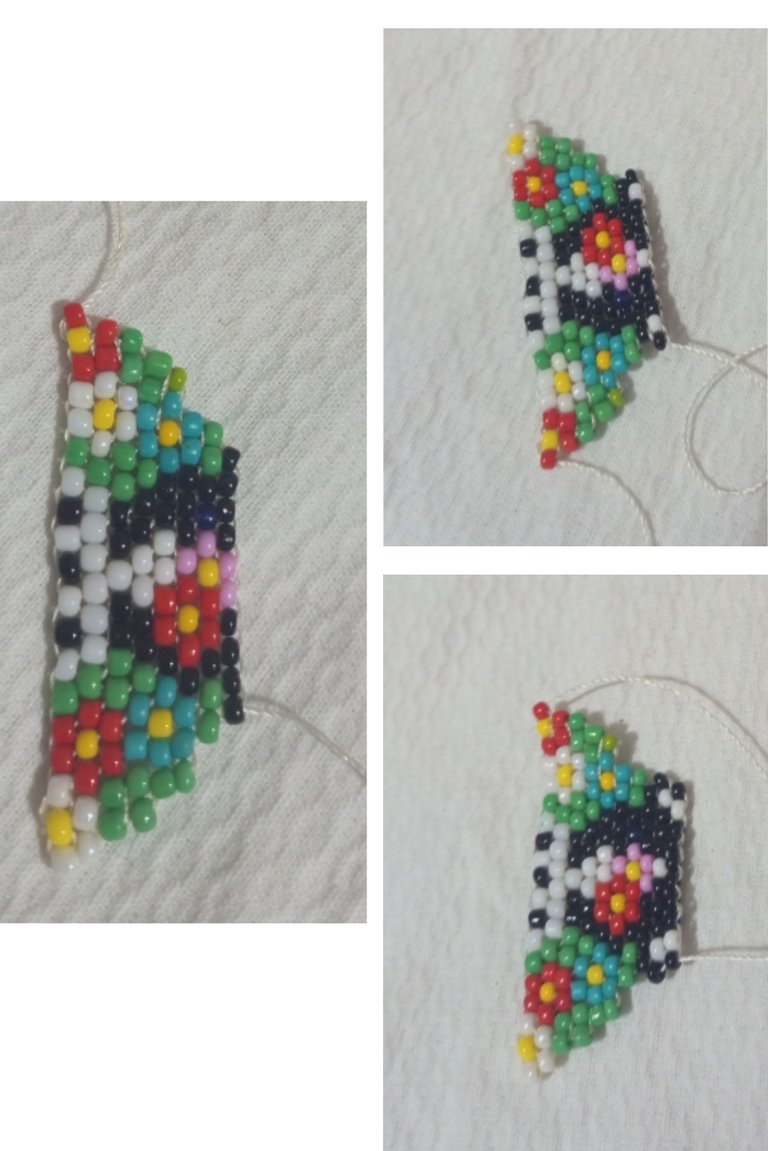
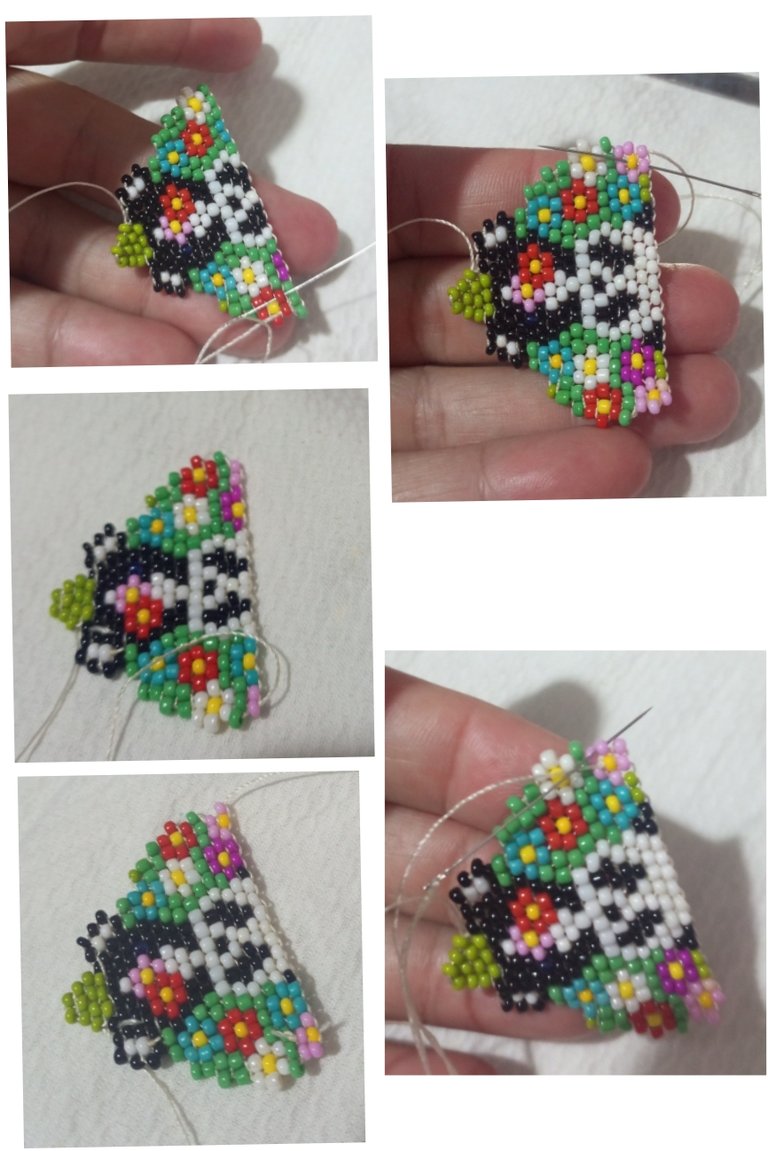
| Para la parte superior del diseño enhebro la aguja en el hilo y posiciono el hilo en la segunda mostacilla y anexe el resto de las mostacillas de la línea. | For the top of the design I thread the needle into the thread and position the thread in the second bead and attach the rest of the beads of the line. |
| Paso 11 | Step 11 |
|---|---|
| En las siguientes imágenes observamos el resto de las líneas que construyen los ojos y orejas del osito. | In the following images we can see the rest of the lines that build the eyes and ears of the bear. |
| Paso 12 | Step 12 |
|---|---|
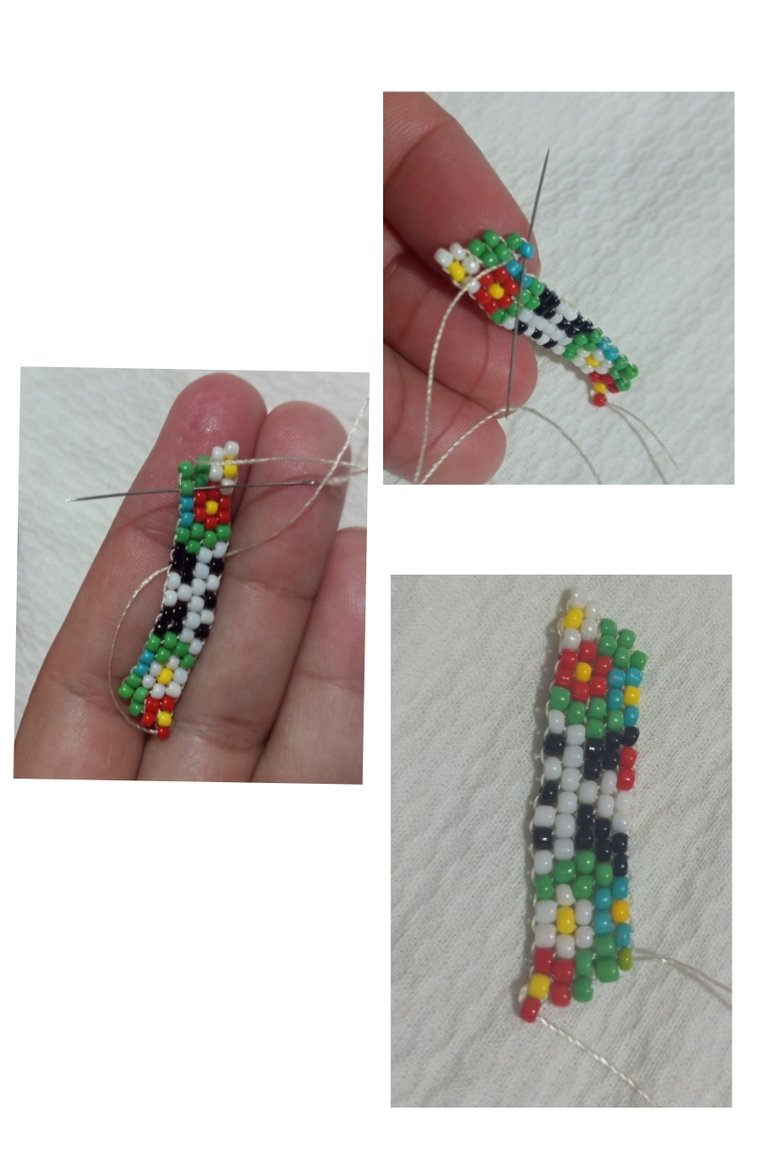
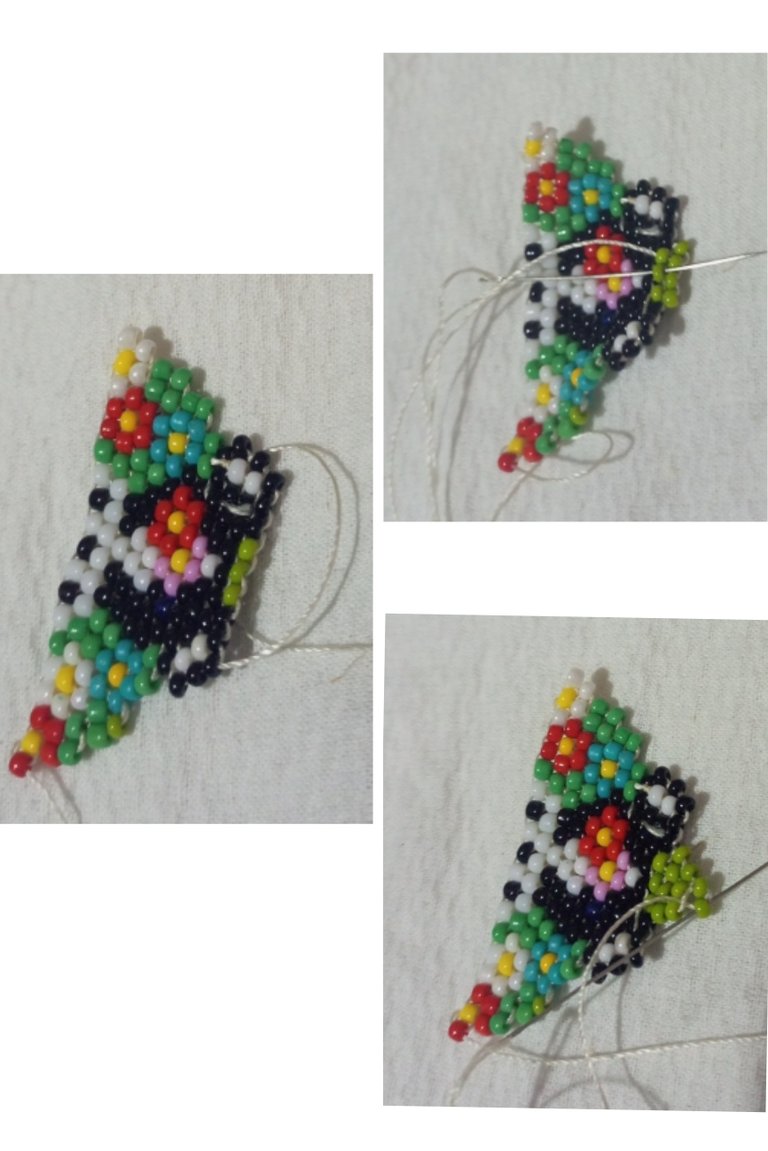
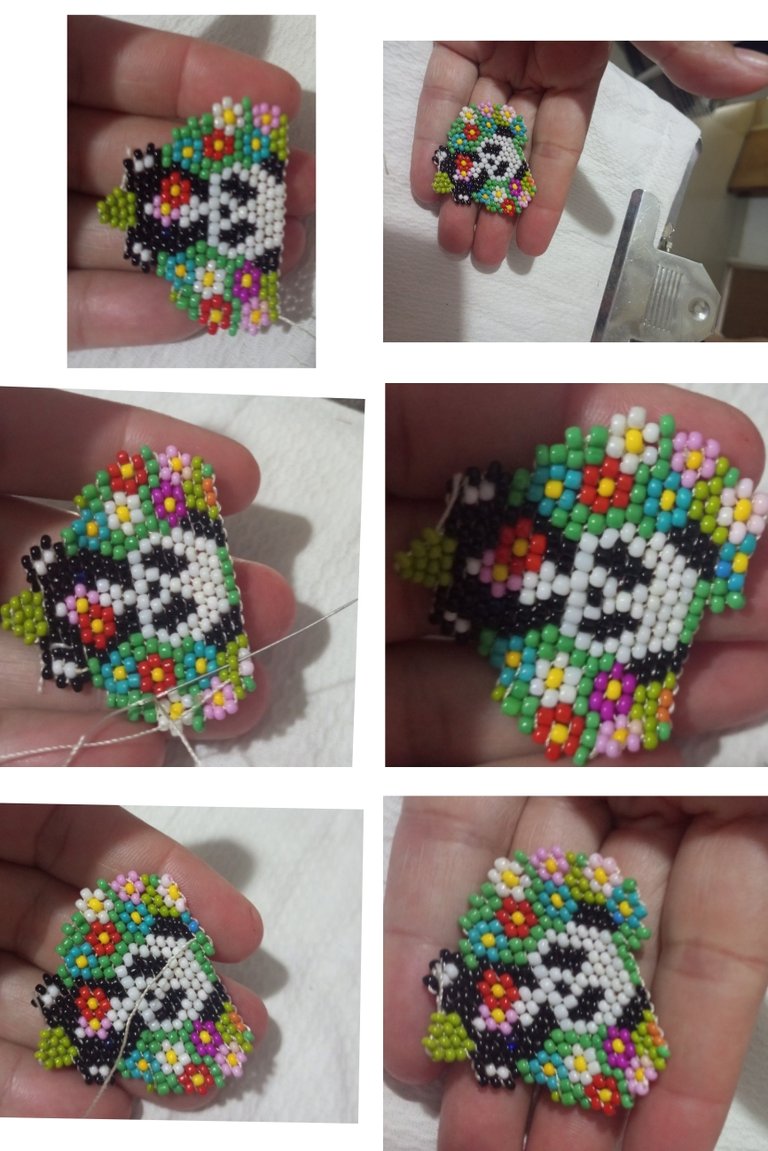
| En las imágenes observamos la culminación de un lado de la parte superior. Podemos ver que le damos forma de corazón con la construcción de las líneas. | In the images we observe the culmination of one side of the upper part. We can see that we give it a heart shape with the construction of the lines. |
| Paso 13 | Step 13 |
|---|---|
| Construí la otra parte del corazón. | I built the other part of the heart. |
| Paso 14 | Step 14 |
|---|---|
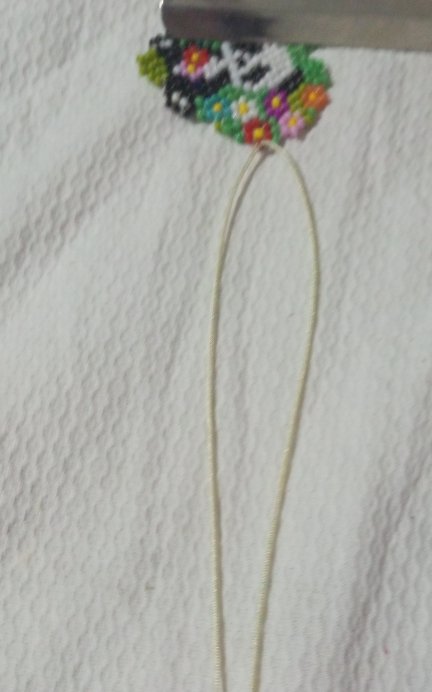
| Coloqué los aritos en las mostacillas de cada lado. | I placed the earrings on the beads on each side. |

| Paso 15 | Step 15 |
|---|---|
| Corté 2 piezas de hilo chino beige e introduje el hilo por uno de los aritos. | I cut 2 pieces of beige Chinese thread and inserted the thread through one of the rings. |
| Paso 16 | Step 16 |
|---|---|
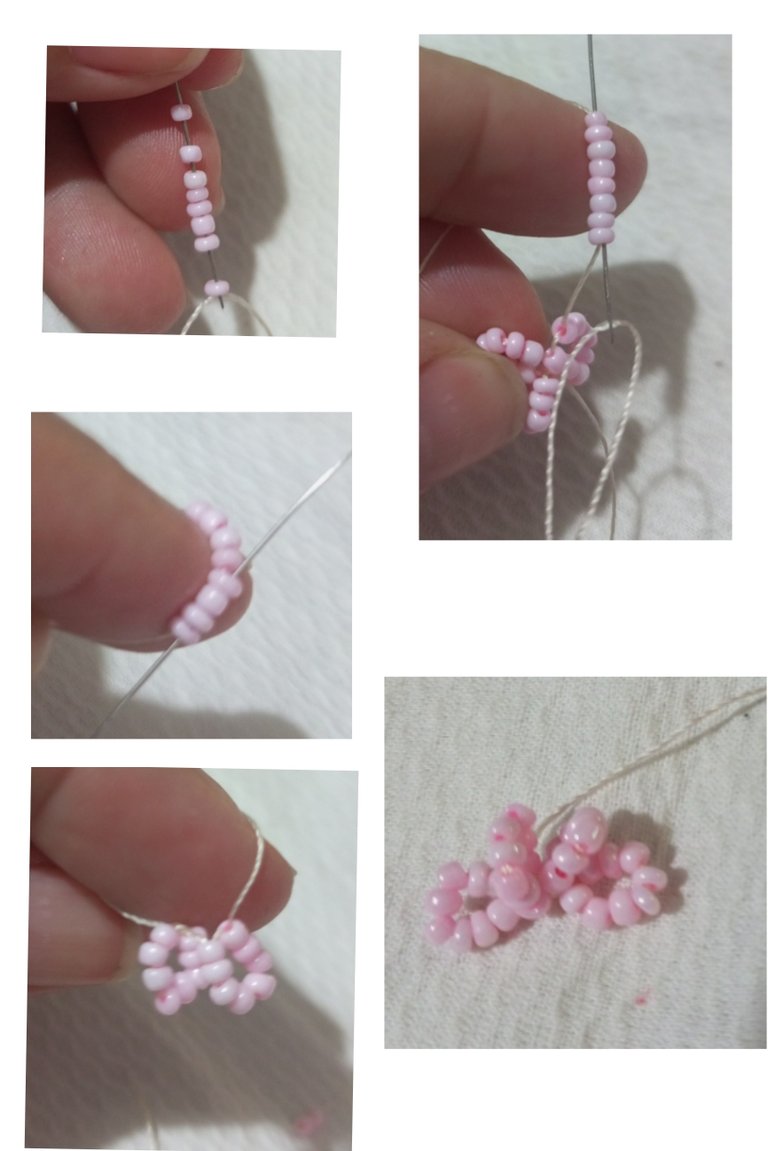
| Construí aritos de 8 mostacillas unidos un totol de cuatro aritos. | I built beads of 8 beads attached to a totol of four beads. |
| Paso 17 | Step 17 |
|---|---|
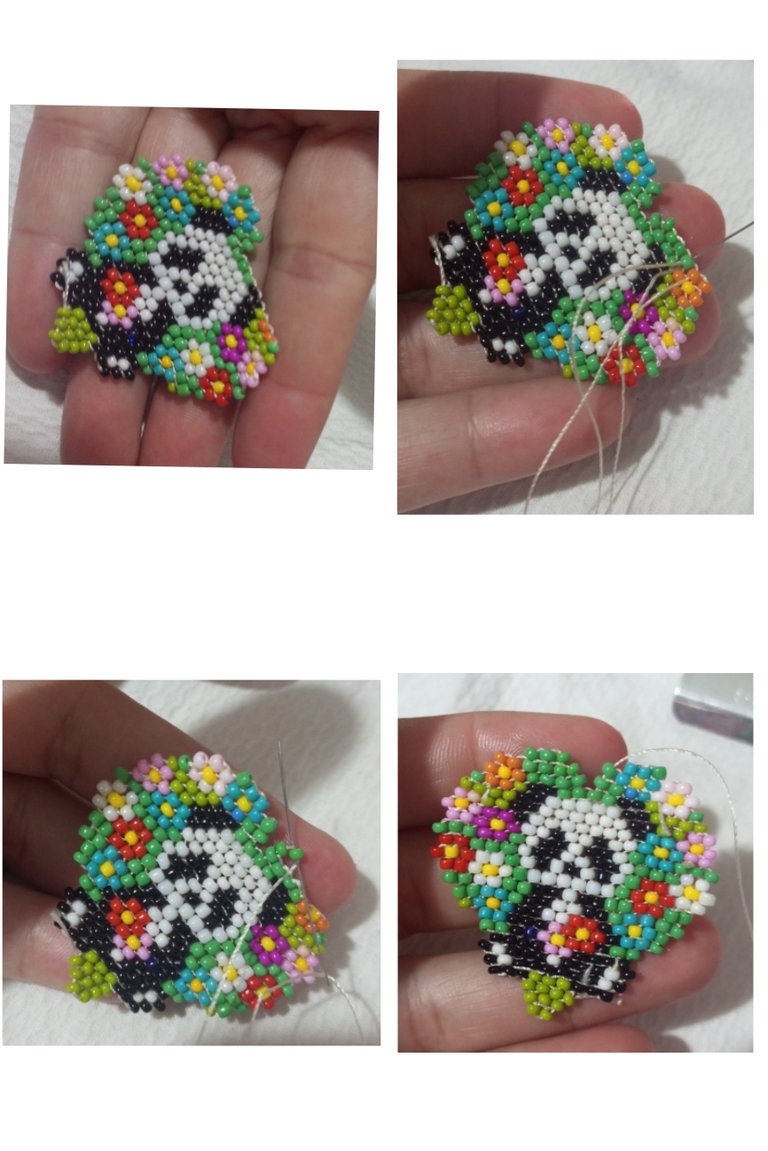
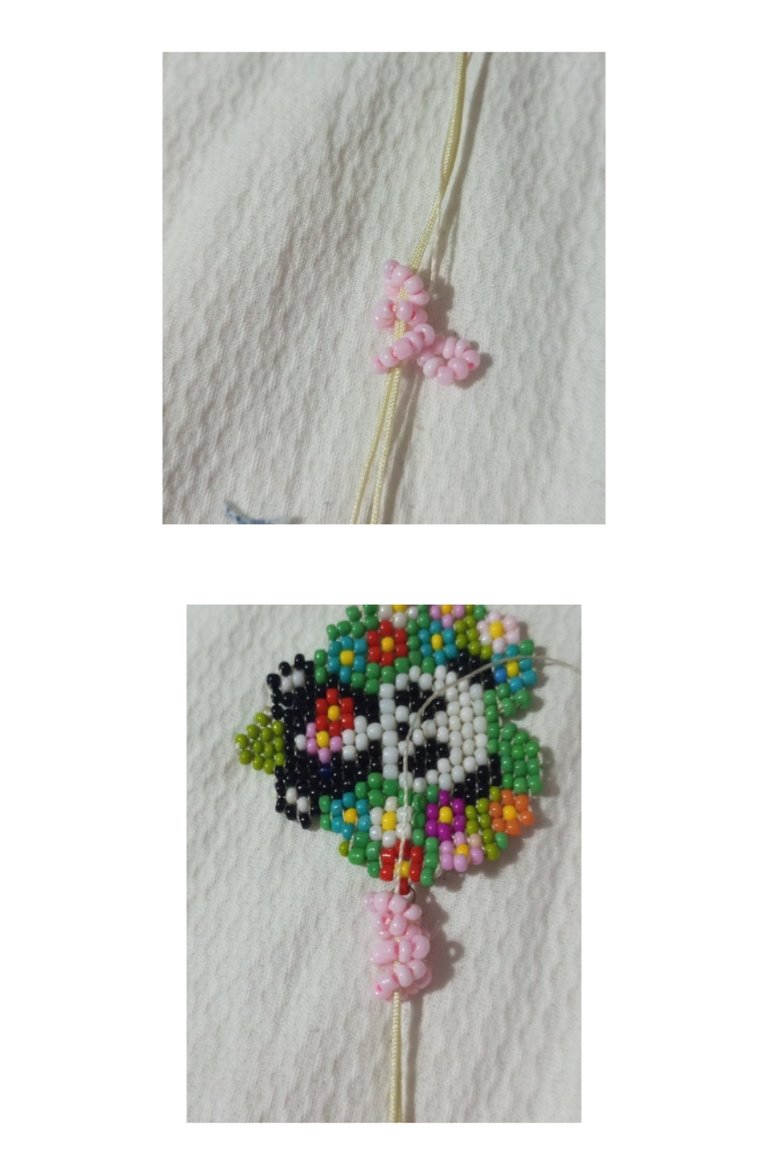
| Introduje los aritos de mostacillas en el hilo. | I inserted the bead rings into the thread. |
| Paso 18 | Step 18 |
|---|---|
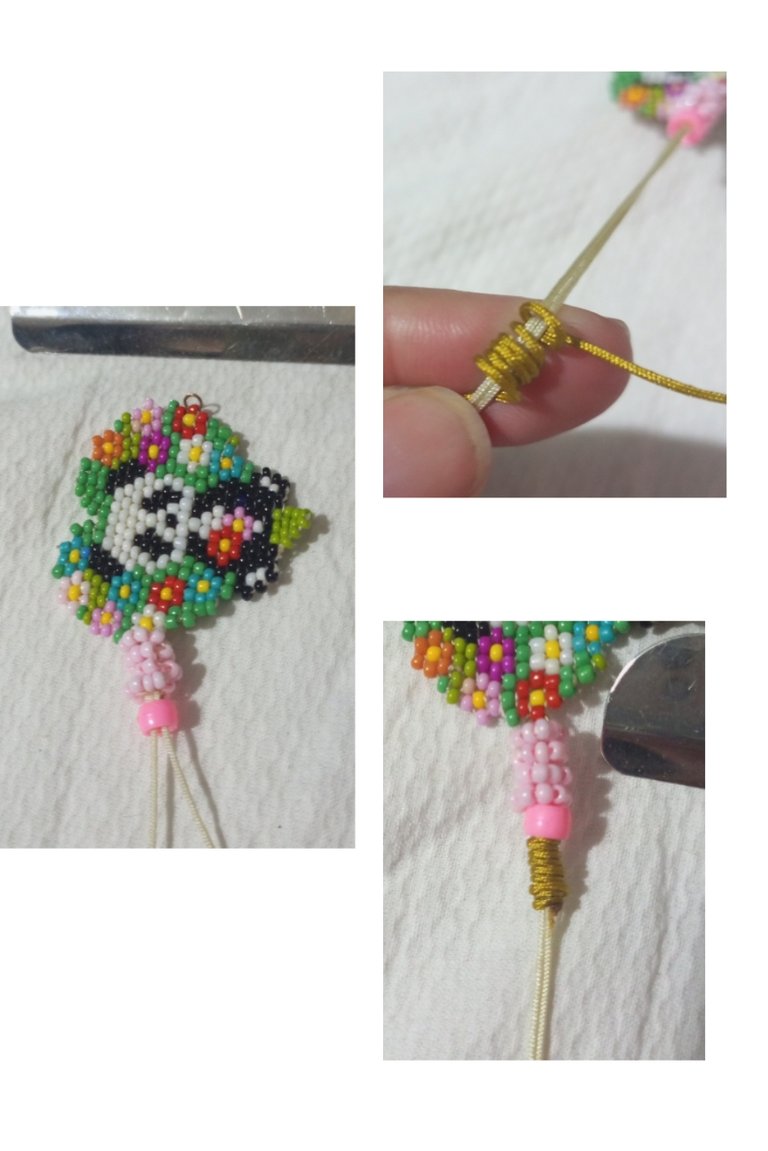
| Introduje un aro plástico y realicé un nudo franciscano en hilo chino beige corté el hilo excedente y quemé con el yesquero. | I inserted a plastic ring and made a Franciscan knot in beige Chinese thread, cut the excess thread and burned with tinder. |
| Paso 19 | Step 19 |
|---|---|
| Repetí el proceso en el otro lado de la manilla del brazalete. | I repeated the process on the other side of the bracelet handle. |
| Paso 20 | Step 20 |
|---|---|
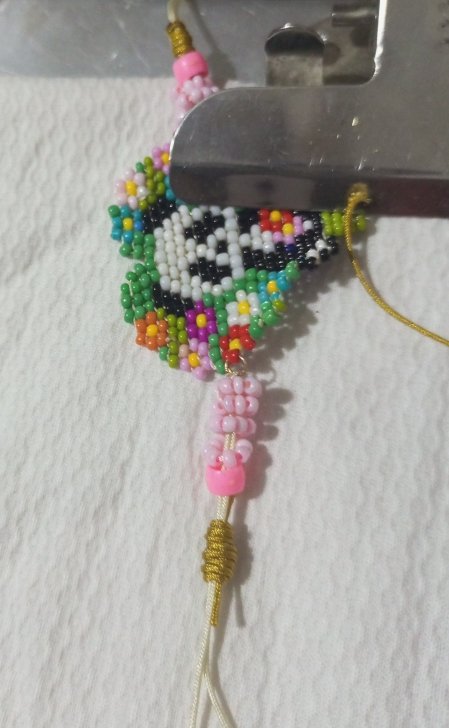
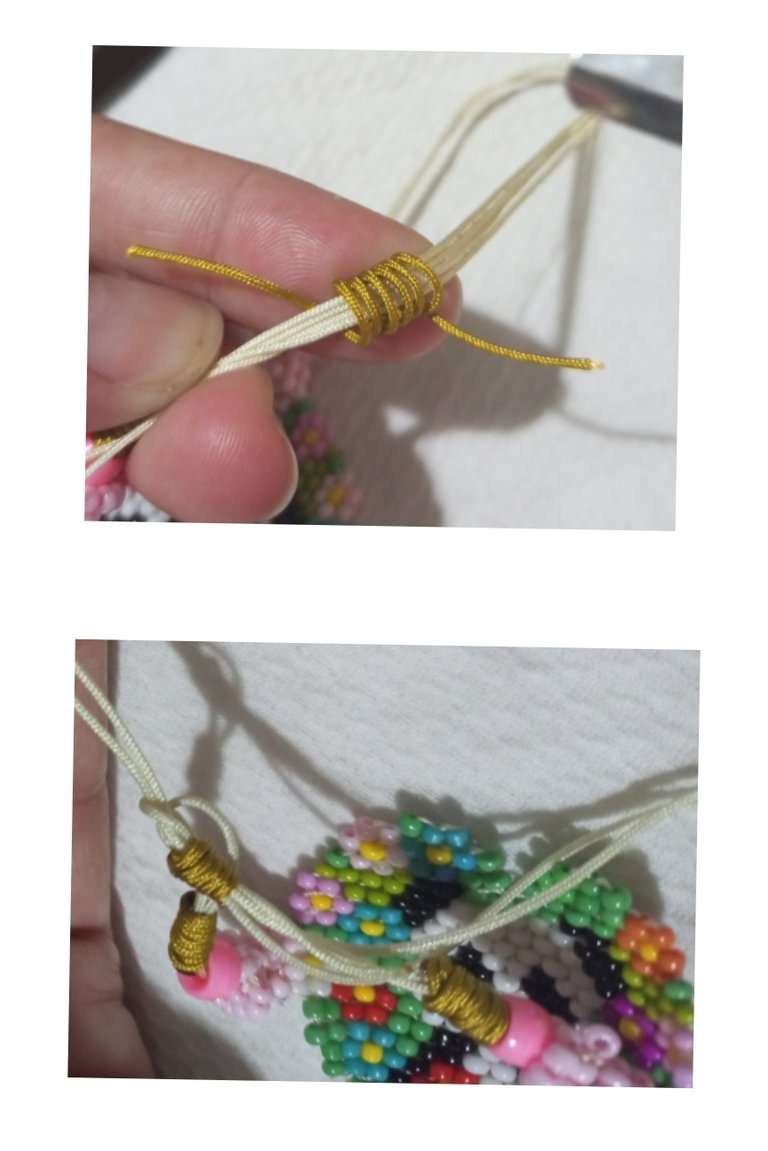
| Realicé un nudo franciscano de 6 vueltas para cerrar las manillas. | I tied a Franciscan knot of 6 turns to close the handles. |
| Paso 21 | Step 21 |
|---|---|
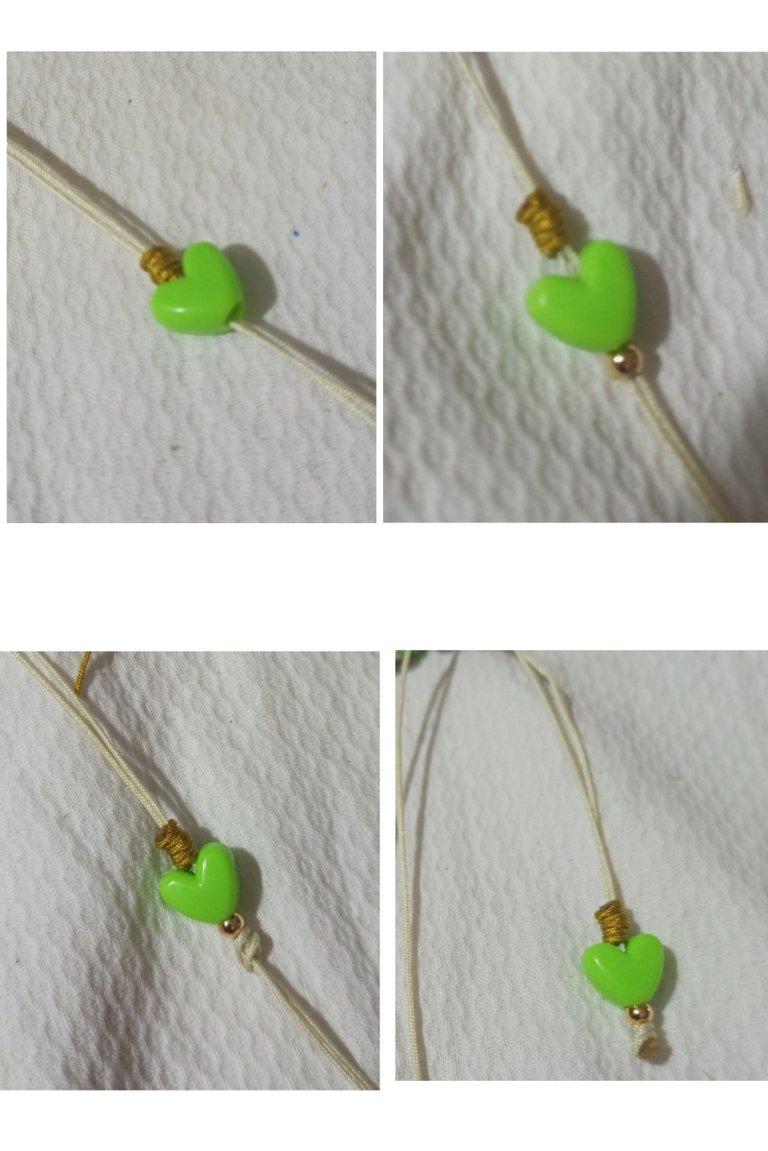
| Realicé un nudo franciscano en hilo chino dorado, introduje el corazon y un balin y cerré con un nudo sencillo, corté y quemé el hilo excedente. | I made a Franciscan knot in golden Chinese thread, introduced the heart and a ball and closed with a simple knot, cut and burned the excess thread. |
| Paso 22 | Step 22 |
|---|---|
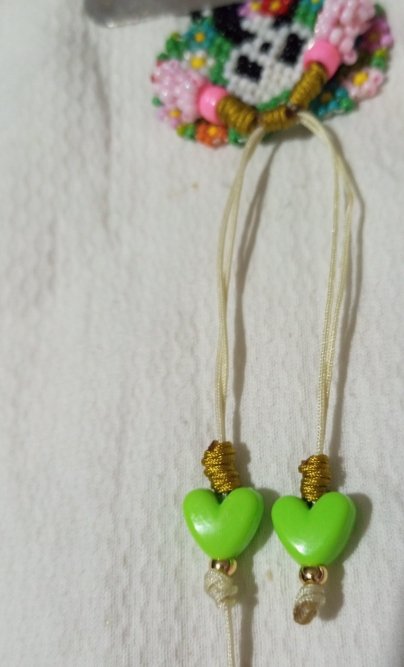
| Repetí el mismo procedimiento en el otro lado del hilo. | I repeated the same procedure on the other side of the thread. |
| Despedida | Farewell |
|---|---|
| Y esté es mi post para el día de hoy LINDO BRAZALETE DE OSITO PANDA muy contenta y agradecida con Dios por el resultado. | And this is my post for today CUTE PANDA BEAR BRACELET very happy and thankful to God for the result. |

| Créditos | Credits |
|---|---|
| Traductor: www.DeepL.com/Translator (free version). Las fotos fueron tomadas con mi Celular Tecno Sport 7T. Foto de portada editada con Canva y PhotoRoom. Banner:https://images.app.goo.gl/5N3pujMb9u2AePz87. | Translator: www.DeepL.com/Translator (free version). The photos were taken with my Tecno Sport 7T cell phone . Cover photo edited es Canva and PhotoRoom. Banner:https://images.app.goo.gl/5N3pujMb9u2AePz87. |
Wow amiga qué pulsera tan bellamente elaborada de una manera tan delicada y prolija, te quedó espectacular.
!discovery 30
Gracias amiga, saludos 😊
This is a very tender bracelet, it was excellently made.It looks very pretty on and really has an amazing level of detail.Thank you for leaving us such beautiful work.
selected by @dayadam
Thank you @diyhub, thank you. It is a pleasure for me to work hard and deliver work that pleases and pleases. Greetings 🤗 thank you very much for your support.
Thank you for your support @innerblocks and.
This post was shared and voted inside the discord by the curators team of discovery-it
Join our Community and follow our Curation Trail
Discovery-it is also a Witness, vote for us here
Delegate to us for passive income. Check our 80% fee-back Program
Gracias ☺️ @melinda010100
Your bracelet is very beautiful, the panda motif surrounded by beautiful flowers gives a cheerful impression. you are very creative👍