| Esp | Eng |
|---|---|
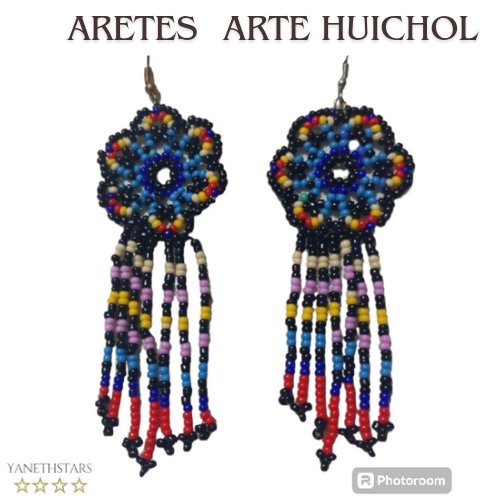
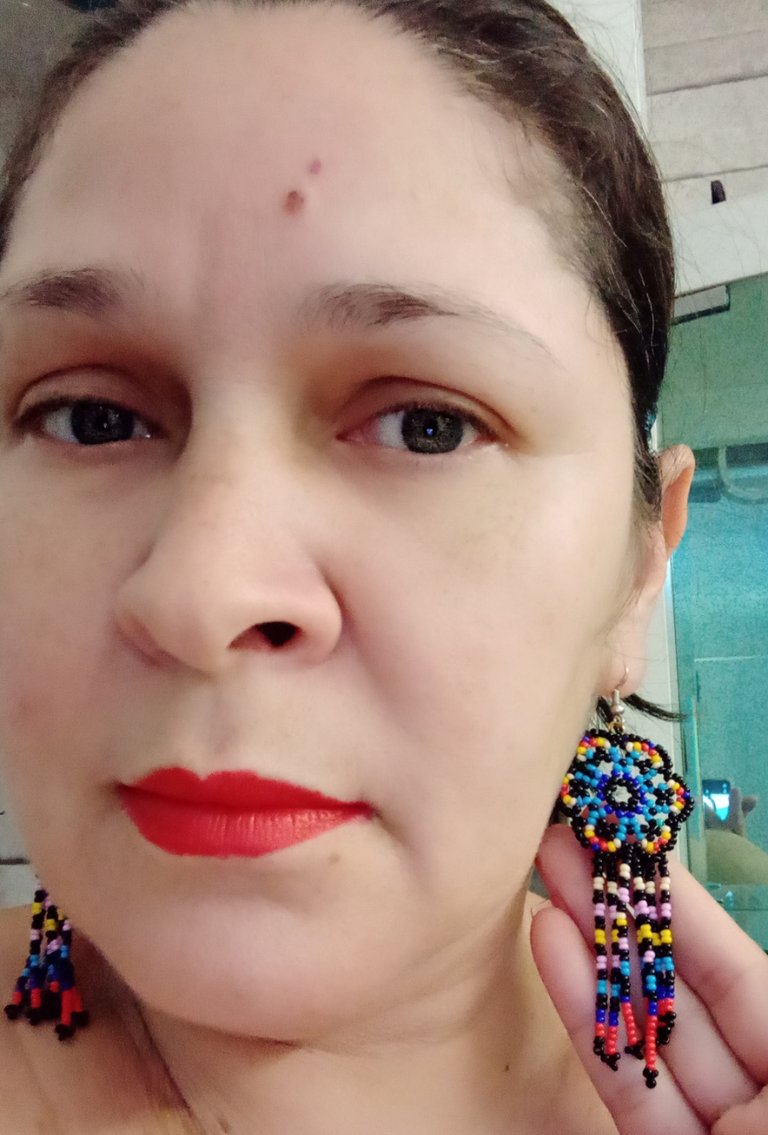
| Hola amigos creativos de @Jewelry, el día de hoy les entrego estos LINDOS ARETES HECHOS EN EL ARTE HUICHOL. Estos hermosos aretes los hice como un ensayo para reproducir el arte Huichol, y digo "ensayo" por que será el primero de muchos y por supuesto tienen sus detalles o fallas de principiante. Estás artesanías son muy bonitas y coloridas y originarias de la cultura y el folklore Huichol. Los Huichol es un grupo étnico perteneciente a México, podemos encontrar en este arte diferentes diseños y formas en accesorios, carteras, mantas, adornos, cuadros y todo lo que podamos imaginar. Estos aretes son hechos con mostacillas que es la materia prima que ellos usan, (chaquiras, abalorios o cuentas) y como a mi me fascinan las mostacillas no dude en realizarlos. A continuación la lista de materiales y procedimientos para elaborar estos lindo aretes, espero les guste y disfruten mi post. | Hello creative friends of @Jewelry, today I give you these NICE EARRINGS MADE IN HUICHOL ART. These beautiful earrings I made them as a test to reproduce the Huichol art, and I say "test" because it will be the first of many and of course they have their details or beginner flaws. These crafts are very beautiful and colorful and originate from the Huichol culture and folklore. The Huichol is an ethnic group belonging to Mexico, we can find in this art different designs and shapes in accessories, handbags, blankets, ornaments, paintings and everything we can imagine. These earrings are made with beads which is the raw material they use, (beads, beads or beads) and as I am fascinated by beads I did not hesitate to make them. Below is the list of materials and procedures to make these beautiful earrings, I hope you like it and enjoy my post. |
| Materiales: | Materials: |
|---|---|
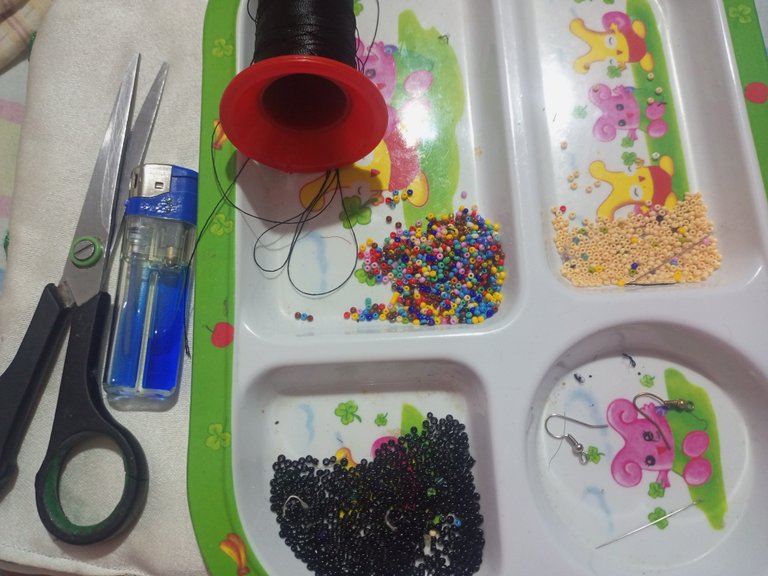
| Hilo chino negro, mostacillas: negras, azules claras, azul marino, rojas, rosadas, beige, amarillas, 2 anzuelos, yesquero, tijeras, agujas de mostacillas, pinzas de bisuteria. | Chinese black thread, beads: black, light blue, navy blue, red, pink, beige, yellow, 2 hooks, tinder, scissors, bead needles, jewelry clips. |
| Instrucciones: | Instructions: |
|---|
| Paso 1 | Step 1 |
|---|---|
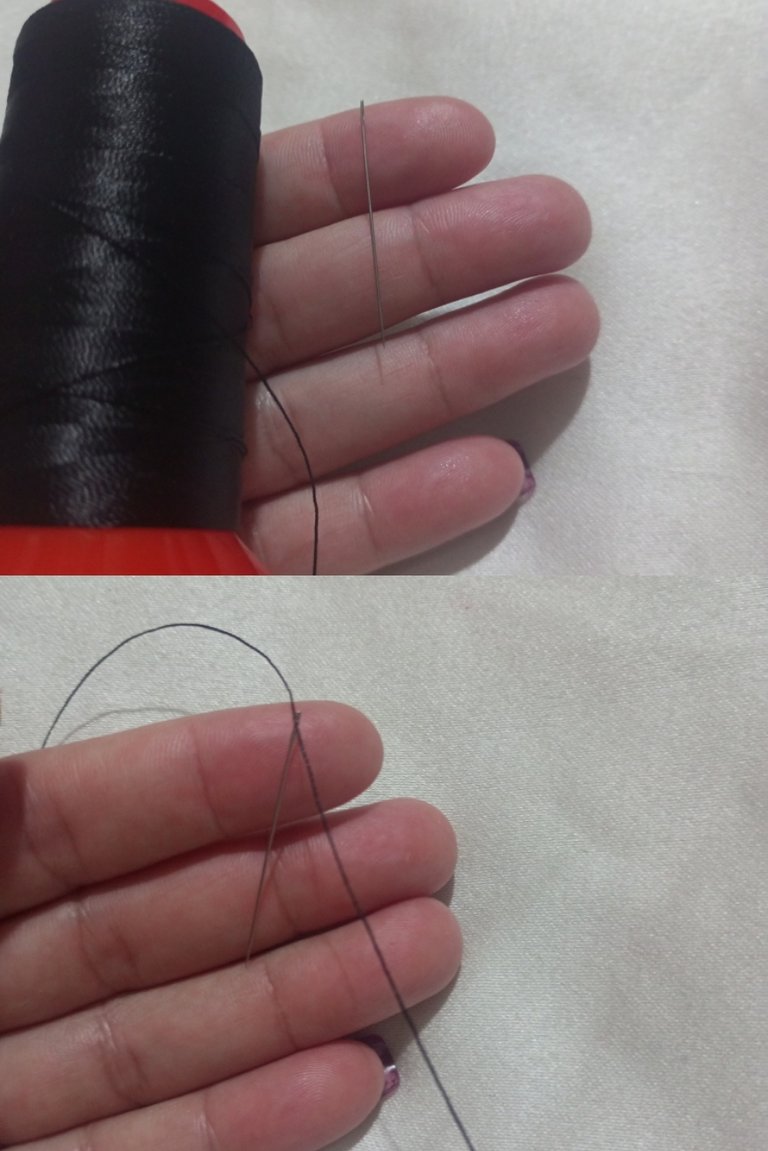
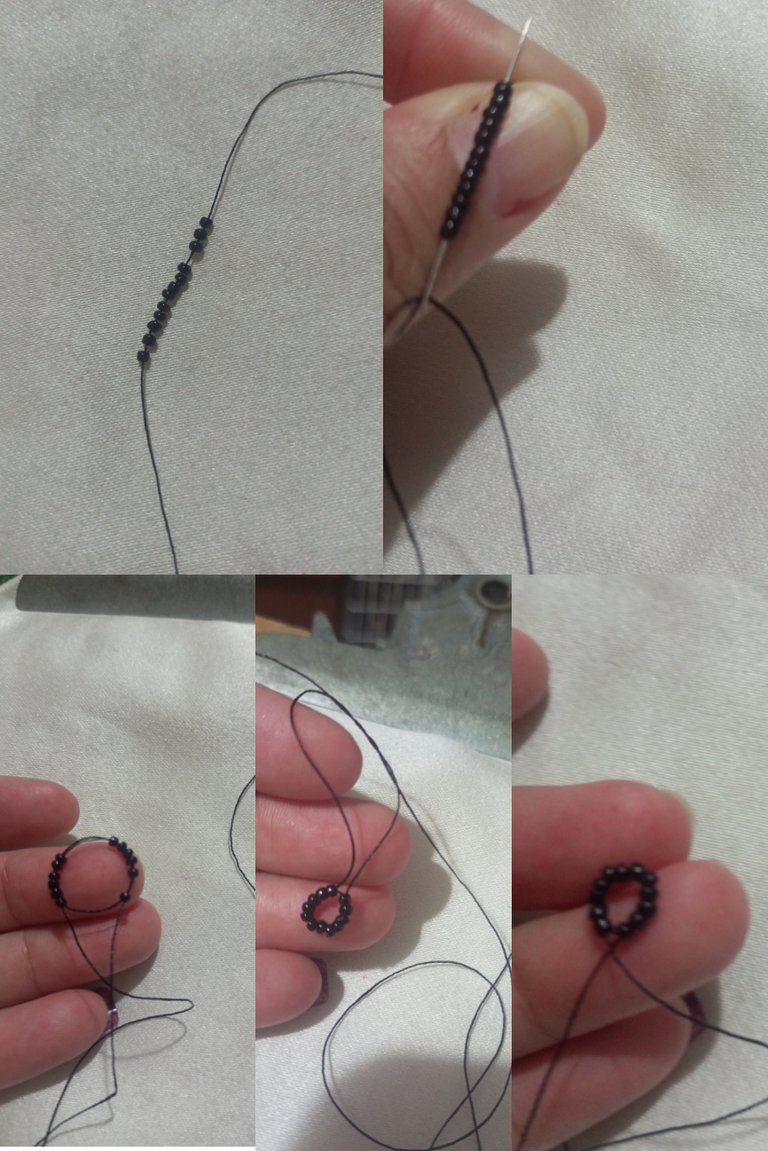
| Enhebre 1 metro y medio de hilo chino negro en la aguja mostacillera. | Thread 1.5 meters of black Chinese thread on the mustard needle. |
| Paso 2 | Step 2 |
|---|---|
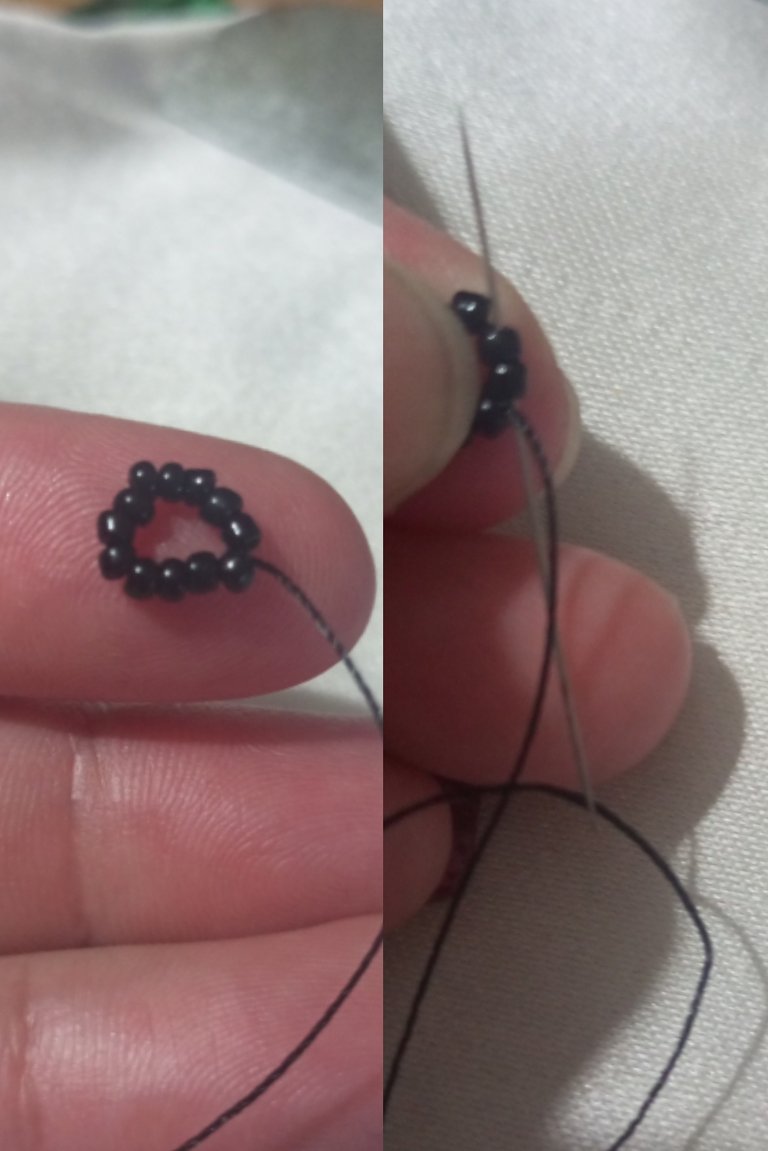
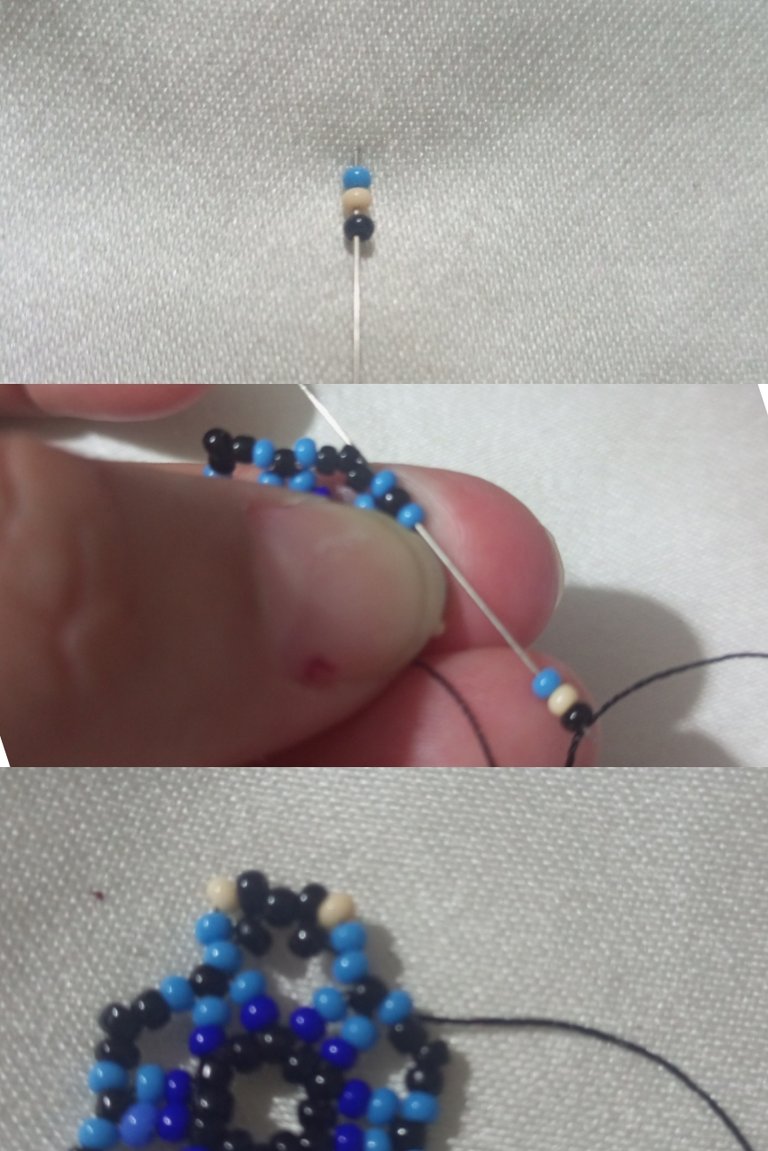
| Introduje 12 mostacillas negras en la aguja mostacillera y en el sentido del reloj vuelvo a introducir la aguja por las mostacillas e hice un ojal, para rematar y cerrar el ojal hice 2 nudos corté y quemé el hilo excedente. | I inserted 12 black beads in the beading needle and in clockwise direction I reinserted the needle through the beads and made a buttonhole, to finish and close the buttonhole I made 2 knots, cut and burned the excess thread. |
| Paso 3 | Step 3 |
|---|---|
| La aguja la introduje en la segunda mostacilla partiendo de la mostacilla donde sale el hilo. | The needle was inserted into the second bead starting from the bead where the thread exits. |
| Paso 4 | Step 4 |
|---|---|
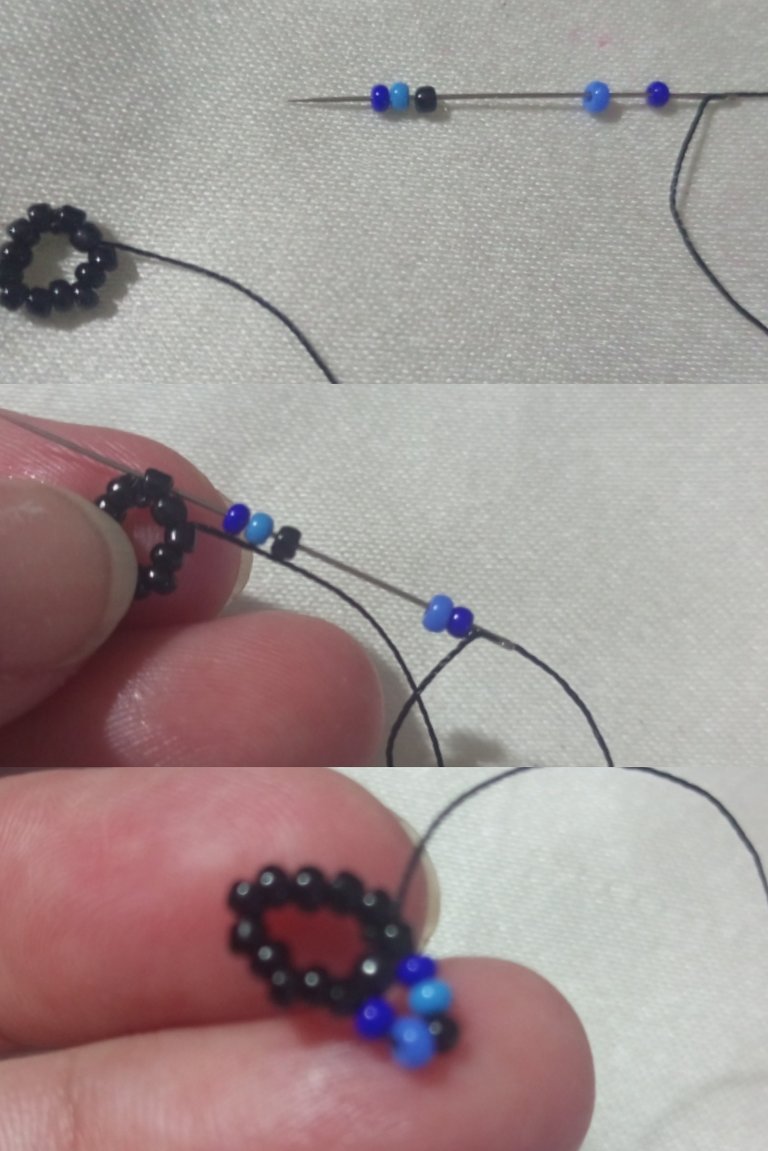
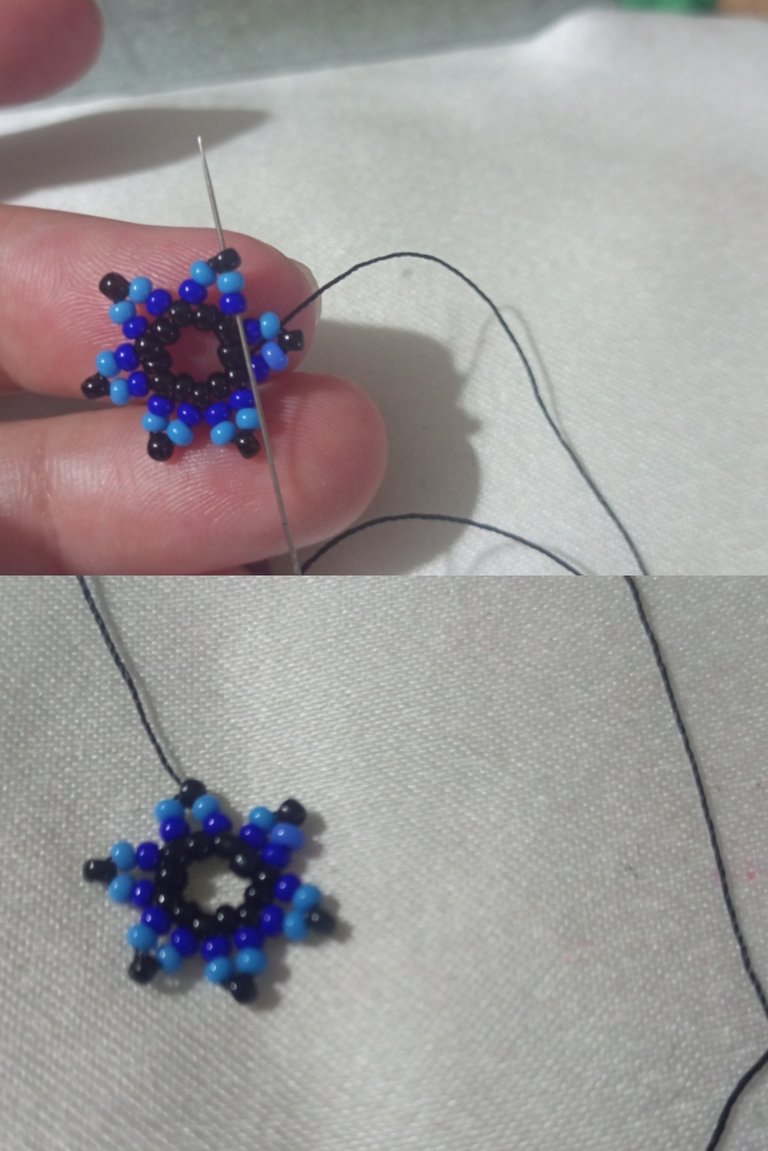
| Utilicé el siguiente patron de colores de mostacillas para hacer los primeros pétalos de la flor: azul marino, azul claro, negro, azul claro, azul marino e introduje la aguja dejando una mostacilla negra en el medio. | I used the following pattern of bead colors to make the first petals of the flower: navy blue, light blue, black, light blue, navy blue and inserted the needle leaving a black bead in the middle. |
| Paso 5 | Step 5 |
|---|---|
| Utilizando el patrón anterior e introduciendo la aguja en la primera mostacilla donde culmina cada pétalo y dejando una mostacilla construiremos la flor. | Using the previous pattern and inserting the needle in the first stitch where each petal ends and leaving a stitch, we will construct the flower. |
| Paso 6 | Step 6 |
|---|---|
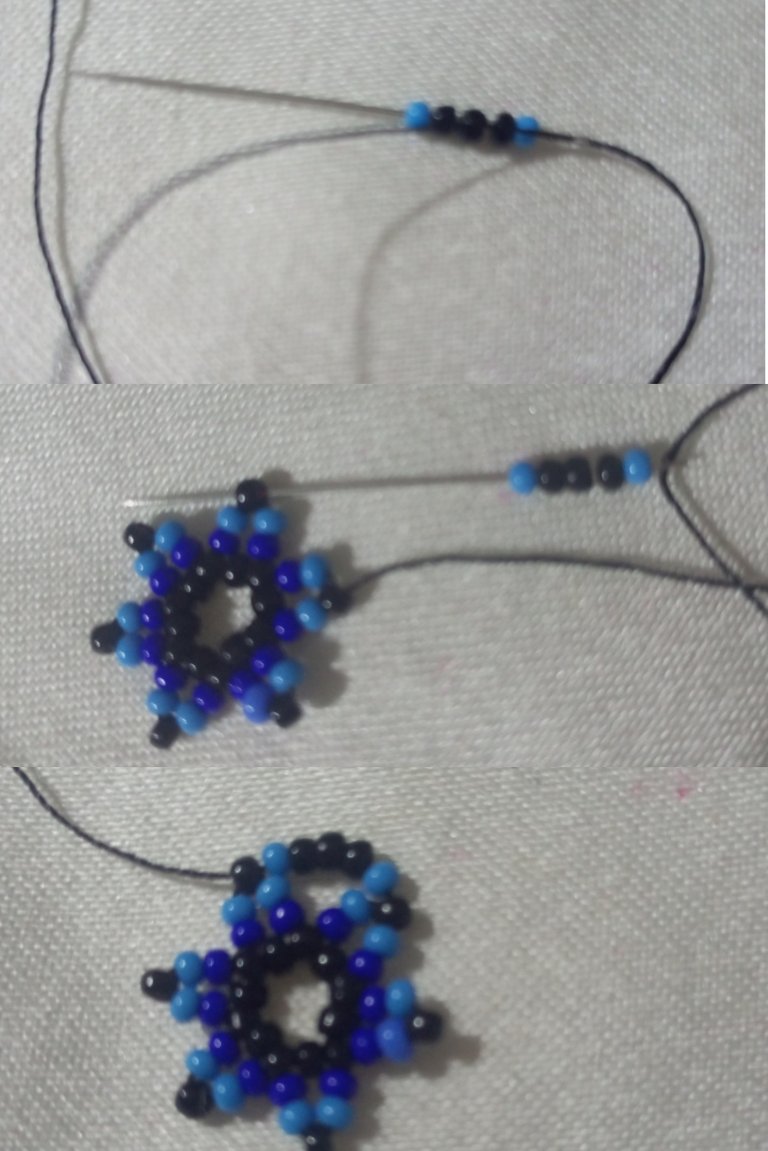
| Posicionamos la aguja para construir la segunda parte de los petalos de la flor, para eso introducimos la aguja hacia arriba pasando por las mostacillas azul marino, azul claro y colocamos la aguja en la mostacilla negra. | We position the needle to build the second part of the flower petals, for that we introduce the needle upwards passing through the navy blue and light blue beads and we place the needle in the black bead. |
| Paso 7 | Step 7 |
|---|---|
| Ahora usaremos el siguiente patrón: 1 mostacilla azul claro, 3 negras, 1 azul claro. E introducimos en la siguiente mostacilla negra. | Now we will use the following pattern: 1 light blue bead, 3 black, 1 light blue. And we insert into the following black beads. |
| Paso 8 | Step 8 |
|---|---|
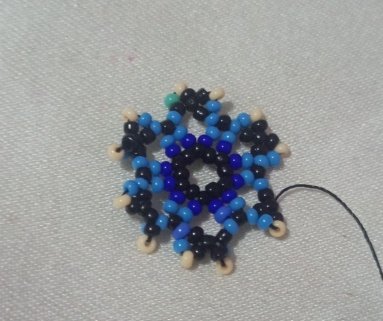
| Vemos culminado el proceso de la segunda parte. | We see the process of the second part completed. |
| Paso 9 | Step 9 |
|---|---|
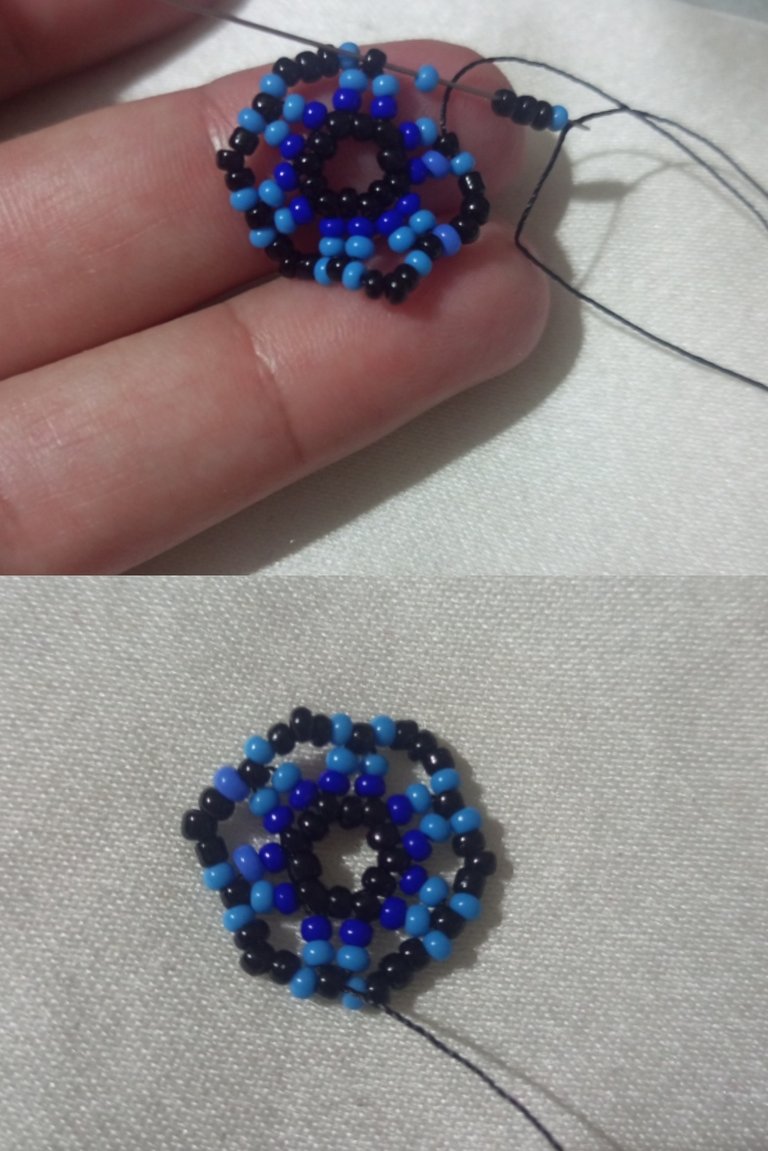
| El hilo sale en la mostacilla negra y la posición haremos en la segunda mostacilla azul claro. | The thread exits on the black bead and the position we will make on the second light blue bead. |

| Paso 10 | Step 10 |
|---|---|
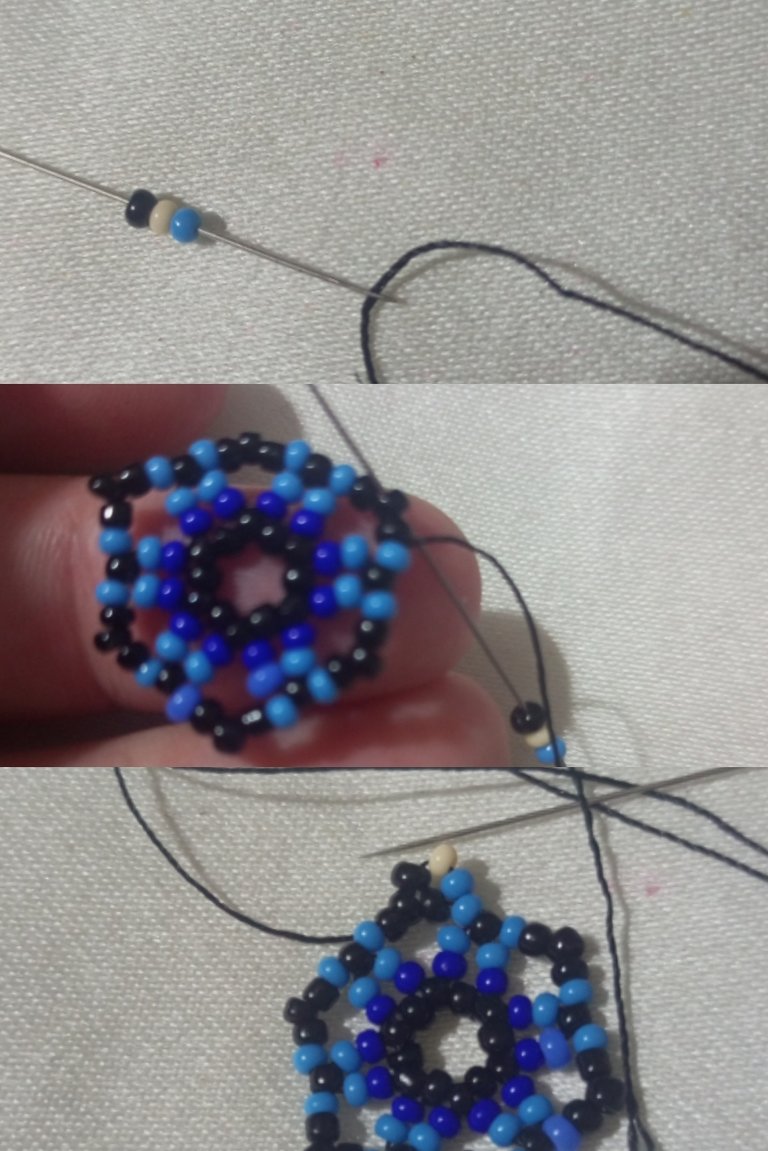
| Utilizamos el siguiente patrón: azul claro, beige, negro e introducimos en la segunda mostacilla negra. | We use the following pattern: light blue, beige, black and insert into the second black bead. |
| Paso 11 | Step 11 |
|---|---|
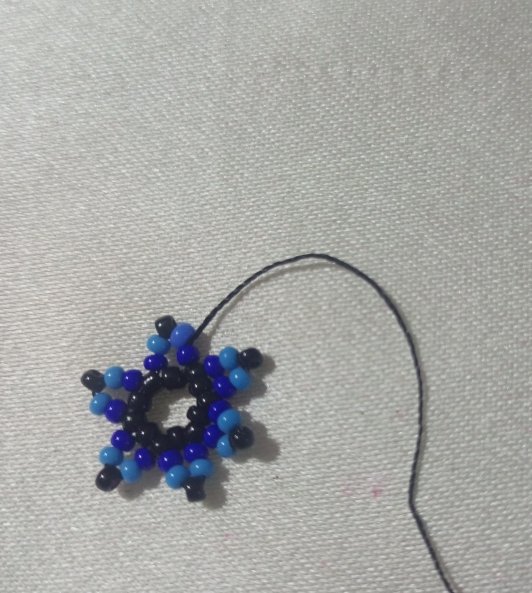
| Tomaremos ahora las mostacillas en el sentido contrario: negro, beige y azul claro e introducimos la aguja por las tres mostacillas: azul claro, negro y azul claro. Vemos formado el primer pétalo de la tercera parte de la flor. | We will now take the beads in the opposite direction: black, beige and light blue and introduce the needle through the three beads: light blue, black and light blue. We see the first petal of the third part of the flower formed. |
| Paso 12 | Step 12 |
|---|---|
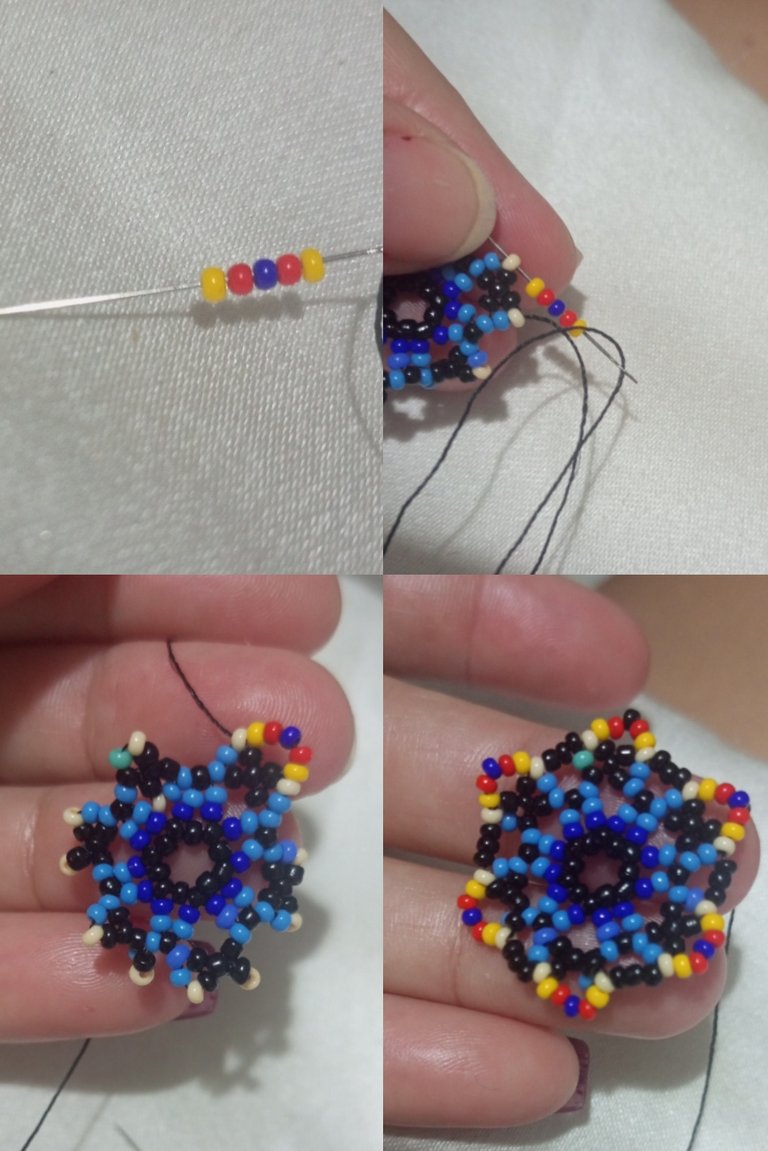
| Usamos el siguiente patrón: amarillo, rojo, azul marino, rojo, amarillo y lo llevaremos a las puntas de las mostacillas beige. | We use the following pattern: yellow, red, navy blue, red, yellow and bring it to the ends of the beige beads. |
| Paso 13 | Step 13 |
|---|---|
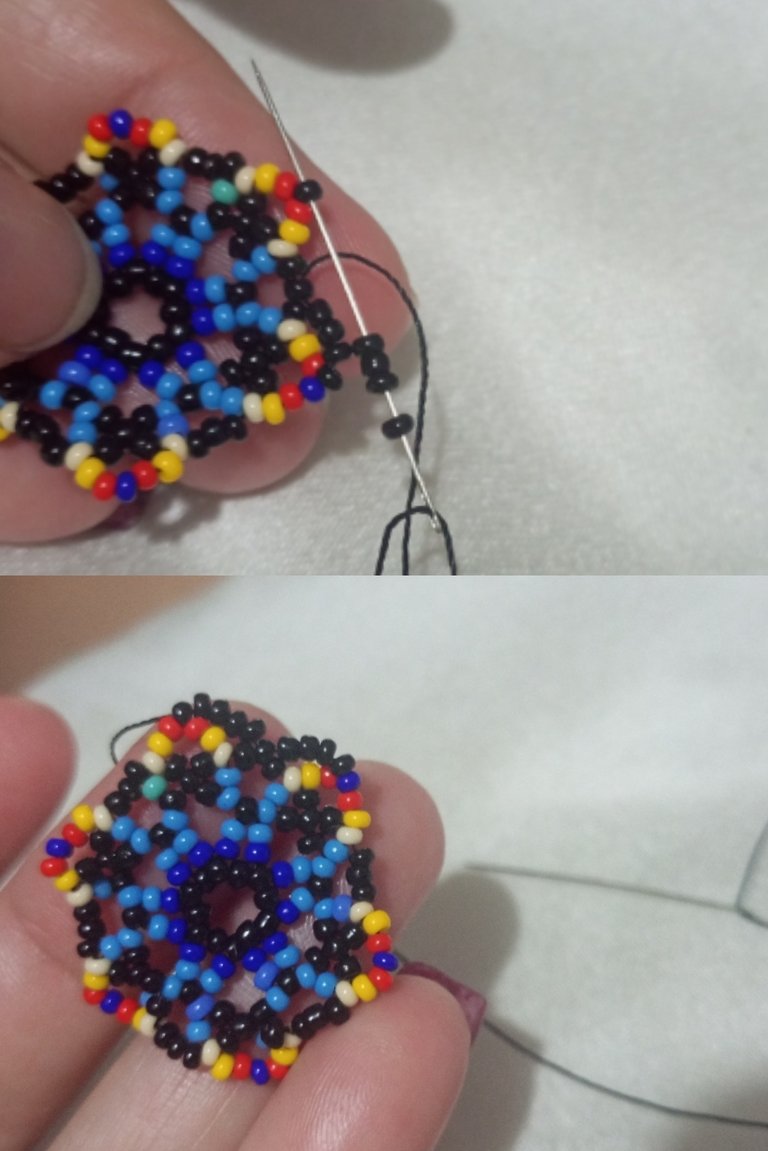
| El siguiente paso es posicionar la aguja en la mostacilla azul marino de la punta y de alli comenzar a colocar las mostacillas negras, introduje 4 mostacillas negras y la colocamos en la mostacilla negra del medio. Introducimos nuevamente 4 mostacillas y llevamos la aguja a la mostacilla azul marino, hasta culminar la flor. | The next step is to position the needle in the navy blue bead at the tip and from there begin to place the black beads, I introduced 4 black beads and placed it in the black bead in the middle. We introduce again 4 beads and take the needle to the navy blue bead, until the flower is completed. |
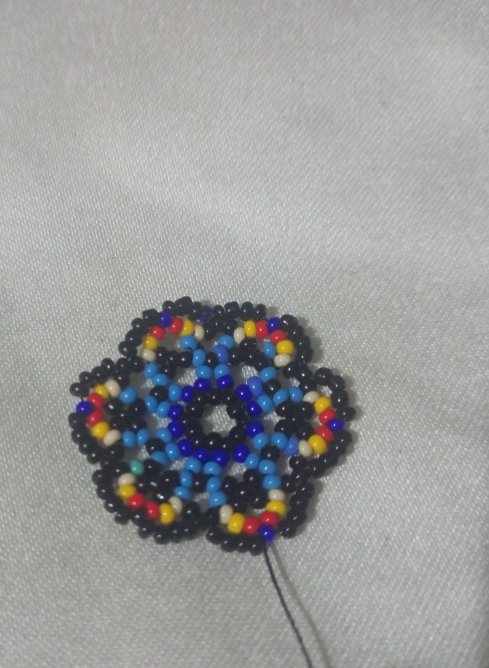
| Paso 14 | Step 14 |
|---|---|
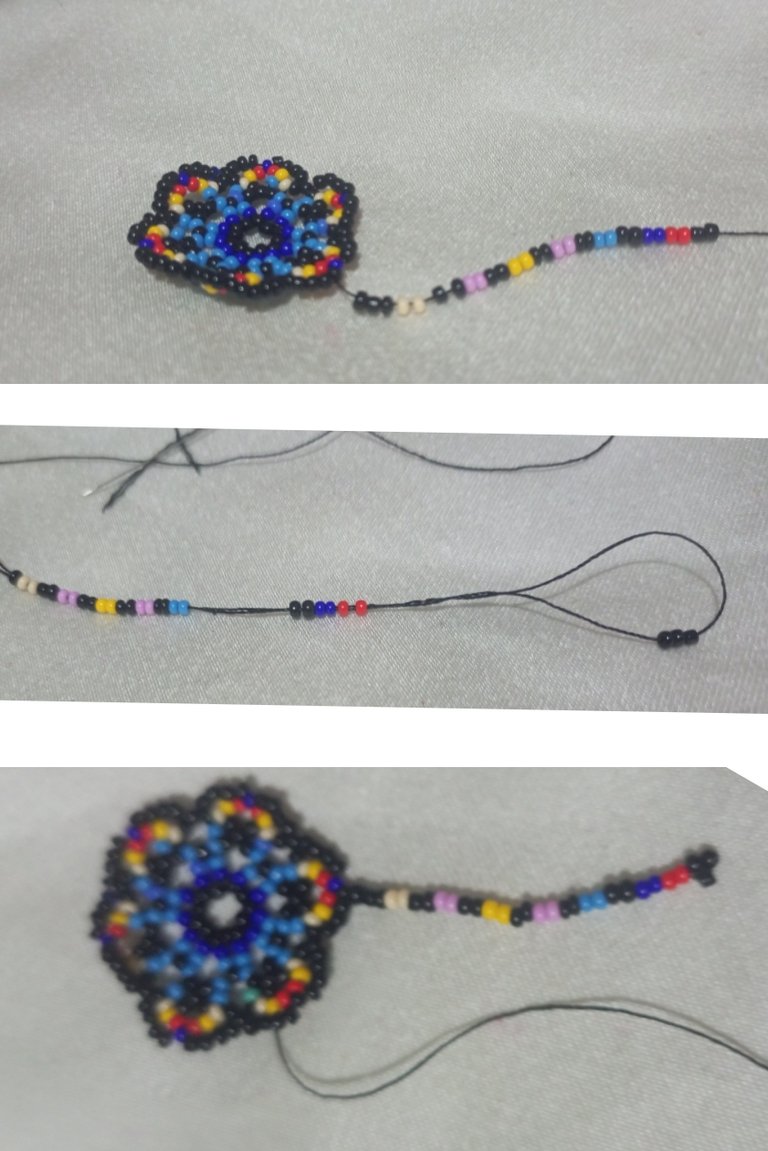
| Haremos los flecos. Con el patrón que se observa en la foto. Son 6 flecos. Culminando el primer fleco con 2 rojas y 3 negras, con las 3 negras haremos la culminación del fleco. | We will make the bangs. With the pattern seen in the photo. There are 6 bangs. Culminating the first fringe with 2 red and 3 black ones, with the 3 black ones we will make the culmination of the fringe. |
| Paso 15 | Step 15 |
|---|---|
| Iremos construyendo el resto de los flecos añadiendo 2 mostacillas rojas extras al final de cada fleco hasta llegar a 8 mostacillas rojas en el fleco del medio y luego reducimos 2 mostacillas rojas hasta llegar otra vez a dos mostacillas hasta el último fleco. | We will build the rest of the bangs by adding 2 extra red beads at the end of each fringe until we reach 8 red beads in the middle fringe and then we reduce 2 red beads until we reach again 2 red beads until the last fringe. |

| Paso 16 | Step 16 |
|---|---|
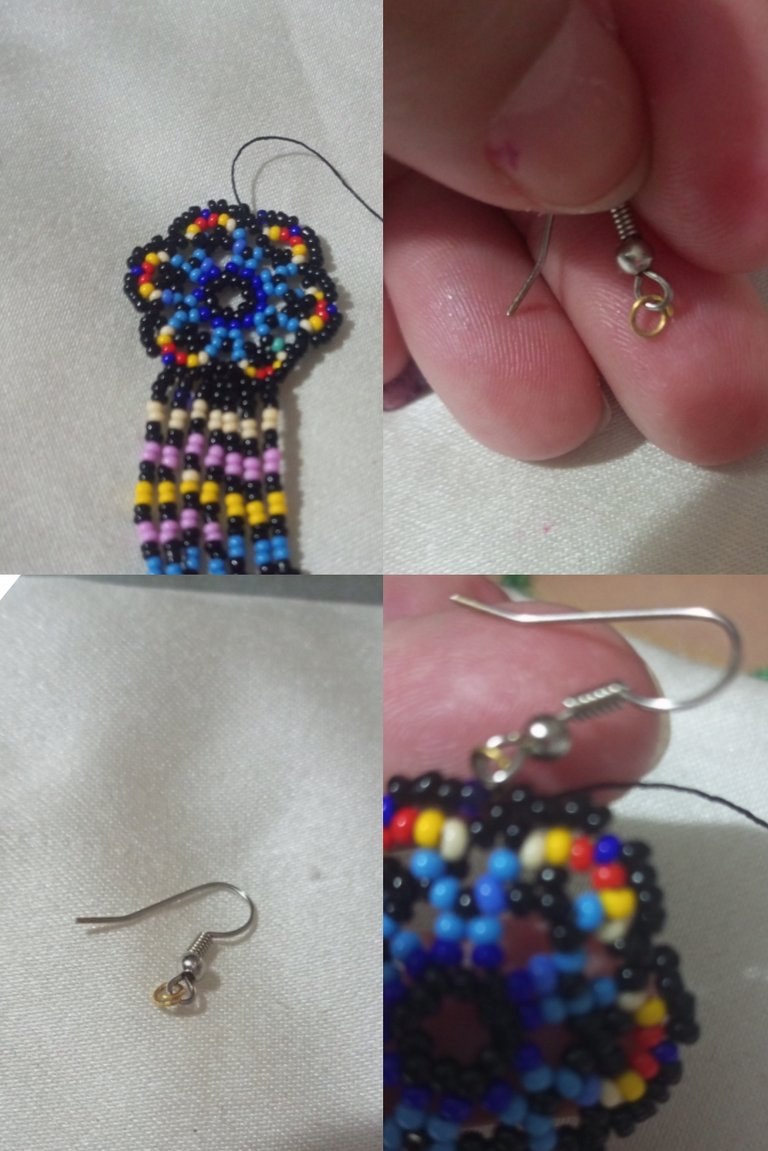
| Colocamos el anzuelo al arete utiizamos una argolla delgada que podamos introducir por el orificio de la mostacilla. | We attach the hook to the earring using a thin ring that we can insert through the hole of the bead. |
| Paso 17 | Step 17 |
|---|---|
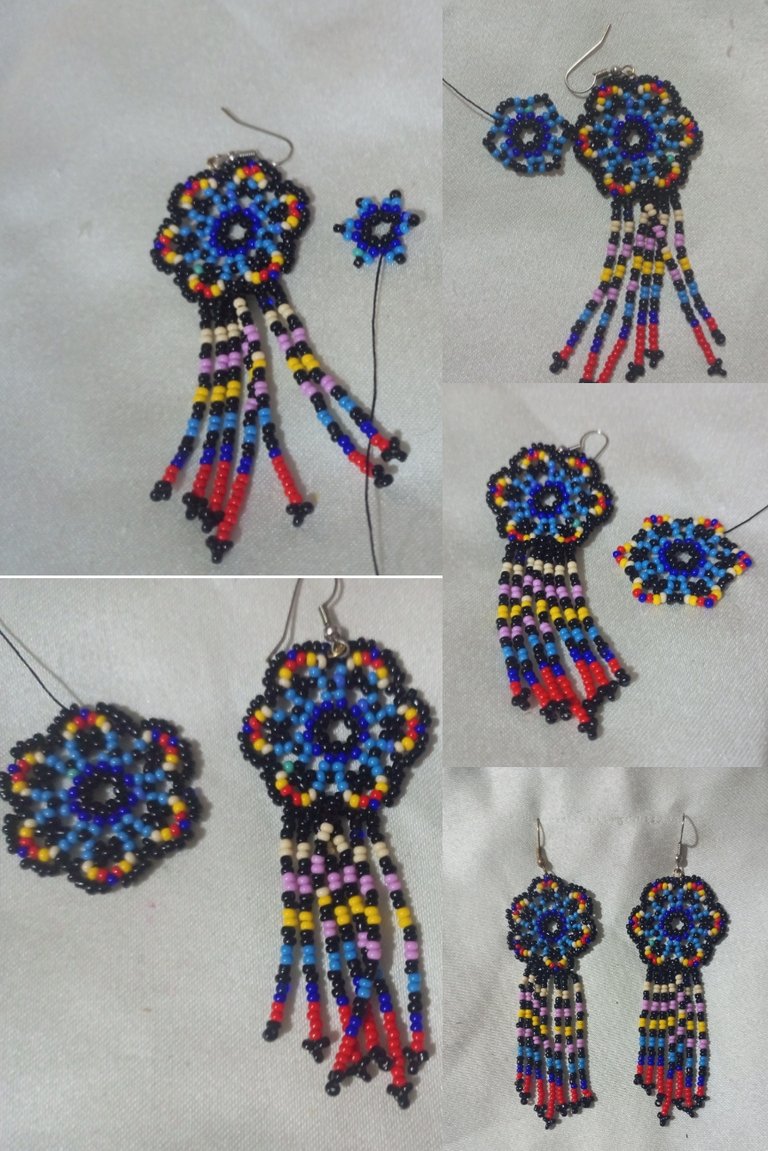
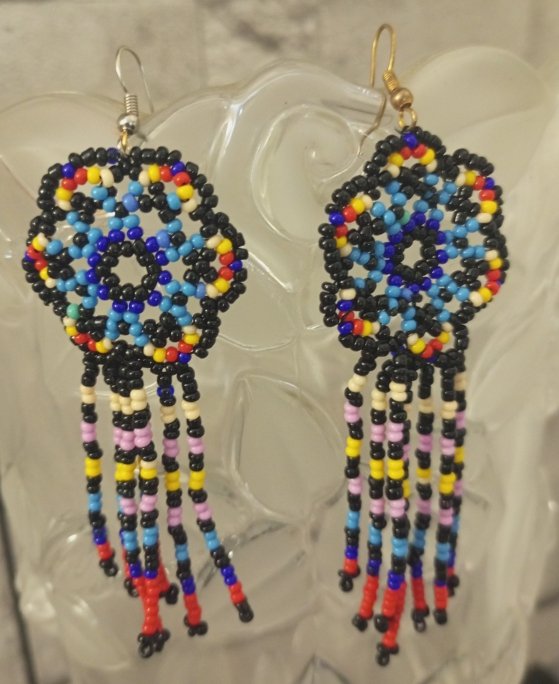
| Repetiré todo el proceso para el otro arete. | I will repeat the whole process for the other earring. |
| Despedida | Farewell |
|---|---|
| Y está es mi propuesta para el día de hoy LINDOS ARETES HECHOS EN EL ARTE HUICHOL. Un post hecho con amor, espero les guste y disfruten mi post. | And this is my proposal for today NICE ARTS MADE IN HUICHOL ART. A post made with love, I hope you like it and enjoy my post. |

| Créditos | Credits |
|---|---|
| Traductor: www.DeepL.com/Translator (free version).Las fotos fueron tomadas con mi Celular Tecno Sport 7T. Foto de portada editada con Canva y PhotoRoom. Banner Pixabay.com. | Translator: www.DeepL.com/Translator (free version). The photos were taken with my Tecno Sport 7T cell phone. Cover photo edited with Canva and PhotoRoom. Banner Pixabay.com. |
Nice one
To weave this kind of earring takes a lot of time and energy. You did well dear especially with the color combinations and the enter of the earring weaving.
@apunawu Hello thank you 😊. I appreciate your comment very much. Regards 🤗
Hermosos los colores que elegiste bellos. Bonita creación amiga. Bonita noche 🌃
@delvallecedeno gracias amiga 😊. Saludos
You made beautiful earrings and the color combination is giving the right vibe. 😍
@ene22 Thank you 😊. Yes the beauty of this art is that it is like that, the more colors it looks the more beautiful. Greetings 🤗
Amiga te quedaron hermosos y coloridos tus aretes
@evelin71 gracias amiga, agradezco tu visita a mi post. Saludos 🤗
@rutablockchain gracias amigos, siempre apoyan mi contenido. Saludos 🤗