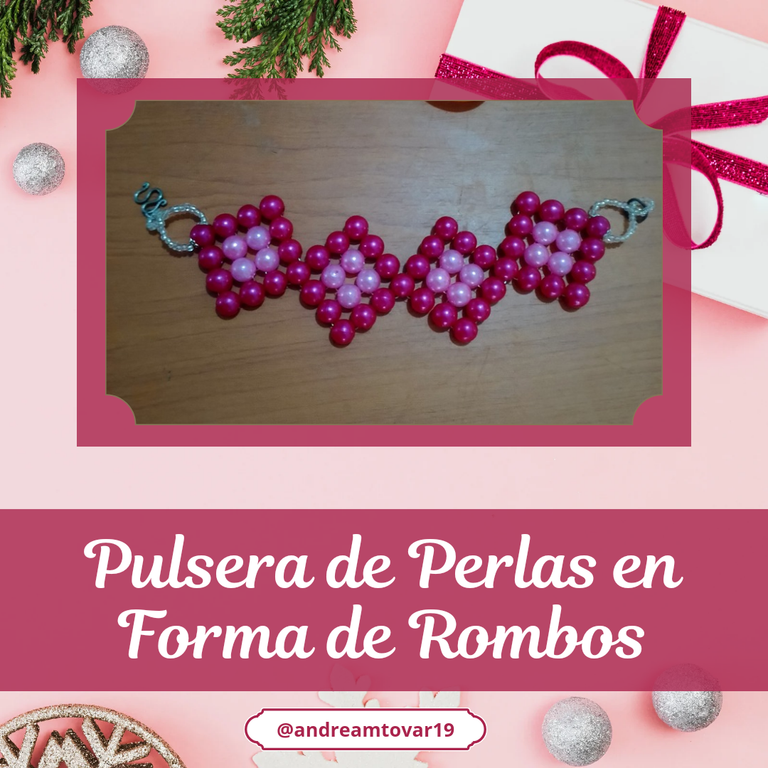

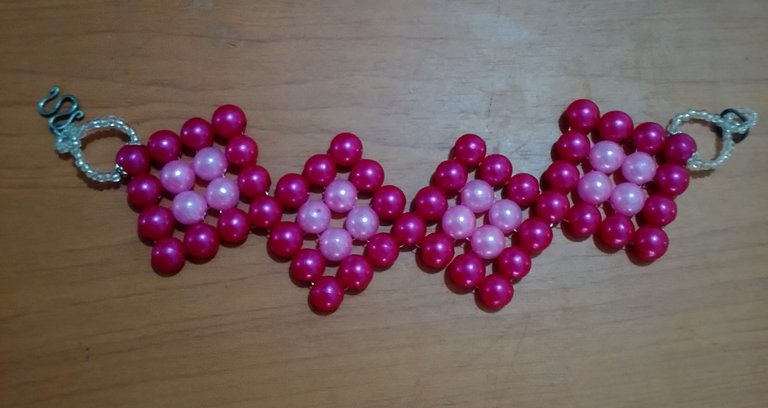
Hola queridos amigos de Hive y de esta hermosa comunidad de DIYHub, espero que hayan tenido un feliz inicio de año 2025. El día de hoy les quiero compartir un nuevo diseño para una pulsera de perlas rosadas, está vez he hecho la pulsera con diseño de rombos donde el centro es rosado claro y el exterior es rosado oscuro. En esta pulsera he usado por primera vez los separadores en forma de flor y seguramente se preguntarán porqué, no se trata de un asunto estético, es porque las mostacillas se iban dentro de la perla así que tuve que usarlas, aún así es algo diferente que complementó el diseño de la pulsera.
Materiales:

💖Perlas de color rosado oscuro y tamaño mediano
💖 Perlas de color rosado claro y tamaño mediano
💖Mostacillas transparentes
💖2 separadores en forma de flor de color plateado
💖 Broche y Argolla
💖1,5mt de nylon 0,4
Procedimiento
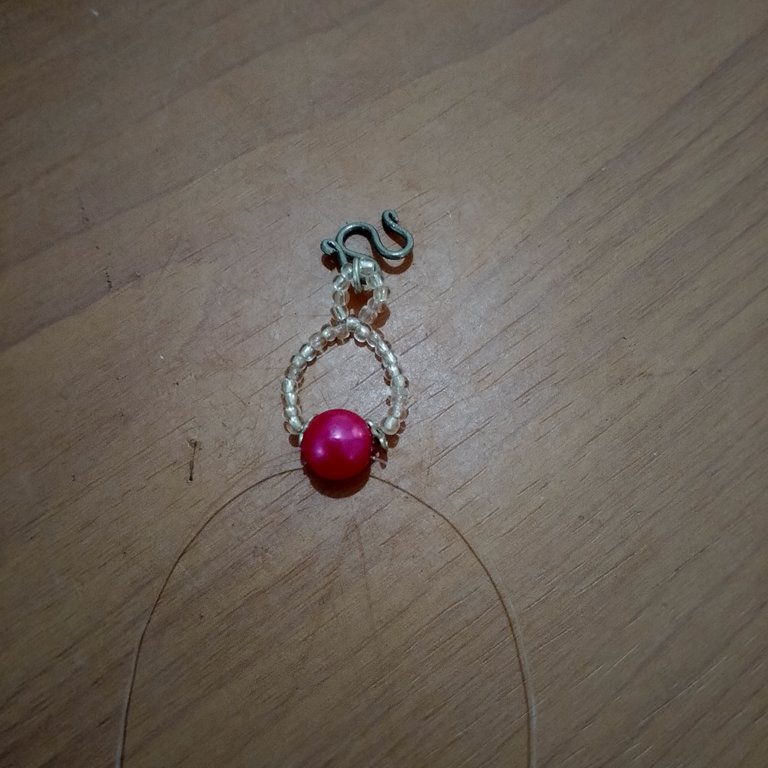
En el nylon insertamos 5 mostacillas transparentes, el broche, 5 mostacillas transparentes más y cruzamos por una nueva mostacilla transparente. En cada lado del nylon agregamos 10 mostacillas transparentes, un separador en forma de flor color plateado y cruzamos por una nueva perla de color rosado oscuro.
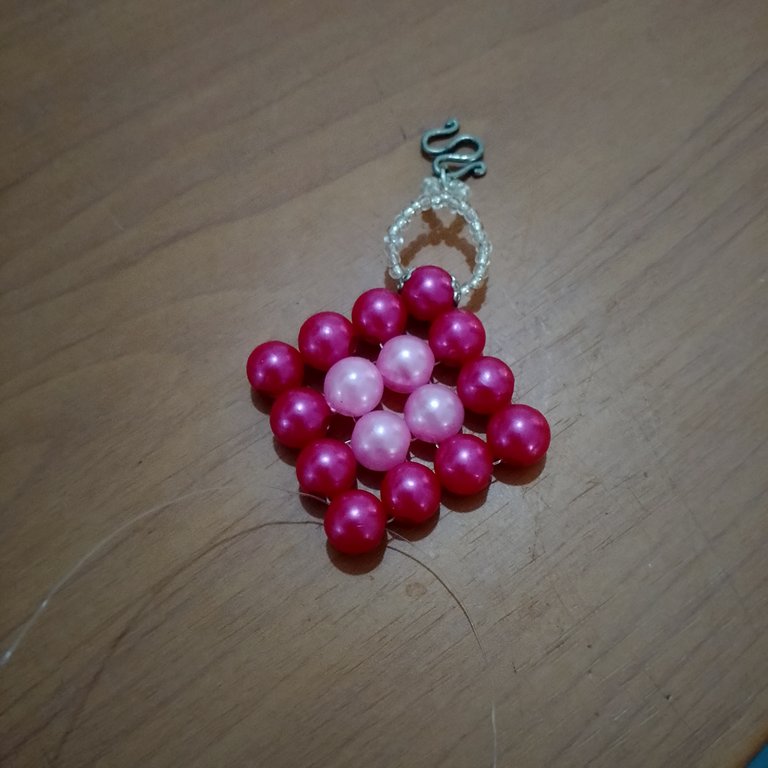
En cada nylon insertamos una perla de color rosado oscuro y cruzamos por una nueva perla de color rosado claro, luego en cada nylon agregamos una perla de color rosado claro, 3 perlas de color rosado oscuro y pasamos el nylon nuevamente por la primera perla de color rosado claro, quedándonos así un aro de perlas en cada nylon. Cruzamos los nylon por una perla de color rosado claro, insertamos en cada nylon nuevamente una perla de color rosado oscuro y cruzamos por una nueva perla de color rosado oscuro.
Volvemos a insertar en cada nylon una perla de color rosado oscuro y cruzamos por una nueva perla de color rosado claro, luego en cada nylon agregamos una perla de color rosado claro, 3 perlas de color rosado oscuro y pasamos el nylon nuevamente por la primera perla de color rosado claro, quedándonos así un aro de perlas en cada nylon. Cruzamos los nylon por una perla de color rosado claro, insertamos en cada nylon nuevamente una perla de color rosado oscuro y cruzamos por una nueva perla de color rosado oscuro. Repetimos esto dos veces más.
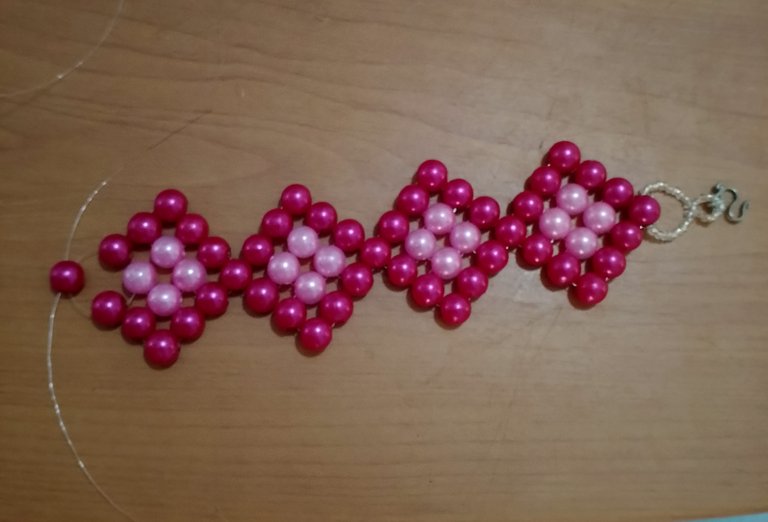
En cada nylon añadimos un nuevo separador en forma de flor de color plateado, 10 mostacillas transparentes y cruzamos por una nueva mostacilla transparente, en uno de los nylon insertamos 5 mostacillas transparentes, la argolla, 5 mostacillas transparentes más y pasamos el nylon por la mostacilla del cruce anterior. Con el resto del nylon repasamos las mostacillas y las perlas hasta llegar nuevamente al inicio para darle estabilidad a la pulsera, anudamos bien y cortamos el nylon sobrante.
Que Dios los Bendiga a todos 🙏
Feliz noche y
Feliz y Bendecido año nuevo 2025
- Fotos de mi autoría y fueron tomadas con un celular Infinix Hot 40i
- Traductor usado: DeepL
- Edición de fotos y separadores hechos con la app Editor de fotos Canva.

Hello dear friends of Hive and this beautiful DIYHub community, I hope you have had a happy start of the year 2025. Today I want to share with you a new design for a pink pearl bracelet, this time I have made the bracelet with a diamond design where the center is light pink and the outside is dark pink. In this bracelet I have used for the first time the flower shaped spacers and you will surely wonder why, it is not an aesthetic issue, it is because the beads were going inside the pearl so I had to use them, still it is something different that complemented the design of the bracelet.
Materials:
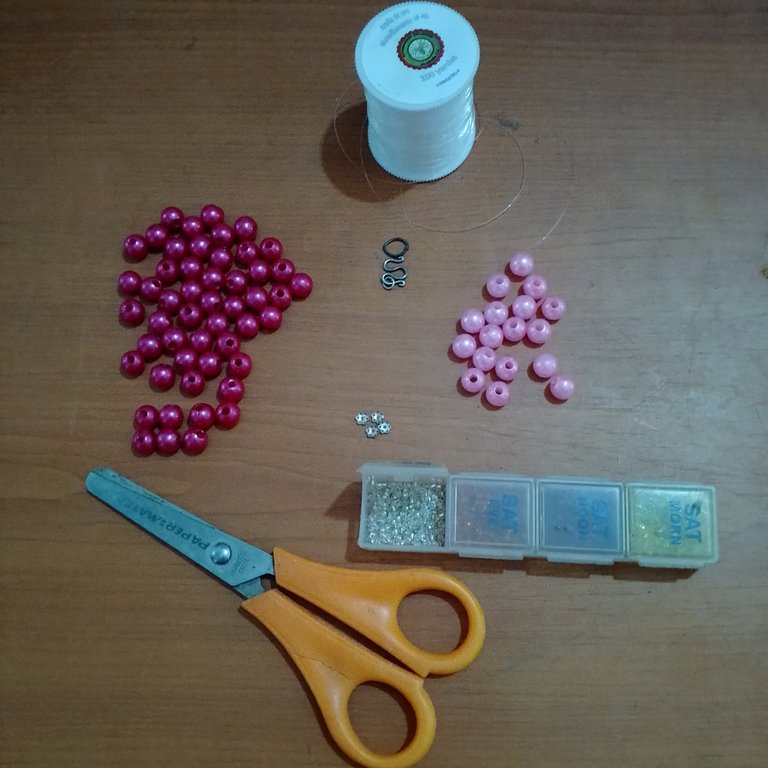
💖Dark pink medium sizedbeads
💖Light pink medium sized beads
💖Clear beads
💖2 silver colored flower shaped spacers
💖Bring and clasp
💖1,5mt of 0,4 nylon
Procedure
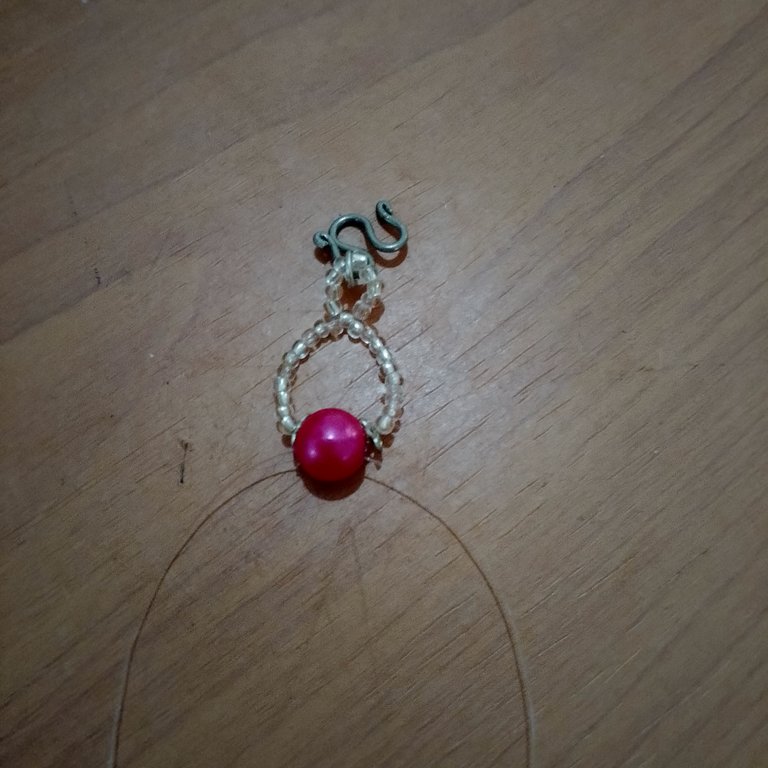
In the nylon we insert 5 transparent beads, the brooch, 5 more transparent beads and cross through a new transparent bead. On each side of the nylon we add 10 clear beads, a silver colored flower shaped spacer and cross through a new dark pink bead.
In each nylon we insert a dark pink bead and cross through a new light pink bead, then in each nylon we add a light pink bead, 3 dark pink beads and pass the nylon again through the first light pink bead, leaving a ring of beads in each nylon. We cross the nylons through a light pink bead, insert in each nylon again a dark pink bead and cross through a new dark pink bead.
We insert again in each nylon a dark pink bead and cross through a new light pink bead, then in each nylon we add a light pink bead, 3 dark pink beads and pass the nylon again through the first light pink bead, leaving a ring of beads in each nylon. We cross the nylons through a light pink bead, insert in each nylon again a dark pink bead and cross through a new dark pink bead. Repeat this two more times.
In each nylon we add a new silver colored flower-shaped separator, 10 clear beads and cross through a new clear bead, in one of the nylons we insert 5 clear beads, the ring, 5 more clear beads and pass the nylon through the bead of the previous crossing. With the rest of the nylon we go over the beads and pearls until we get back to the beginning to give stability to the bracelet, knot well and cut the excess nylon.
May God Bless you all 🙏
Happy night and
Happy and Blessed new year 2025
- Photos of my authorship and were taken with a cell phone Infinix Hot 40i
- Translator used: DeepL
- Photo editing and separators made with the app Canva Photo Editor.
Lovely bracelet friend, it looks so beautiful. There’s no feeling like being able to create things by ourselves without spending above our budget.
Hermosa pulsera,los rombos en dos colores se ven geniales,gracias por compartir.
!DIY
You can query your personal balance by
!DIYSTATS