Hello friends!
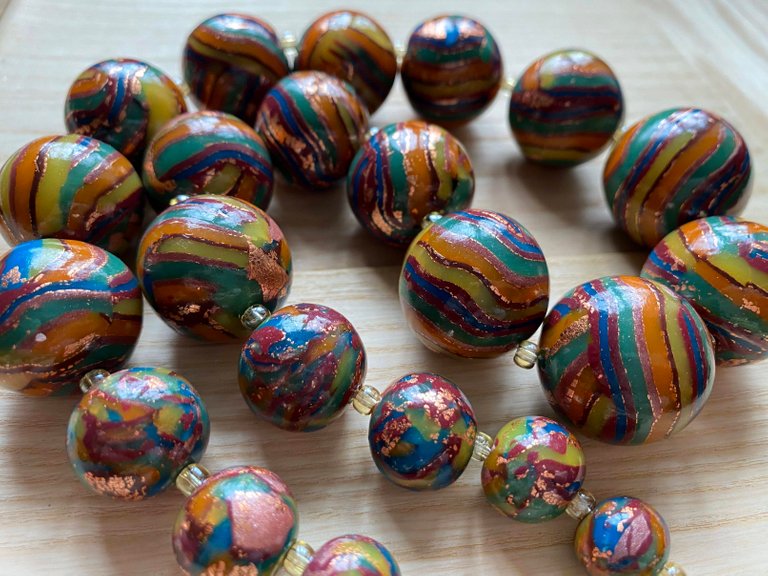
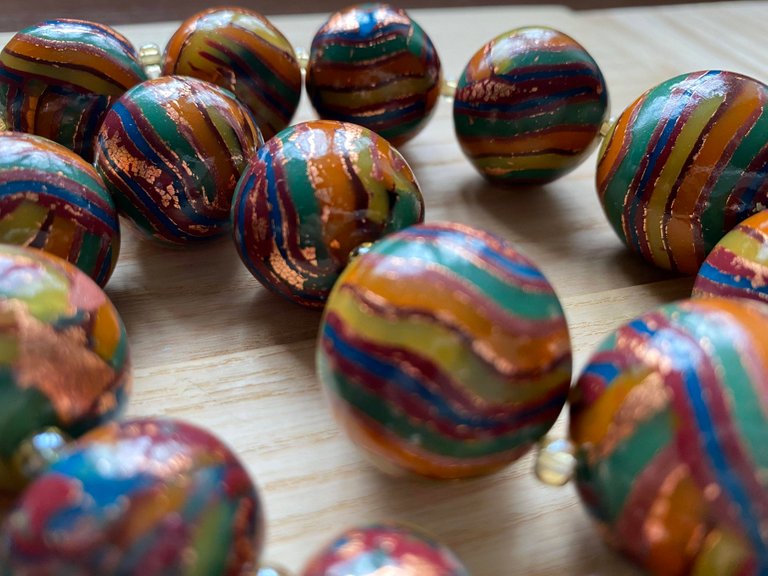
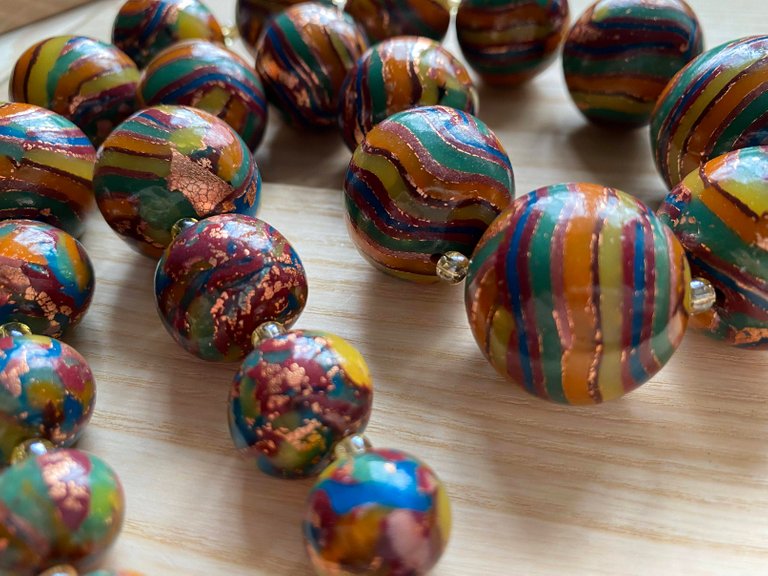
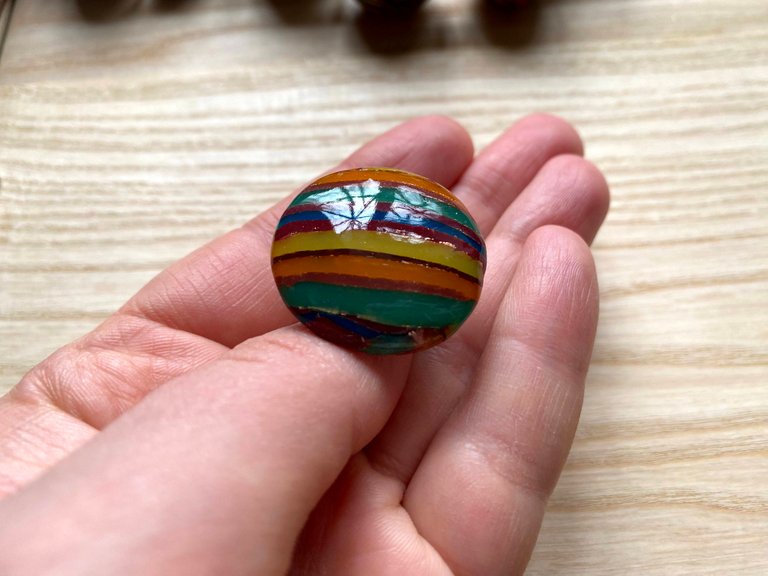
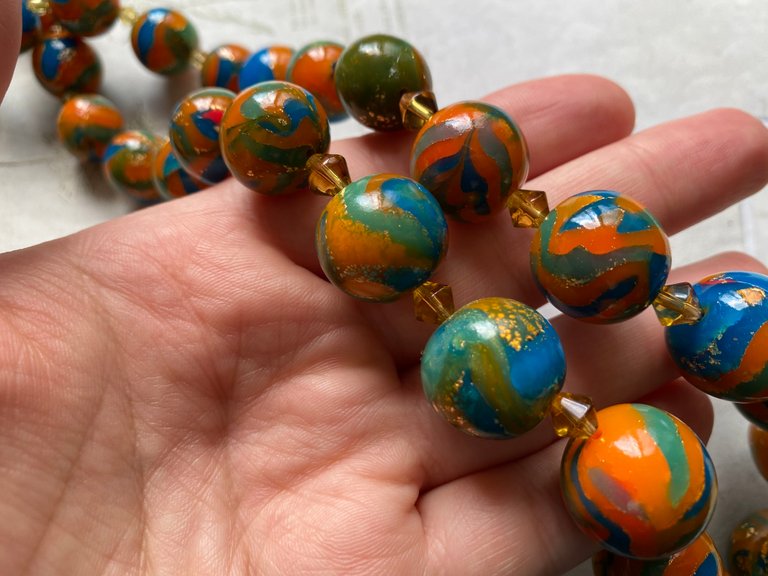
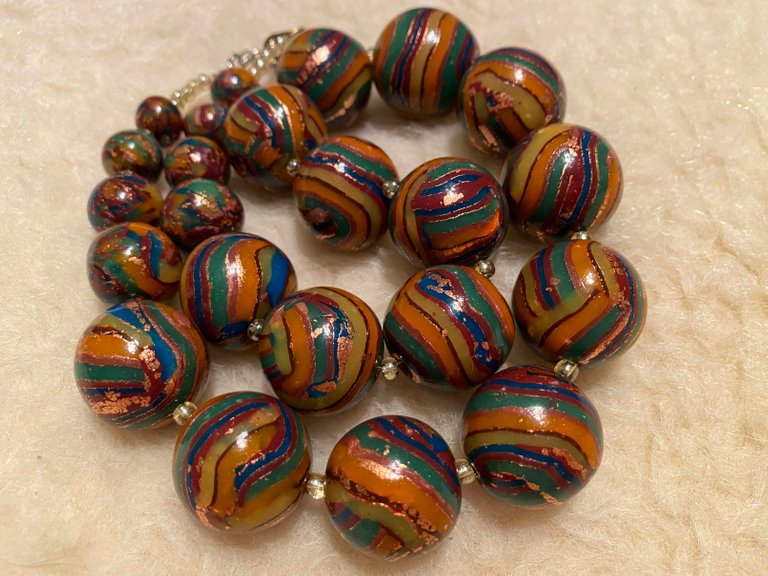
Today I want to show you my new work - these are beads made in a style that resembles Murano glass. Since in my work I used polymer clay with a translucent effect, I managed to achieve this result.
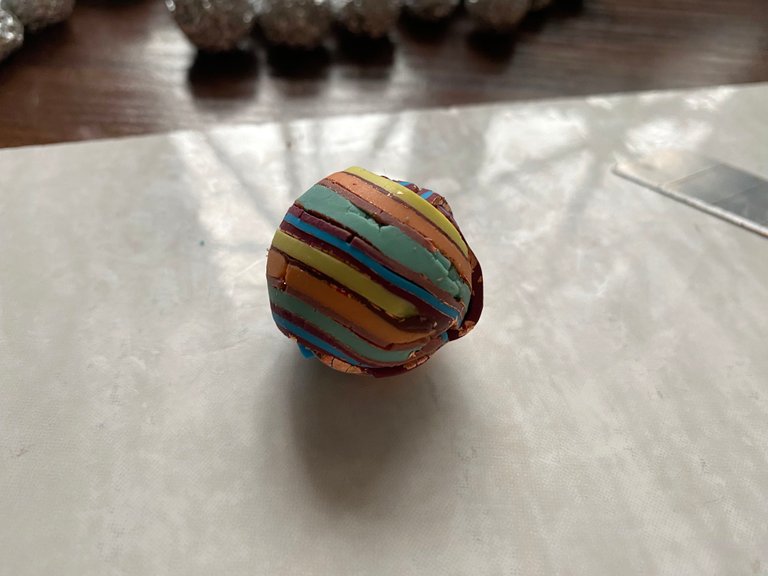
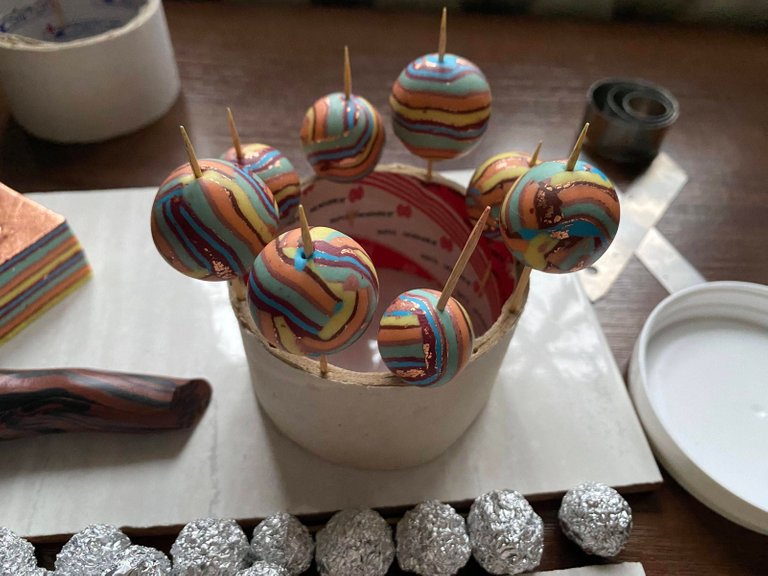
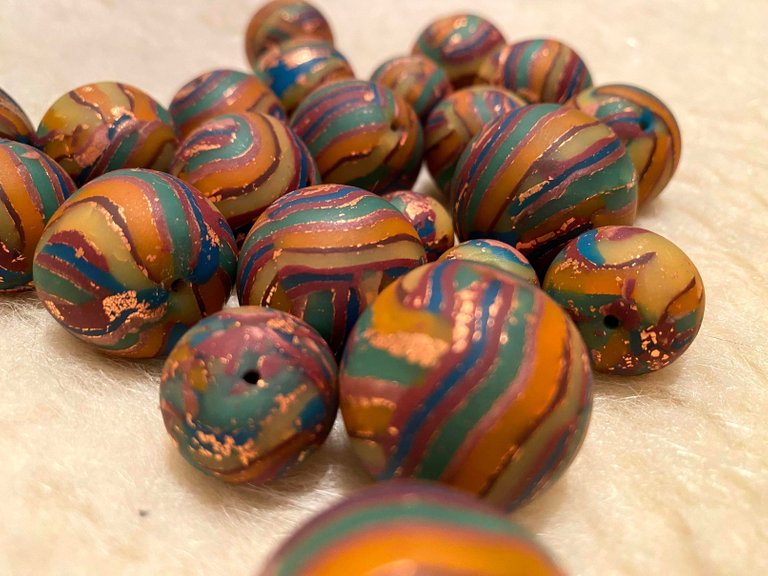
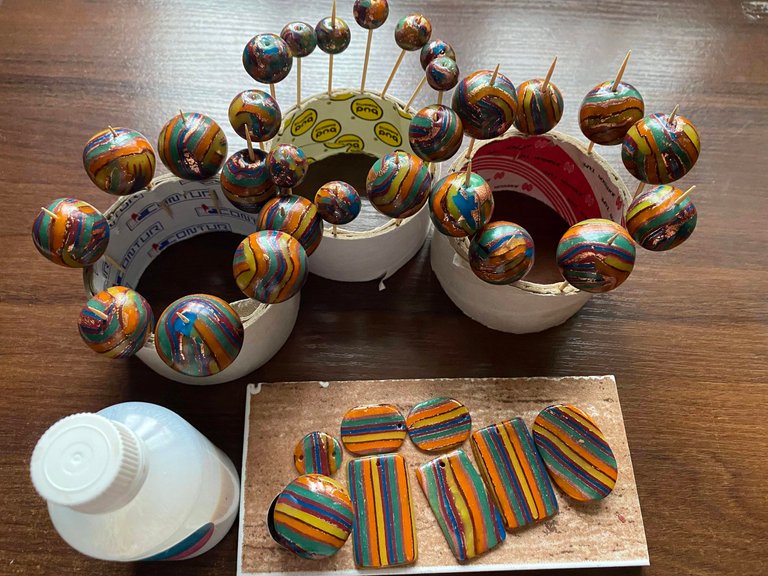
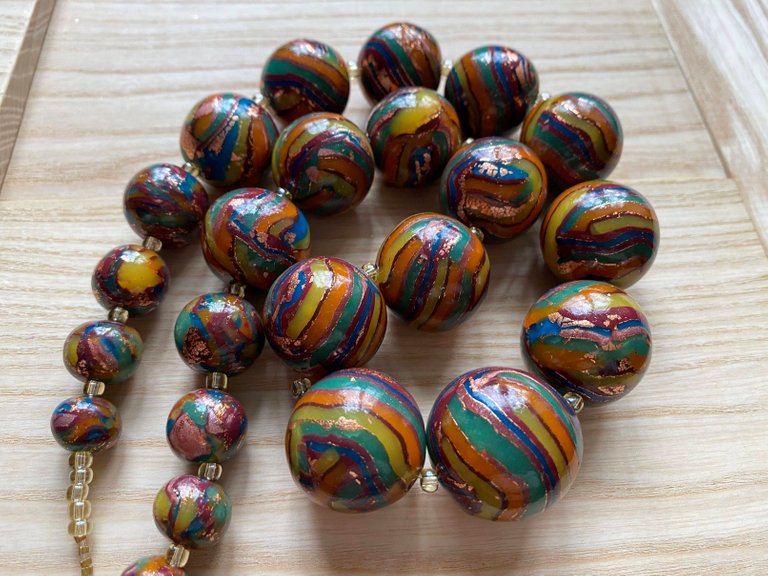
This is what the beads look like:
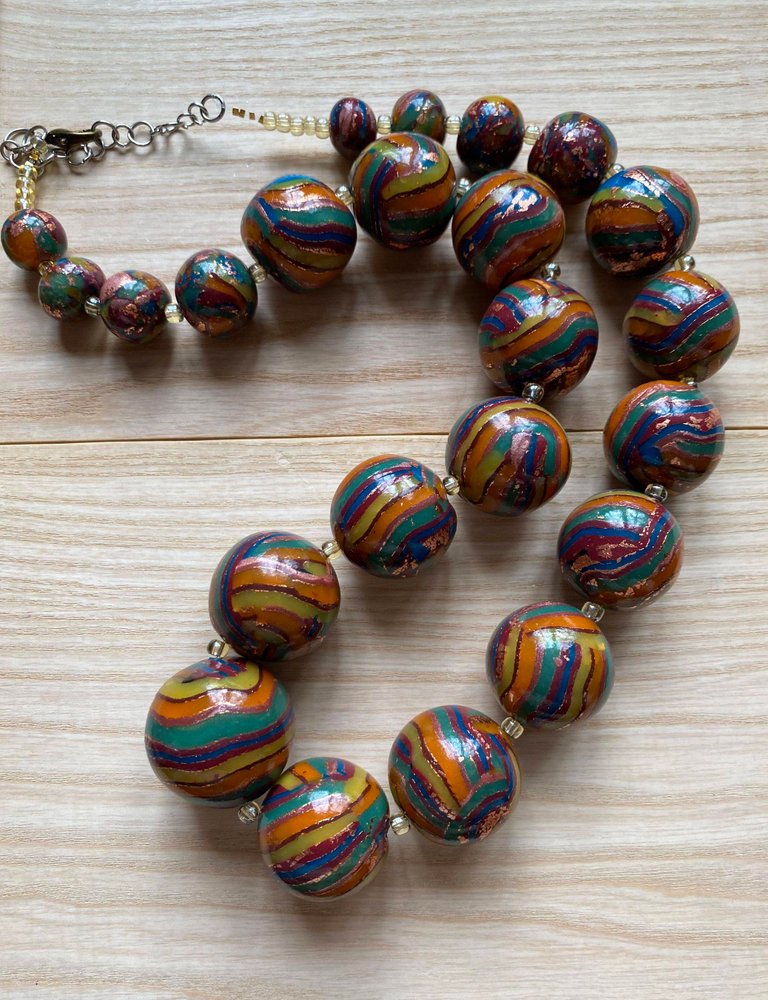
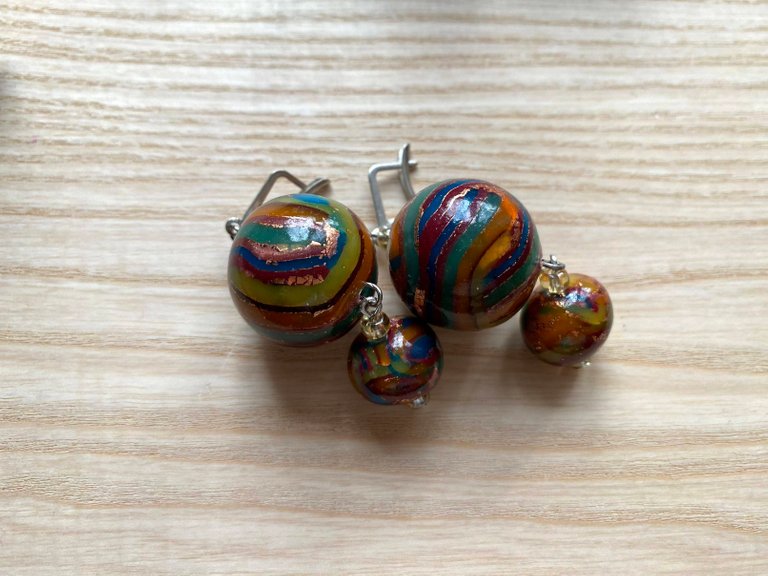
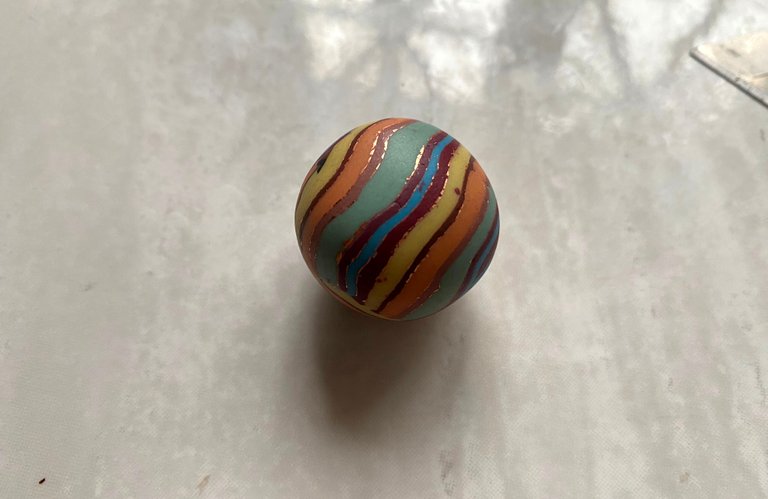
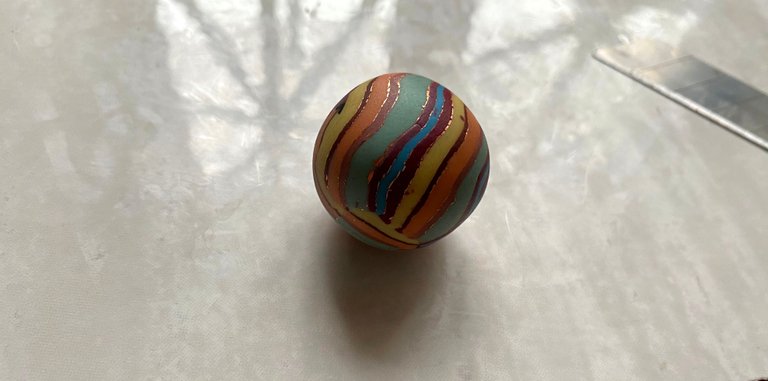
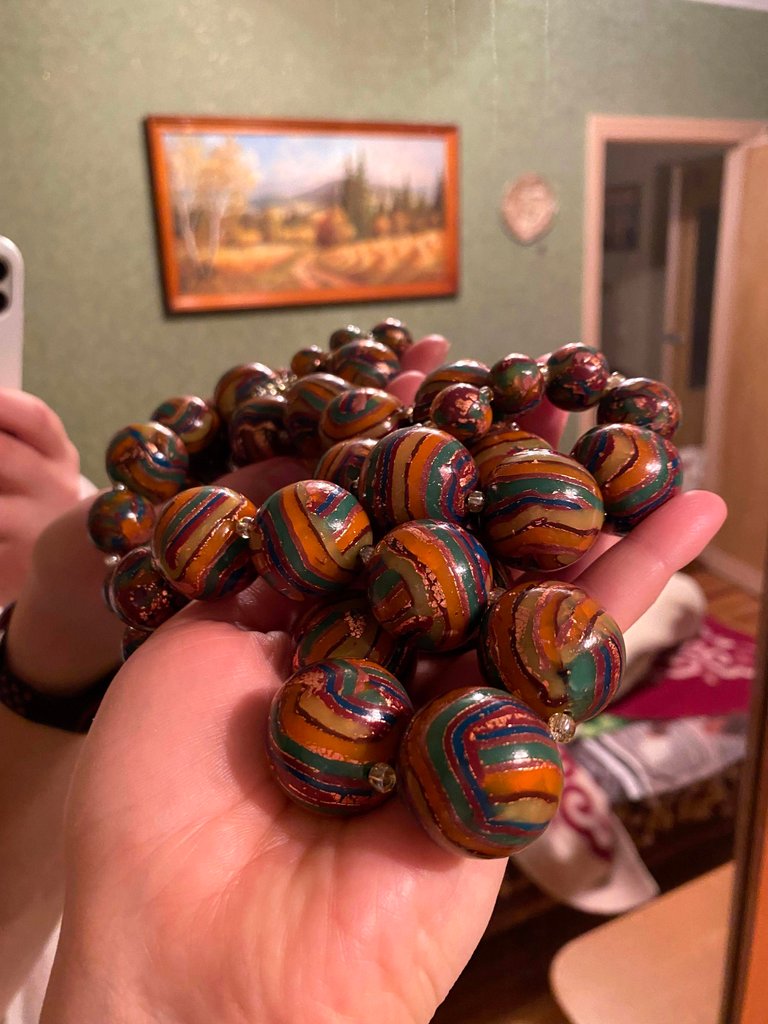
Another one of my works in the same technique:
But let me tell you about everything in order :)
Murano glass has glorified Italy as the birthplace of a unique craft. For many centuries, it has not gone out of fashion, but only gaining popularity. It was Venice that gave the world artistic glass. No one has yet been able to surpass the Venetian masters. Murano glass carries a daring spirit of creativity, a unique philosophy, history and unique style. In the production process, the craftsmen do not use synthetic dyes. The colors of the products are given by natural minerals, which are added in the form of a powder to the initial mixture: lapis lazuli, alexandrite, malachite, garnet and others. Iron oxide stains the glass mass green, copper oxide gives a red tone, tin oxide milky white, an admixture of gold - ruby, cobalt - blue. Gold and silver tones are achieved by adding gold and silver grains of sand. Murano glass, thanks to unique decoration techniques, a variety of shapes and unique shades, makes the product lively and emotional.
There are a variety of techniques for making Murano glass, but I tried to make these beads look like agate Murano glass - glass, the layers of which are differently arranged and differently colored, make up patterns like agate.
Polymer clay is a unique material for creativity, because it can be used to make products in completely different styles, as well as create works that will imitate natural materials, minerals, and so on.
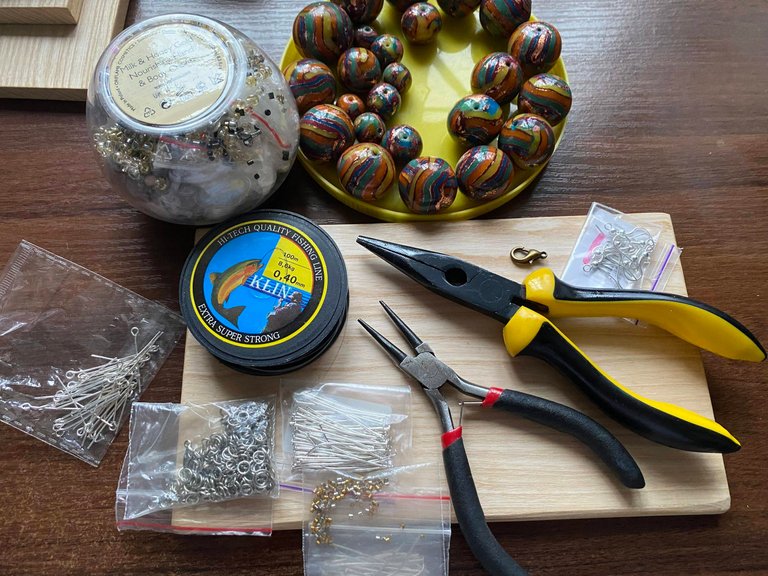
Required Tools and Materials
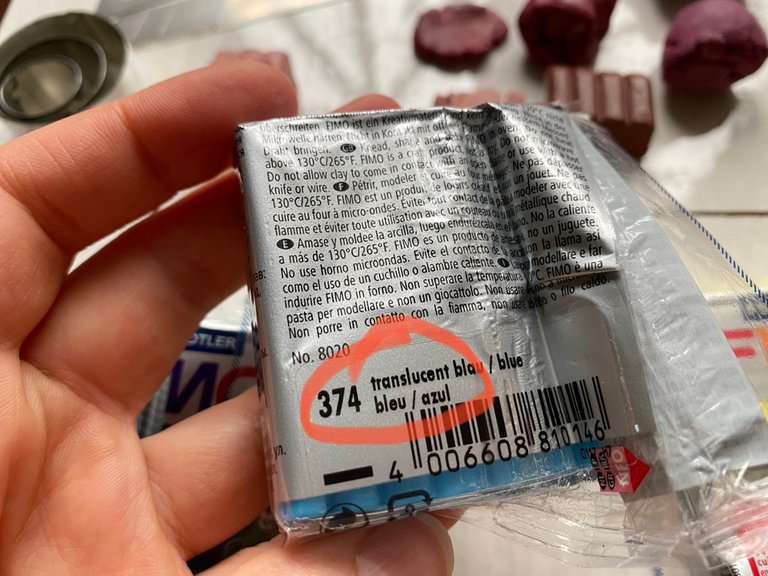
I want to draw your attention to the fact that the main material that I used is polymer clay. It comes in different brands, and its properties may vary. These beads require regular opaque polymer clay, but also mandatory translucent effect polymer clay.
I also want to emphasize separately that you will need a special varnish for polymer clay. All the charm of these beads opens after baking and varnishing in 2-3 layers.
To work you will need:
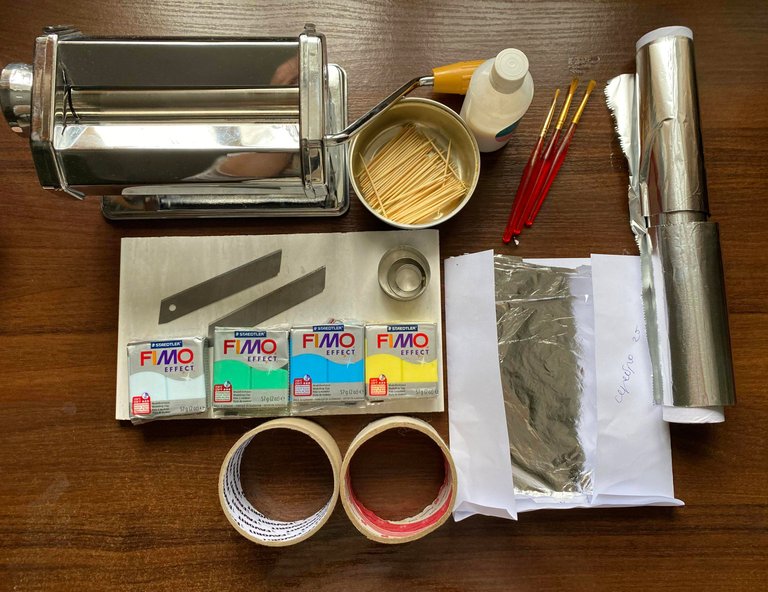
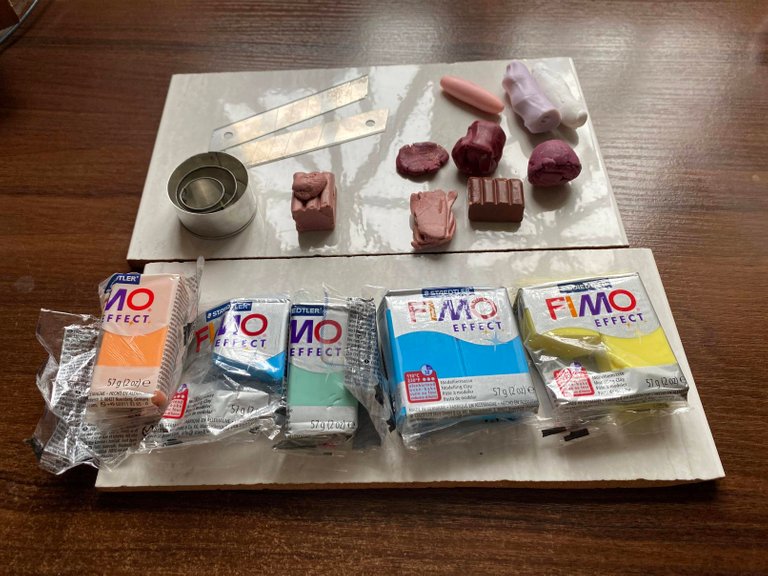
- polymer clay
- work surface (glass or sheet of paper, tile). For many years I have been using the most ordinary tile for work. It is convenient to work on it and then you can bake decorations in the oven.
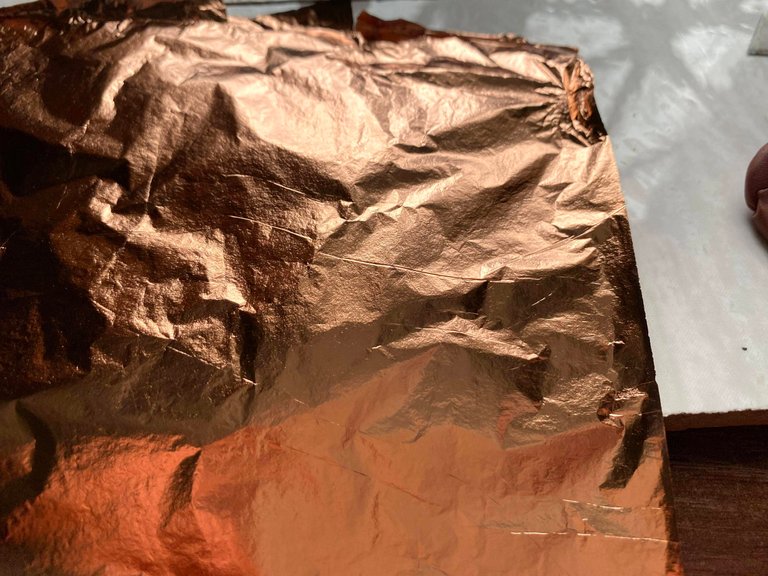
- potal (the thinnest foil available at a nail supply store or art store)
- pasta machine or rolling pin
- stationary knife, blade or scalpel
- toothpicks
- regular baking foil
- varnish for polymer clay
- brushes
- Cardboards from scotch tape or dish sponge (used to stick toothpick beads into them)
- wet wipes to wipe hands and clean up debris in the process
- oven. Polymer clay jewelry is always baked in the oven. Basically, the baking temperature is 100-130 degrees (for different manufacturers of polymer clay, the baking temperature is different, so you need to carefully look at the packaging). Baking time - up to 30 minutes. Well, if your oven has a convection mode, then the decorations will bake evenly and be very durable in use.
- pliers or half nose pliers for assembling and attaching fittings
- accessories for assembling jewelry
- line
- beads or beads for additional decor
Difficulty level: This technique is suitable for those who have at least a little experience in sculpting from polymer clay. It will be difficult for a beginner to cope.
Working time: Bead molding takes about 3 hours. Varnishing and assembly of the finished product will take another 1.5-2 hours.
Step 1
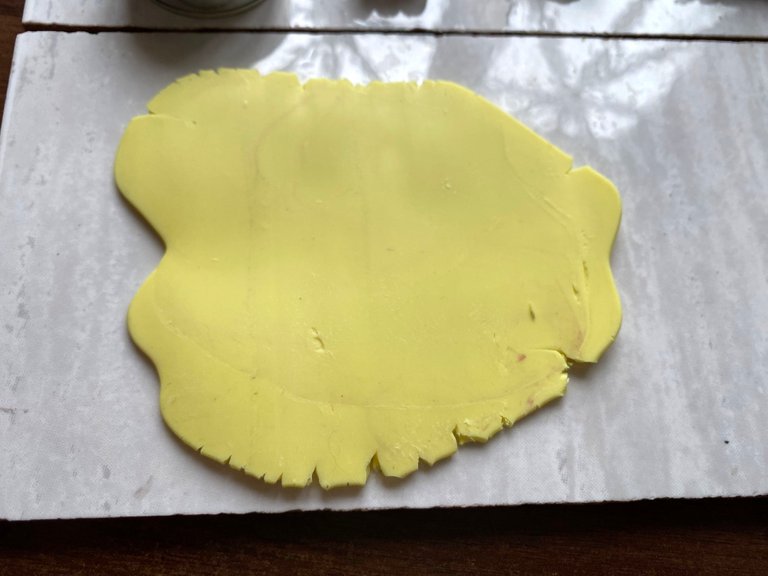
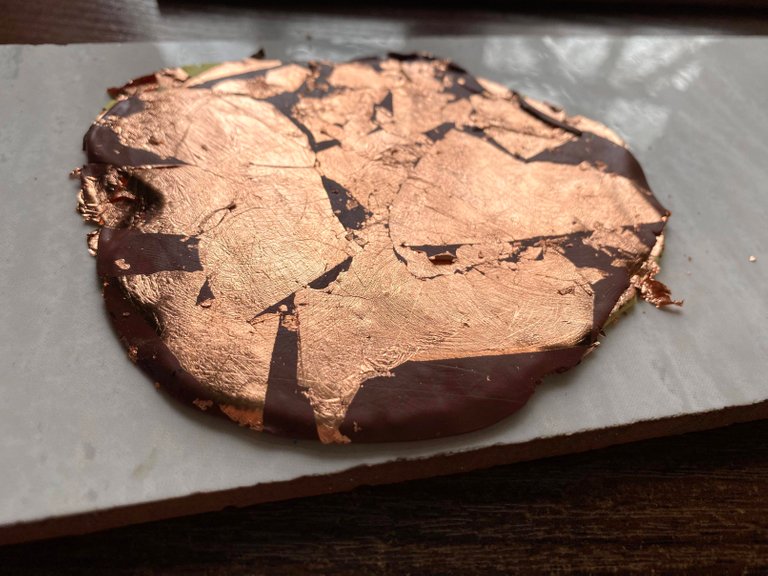
I roll out polymer clay of a lemon translucent color into a layer about 2 mm thick.
I want to draw your attention to the fact that next I rolled out all the colors of polymer clay into layers of different thicknesses. This is necessary so that the finished product looks more interesting and the desired "agate" effect is obtained.
Step 2

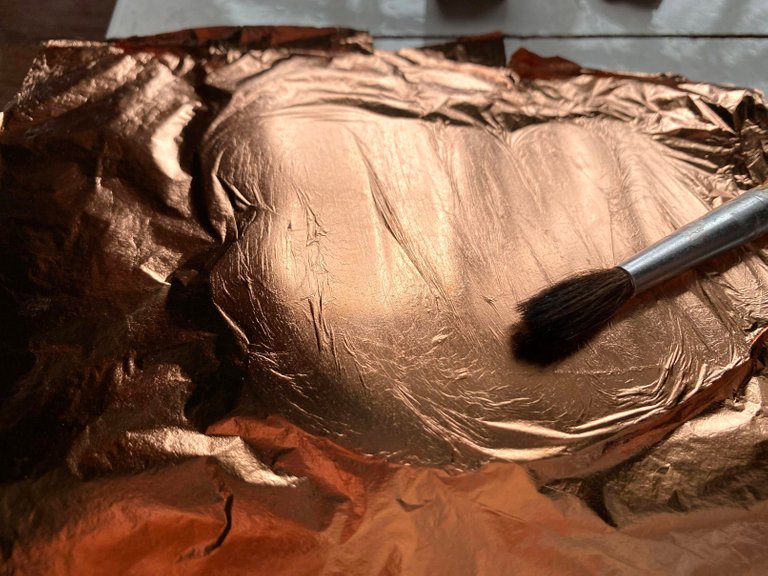
I put a potal on a layer of polymer clay and smooth it gently with a brush. Potal adheres very well to polymer clay. If it breaks a little in the process, it's okay, you can put the pieces on clay.
Step 3
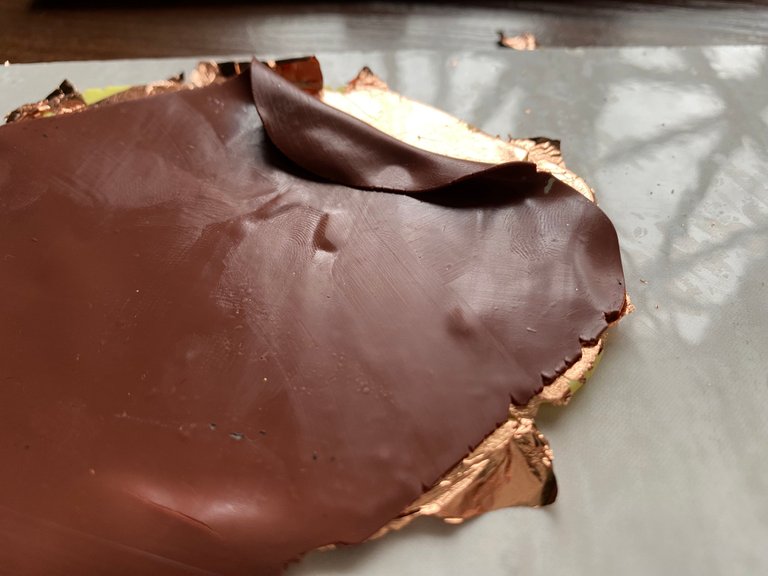
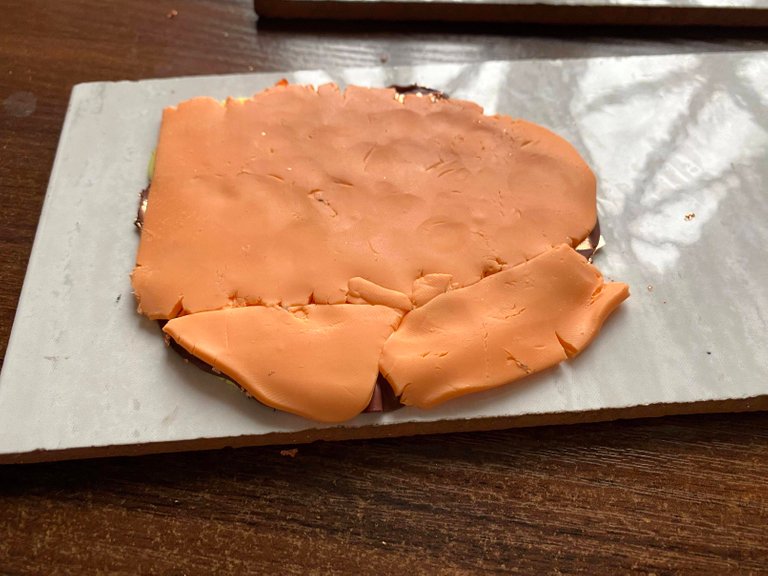
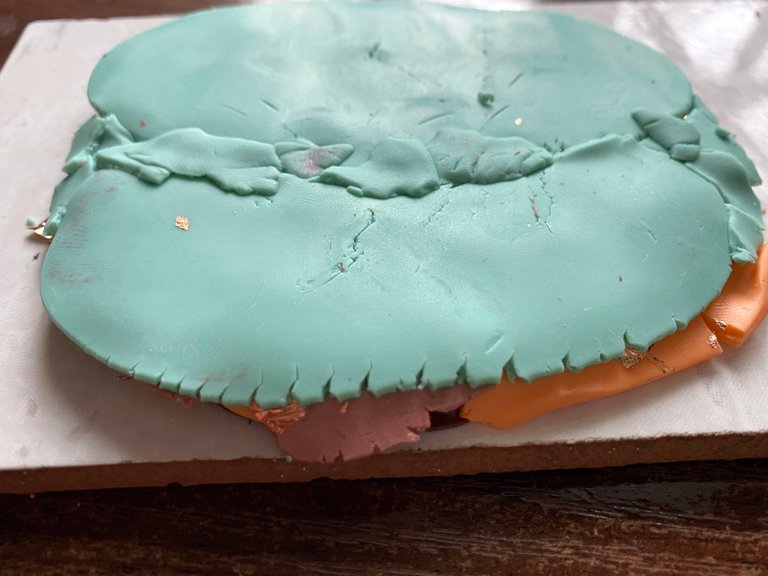
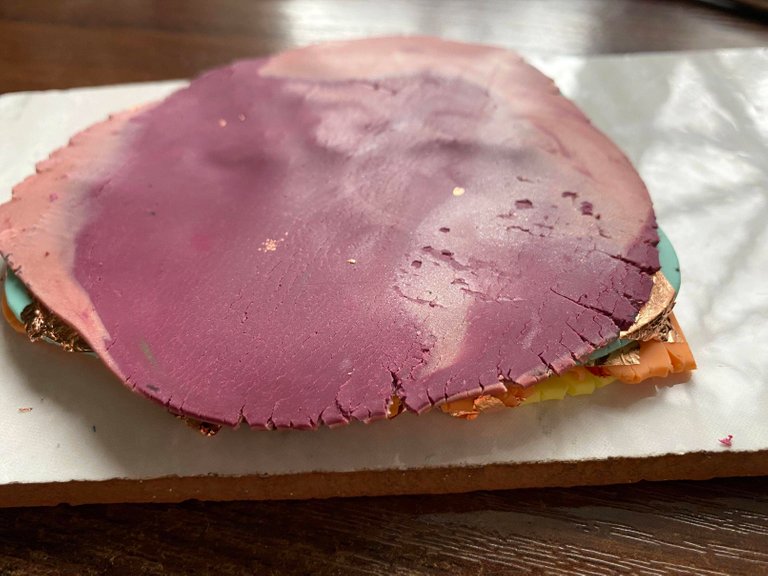
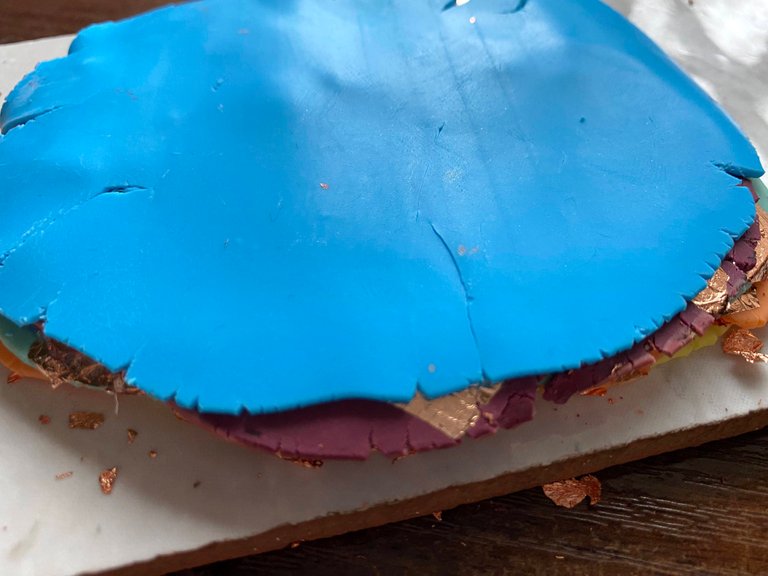
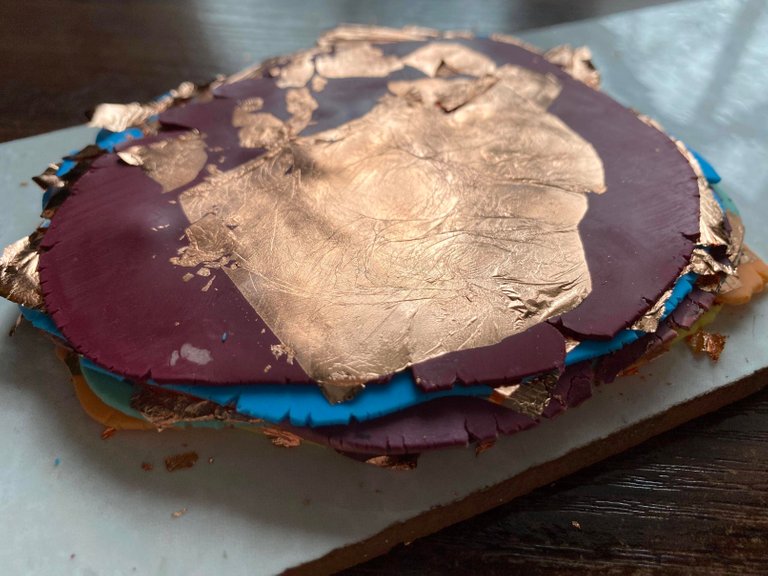
I continue to alternate layers of different colors of polymer clay with potal. I think that the process is clear from the photo.
Step 4
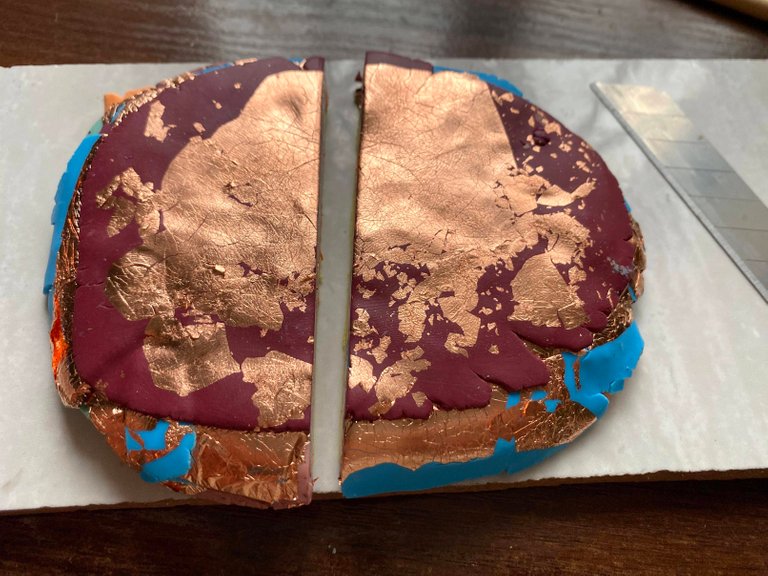
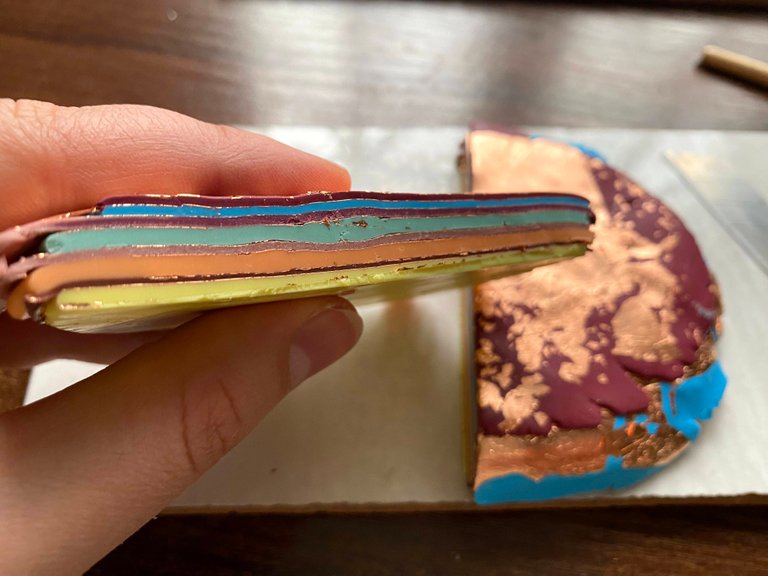
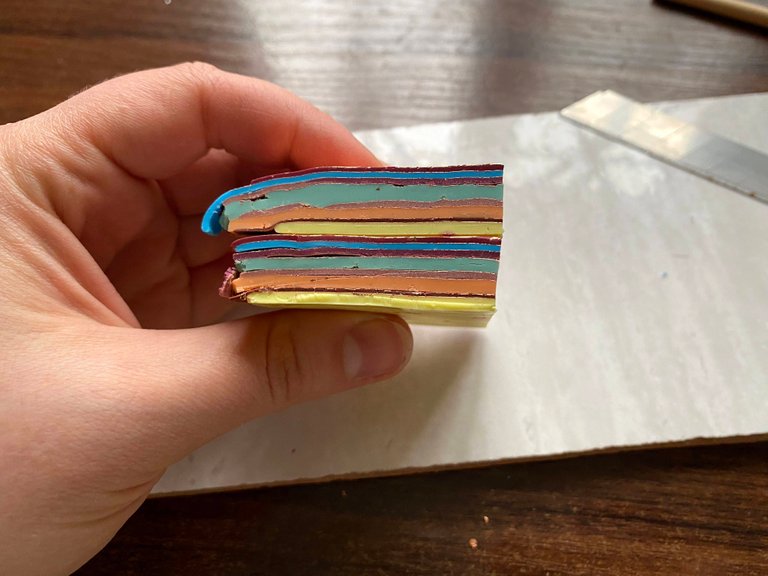
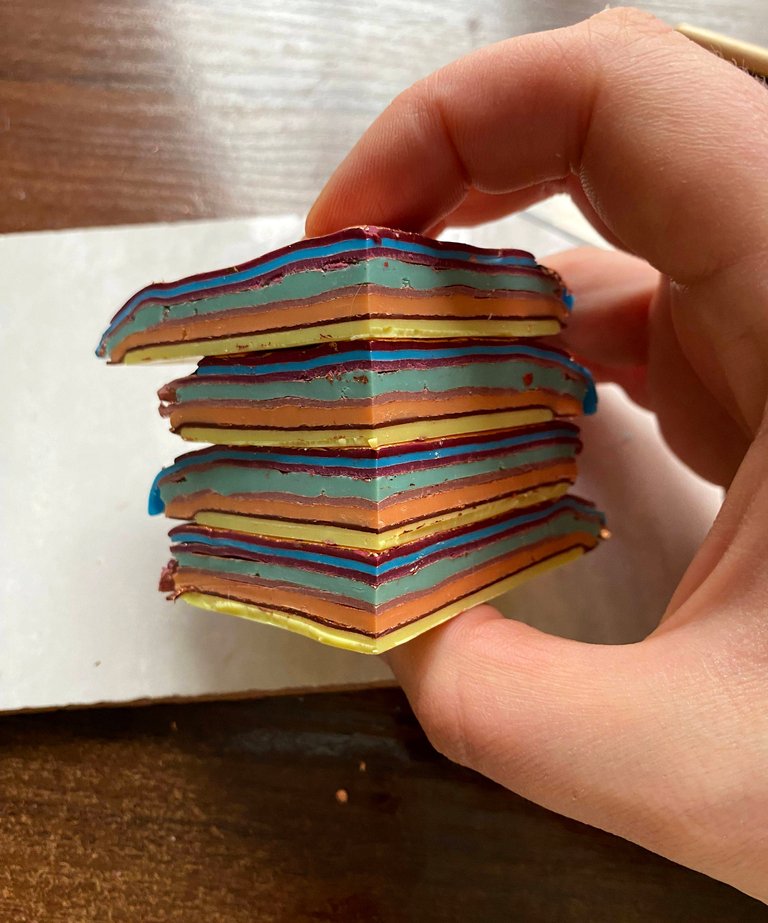
I cut the resulting "cake" into 4 parts and put them one on top of the other.
Step 5
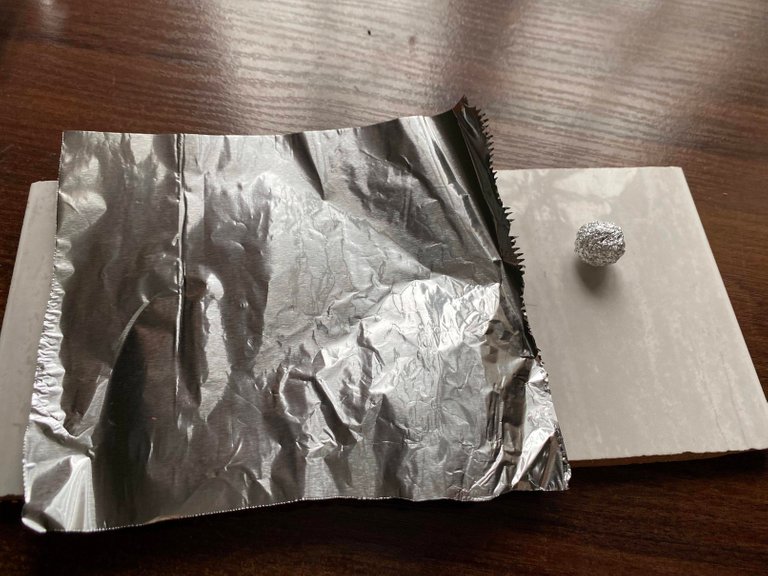
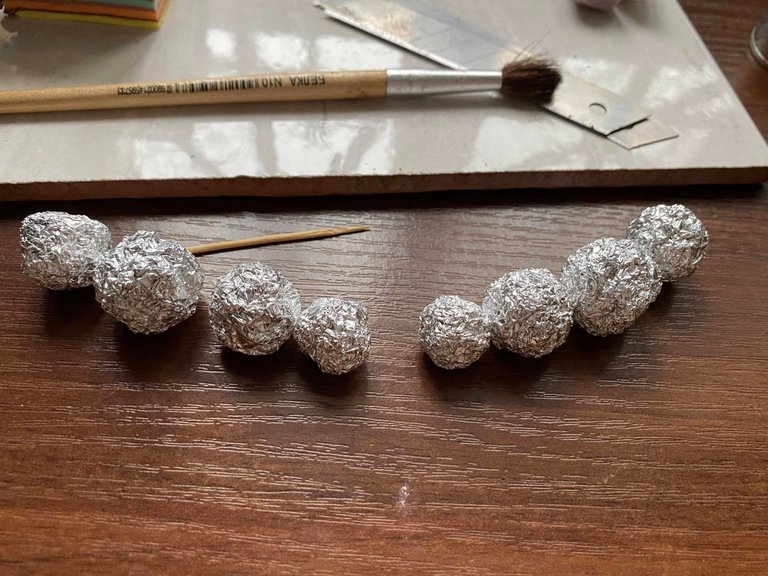
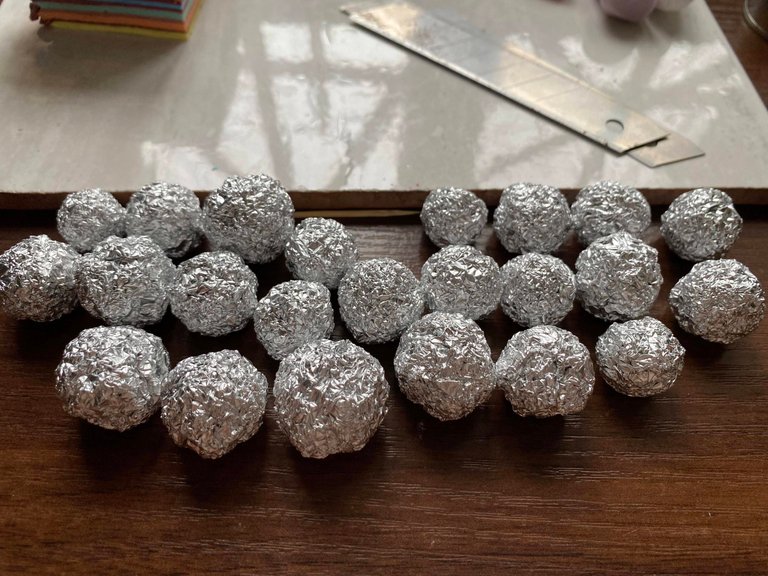
I prepare the centers for future beads by rolling small balls of different sizes from ordinary baking foil. You can not do this, but sculpt beads only from clay. But, when a foil ball is inside the bead, this has advantages, because polymer clay is saved this way, the finished product is not so heavy, and also, when baking, the foil heats up and the bead is evenly baked inside and out.
Step 6
Next, you need to wrap the foil balls with a thin layer of polymer clay. You can use polymer clay of any color or a mixture of sculpting residues, as this layer will not be visible.
Step 7
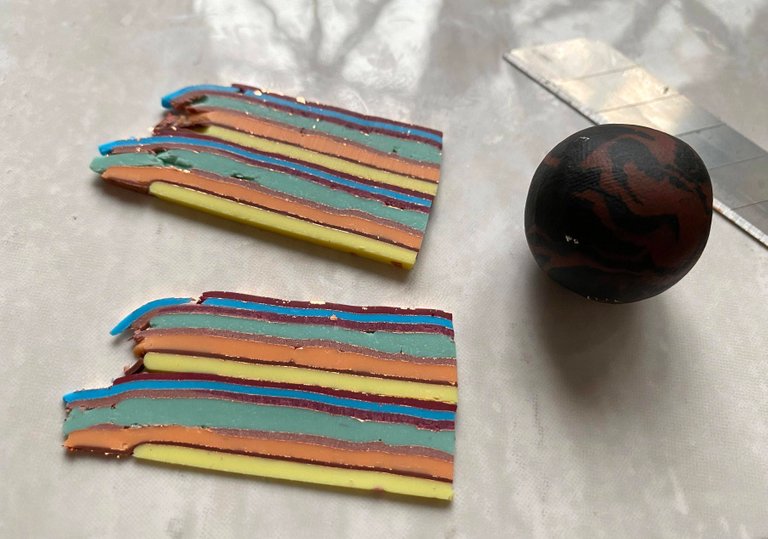
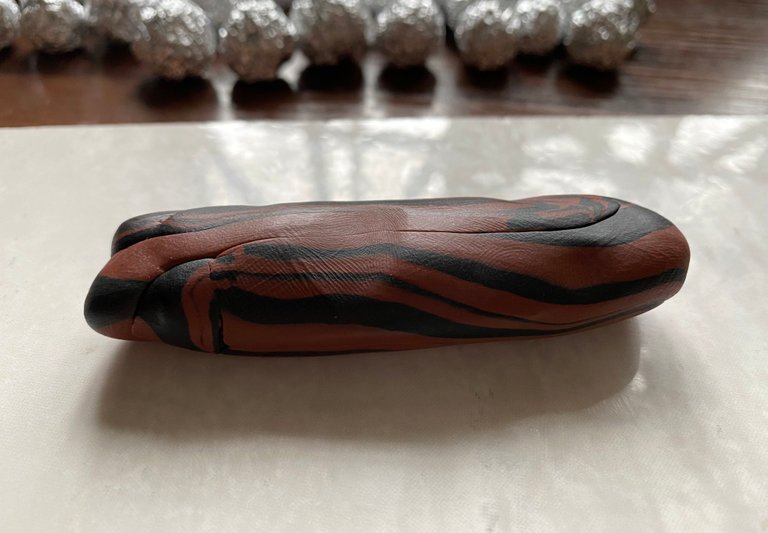
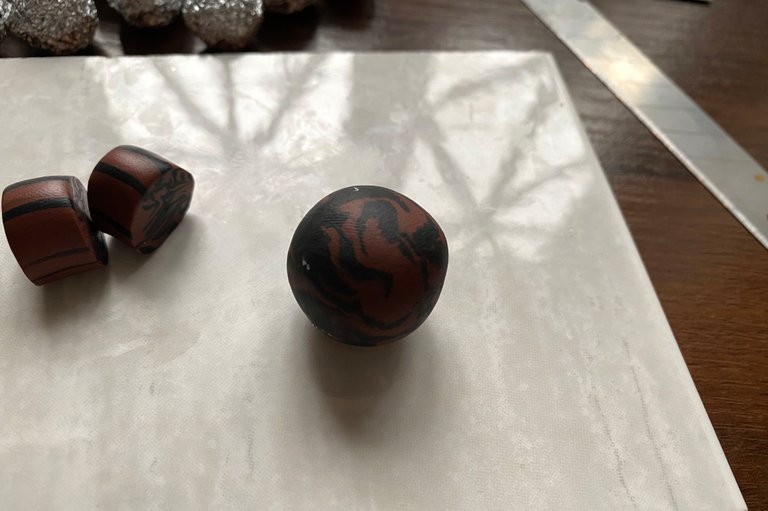
Bead formation. I cut off thin strips from a colored striped layer, with which I wrap the bead from all sides. I roll the ball in my hands until all the cracks are smoothed out.
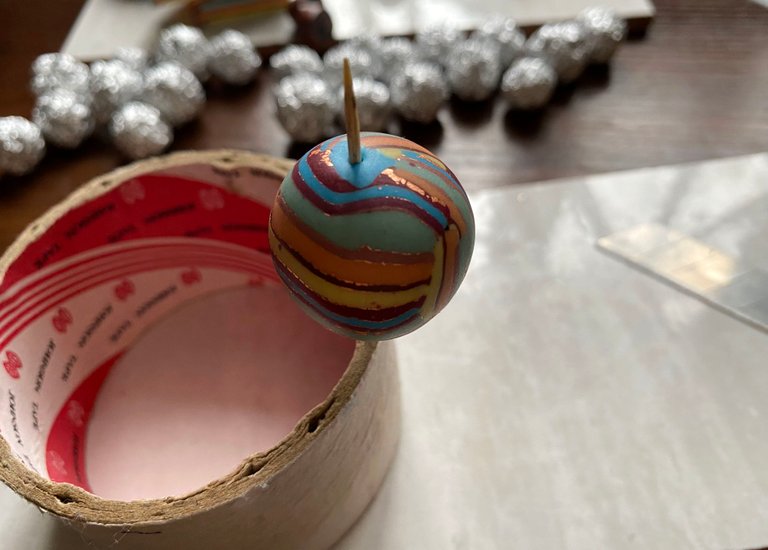
When the bead is even and round, I make a hole in it with an ordinary toothpick. I don't take out my toothpick.
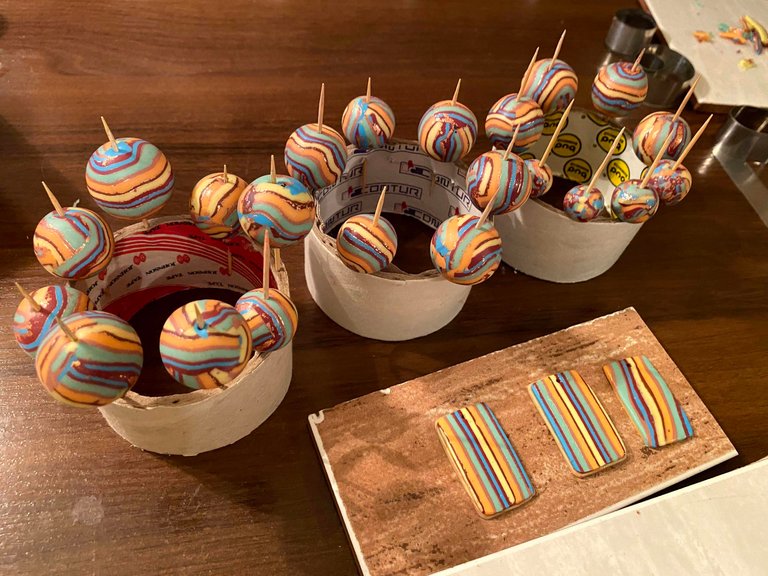
I like to use ordinary round tape boxes for baking beads. It is convenient to stick toothpicks with beads into them.
Step 8
Baking beads in the oven. Each brand of polymer clay has its own temperature and baking time, so you need to be careful and follow the instructions on the package.
Pay attention to how the beads became after baking. The translucent clay changed its color and the translucent effect began to appear.
Important! When you take the beads out of the oven, you need to remove the toothpicks from them while the beads are still warm. If the bead cools down completely together with the toothpick, it happens that it is simply impossible to remove the toothpick later and you will have to drill it out with a drill. Therefore, in order not to add unnecessary work and grief to yourself, it is better to get toothpicks on time, that is, from still warm beads.
Step 9
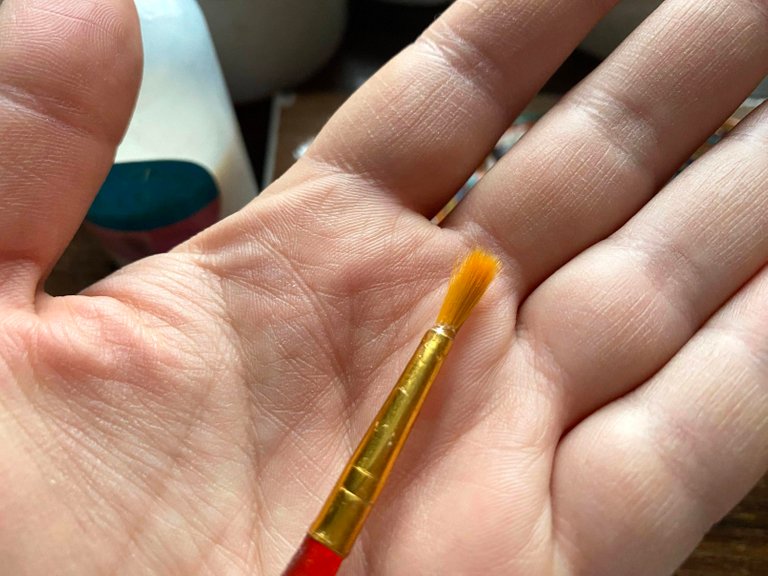
Lacquering. To do this, use a special varnish for polymer clay and a regular brush.
You need to varnish the beads in 2 or 3 layers, because one layer is not enough to reveal their beauty.
Only after the varnish has dried will you see the full picture and beauty of this sculpting technique.
Step 10
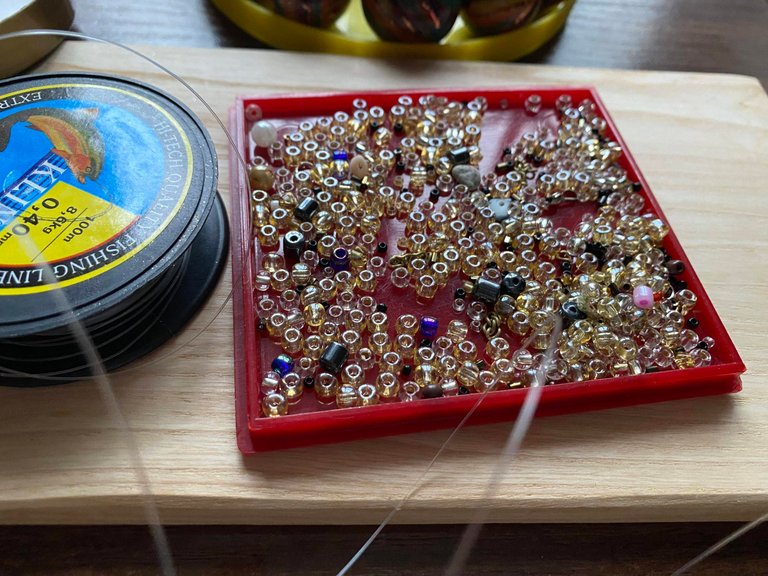
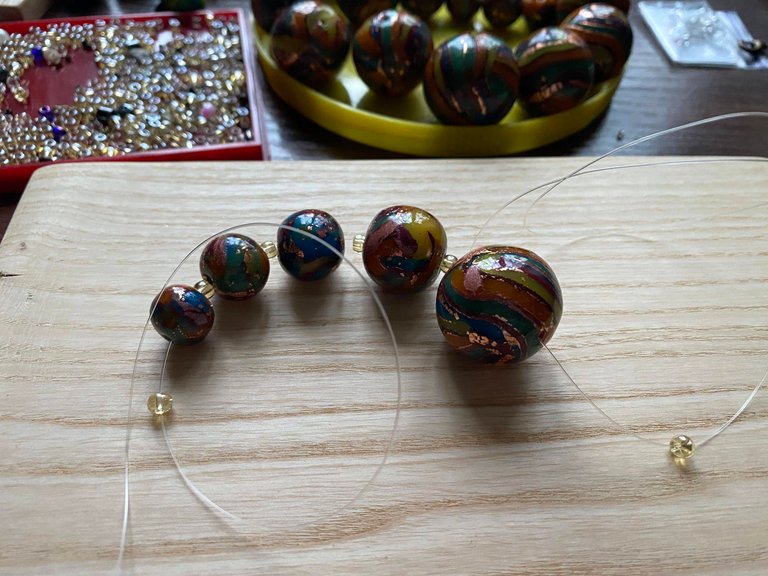
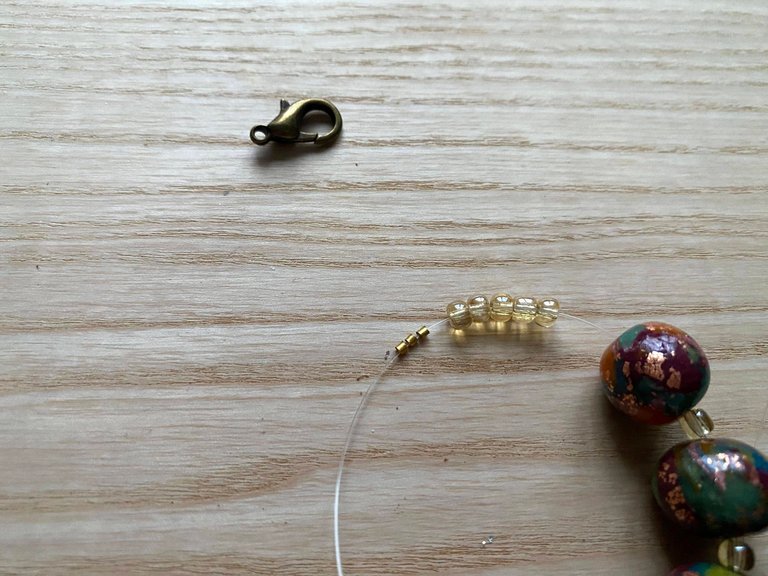
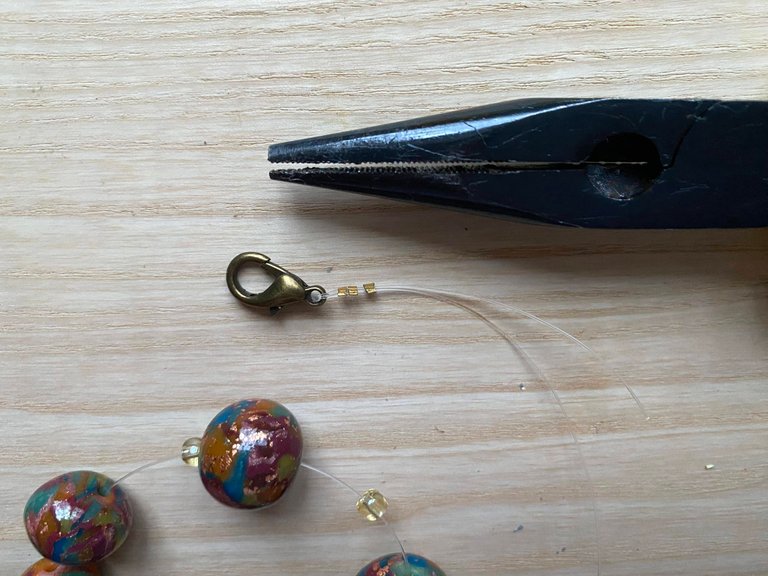
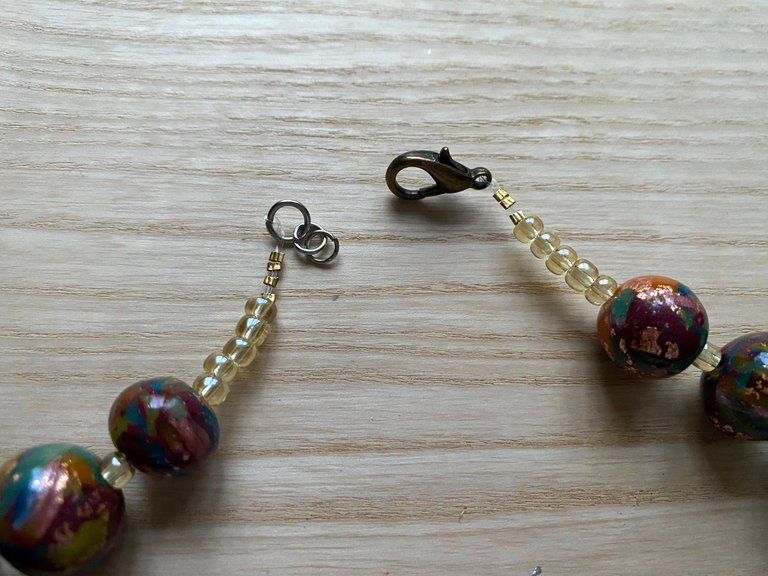
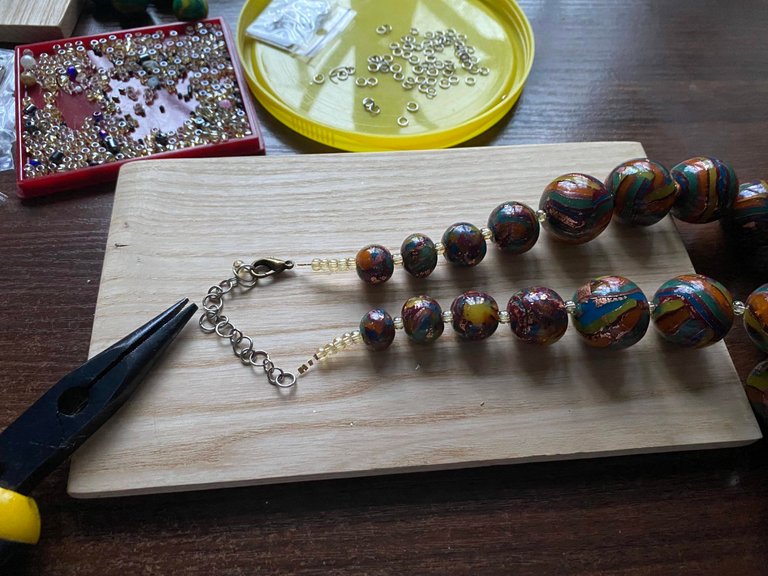
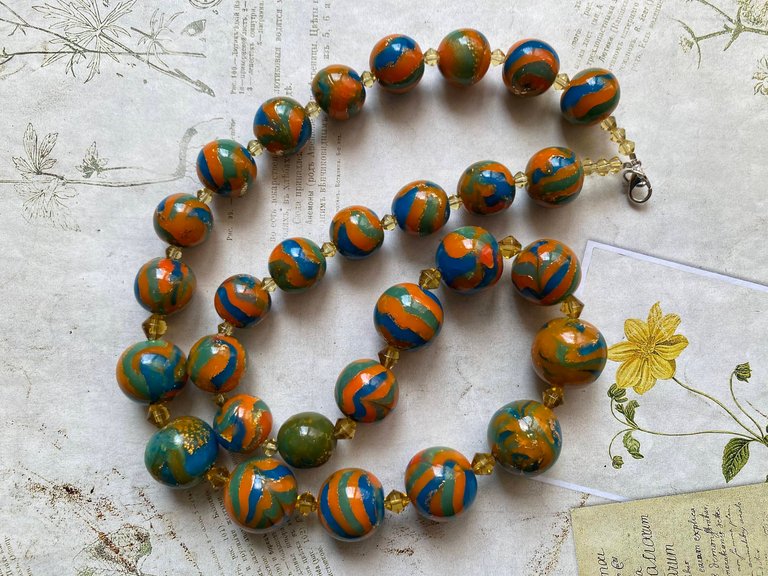
Product assembly. I collected beads on an ordinary fishing line. The photo shows how I designed the lock on the product - in order for the carabiner lock to hold well, I used three metal clips or crimps on both sides. Crimps look like very small cylindrical metal beads, they are put on a fishing line, and then clamped with pliers.
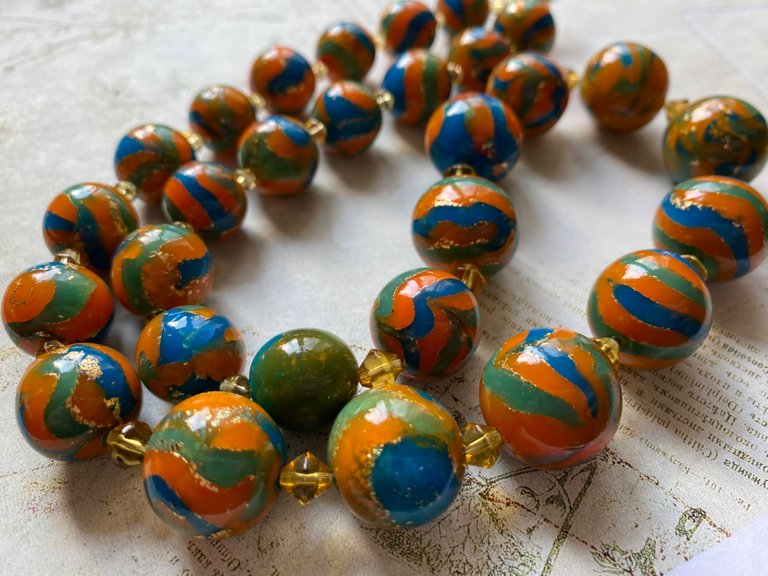
That's all! Beads are ready! They have an interesting feature - in different lighting, due to the fact that I used a lot of different colors, they look different. Therefore, I add photos in electric and natural light.
I wish you all creative success and inspiration!!!
Thank you for attention!
Best regards, @elenka
The rewards earned on this comment will go directly to the people( @dayadam ) sharing the post on Twitter as long as they are registered with @poshtoken. Sign up at https://hiveposh.com.
Спасибо большое!
💕
🌻🌻🌻
Simplemente hermoso, gracias por compartir este proceso
¡Muchas gracias! Estoy muy complacido)
De nada
:)
Thank you for sharing this post in the DIYHUB Community!
Your content got selected by our fellow curator sharminmim & you just received a little thank you upvote from us for your great work! Your post will be featured in one of our recurring compilations which are aiming to offer you a stage to widen your audience within the DIY scene of Hive. Stay creative & HIVE ON!
Please vote for our hive witness <3
Thanks to!!! I am glad that you liked my handiwork and master class.
I wish the whole team success! Thank you for your work supporting the authors
Congratulations @elenka! You have completed the following achievement on the Hive blockchain And have been rewarded with New badge(s)
Your next target is to reach 900 comments.
You can view your badges on your board and compare yourself to others in the Ranking
If you no longer want to receive notifications, reply to this comment with the word
STOPTo support your work, I also upvoted your post!
Check out our last posts:
Support the HiveBuzz project. Vote for our proposal!
Дякую!
Будь ласка, @elenka
До речі, ми дуже цінуємо вашу підтримку нашої попередньої пропозиції про фінансування, але термін її дії закінчився!
Чи можемо ми попросити вас переголосувати нашу пропозицію, щоб наша команда могла продовжити цей рік?
Ви можете зробити це на Peakd, ecency, [Hive.blog](https:/ /wallet.hive.blog/proposals) або за допомогою HiveSigner.
https://peakd.com/me/proposals/248
Дякую!
Un trabajo maravillosos amiga, me encanto esa combinación de colores. Te felicito @elenka 💕
¡Gracias, muchas gracias por su atención y el elogio de mi trabajo! ¡¡¡Muy agradable!!!
It so amazing, it really really perfect of you I love the handwork, it is so nice but hard for those who don't know how to give a start with of it weldone
Thank you very much for your kind words!!! I hope that my work will inspire creative people and encourage them to try something new in their work) I sincerely wish you success!!!😊
!hiqvote
Thank you very much!
@danielhuhservice, the HiQ Smart Bot has recognized your request (5/5) but the daily limit has been reached or the mana is too low. Try again later.
As a consolation, @elenka gets !PIMP from @hiq.redaktion.
For further questions, check out https://hiq-hive.com or join our Discord. And don't forget to vote HiQs fucking Witness! 😻
Aw man @hiq.smartbot, you are out of PIMP to slap people.
Go Stake some more and increase your PIMP power.
(We will not send this error message for 24 hours).
Read about some PIMP Shit or Look for the PIMP District
Wow! I have left out of words, speechless! I had no idea about the creation process of these beads... They look great!!!
Great job! A lot of creativity is needed for something like this...
I have picked this post on behalf of the @OurPick project which will be highlighted in the next post!
Thank you very much dear friend!!! I thank you for such encouraging words, it is very important for me now.
I wish you a wonderful mood and all the best and most beautiful in life and work!
Yay! 🤗
Your content has been boosted with Ecency Points, by @anri-avgustino.
Use Ecency daily to boost your growth on platform!
Support Ecency
Vote for new Proposal
Delegate HP and earn more
Thank you!!!
wow, your skills are very good and the steps you make are very detailed.
Thank you so much! I'm very glad that you liked my work. Everyone can learn this, all that matters is desire and a little patience)))
I wish you good mood!
you're welcome, you're right everyone can do it as long as there is a separate belief.
Wow! I didn't know we can make beads by ourselves. I must try it with my daughter. Thank you for showing the process 😊
I am very glad that my article was useful for you! Thank you very much for your feedback, it means a lot to me. Joint creativity is something that brings people together! Be sure to try to make beads together)
I wish you a wonderful creative mood!!!