¡Hola hivers!💜
Espero que se encuentren bien y felices. Tiempo sin pasar por aquí por esta maravillosa comunidad de crafters. Para este San Valentin, estuve buscando ideas para regalarle a mi amorcito. Quería que fuera algo bonito, delicado, que le gustara mucho y que lo hiciera sentir consentido. Así que buscando inspiración me encontré con un ramo de carritos hot wheels. Nunca había hecho un ramo pero investigue al respecto y me arriesgue, asi que les cuento como fue el proceso:

MATERIALES
Papel coreano
Cinta adhesiva
Palitos de madera (también llamados palitos de altura)
Anime o un oasis
Cinta de raso
Hilo chino o cinta muy delgada
Exacto o cutter
Silicone frio
Carrito hot wheels
Galletas (opcional)
Tarjeta (opcional)
PASO A PASO
 |  |
|---|
PASO 1
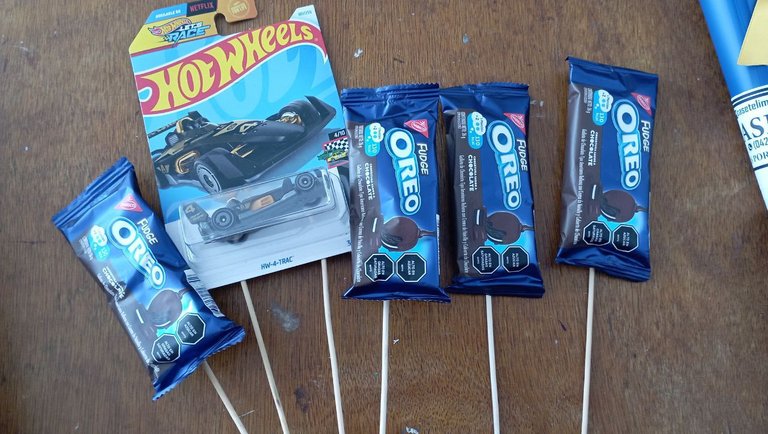
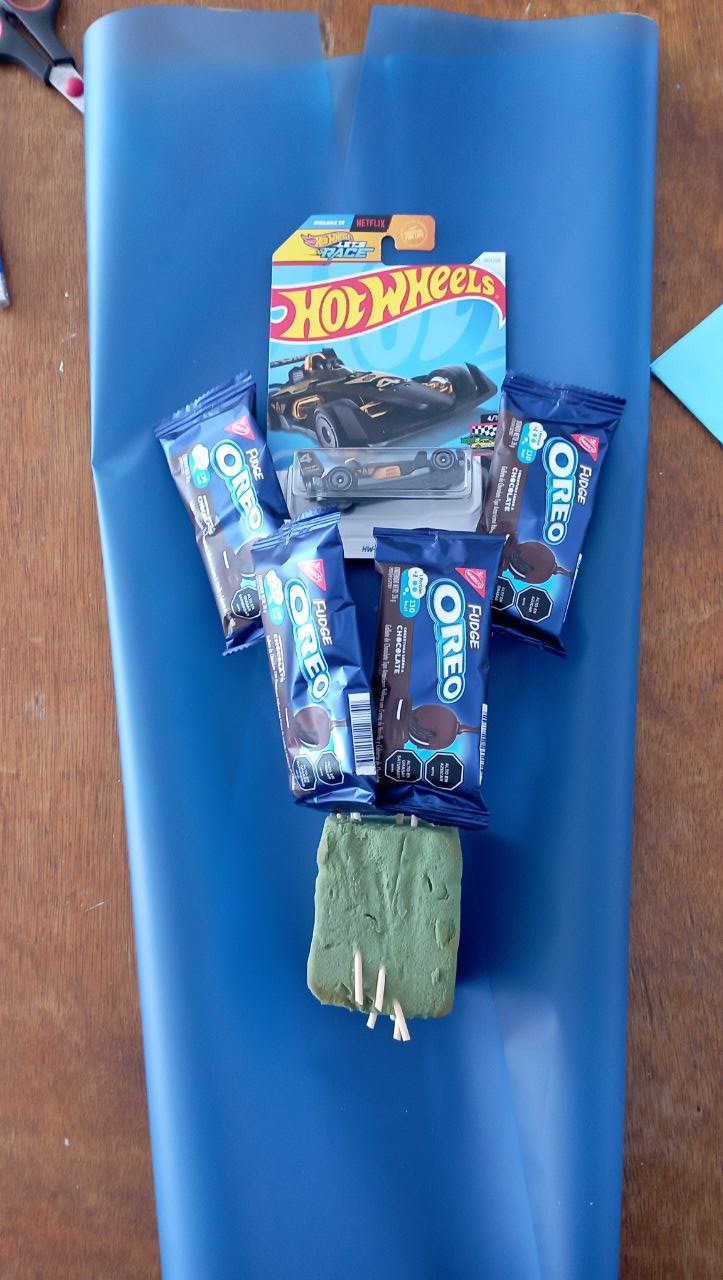
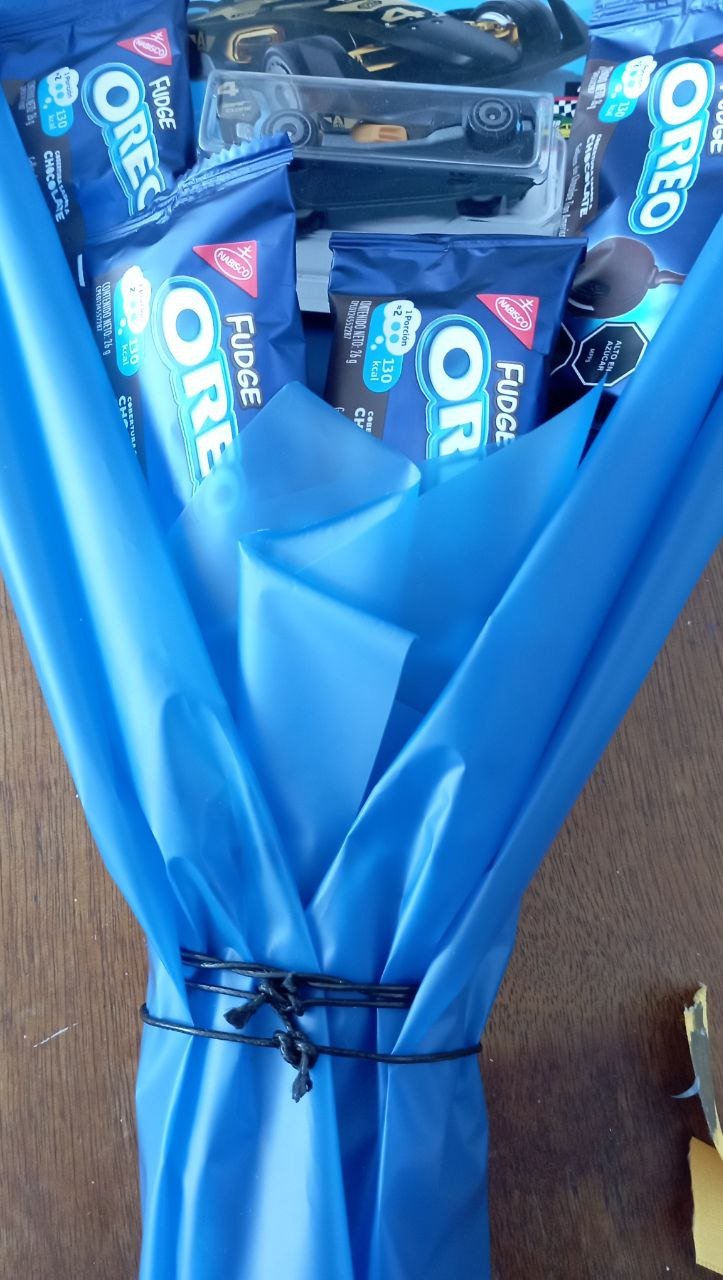
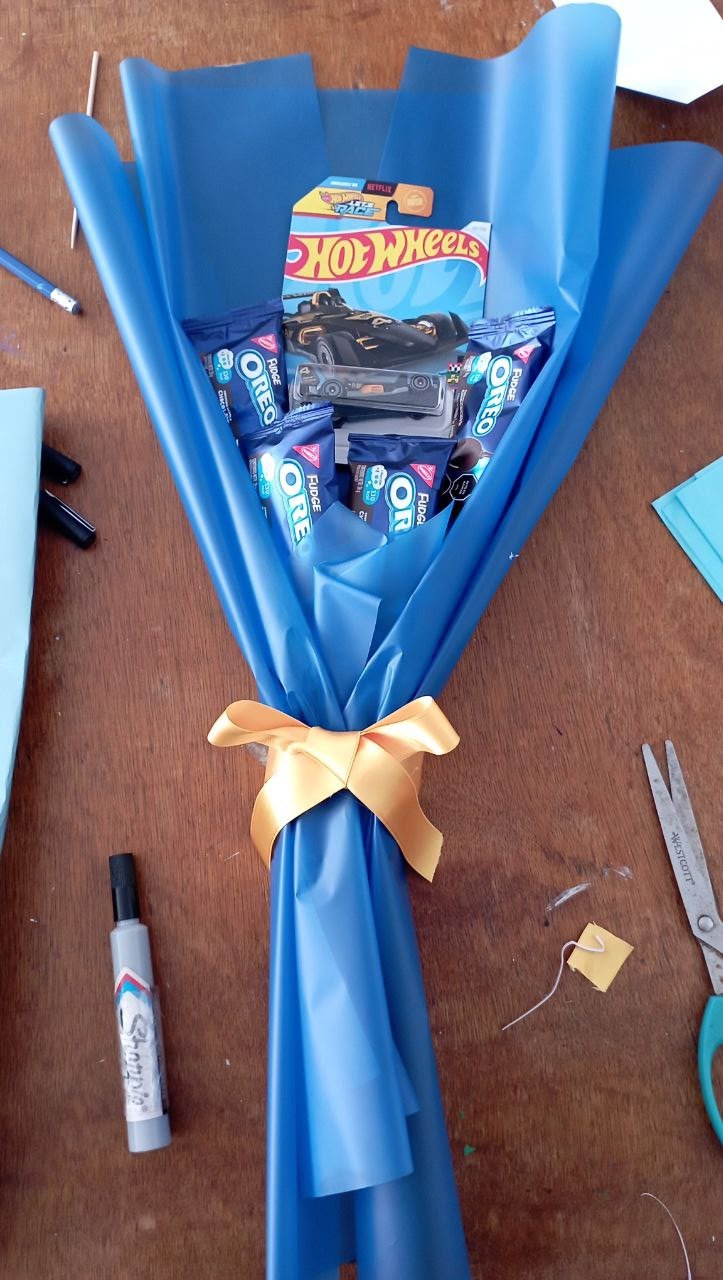
Lo primero fue pegar los palitos de altura al carrito hot wheels y las galletas con ayuda del silicone frío. Los dejé secar un buen rato. Vi que la gran mayoría de los arreglos iban en números impares, así que decidí usar 1 carrito y 4 galletas oreo fudge. Aun así, vi ramos gigantes que podían llevar hasta 5 carritos y flores naturales.
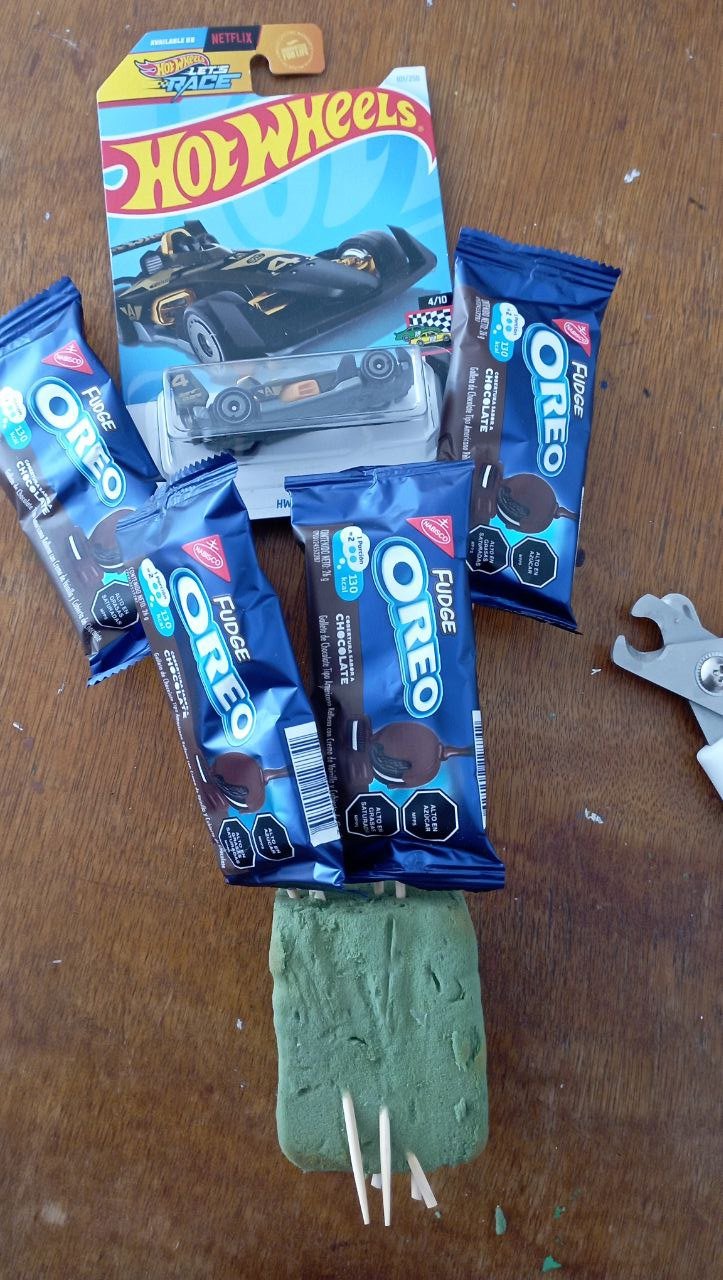
Al estar seco el silicone, los inserte en un oasis de unos 6x6 cm (también se puede usar un anime), así logré fijarlos y que fueran más fáciles de manejar para mi. Tuve que hacer algunas pruebas, hasta que estuvieran en un orden que me gustara.
 |  |
|---|
PASO 2
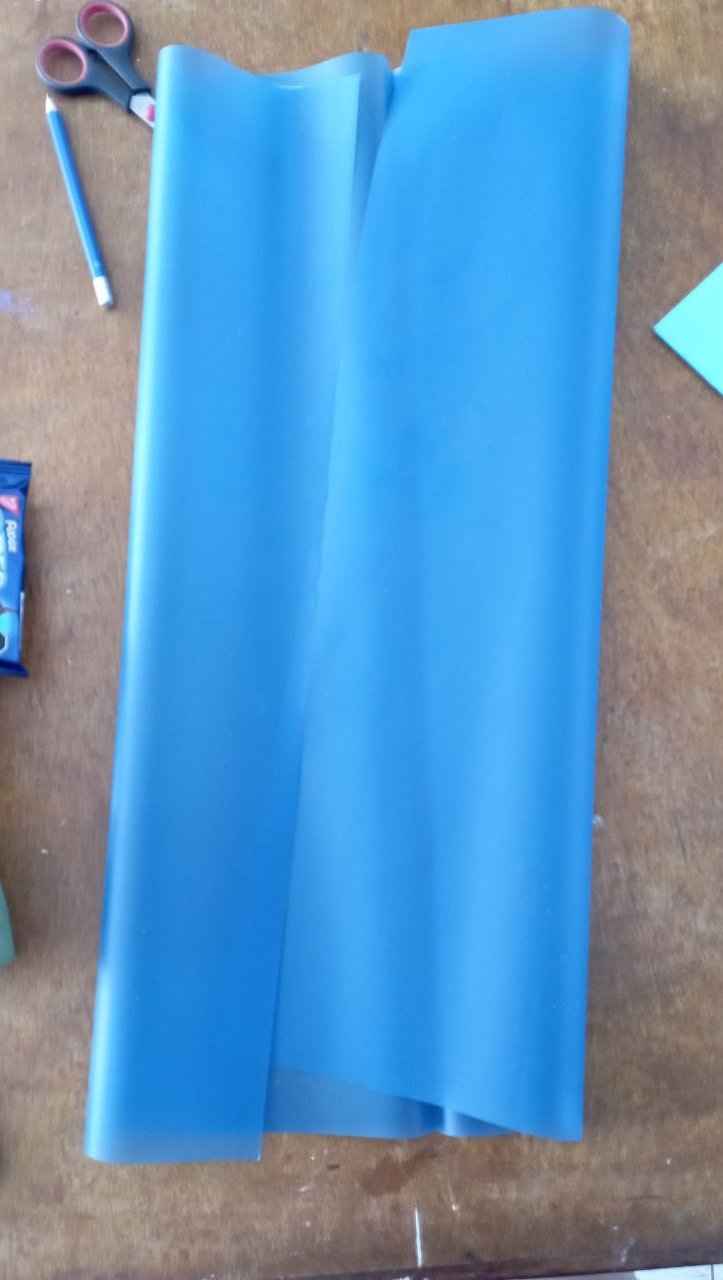
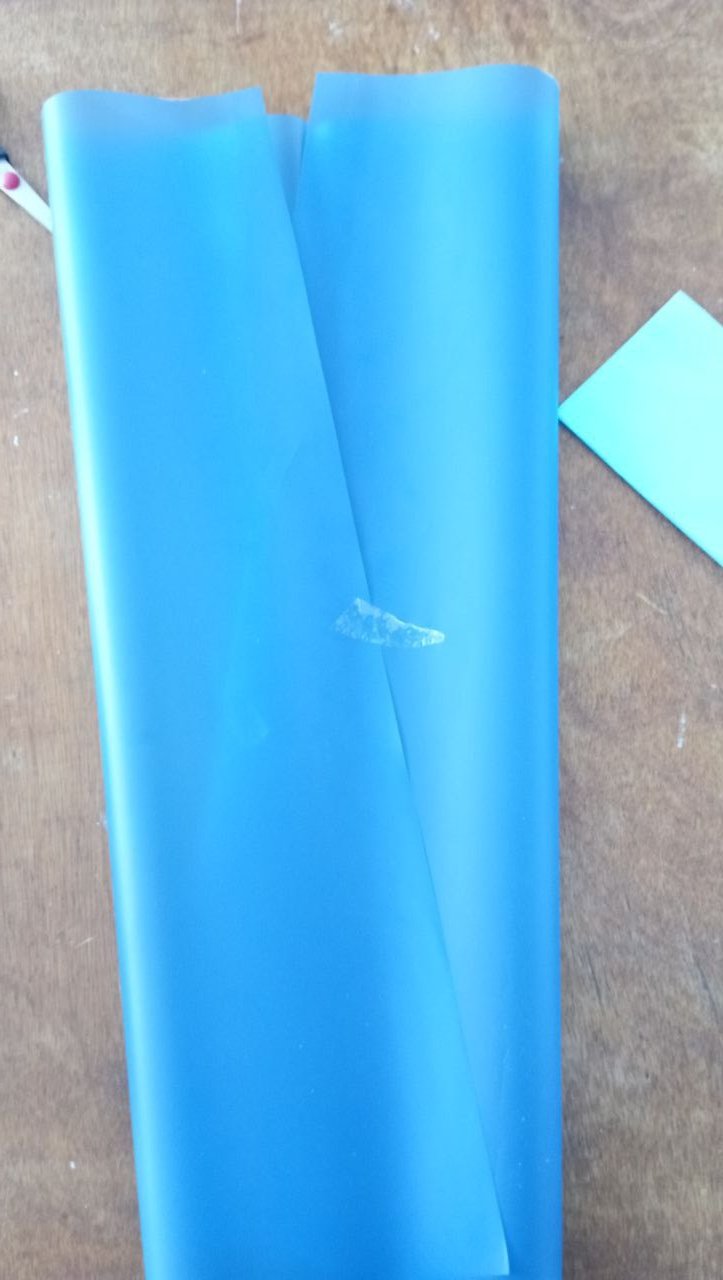
Esta fue mi primera vez trabajando con papel coreano. Por si no lo conoces, es un papel translúcido, que viene en muchísimos colores y estilos y es genial para hacer arreglos florales porque es muy fácil de moldear. En este caso, utilice 2 papeles coreanos de color azul rey (había muchos, pero fue el que mas me gusto).
Tome el primero, lo extendí en la mesa y con ayuda de la cinta adhesiva tome un extremo y lo pegue cruzandolo con el centro. Luego tomé el otro extremo y lo crucé pegando cerca del primero. No use una medida exacta, lo que hice fue colocar el carrito y las galletas y probar que tal se veía, si el papel quedaba exacto o cubría las cosas. Tuve que ajustar la cinta adhesiva para que quedara mejor.
Consejo: no le temas al papel (me paso que le tuve miedo a dañarlo, pero después de que agarre confianza pude trabajar mucho mejor)
 |  |
|---|
PASO 3
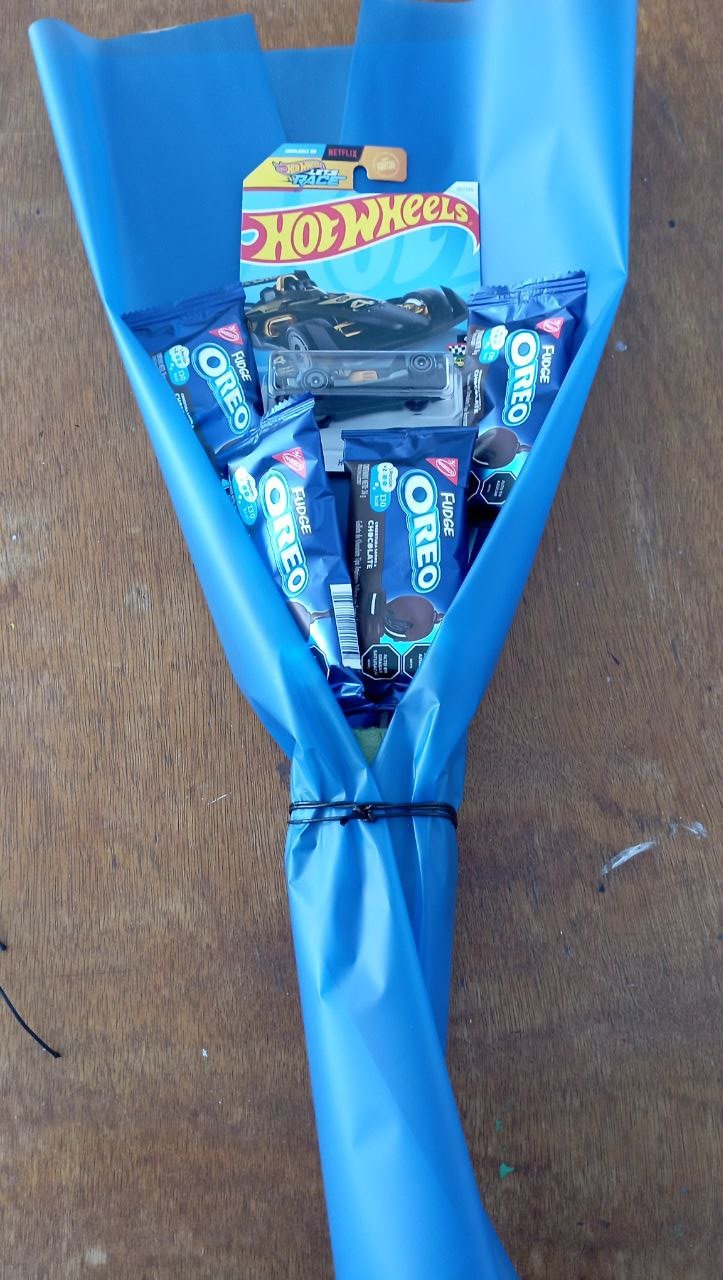
Es hora de poner el oasis con las cosas ya fijadas encima del papel coreano. Para fijar el oasis tuve que amarrarlo con un hilo chino que tenía. Bastó darle algunas vueltas y hacerle un nudo para tenerlo fijo.
 |  |
|---|

PASO 4
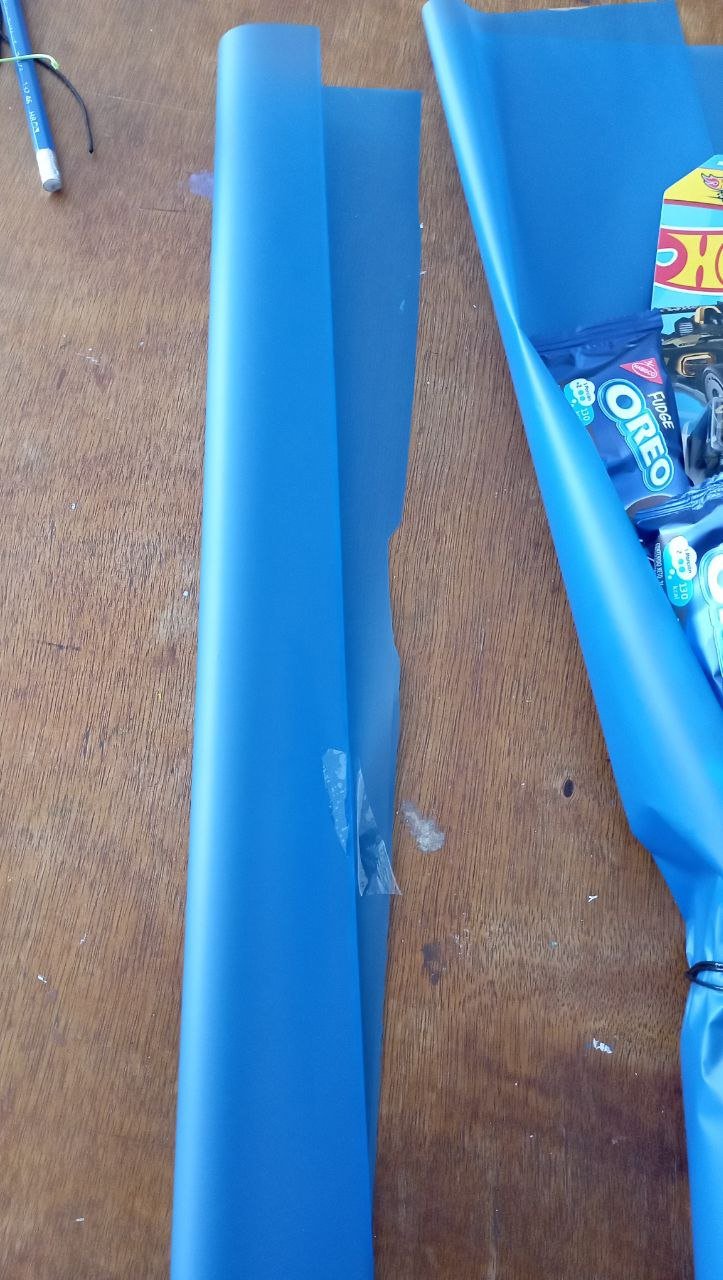
Sentía que le faltaba más volumen al ramo, así que usé el segundo papel coreano. Este lo corte por la mitad con ayuda de un exacto. Esa mitad la volví a cortar por la mitad. En cada cuarto de papel, cruce levemente uno de sus extremos y lo pegue con cinta adhesiva. Luego los coloque a cada lado del ramo. Una vez que estuve segura de que se veían bien los fijé con ayuda de otro trozo de hilo chino.
PASO 5
Me encontré con que se veía un pedacito de oasis, así que corté un rectángulo pequeño de papel coreado. Lo doble como que fuera una mini flor y lo metí dentro tapando el oasis.
 |  |
|---|
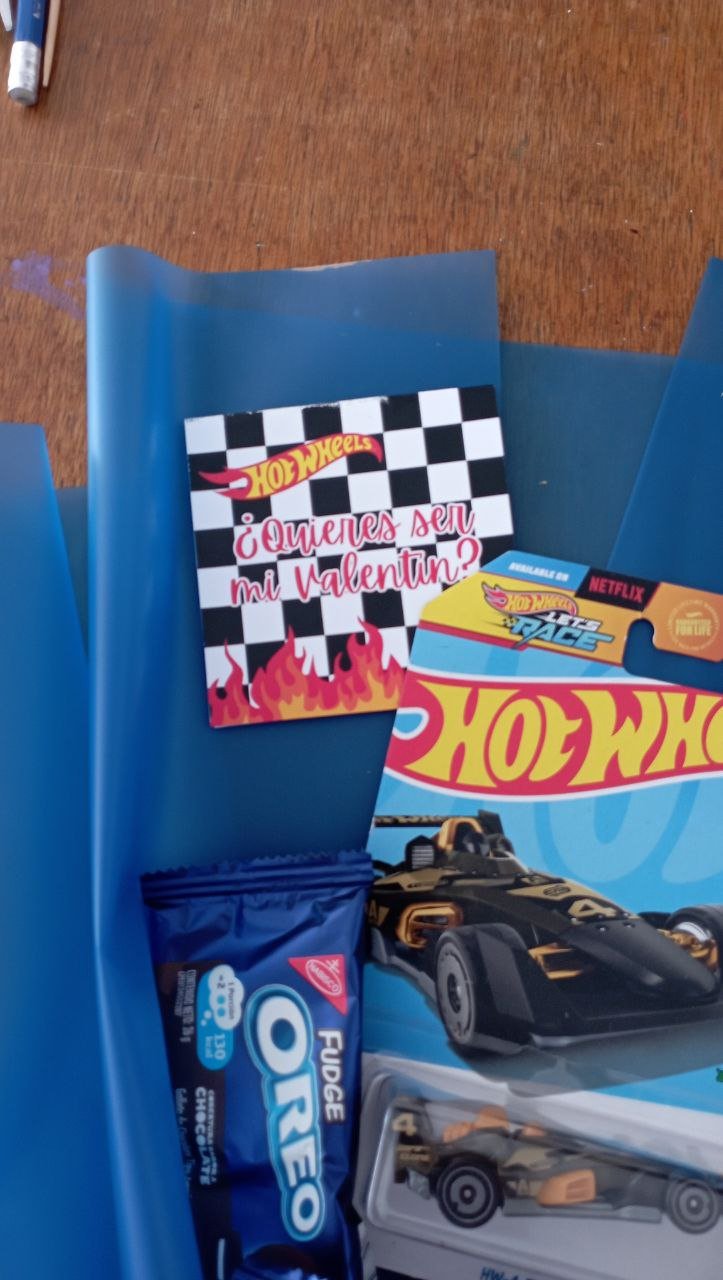
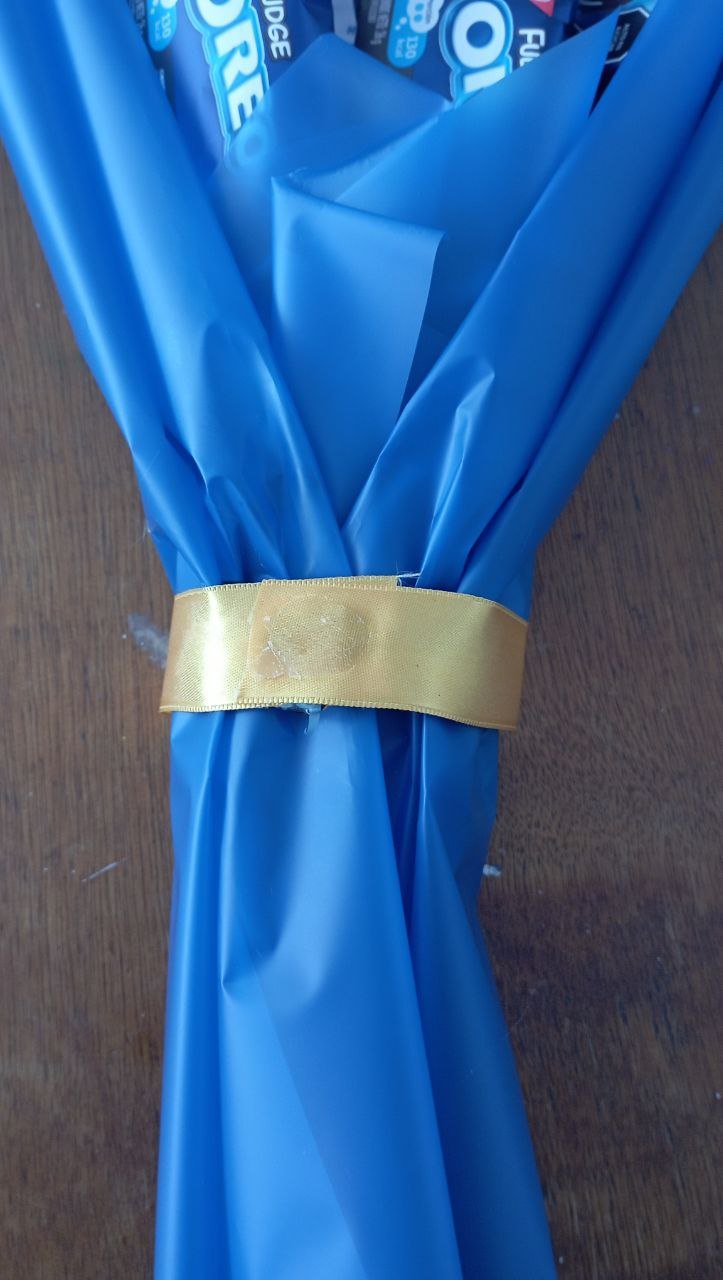
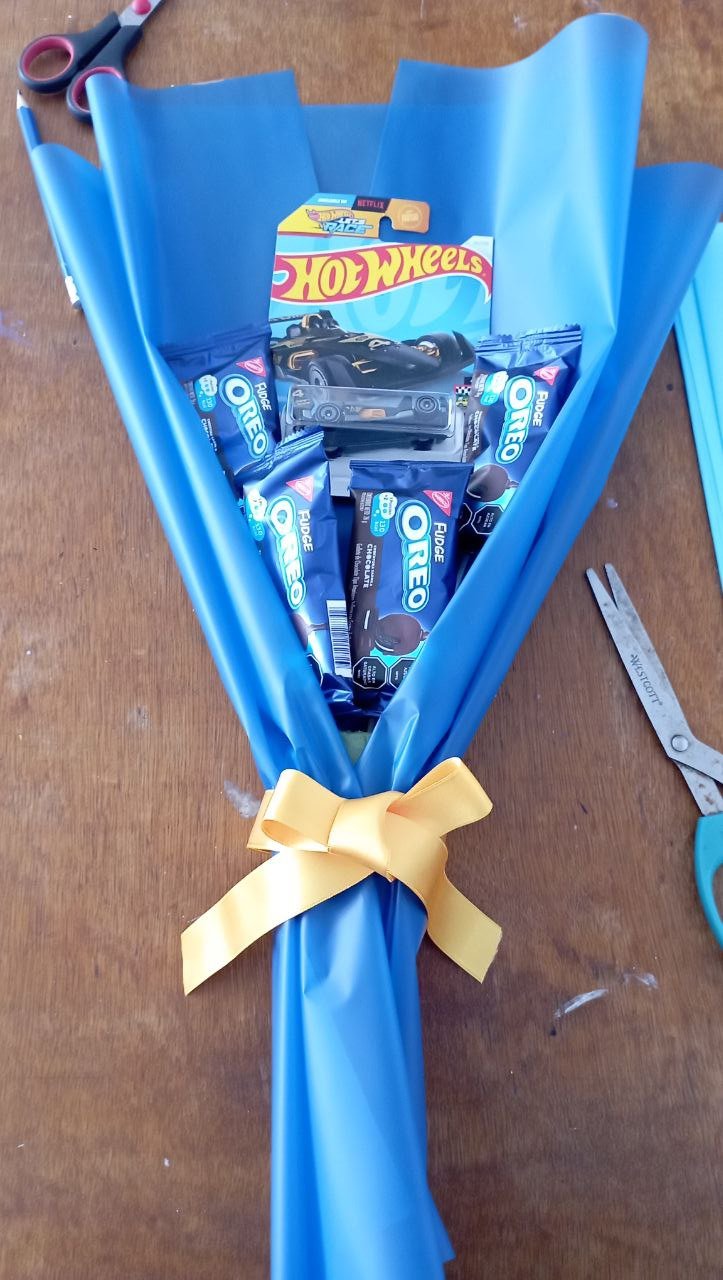
PASO 6
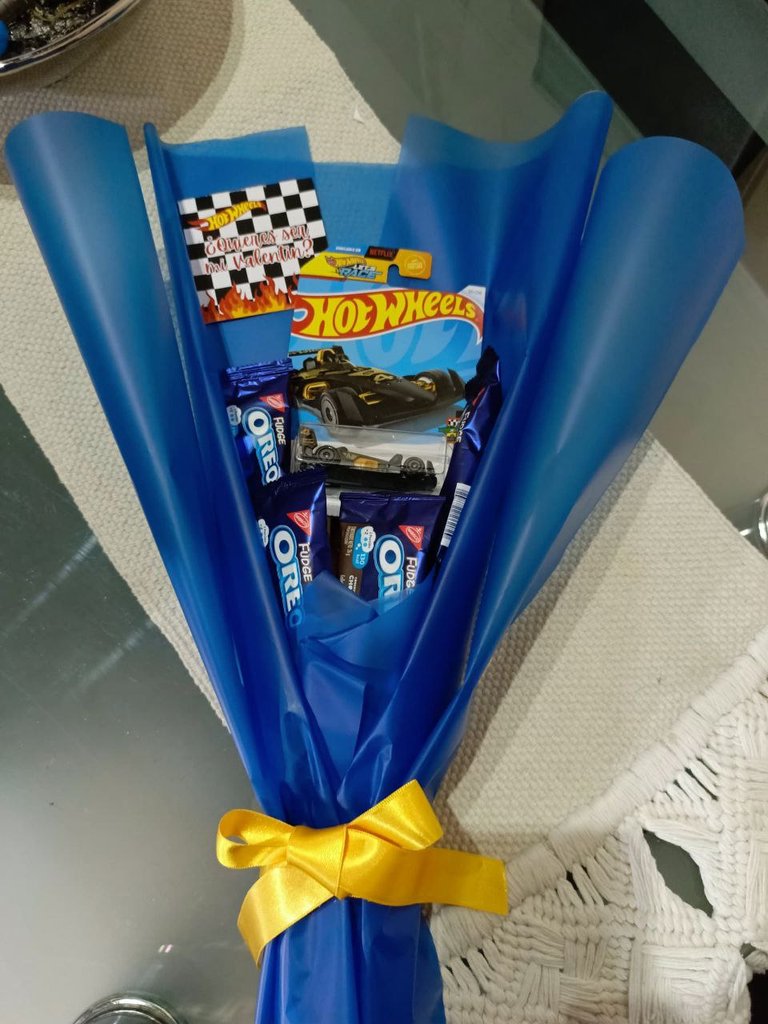
Con ayuda de la cinta taparemos el hilo chino. Para que hiciera contraste, use una cinta amarilla brillante. Corte el trozo suficiente para cubrir el hilo y con ayuda del silicone frío lo pegue. Con otro trozo de cinta hice un lazo y lo pegue sobre la cinta. De último añadí una tarjeta con temática de hot wheels con su respectiva dedicatoria.
PASO 7
¡Ramo de Hot Wheels y galletas Oreos listo para entregarse!
Quedé muy contenta con el resultado y a mi amorcito le encantó su ramo. Es un tutorial sencillo, que no requiere muchos materiales y que con poco puedes hacer un lindo detalle. Siempre he pensado que un regalo hecho a mano es un gran regalo. Algunas otras ideas que vi es que usaban un carrito con una flor eterna o flor con limpiapipas, es también una excelente opción para regalar. Nos vemos en el próximo tutorial.
Gracias por leerme
Con cariño, G.
Hi hivers! 💜
I hope you are well and happy. It's been a while since I've stopped by this wonderful community of crafters. For this Valentine's Day, I was looking for gift ideas for my sweetheart. I wanted it to be something nice, delicate, that he would love and that would make him feel pampered. So looking for inspiration I came across a bouquet of hot wheels cars. I had never made a bouquet before but I did some research and took a chance, so I'll tell you how the process went:
MATERIALS
Korean paper
Adhesive tape
Wooden sticks (also called height sticks)
Anime or an oasis
Satin ribbon
Chinese thread or very thin ribbon
Exacto or cutter
Cold silicone
Hot wheels cart
Cookies (optional)
Card (optional)
STEP BY STEP
| |
|---|
STEP 1
The first thing to do was to glue the height sticks to the hot wheels and the cookies with the help of cold silicone. I let them dry for a while. I saw that most of the arrangements were in odd numbers, so I decided to use 1 cart and 4 oreo fudge cookies. Even so, I saw giant bouquets that could take up to 5 trolleys and natural flowers.
When the silicone was dry, I inserted them in an oasis of about 6x6 cm (you can also use an anime), so I could fix them and make them easier for me to handle. I had to do some tests, until they were in an order that I liked.
| |
|---|
**STEP 2
This was my first time working with Korean paper. In case you're not familiar with it, it's a translucent paper, which comes in many, many colors and styles and is great for making floral arrangements because it's so easy to shape. In this case, I used 2 king blue Korean papers (there were many, but it was the one I liked the most).
I took the first one, spread it on the table and with the help of the adhesive tape I took one end and glued it crossing it with the center. Then I took the other end and crossed it and glued it close to the first one. I didn't use an exact measurement, what I did was to place the cart and the cookies and test how it looked, if the paper was exact or if it covered things. I had to adjust the tape to make it look better.
Tip: don't be afraid of the paper (I was afraid of damaging it, but after I gained confidence I was able to work much better).
| |
|---|
**STEP 3
It's time to put the oasis with the things already attached on top of the Korean paper. To fix the oasis I had to tie it with a Chinese thread I had. All it took was a few turns and a knot to secure it.
| |
|---|
**STEP 4
I felt that the bouquet lacked more volume, so I used the second Korean paper. This one I cut in half with the help of an cutter. That half I cut in half again. On each quarter of the paper, I slightly crossed one of its ends and taped it. I then placed them on each side of the bouquet. Once I was sure they looked good I attached them with the help of another piece of Chinese twine.
**STEP 5
I found myself looking at a little piece of oasis, so I cut a small rectangle of choreographed paper. I folded it like a mini flower and tucked it inside covering the oasis.
| |
|---|
**STEP 6
With the help of the ribbon, we will cover the Chinese thread. For contrast, I used a bright yellow ribbon. I cut enough to cover the thread and with the help of the cold silicone I glued it. With another piece of ribbon I made a bow and glued it over the ribbon. Lastly I added a hot wheels themed card with a dedication.
**STEP 7
Hot Wheels and Oreos bouquet ready to be delivered!
I was very happy with the result and my sweetheart loved her bouquet. It is a simple tutorial that does not require many materials and with little you can make a nice detail. I have always thought that a handmade gift is a great gift. Some other ideas I saw is that they used a trolley with an everlasting flower or pipe cleaner flower, it is also an excellent option to give as a gift. See you in the next tutorial.
Thank you for reading me
With love, G..
FUENTE
Fotos: tomadas por mi desde mi redmi 10
Traducción: Deepl
SOURCE
Photos: taken by me from my redmi 10
Translation: Deepl

https://bsky.app/profile/did:plc:rag2mftdy2alo7rtmyttmpk4/post/3lihuwfo6a32c
https://bsky.app/profile/did:plc:rag2mftdy2alo7rtmyttmpk4/post/3lihuwfo6a32c
The rewards earned on this comment will go to the author of the blog post.
¡Enhorabuena!
✅ Has hecho un buen trabajo, por lo cual tu publicación ha sido valorada y ha recibido el apoyo de parte de CHESS BROTHERS ♔ 💪
♟ Te invitamos a usar nuestra etiqueta #chessbrothers y a que aprendas más sobre nosotros.
♟♟ También puedes contactarnos en nuestro servidor de Discord y promocionar allí tus publicaciones.
♟♟♟ Considera unirte a nuestro trail de curación para que trabajemos en equipo y recibas recompensas automáticamente.
♞♟ Echa un vistazo a nuestra cuenta @chessbrotherspro para que te informes sobre el proceso de curación llevado a diario por nuestro equipo.
🏅 Si quieres obtener ganancias con tu delegacion de HP y apoyar a nuestro proyecto, te invitamos a unirte al plan Master Investor. Aquí puedes aprender cómo hacerlo.
Cordialmente
El equipo de CHESS BROTHERS
Your first bouquet looks so cute; who knows what your second and third bouquets will look like? This is such a great Valentine's gift, and it turned out so well. Great job, and thanks for sharing.
Ohh, I hope the next one will be even nicer and bigger. Thanks💜💜
Congratulations @geneleori! You have completed the following achievement on the Hive blockchain And have been rewarded with New badge(s)
Your next target is to reach 25000 upvotes.
You can view your badges on your board and compare yourself to others in the Ranking
If you no longer want to receive notifications, reply to this comment with the word
STOP