¡Bienvenidos a mi blog!
Buenos días ,feliz lunes para todos los que forman parte de esta hermosa comunidad #Diyhub , deseándole muchas paz, salud , unión familiar y que este día , Dios siga tomando control y domino de sus vidas. Yo feliz de regresar nuevamente a mi comunidad favorita después de unos días de descanso.
Nuestra cocina es el espacio que más frecuentamos en el hogar , hacemos de este lugar que sea placentero, por lo tanto adornarlo es lo mejor y que nos sintamos cómodos.
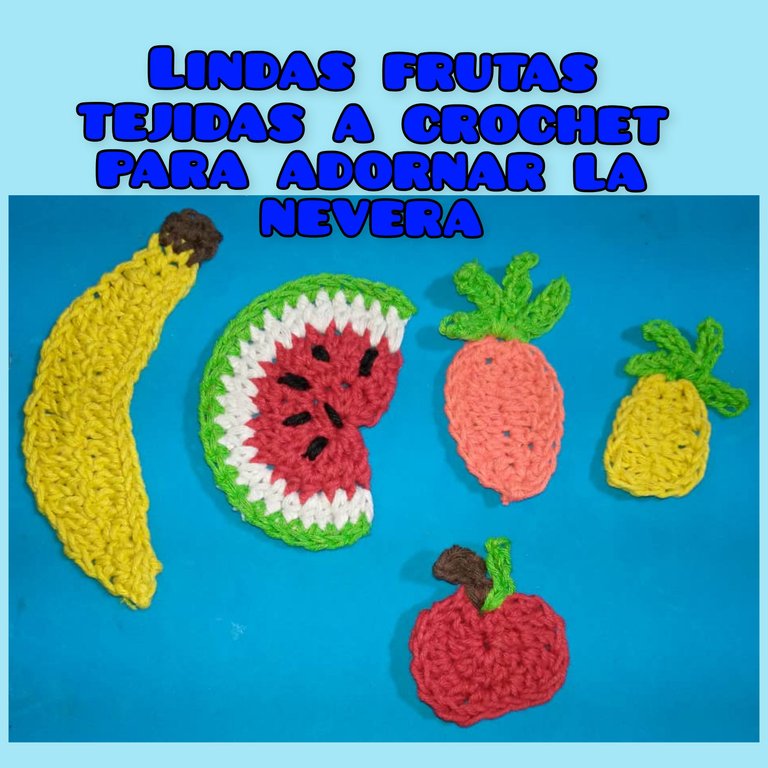
Por eso hoy quiero mostrar como tejer a crochet unas frutas para adornar la cocina ,específicamente el refrigerador, aunque puede ser cualquier espacio.
Welcome to my blog!
Good morning, happy Monday to all who are part of this beautiful community #Diyhub, wishing you lots of peace, health, family togetherness and that this day, God continues to take control and dominion of your lives. I am happy to be back again to my favorite community after a few days of rest.
Our kitchen is the most frequented space in the home, we make this place to be pleasant, so decorate it is the best and that we feel comfortable.
That's why today I want to show you how to crochet some fruits to decorate the kitchen, specifically the refrigerator, although it can be any space.
Materiales para tejer a crochet las frutas:
- Hilos de tejer, colores: amarillo, rojo, verde, negro, anaranjado y marrón.
- Aguja , número 3.
- Aguja lanera.
- Tijera.
- Pedazos de imán.
Materials to crochet the fruits:
- Knitting yarn, colors: yellow, red, green, black, orange and brown.
- Needle, number 3.
- Wool needle.
- Scissors.
- Pieces of magnet.

Pasos para la realización de las frutas tejidas:
- Para hacer la piña 🍍 ,tomamos el hilo amarillo junto con la aguja, levantamos ocho cadenas,en la cadena 6 hacemos un punto bajo ,en las siguientes cadenas hacemos puntos medios altos, en la cadena 1 hacemos 5 puntos medios altos, del otro lado hacemos 6 puntos medios altos y los dos últimos hacemos puntos bajos, cerramos con punto deslizado.
- Luego para hacer las hojas,tomamos el hilo verde , levantamos cinco cadenas y en cada cadena hacemos punto deslizados hasta donde se comenzó, así mismo hacemos dos hojas más. Y así de fácil se tejió la piña.
Steps for the realization of the knitted fruits:
- To make the pineapple 🍍 ,we take the yellow yarn together with the needle, we raise eight chains,in chain 6 we make a low stitch ,in the following chains we make medium high stitches, in chain 1 we make 5 medium high stitches, on the other side we make 6 medium high stitches and the last two we make low stitches, we close with slipped stitch.
- Then to make the leaves, we take the green yarn, we pick up five chains and in each chain we knit slipped stitches up to where we started, in the same way we knit two more leaves. And that's how easy it was to knit the pineapple.

- Para hacer la zanahoria 🥕, tomamos el hilo anaranjado ,levantamos 12 cadenas ,la cadena 10 y 9 hacemos puntos bajos , las siguientes hacemos puntos medios altos en la última meter en el mismo punto 5 puntos medios altos. Del otro lado hacer lo mismo ,terminar con dos puntos bajos y cerrar con puntos deslizados.
- Para hacer las hojas,levantar 5 cadenas y hacer puntos bajos en casa cadena, así mismo hacer 3 más. Con esto terminamos la linda zanahoria.
- To make the carrot 🥕, we take the orange yarn ,pick up 12 chains ,chain 10 and 9 we make low stitches , the following ones we make medium high stitches in the last tuck in the same stitch 5 medium high stitches. On the other side do the same, finish with two low stitches and close with slipped stitches.
- To make the leaves, pick up 5 chains and make low stitches in each chain, in the same way make 3 more stitches. With this we finish the beautiful carrot.

- Para tejer la sandía 🍉, tomamos el hilo rojo ,hacemos un anillo mágico , dentro del anillo metemos 8 puntos medios altos, no cerrar el anillo . Levantamos una cadena y volteamos el motivo , en cada punto hacemos un aumento, para un total de 16 puntos medios altos. Levantamos una cadena y tomamos el hilo blanco, en esta vuelta hacemos dos medios puntos altos en el primer punto,osea un aumento y un punto medio alto. Así hacemos toda la vuelta.
- Cambiamos al hilo verde , hacemos un punto bajo en cada punto.
- Con el hilo negro y una aguja lanera, hacemos las semillas de la patilla y lista.
- To knit the watermelon 🍉 , we take the red yarn ,we make a magic ring , inside the ring we put 8 medium high stitches, do not close the ring . We pick up a chain and turn the motif , in each stitch we make an increase, for a total of 16 medium high stitches. Pick up a chain and pick up the white yarn, in this round we make two half double crochet stitches in the first stitch, that is, one increase and one half double crochet stitch. This is how we do the whole row.
- We change to the green yarn, we knit a single crochet in each stitch.
- With the black yarn and a knitting needle, we make the seeds of the sideburn and we are done.

- Para tejer la manzana 🍎, tomamos el hilo rojo, hacemos tres cadenas ,cerramos la primera cadena con un punto deslizado dentro de esa espacio que quedó metemos 13 puntos medios altos, para la siguiente vuelta levantamos una cadena , hacemos puntos bajos en los primeros dos puntos ,luego hacemos 3 aumentos en los siguientes puntos, 3 puntos bajos y por últimos dos puntos bajos.
- Tomamos el hilo marrón , hacemos 5 cadenas , a cada punto hacemos puntos bajos. Continuamos con el hilo verde, levantamos 5 cadenas, le hacemos 5 puntos bajos y listo.
- To knit the apple 🍎, we take the red yarn, we make three chains ,we close the first chain with a slipped stitch inside that space that was left we put 13 medium high stitches, for the next round we lift a chain , we make low stitches in the first two stitches ,then we make 3 increases in the following stitches, 3 low stitches and finally two low stitches.
- We take the brown yarn, we make 5 chains, at each stitch we make single crochet stitches. We continue with the green yarn, we raise 5 chains, we make 5 single crochet stitches and that's it.

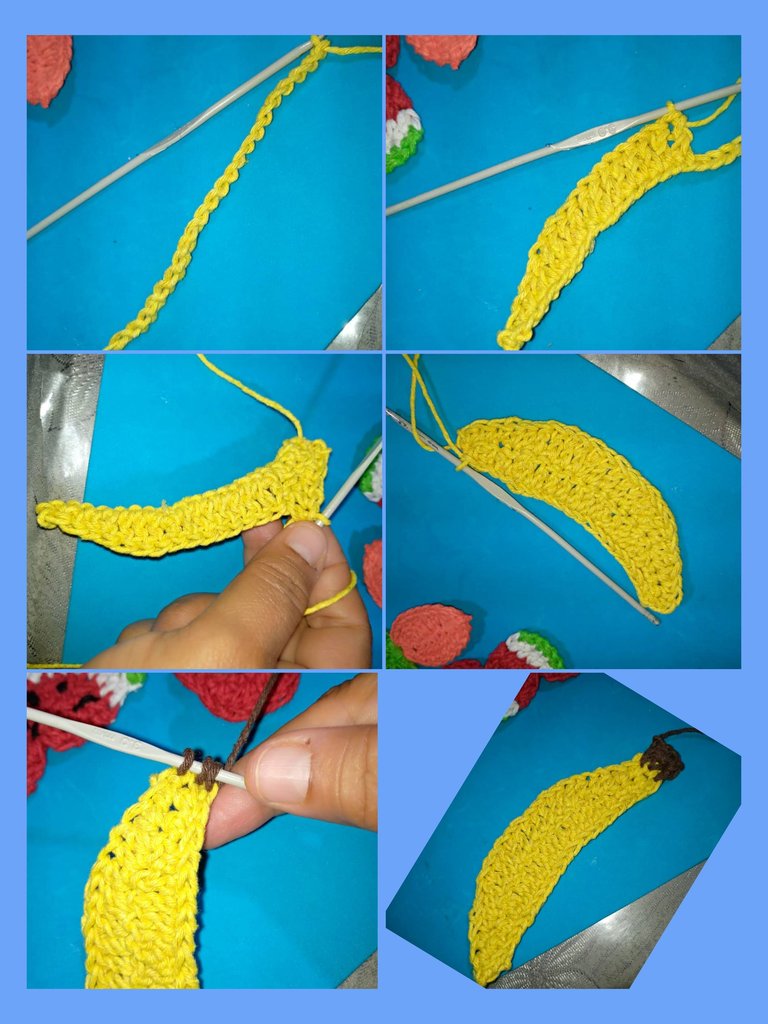
- Para tejer la banana 🍌, tomamos el hilo amarillo, levantamos 20 cadenas, en la segunda cadena hacemos un punto deslizado, en la tercera cadena hacemos un punto bajo, en las siguientes, 2 puntos altos en cada punto y un aumento. Dos puntos altos más y un aumento, así hasta llegar al punto 18. El punto 19 y 20 son dos puntos bajos. Del otro lado hacer 20 puntos medios altos y terminar con punto deslizado.
- Con el hilo marrón ,introducir el hilo tres veces con punto bajo , hacer tres puntos bajos más y listo.
- Para tejer la banana 🍌, tomamos el hilo amarillo, levantamos 20 cadenas, en la segunda cadena hacemos un punto deslizado, en la tercera cadena hacemos un punto bajo, en las siguientes, 2 puntos altos en cada punto y un aumento. Dos puntos altos más y un aumento, así hasta llegar al punto 18. El punto 19 y 20 son dos puntos bajos. Del otro lado hacer 20 puntos medios altos y terminar con punto deslizado.
- With the brown yarn, introduce the yarn three times with slip stitch, knit three more slip stitches and that's it.
- Acomodamos y recortamos los hilos con las tijeras.
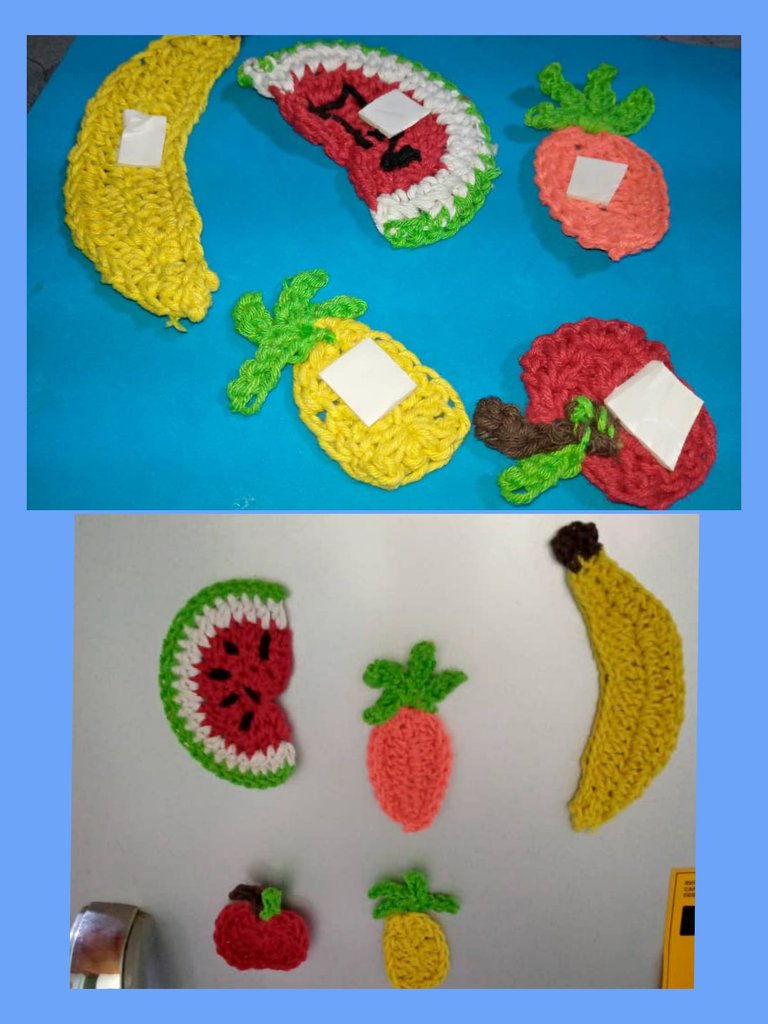
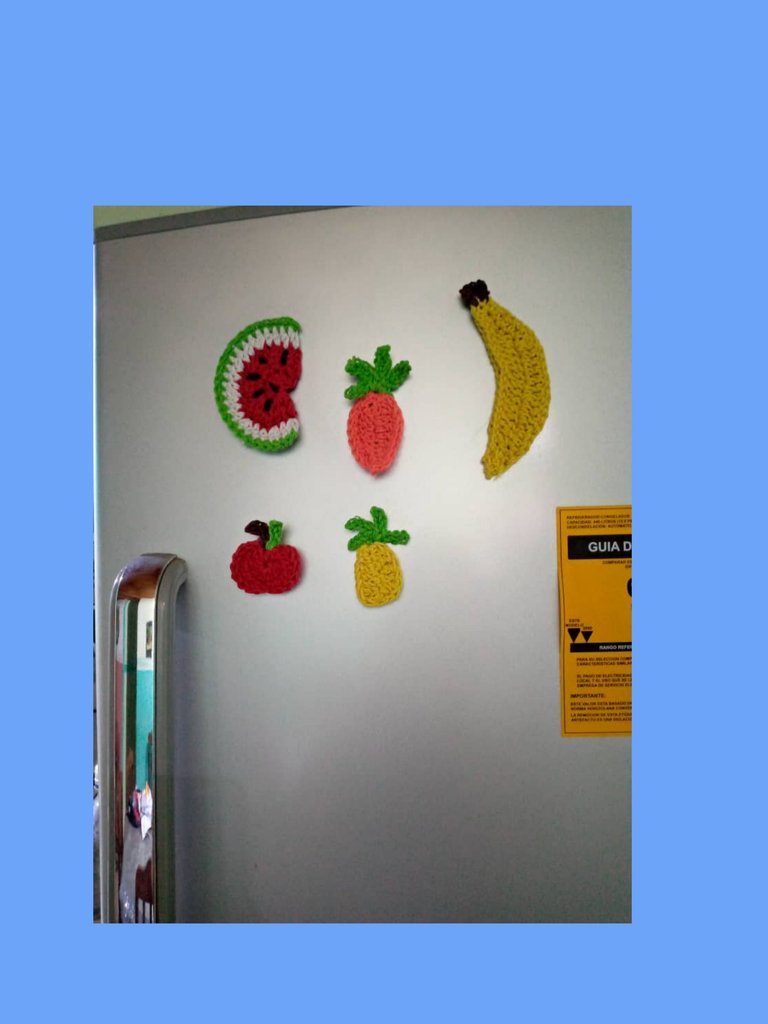
- Ya teniendo las frutas listas ,procedemos a colocarles el imán por la parte de atrás y lo colocamos.en el refrigerador. Espero sea de su agrado.
- We arrange and cut the threads with the scissors.
- Once the fruits are ready, we proceed to place the magnet on the back and place it in the refrigerator. I hope you like it.
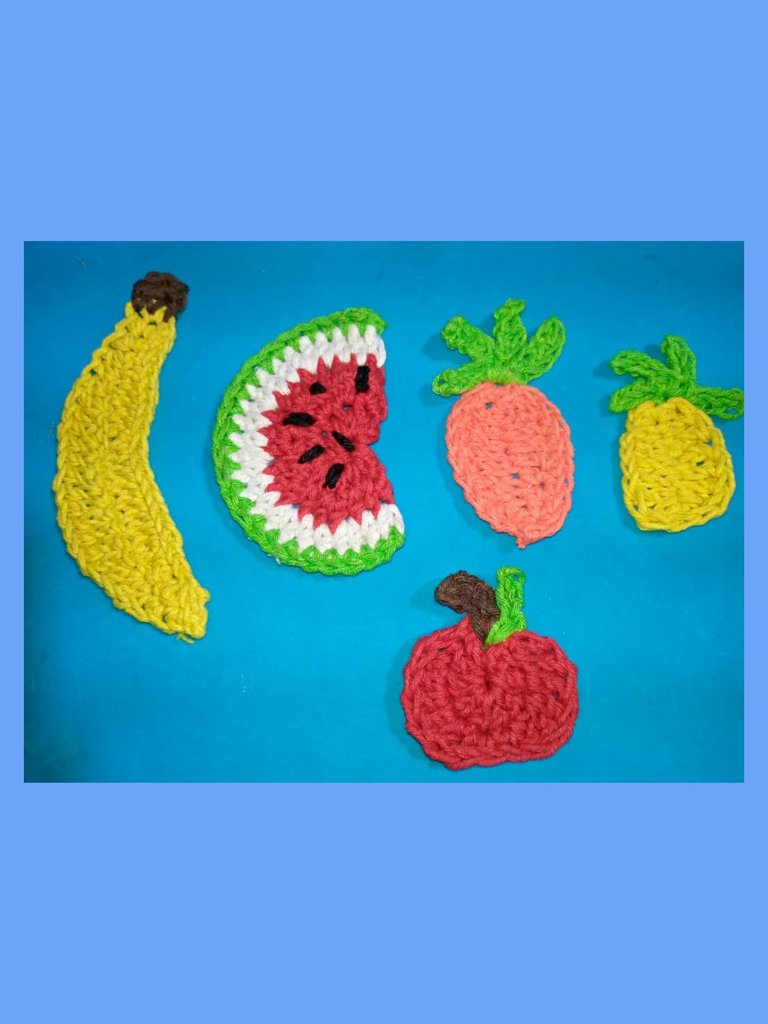
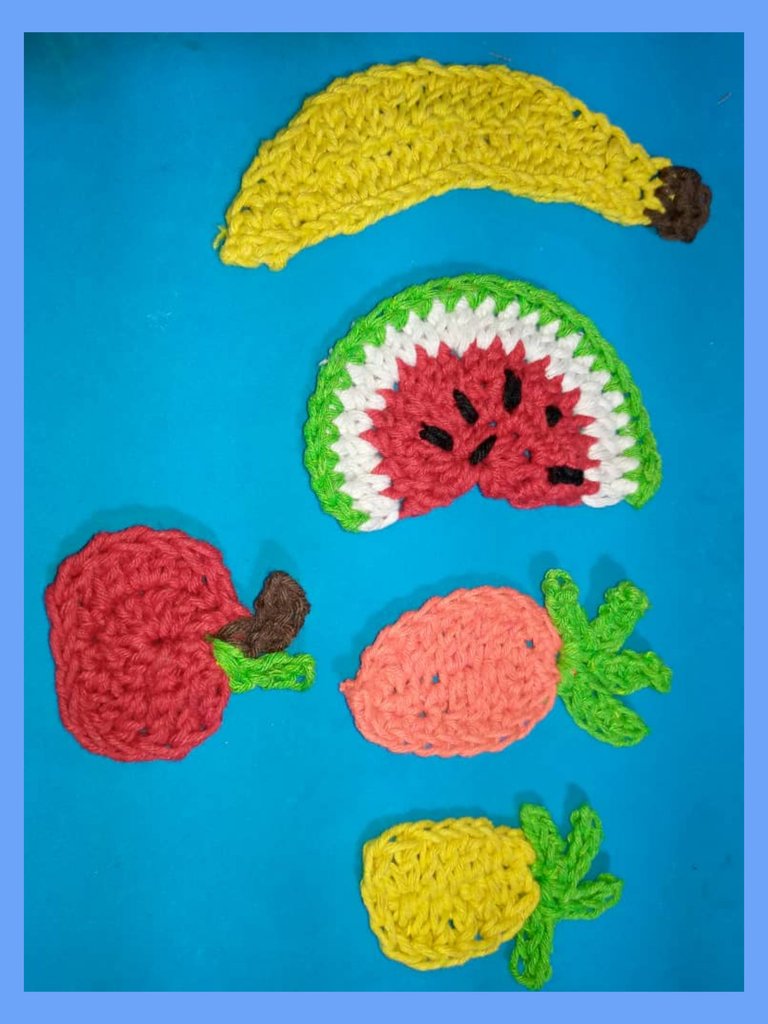
Aquí el resultado final de las frutas tejidas 🍎🍌 🥕 🍍 🍉
Here is the final result of the woven fruits 🍎🍌 🥕 🍍 🍉
Gracias por leer y comentar mi post, las fotos son mías , tomadas con teléfono infinix, editadas con incollage y traducidas con Deepl.
Thanks for reading and commenting on my post, the photos are mine, taken with infinix phone, edited with incollage and translated with Deepl.

What a beauty, this is one of the most beautiful and and funny post I have seen today. I always admire your great knitting talent Eunice, thank you for sharing it on DIYHub Community...
Gracias @jesuslnrs ,no sabes lo que me alegra esas lindas palabras y a la vez me motivan a seguir tejiendo y saber que lo estoy haciendo bien. Muchas gracias. Saludos y bendiciones.
Crochet fruits
I love it☺️. Nicely done.
Thanks for sharing
Gracias @kristeo , me alegra mucho que te guste. Saludos.
WOW! It looks like the real fruits. It definitely shows your creativity and skills. Love it. Great work!
selected by @rezoanulvibes
Ay gracias @diyhub , por el apoyo de siempre. Saludos.
Awww 🥰 these fruits look realistic and beautifully done, and they fit perfectly on the body of the freezer. !DIY
Si @funshee , si quedaron hermosas. Gracias por comentar. Saludos.