Hello together,
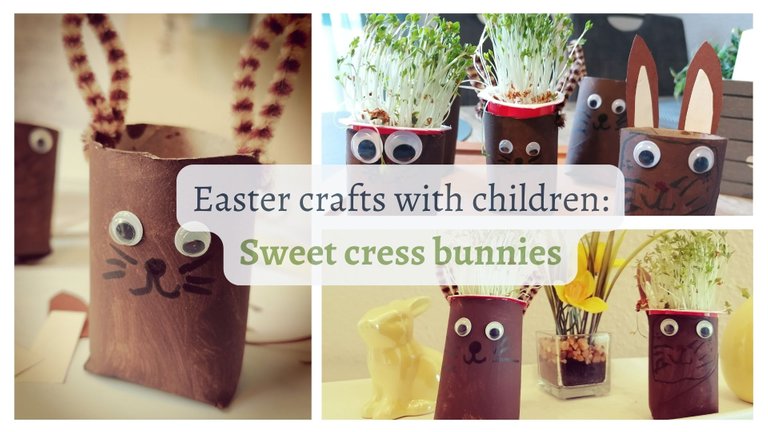
today I show you how I made cute cress bunnies with my son. We did upcycling, so we made things that would otherwise be thrown away. I really like to use things again, because I am often shocked by the many rubbish you produce. It’s fun to breathe new life into seemingly useless things. Especially children can be very enthusiastic about it and soon they see in every empty toilet paper roll a potential toy ;)
The craft idea I show you today can be adapted to any season, so maybe cress monsters for Halloween or cress Santa Claus. The beauty of cress is that you can almost watch it grow and thus motivate even the smallest gardeners to plant themselves. And it is also healthy and delicious.
Hallo zusammen,
heute zeige ich Euch, wie ich mit meinem Sohn süße Kresse-Hasen gebastelt habe. Dabei haben wir Upcycling betrieben, also mit Dingen gebastelt, die man sonst eigentlich wegschmeißen würde. Ich mag es sehr, Dinge noch einmal zu benutzen, da mich der viele Müll den man so produziert oft schockiert. Es macht Spaß scheinbar unnützen Dingen ein neues Leben einzuhauchen. Gerade Kinder kann man sehr damit begeistern und schon bald sehen sie in jeder leeren Klopapierrolle ein potentielles Spielzeug ;)
Die Bastel Idee, die ich Euch heute zeige, kann man auf jede Jahreszeit anpassen, also vielleicht Kresse-Monster zu Halloween oder Kresse-Weihnachtsmänner. Das Schöne an Kresse ist, dass man ihr beim Wachsen fast zuschauen kann und somit auch die kleinsten Gärtner zum selber anpflanzen motiviert. Und gesund und köstlich ist sie nebenbei auch noch.

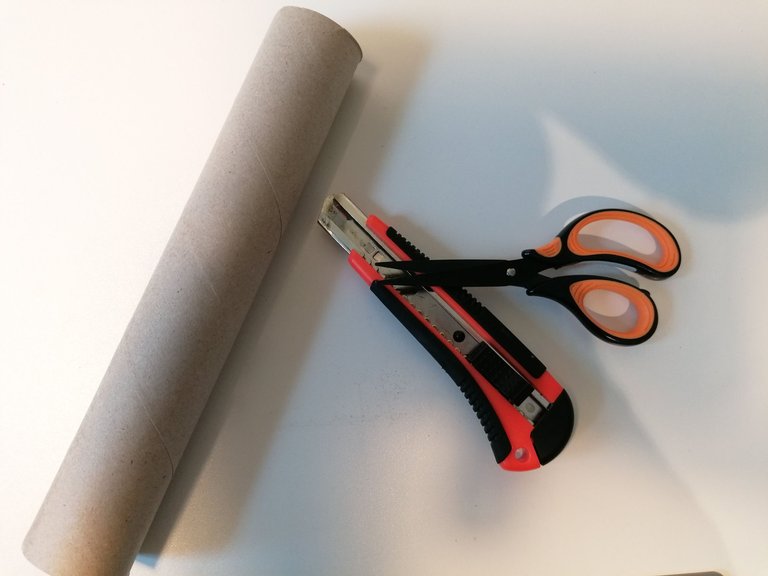
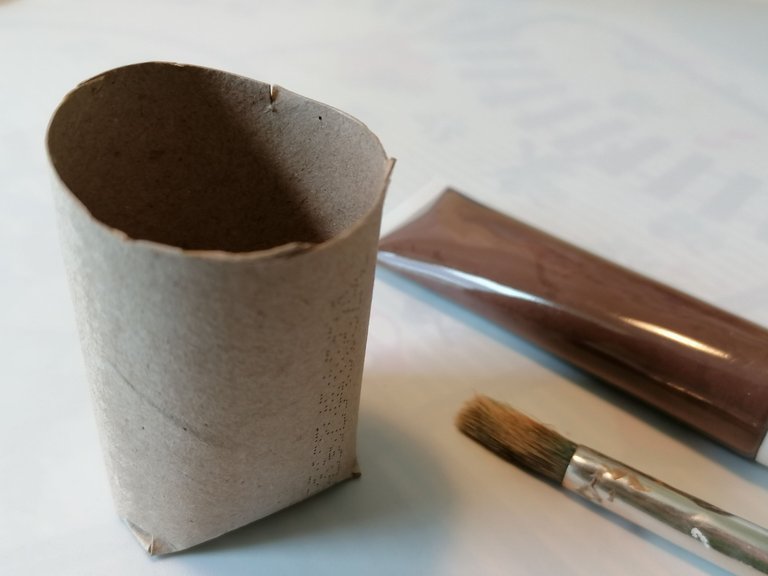
Required materials:
1 cardboard roll, scissors, cutter, duct tape, paint, 1 small yogurt cup, cotton wool, cress seeds
Benötigte Materialien:
1 Papprolle, Schere, Cutter, Tesafilm, Farbe, 1 kleinen Joghurtbecher, Watte, Kressesamen
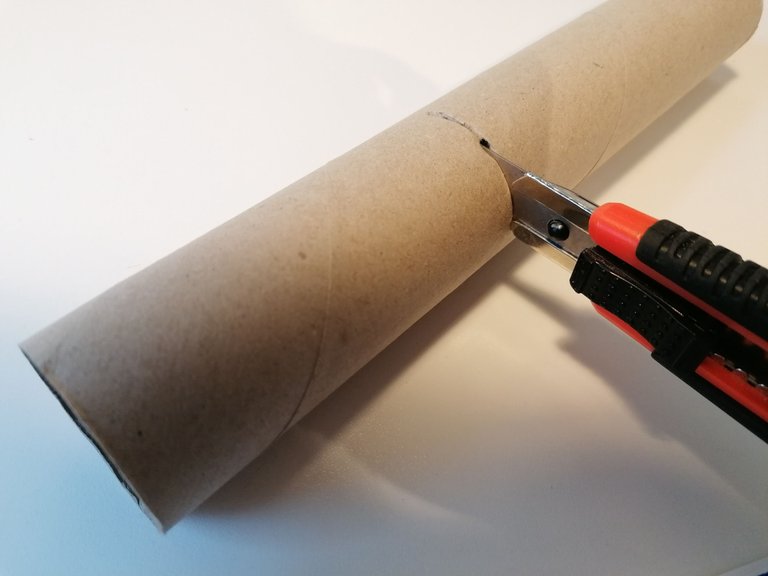
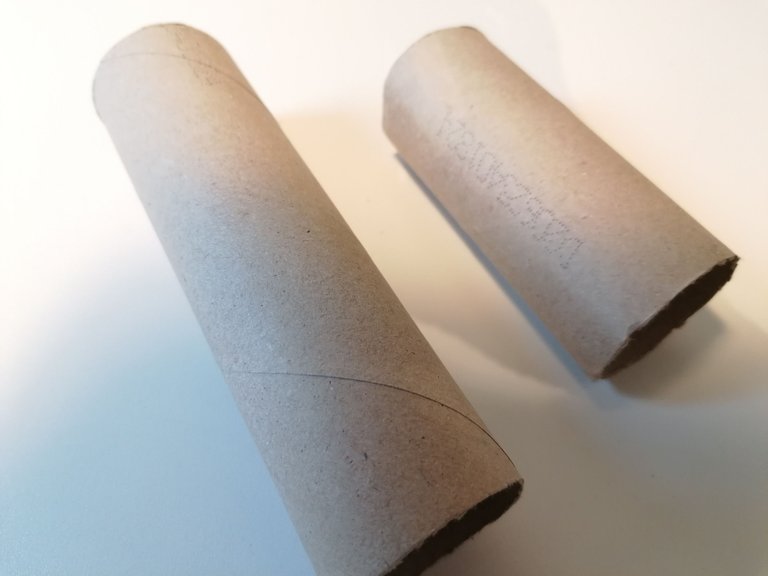
STEP 1:
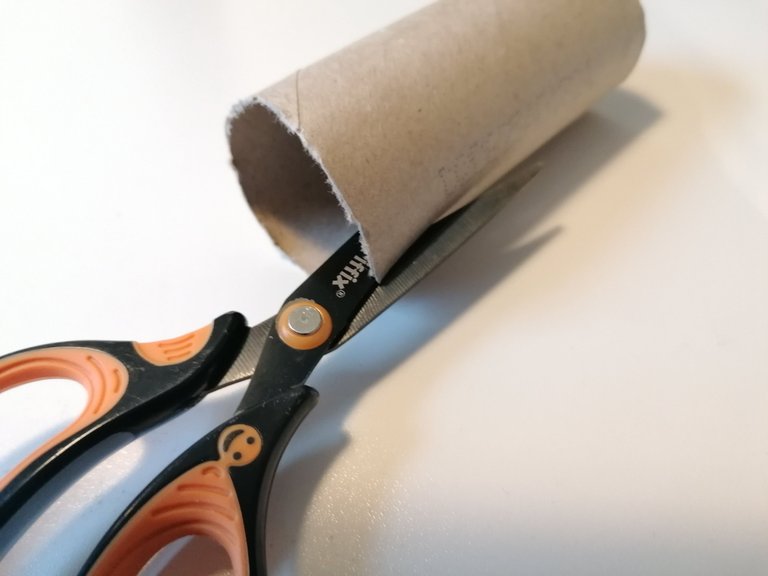
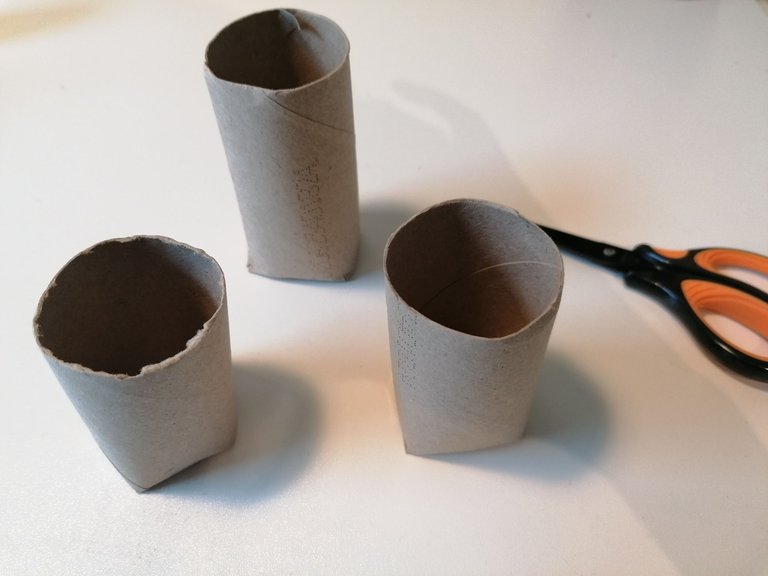
If you have a long paper roll from the paper towels, you can cut it into 2 - 3 smaller rolls, depending on the size your rabbits should get. For a rabbit family, they can also be of different sizes.
Wenn Ihr eine lange Papprolle vom Küchenpapier habt, könnt Ihr diese in 2 - 3 kleinere Rollen schneiden, je nachdem welche Größe Eure Hasen bekommen sollen. Für eine Hasenfamilie können sie auch gerne unterschiedlich groß sein.
STEP 2:
With scissors, we cut the cardboard roll at the bottom 4 x opposite each about 1.5 cm long.
Mit einer Schere haben wir die Papprolle unten 4 x jeweils gegenüberliegend ca. 1,5 cm lang eingeschnitten.
STEP 3:
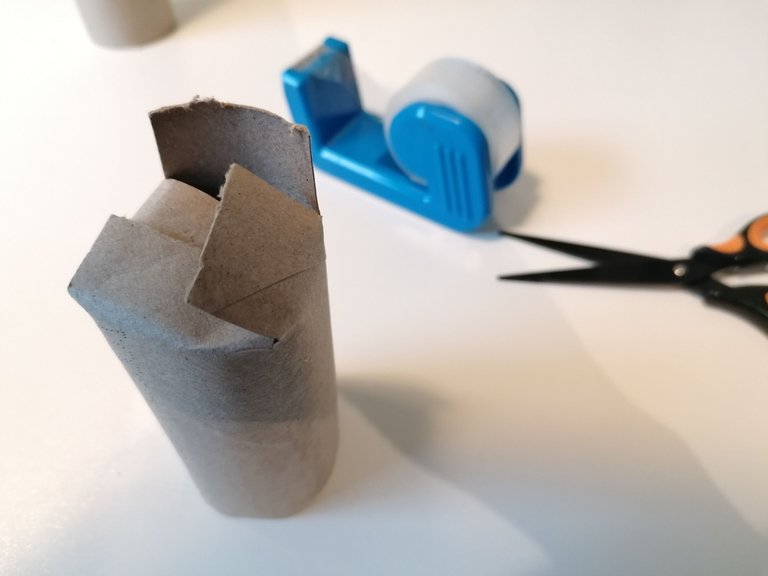
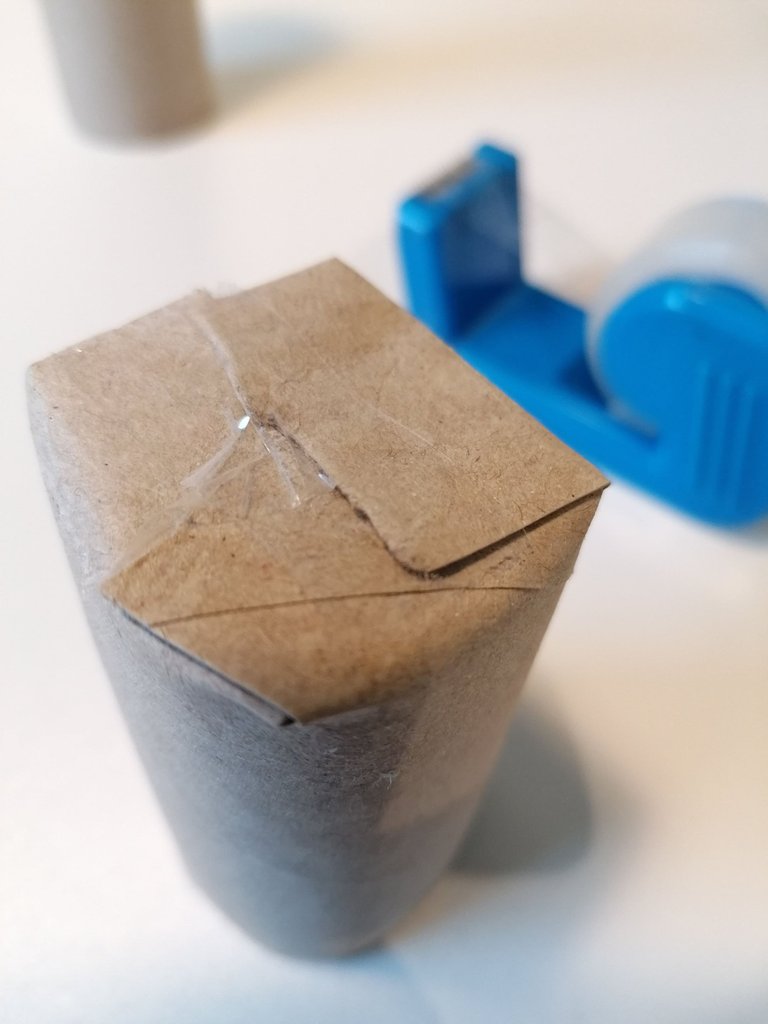
Fold the 4 strips, which were created by the cutting, over each other and close the bottom of the roll.
Die 4 Streifen, die durch das Einschneiden entstanden sind, klappt Ihr nun fächerartig übereinander und verschließt so den Boden der Rolle.
STEP 4:
We fixed the floor with adhesive strips.
Den Boden haben wir nun noch mit Tesafilm fixiert.
STEP 5:
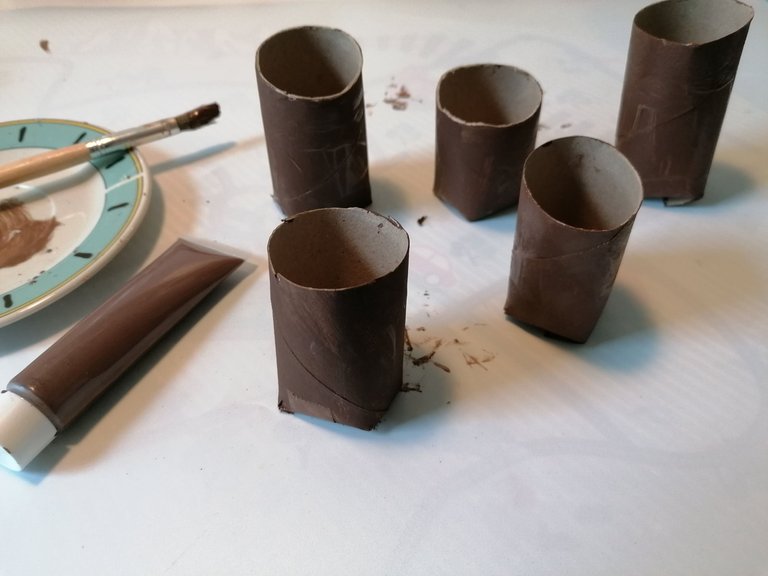
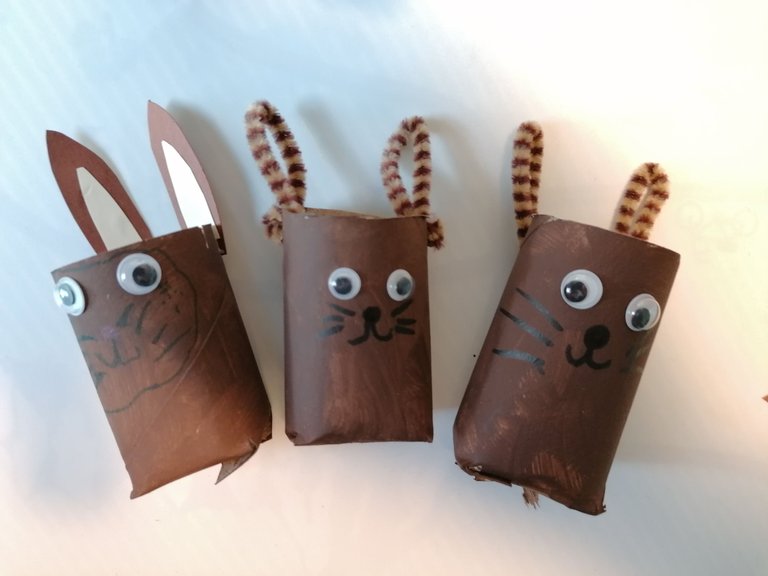
Now we have painted the rolls with brown paint, of course you can also make white or beige bunnies.
Nun haben wir die Rollen mit brauner Farbe bemalt. Man kann natürlich auch weiße oder beige Hasen machen.
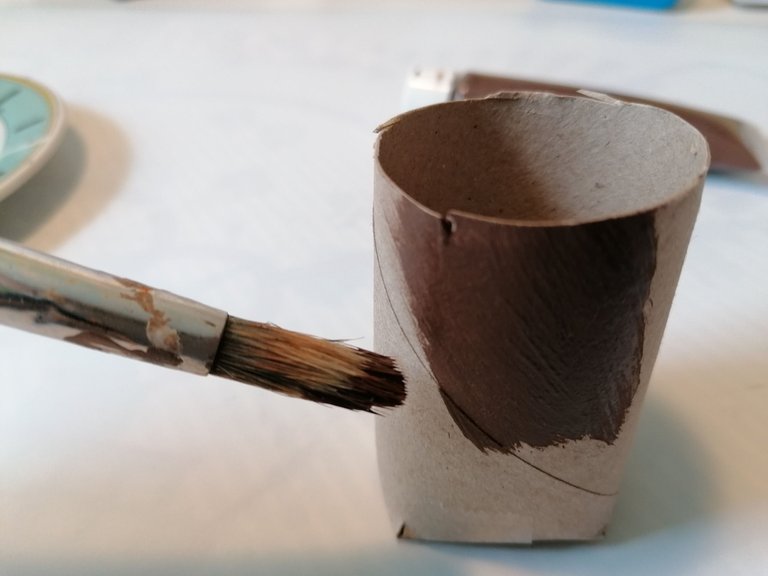
Since I pressed too much brown color on the plate, we quickly entered mass production, because I did not want to waste the color. Good thing I found some toilet paper rolls ;)
Da ich zu viel braune Farbe auf den Teller gedrückt habe, sind wir kurzerhand in die Massenproduktion eingestiegen, da ich die Farbe nicht verschwenden wollte. Gut, dass ich noch ein paar Klopapierrollen gefunden habe ;)
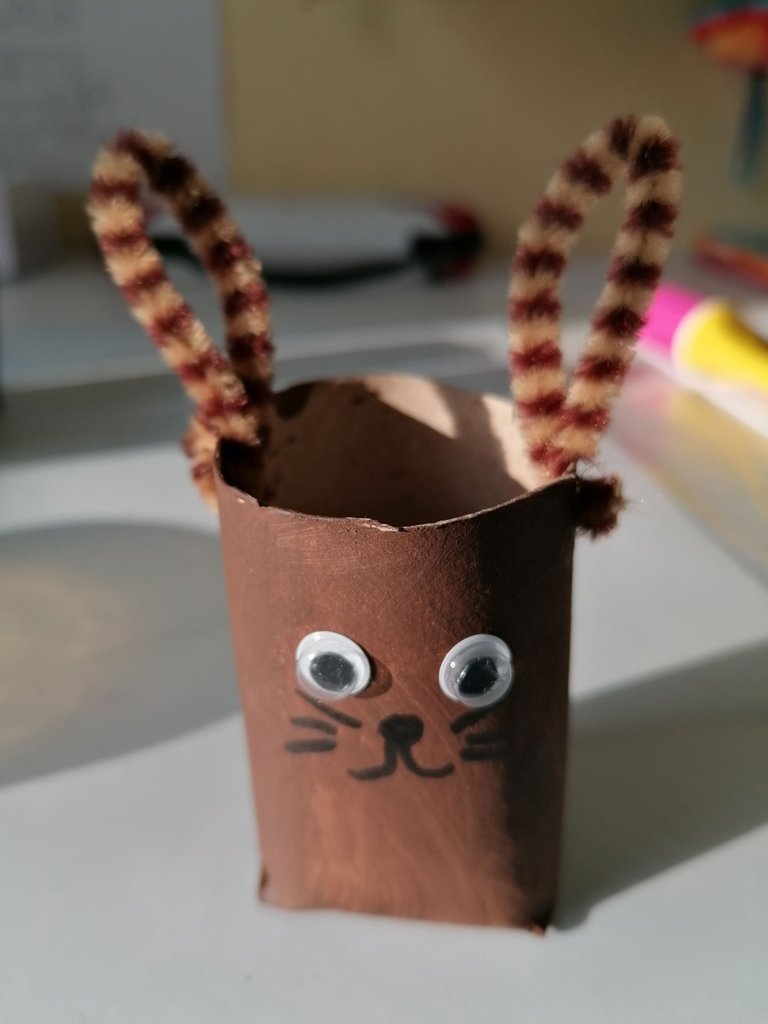
STEP 6:
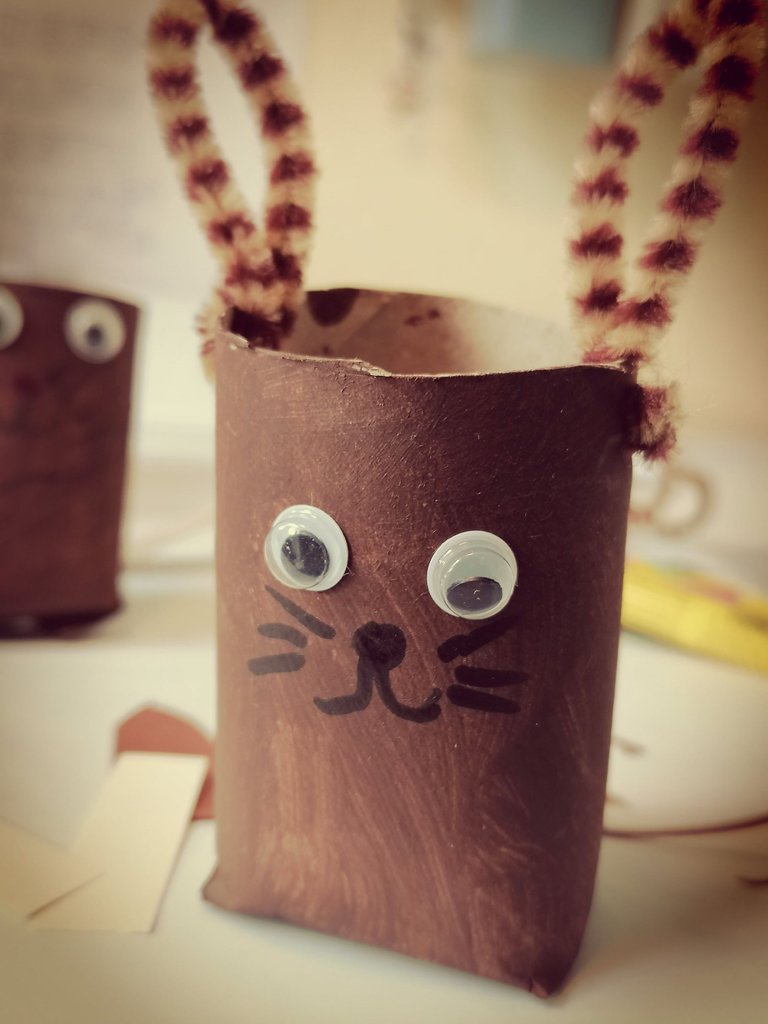
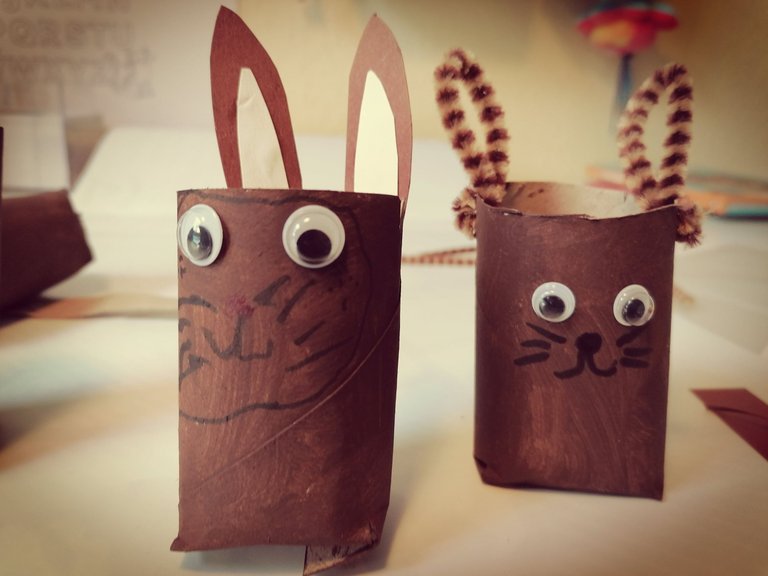
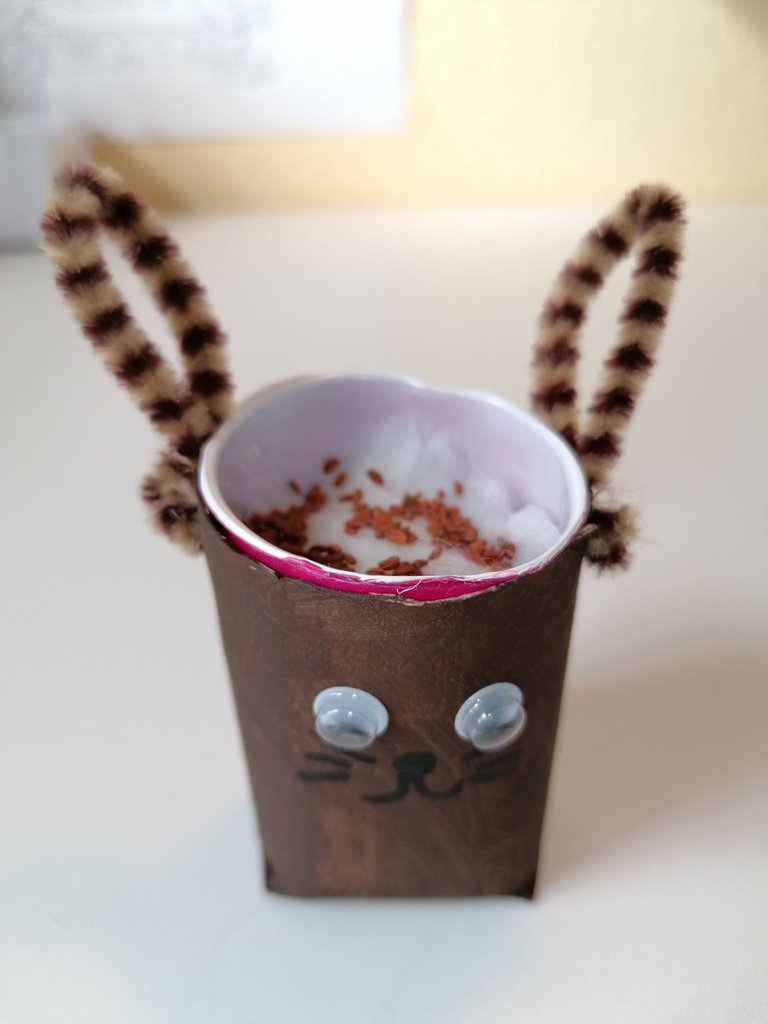
Now we made ears for the rabbits.
For the first bunny, we formed ears from pipe wire and simply attached them to the cardboard through a small hole.
Nun haben wir noch Ohren für die Hasen gebastelt.
Dem ersten Hasen haben wir Ohren aus Pfeifendraht geformt und diese einfach durch ein kleines Loch an der Pappe befestigt.
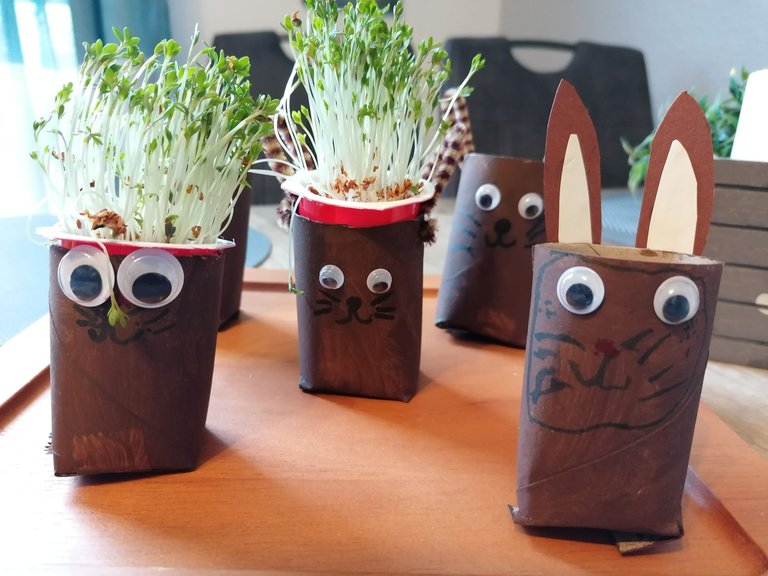
The next bunny received ears made of construction paper.
Der nächste Hase hat Ohren aus Tonpapier erhalten.
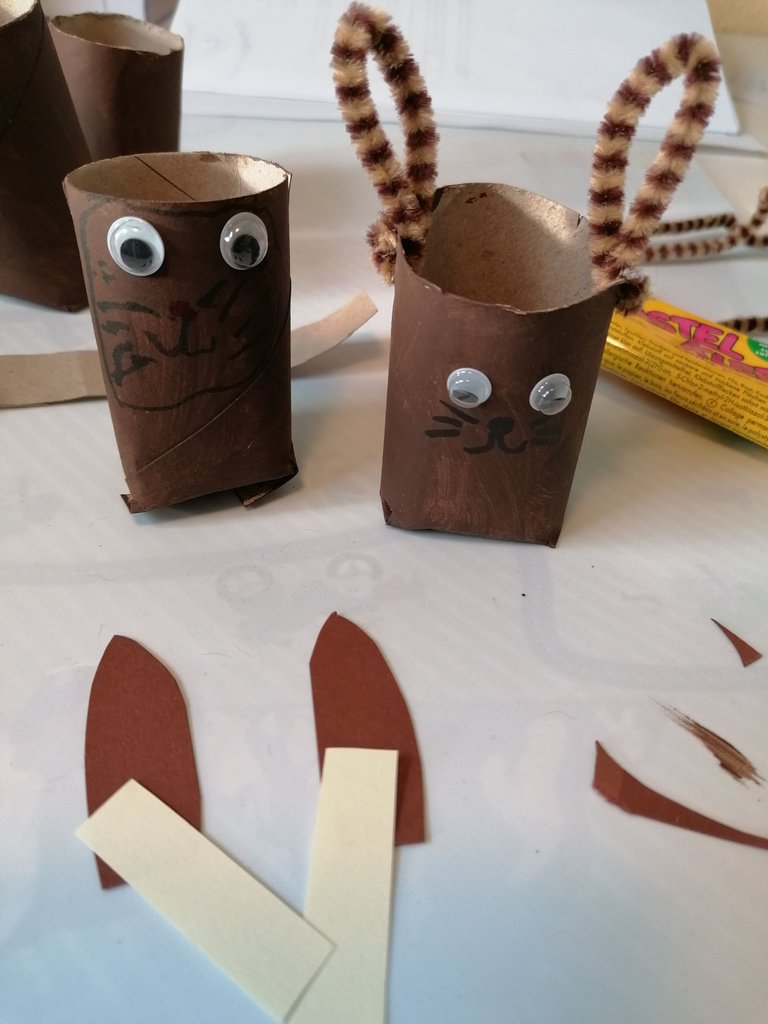
We had a lot of fun designing the rabbit faces and there are also a few bizarre figures came out, eg creativity and that of your children are no limits here. a two-face bunny with 2 faces, one of which had only 1 eye ;)
There are no limits to your creativity and that of your children.
Wir hatten richtig viel Spaß beim Gestalten der Hasengesichter und es sind auch ein paar skurrile Gestalten dabei herausgekommen, z.B.Kreativität und die Eurer Kinder sind hierbei keine Grenzen gesetzt. ein Two-Face Hase mit 2 Gesichtern wobei eines davon nur 1 Auge hatte ;)
Eurer Kreativität und die Eurer Kinder sind hierbei keine Grenzen gesetzt.
STEP 7:
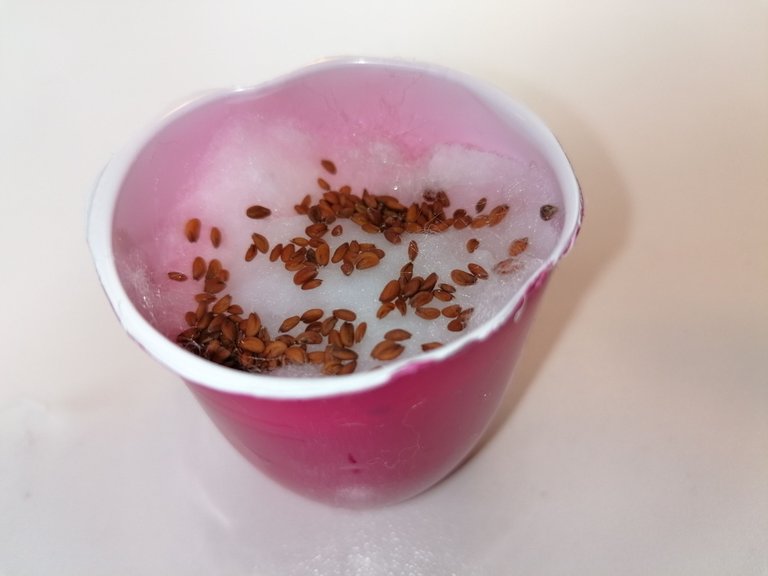
Next, we quickly treated ourselves to a few "fruit dwarfs (small yogurts) and then cleaned the cups.
Als nächstes haben wir uns schnell noch ein paar Fruchtzwerge gegönnt und die Becher dann sauber gemacht.
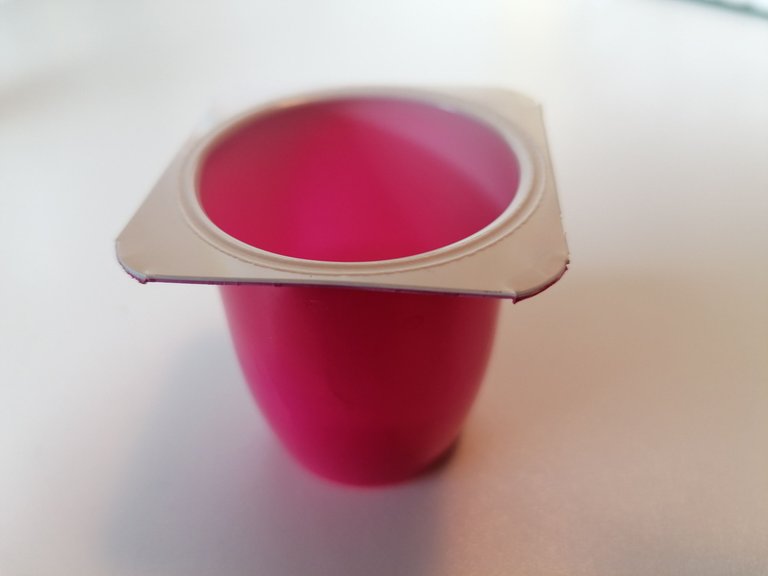
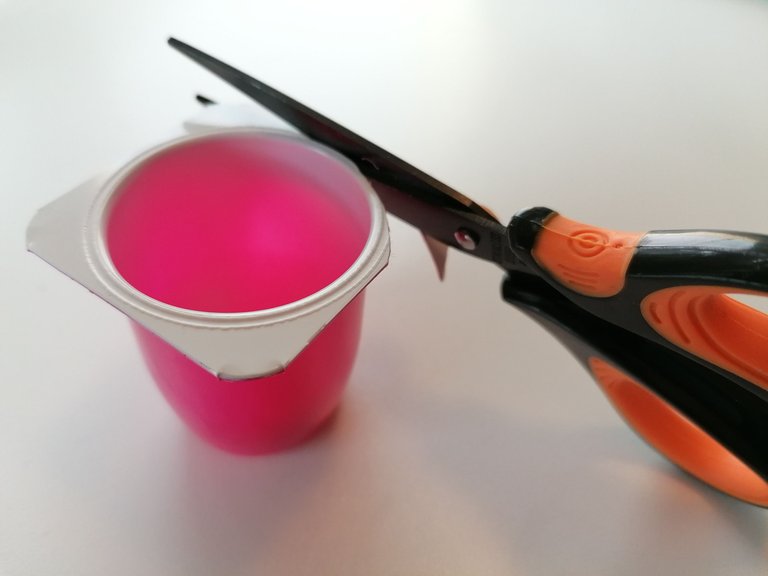
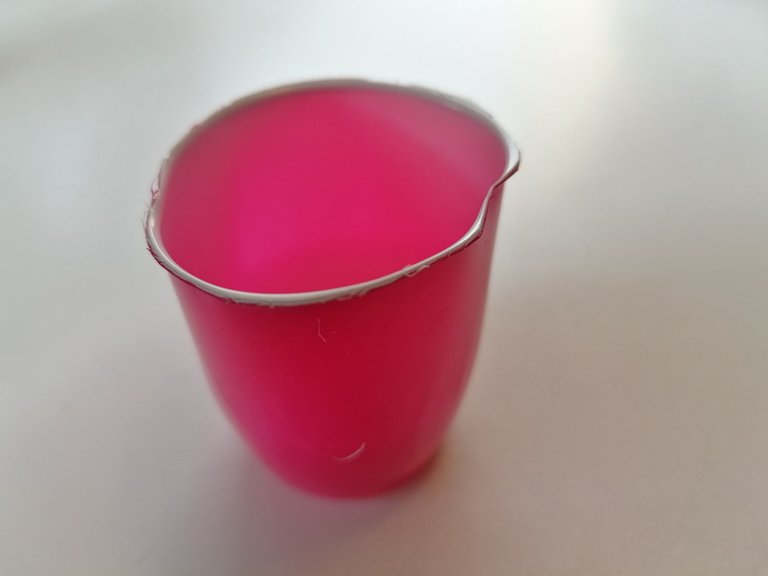
We cut off the edge all around and left only a small rest so that the cup does not slip into the roll. The cups of the small joghurts fit perfectly into the toilet paper or kitchen towel rolls.
Den Rand haben wir ringsherum abgeschnitten und nur noch einen kleinen Rest stehen lassen, damit der Becher nicht in die Rolle hineinrutscht. Die Becher der Fruchtzwerge passen übrigens perfekt in die Klopapier oder Küchentuch-Rollen.
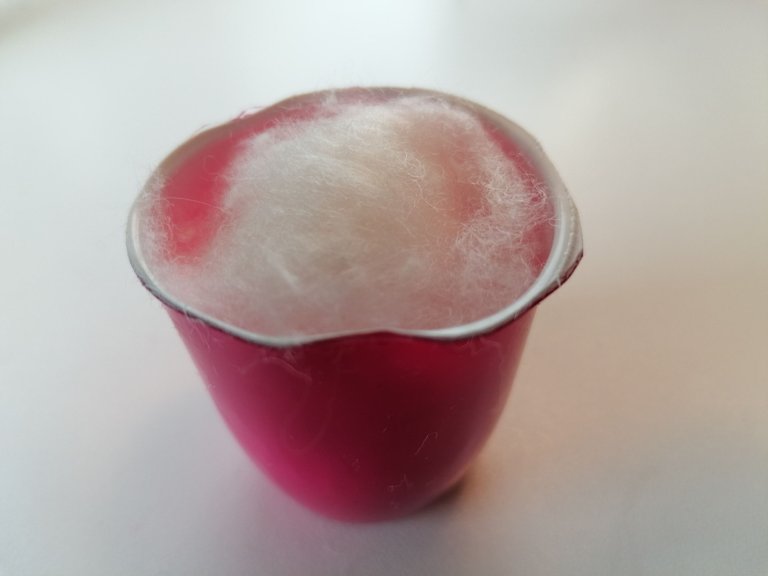
STEP 8:
Now the cup is filled with normal cotton wool.
Nun wird der Becher mit ganz normaler Watte gefüllt.
STEP 9:
We first soaked the cotton wool with some water so that it is nice and moist and then spread the cress seeds on it.
Die Watte haben wir zunächst mit etwas Wasser getränkt, damit sie schön feucht ist und dann die Kressesamen darauf verteilt.
STEP 10:
Now put the cup in the rabbit and the cress bunny is ready.
The next day you can already see how the cress starts to germinate and quickly your bunnies get funny hairstyles :)
Nun noch den Becher in den Hasen stecken und fertig ist der Kresse Hase.
Am nächsten Tag könnt ihr bereits erkennen, wie die Kresse anfängt zu keimen. Und ruck zuck bekommen Eure Hasen lustige Frisuren :)
And the funny bunny family is ready, and the best part: you always have delicious fresh cress on your breakfast table!
Und fertig ist die lustige Hasenfamilie. Und das Beste daran: Ihr habt immer leckere frische Kresse auf dem Frühstückstisch!
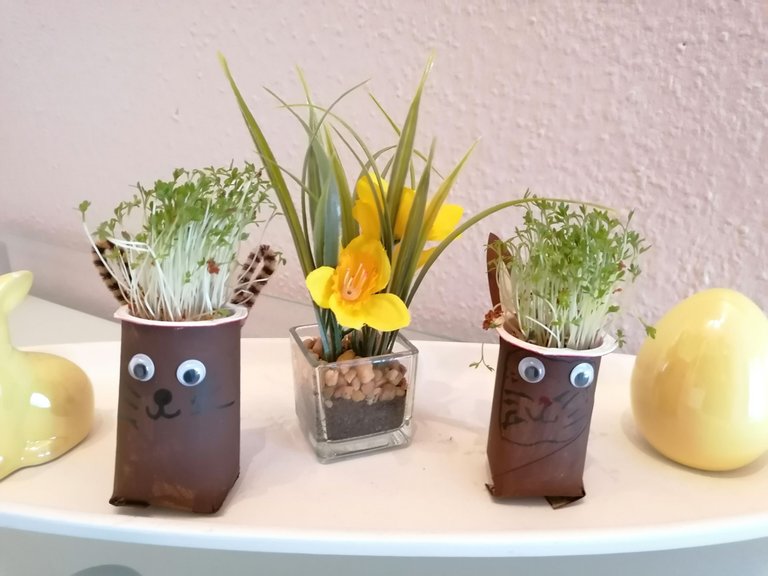
Also as Easter decoration, the rabbits make a pretty good figure.
Auch als Oster Deko machen die Hasen eine recht gute Figur.
Have fun crafting it!
Viel Spaß beim Nachbasteln!
Nette Idee.
!hiqvote
Dankeschön :)
!PIZZA
@ynwa.andree, the HiQ Smart Bot has recognized your request (3/3) and will start the voting trail.
In addition, @karizma gets !PIZZA from @hiq.redaktion.
For further questions, check out https://hiq-hive.com or join our Discord. And don't forget to vote HiQs fucking Witness! 😻
$PIZZA slices delivered:
@karizma(1/5) tipped @ynwa.andree (x1)