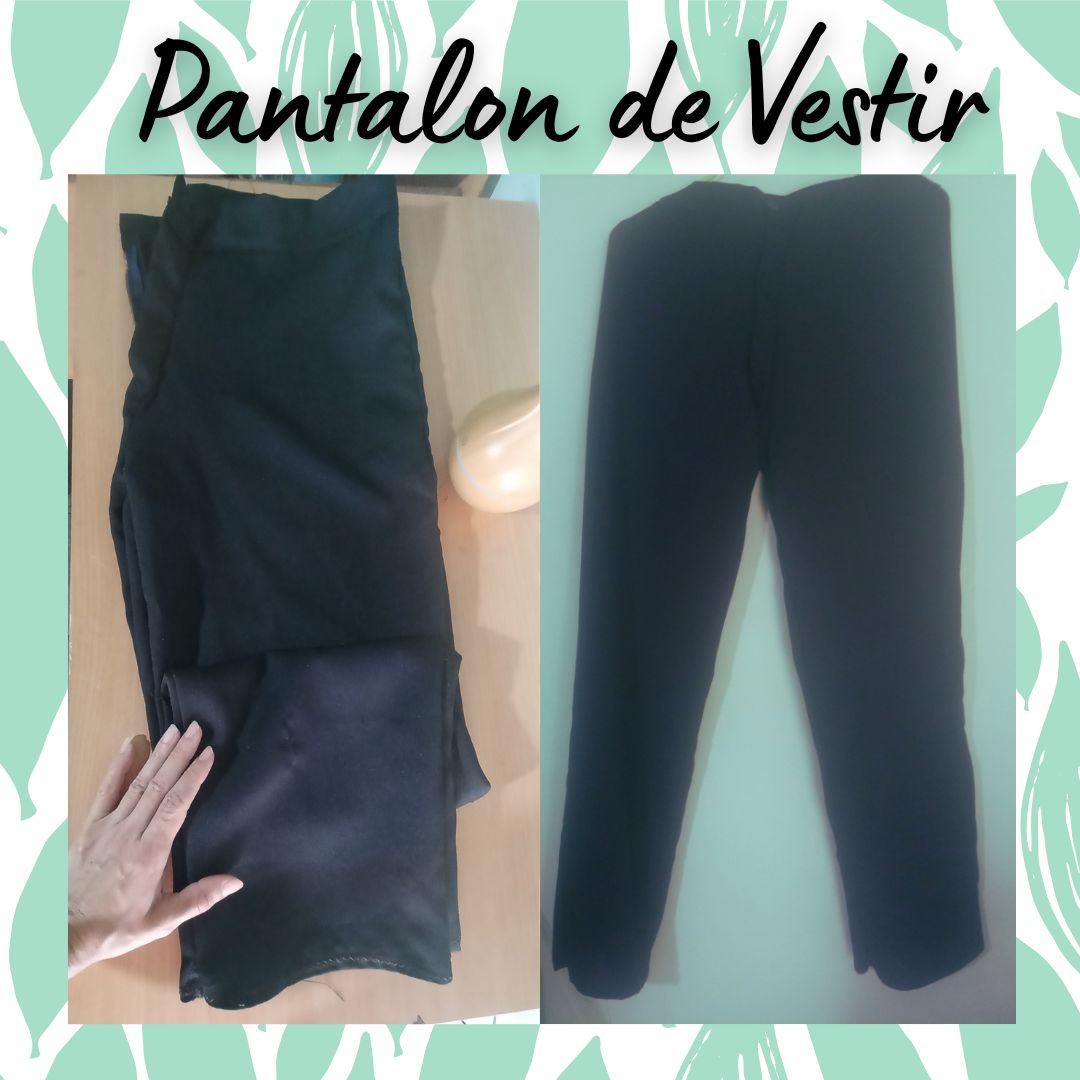
El diseño a confeccionar se realiza con tela de poliéster que le da al pantalón un acabado liso y definido, y como es un pantalón para trabajar y hay que estar en constante movimiento, lo realice no tan ceñido al cuerpo para que de la libertad de desplazamiento sin quitar formalidad al pantalón ya que se debe ver formal con una caída impecable por razones de estética y presentación en el ámbito laboral, ademas de ello se hizo recto sin ningún tipo de adornos ni bolsillos.
Pues bien, les traigo el dia de hoy el paso a paso para realizar el pantalón de vestir:
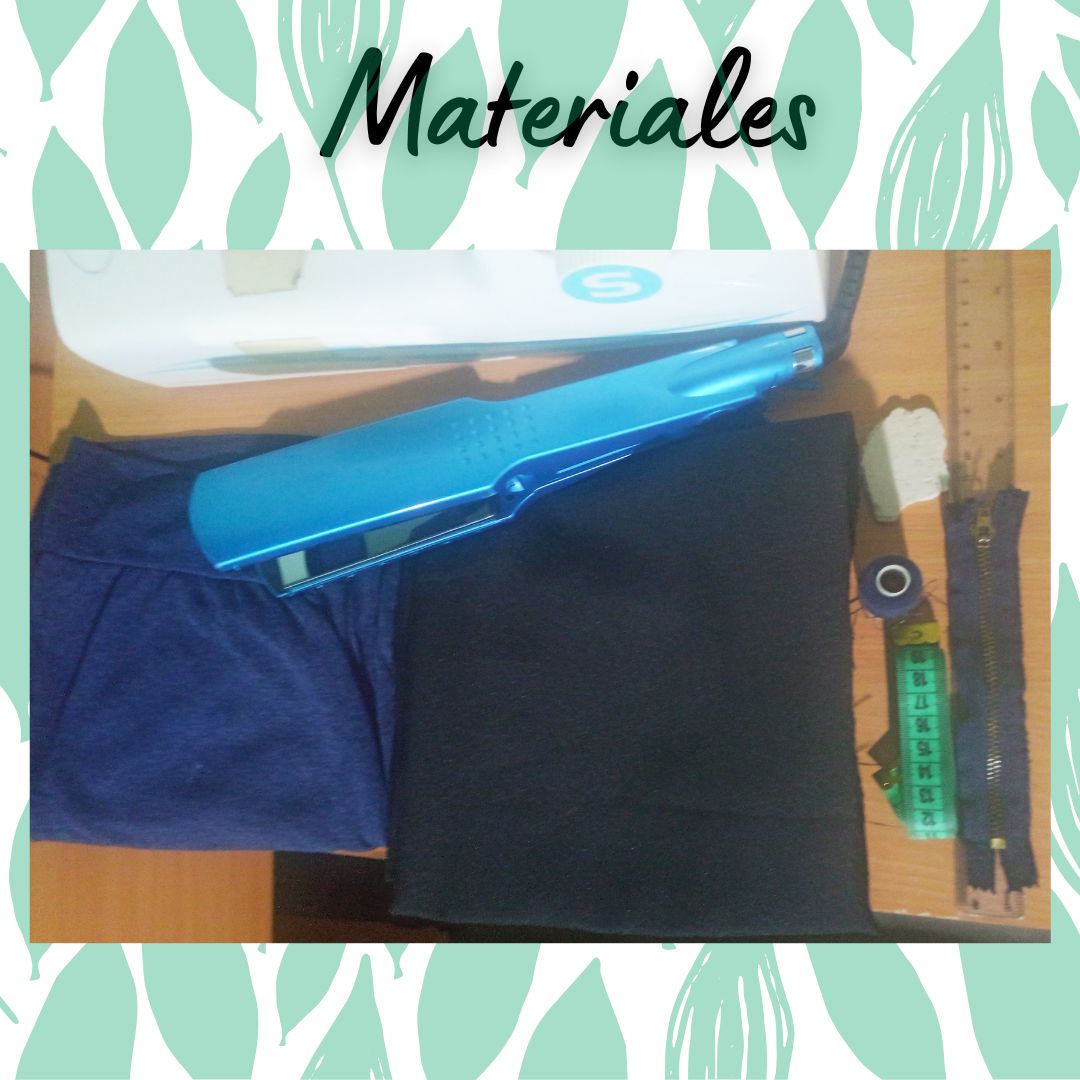
Patrón de un pantalón
Tela de 1 metro y medio
Maquina de coser
Hilo y aguja
Cinta de medir
Regla
Jabon para marcar
Un cierre del tamano deseado
Plancha
Proceso de Elaboración
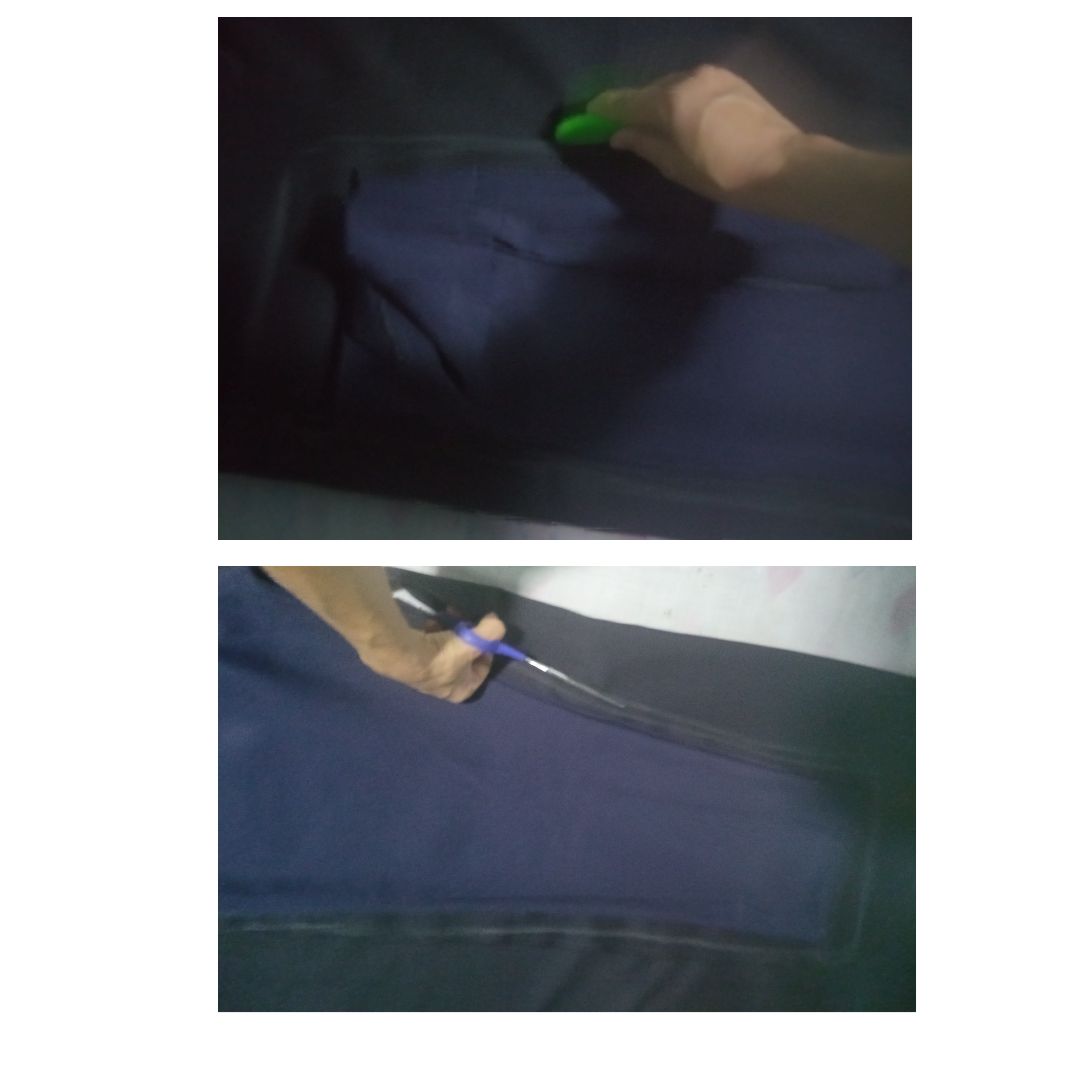
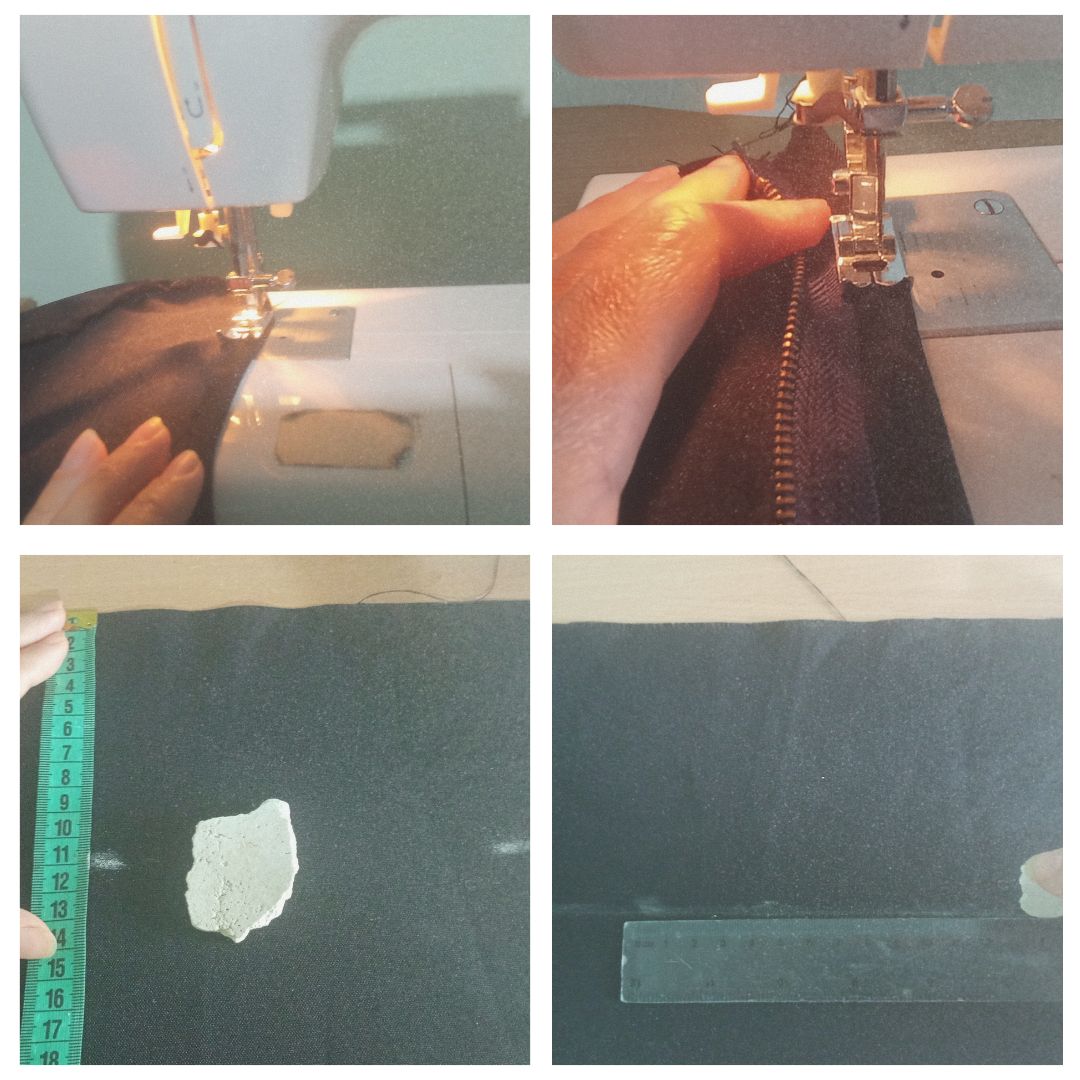
Se coloca la tela tomando en cuenta el hilo de la tela, es decir donde estira la tela va a estar ubicado el ancho del pantalón, se coloca la tela al dobles y colocamos el pantalón que va hacer de patrón y con un pedacito de jabón seco marcamos las líneas siguiendo el patrón de ambas piernas. Se recorta con la tijera con cuidado las lineas que acabamos de trazar, arreglamos la piezas
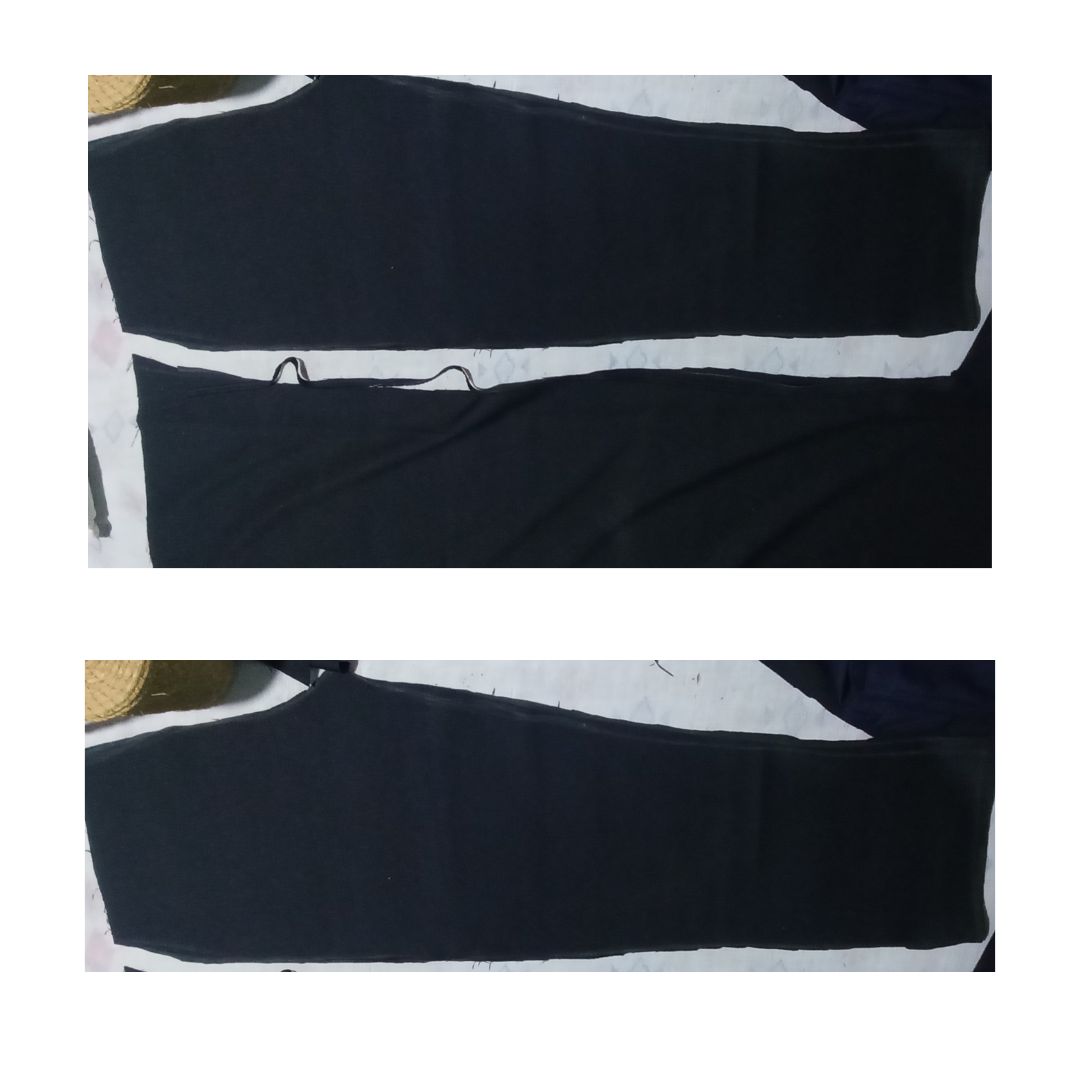
Se ordenan cada pieza y se coloca al revés para coser cada una de las piezas, primero usado costura en forma de zig zag y luego se pasa costura recta, de esta forma aseguramos que no abra ningun descosido
Luego de coser cada una de las piezas, recortamos dos pedacitos de tela al tamaño del cierre y cosemos, luego se pega al pantalón, asegurandolo bien con costura recta.
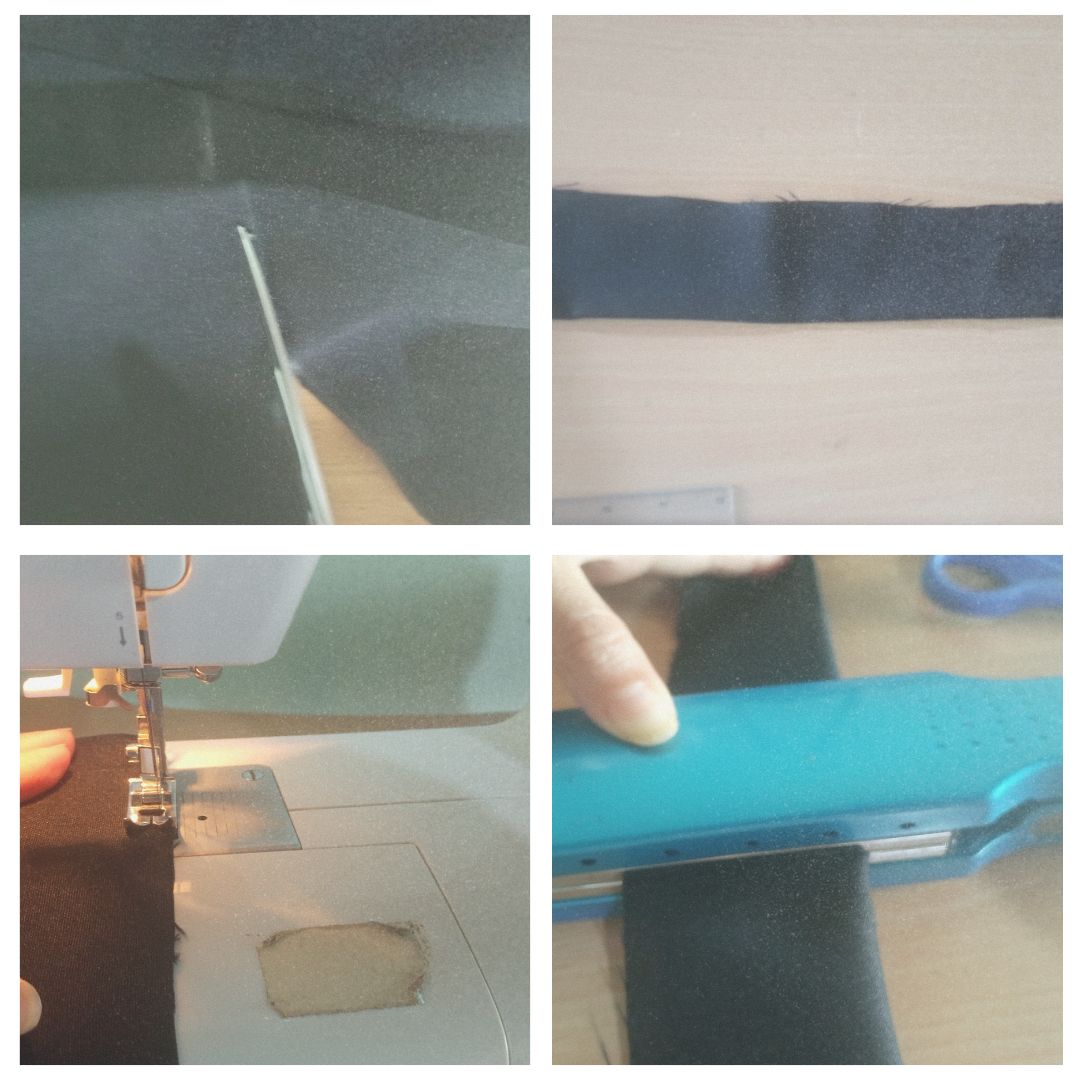
Para la realización de la pretina medimos 11 centímetros, marcamos con tiza ayudándonos de una regla
Recortamos la pretina, doblamos con cuidado, le pasamos la plancha con el fin de que quede bien posicionado y sea mas fácil coser sin que se mueva, posteriormente cosemos con costura recta y para que quede bien fijo la pieza le volvemos a pasar la plancha para cuadrar bien la pretina.
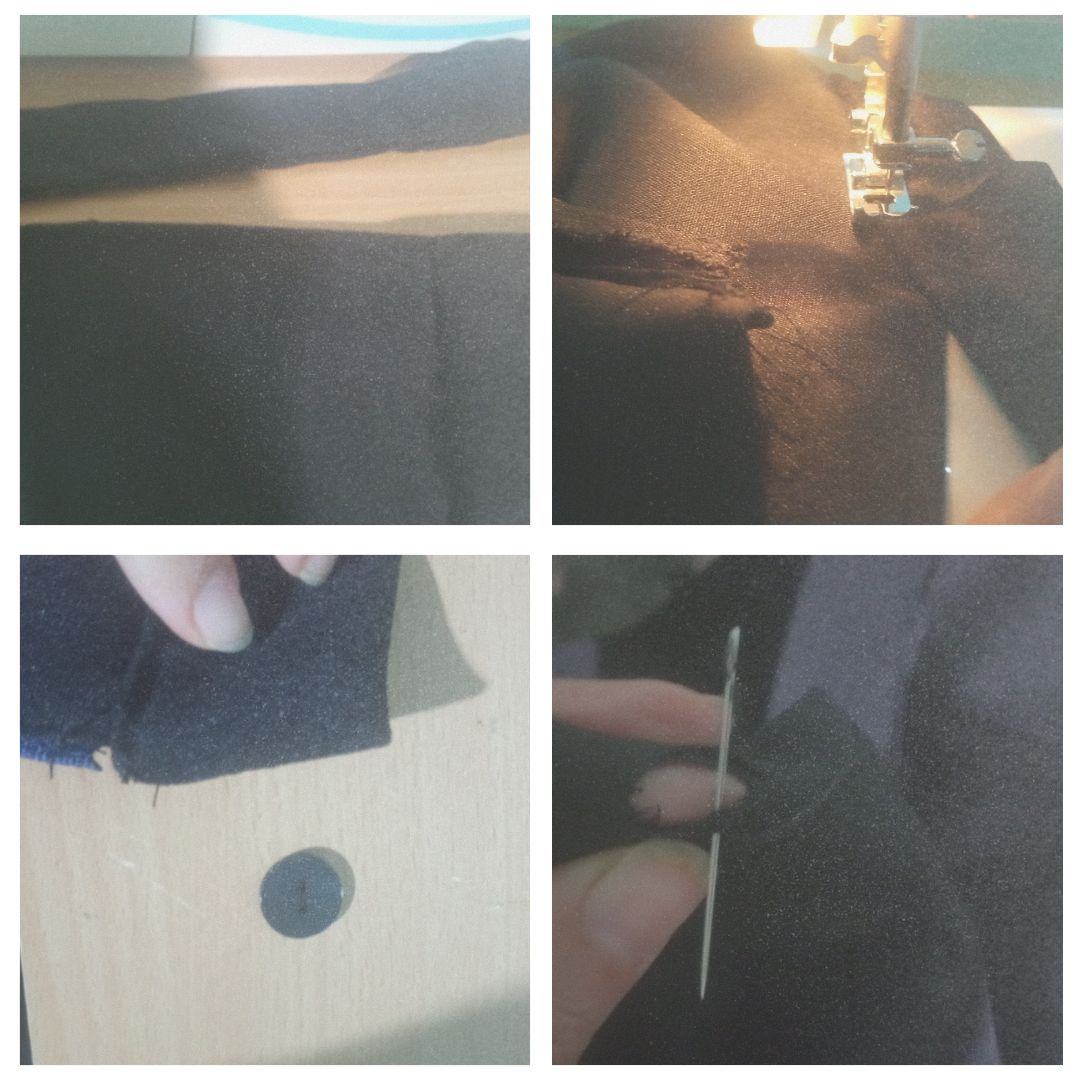
Colocamos alrededor de todo el pantalón la pretina y vamos cosiendo con costura recta, ubicamos el botón en el pantalón y con hilo y la aguja lo colocamos, al otro lado del pantalon recortamos y cosemos el ojal midiendo con antelación el botón para que quede justo.
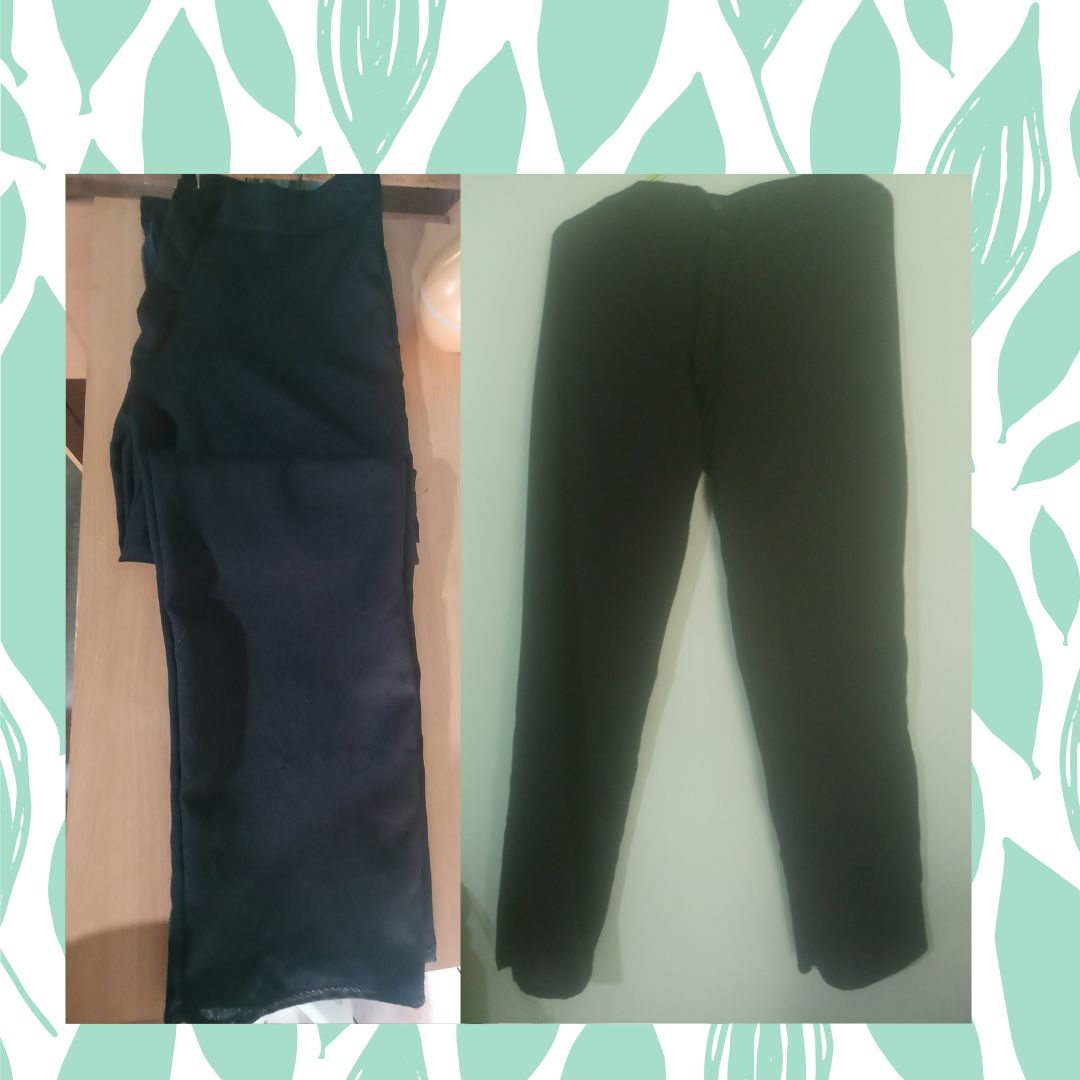
Rematamos con costura las botas del pantalón para que quede a la medida y así nos queda nuestro pantalón de salir con cierre incorporado.
Bueno espero que les haya gustado la manualidad del dia de hoy, si tienen alguna duda o recomendación pueden comentar, será entonces para una proxima ocasion donde seguiremos mostrándoles el paso a paso de diversas creaciones, hasta entonces, Saludos y Bendiciones.
EN
The design to be made is made with polyester fabric that gives the pants a smooth and defined finish, and as it is a pant for work and you have to be in constant movement, I made it not so tight to the body to give freedom of movement without removing formality to the pants as it should look formal with an impeccable fall for reasons of aesthetics and presentation in the workplace, besides it was made straight without any decorations or pockets.
Well, today I bring you the step by step to make a dress pants:
Pattern for a pair of pants
1 and a half meter fabric
Sewing machine
Thread and needle
Measuring tape
Ruler
Soap for marking
A zipper of the desired size
Iron
Process of Elaboration
The fabric is placed taking into account the thread of the fabric, that is to say, where the fabric stretches, the width of the pants will be located, the fabric is placed on the doubles and we place the pants that will be the pattern and with a little piece of dry soap we mark the lines following the pattern of both legs. Carefully cut with the scissors the lines that we have just traced, we fix the pieces.
Arrange each piece and place it upside down to sew each of the pieces, first using zig zag stitching and then sewing straight stitching, this way we make sure that no seam is unpicked.
After sewing each of the pieces, we cut two small pieces of fabric to the size of the zipper and sew, then we glue it to the pants, securing it well with a straight seam.
To make the waistband, measure 11 centimeters and mark with chalk using a ruler.
We cut the waistband, fold it carefully, we pass the iron so that it is well positioned and it is easier to sew without moving, then we sew with a straight seam and to fix the piece well we pass the iron again to square the waistband.
We place the waistband all around the pants and sew with a straight seam, we place the button on the pants and with thread and needle we place it, on the other side of the trousers we cut and sew the buttonhole measuring the button in advance so that it is just right.
We finish the pants legs with a seam so that they fit perfectly and this way we have our pants with a built-in zipper.
Well, I hope you liked today's craft. If you have any questions or recommendations, you can comment. It will be for the next occasion where we will continue to show you the step by step of various creations. Until then, Greetings and Blessings.

Photos owns.
Designer in canva.com
Translated with DeepL.com (free version)
https://bsky.app/profile/did:plc:rag2mftdy2alo7rtmyttmpk4/post/3lindqzs5gr2u
https://bsky.app/profile/did:plc:rag2mftdy2alo7rtmyttmpk4/post/3lindqzs5gr2u
The rewards earned on this comment will go to the author of the blog post.