Español
Saludos amigos creadores🙋🌈🐱.
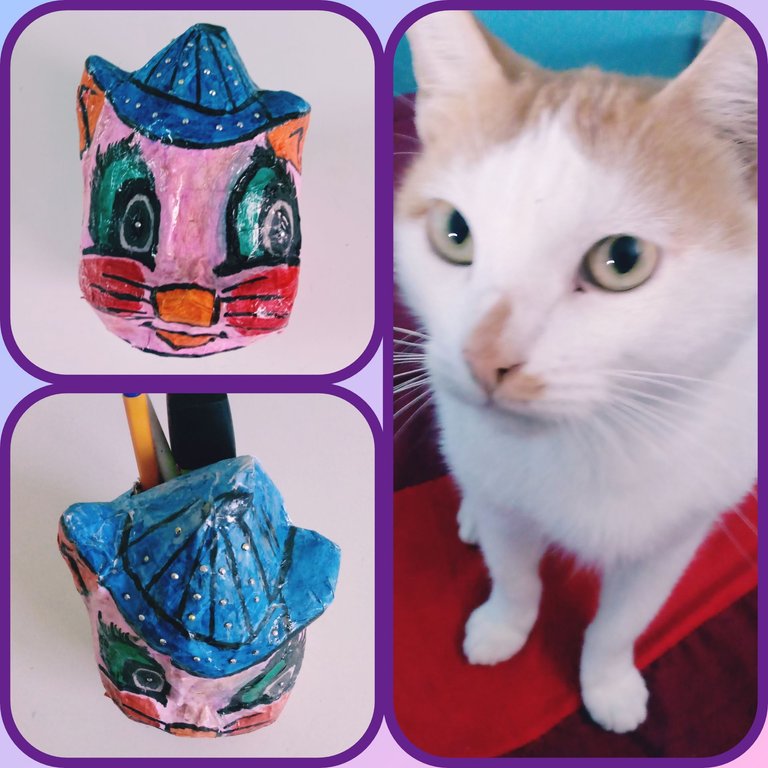
Desde pequeña soy amante de los animales, en especial de los felinos, que me llenan de sentimientos con tan sólo una mirada de sus penetrantes ojos. Este amor hacia ellos también lo comparte mi pequeña primita de diez años, a quién de regalo por su cumpleaños le confeccioné un porta lápiz, inspirada en varios compartidos por ustedes y en mi pequeño gato,Tiguer. Hoy le comparto en forma de tutorial el paso a paso de cómo lo confeccioné.
🐱Materiales🐱
.Molde:Pozuelo plástico mediano
.Cartulina
.Papel
.Tiras de papel blanco
.Pega elaborada de harina
.Pegamento
.Temperas
.Pincel
.Barniz
.Piedresitas brillante
🐱Modo de confección🐱
1-Tomar el molde y con un algondonsito humedecido en aceite impregnar toda su superficie .
2-Utilizando tiras de papel blanco y pega elaborada de harina, realizarle tres capas de empapelado al molde. Dejar secar por ocho horas.
3-Desmontar del molde y tomando una tijera cortar las tiritas sobrantes.
4- Sellar la parte abierta del molde utilizando las tiras de papel blanco y pega elaborada de harina. Permitiéndonos obtener una estructura cóncava cerrada. Dejar secar por cinco horas.
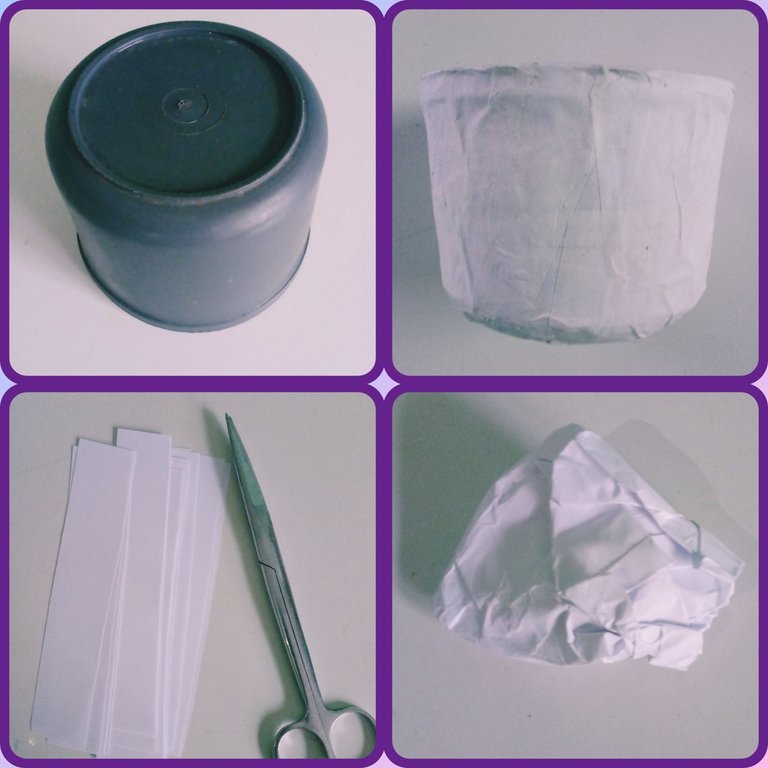
Hasta aquí tenemos creada la base para nuestro porta lápiz. Ahora comenzaremos a conformarle la apariencia de gato confeccionándoles orejas puntiagudas.
Pasos para las orejas:
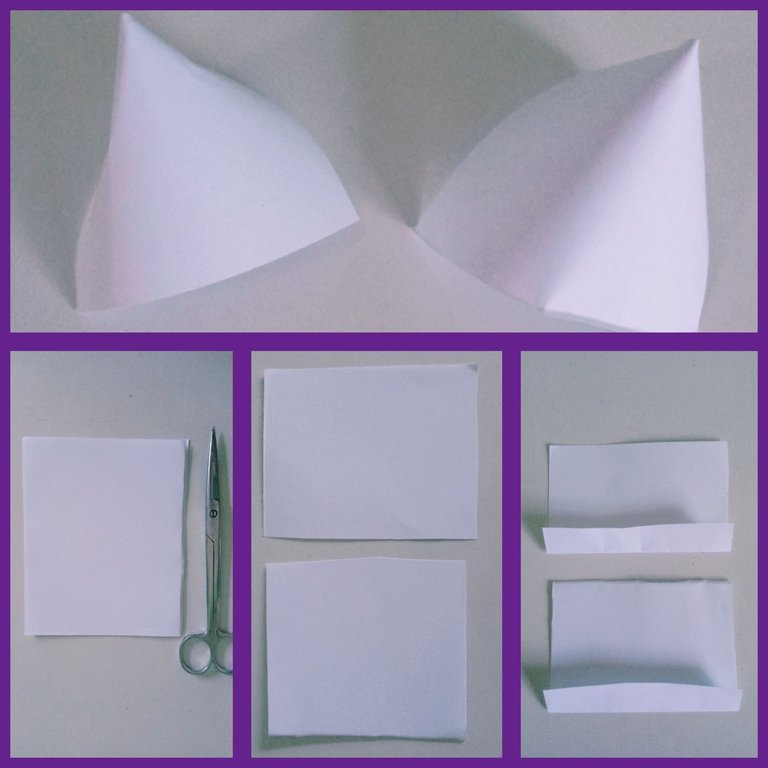
1-Utilizando la tijera, cortar dos cuadrados medianos de cartulina.
2-Realizar en cada uno un pequeño doblez de un centímetro.
3-Colocar pegamento en los dobleces y unirlos conformando pequeños conos.
Sombrero
Estrujar papel y con la pega elaborada de harina, amoldarlo en forma triangular.
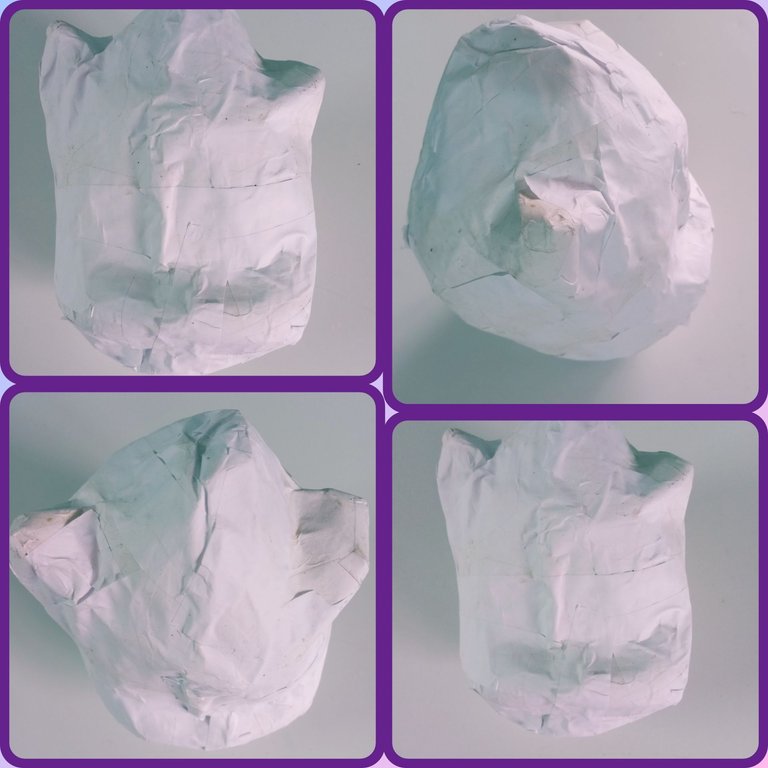
Teniendo listas las estructuras de nuestras orejas y sombrero , pasamos a adherirlas utilizando pegamento a la base confeccionada. Luego, le realizamos una grieta en la parte superior y le damos una capa de empapelado en su totalidad generándole firmeza y dejándola lista para ser decorada con pinceles y temperas.
Para escoger los colores tuve en cuenta los gustos de mi pequeña prima , a quién le encanta los colores rosado y azul, por lo que los empleé para la cara y sombrerito del gato. Quise pintar los ojos verdes , para que fuesen tan penetrantes y encantadores como los de mi gato Tiguer, y realizarles cachetes rojos, para que reflejaran el amor que ellos desplegan a sus dueños. Para su acabado brilloso utilicé barníz y piedresitas coloridas.
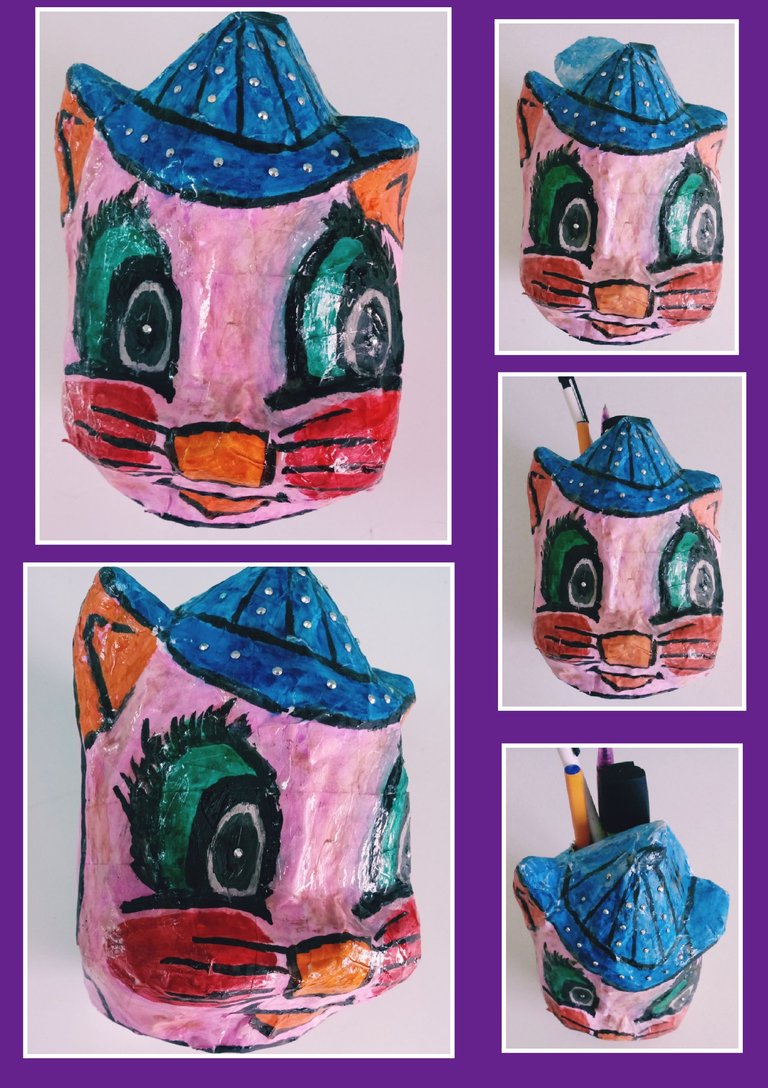
El resultado amigos, me encantó, y más al ver la emoción de mi pequeña prima al recibirlo, quién inmediatamente lo llenó de material escolar.
Los exhorto a que se animen a su confección, les aseguro que a los pequeños de casa les encantarán y más a los amantes de los animales.
Excelentes y bendecidas semanas 🙋🌈🐱
Confecciones y fotografías propias.
English
Greetings fellow creators🙋🌈🐱.
Since childhood I have been a lover of animals, especially felines, which fill me with feelings with just a glance from their penetrating eyes. This love for them is also shared by my little ten-year-old cousin, to whom as a gift for her birthday I made a pencil holder, inspired by several shared by you and my little cat, Tiguer. Today I share in the form of a tutorial the step by step of how I made it.

🐱Materials🐱
.Mold: Medium plastic bowl
.Cardboard
.Paper
.White paper strips
.Paste made of flour
.Glue
.Temperas
.Brush
.Varnish
.Shiny pebbles
🐱Mode of preparation🐱
1-Take the mold and with a little something moistened in oil impregnate its entire surface.
2-Using strips of white paper and glue made of flour, make three layers of wallpaper to the mold. Leave to dry for eight hours.
3-Disassemble from the mold and using a scissors cut the leftover plasters.
4- Seal the open part of the mold using the strips of white paper and glue made of flour. Allowing us to obtain a closed concave structure. Leave to dry for five hours.

So far we have created the base for our pencil holder. Now we will start shaping the cat's appearance by making pointed ears for them.
Steps for the ears:
1-Using scissors, cut two medium squares of cardboard.
2-Make a small bend of one centimeter in each one.
3-Put glue on the folds and join them forming small cones.

Hat
Squeeze paper and with the glue made of flour, mold it into a triangular shape.
Having the structures of our ears and hat ready, we proceed to adhere them using glue to the made base. Then, we give it a layer of wallpaper in its entirety generating firmness and leaving it ready to be decorated with brushes and tempera.

To choose the colors I took into account the tastes of my little cousin, who loves pink and blue colors, so I used them for the cat's face and hat. I wanted to paint the green eyes, so that they would be as penetrating and charming as those of my cat Tiguer, and make red cheeks, so that they would reflect the love that they display to their owners. For its shiny finish I used varnish and colorful pebbles.

The result friends, I loved it, and more when I saw the excitement of my little cousin when she received it, who immediately filled it with school supplies.
I urge you to be encouraged to make them, I assure you that the little ones at home will love them and even more so for animal lovers.
Excellent and blessed weeks 🙋🌈🐱
Own clothing and photographs.
You have created an amazing art using cells. Where there is love and generosity towards animals and life. You have completed the work of creating a cat in this amazing work. You have shown your skills by involving animals with art with the aim of inspiring animals above all. Thanks for sharing
Thank you very much, I love animals. Greetings🙋🐱☀
most welcome my pleasure
Un portalapices muy original y coorido, el gato se ve cuchi y adorable, me encantó el sombrero está genial.
Saludos!
!DIY
Muchas gracias.Bendecidos días 🙋☀.
You can query your personal balance by
!DIYSTATSYour craft truly depicts your love for cats. Nice work creating a useful pencil holder. Well done
Thank you very much. Blessings🙋🌈
Congratulations @marydeluz! You have completed the following achievement on the Hive blockchain And have been rewarded with New badge(s)
Your next target is to reach 300 comments.
You can view your badges on your board and compare yourself to others in the Ranking
If you no longer want to receive notifications, reply to this comment with the word
STOP