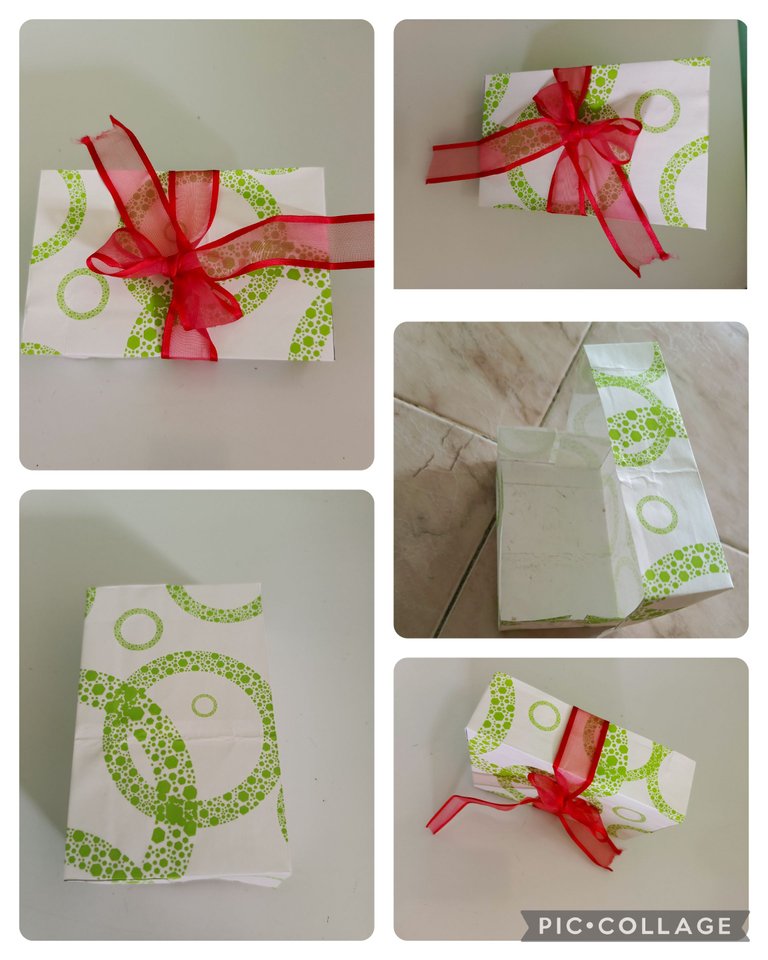
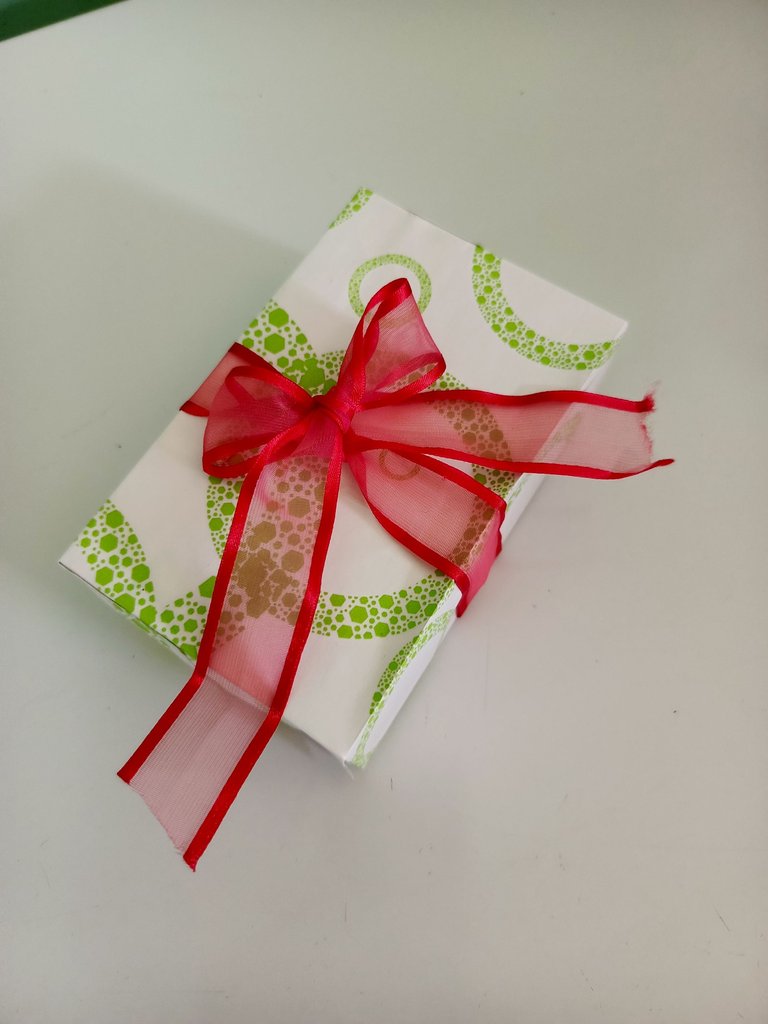
Feliz sábado amigos creativos, hoy les traigo una nueva, interesante y hermosa idea para hacer una linda caja de regalo 🎁 utilizando solo papel .
En otra oportunidad ya les compartí una caja que hice de color azul, también compartí una caja dorada y, el día de hoy traigo una cajita rectangular ideal para obsequiar prendas ,reloj o detalles pequeños, solamente necesitas papel, el color que quieres, el color que desees, el color que tengas a la mano y el resultado estoy seguro que te va a gustar , te muestro cómo lo hice:
Happy Saturday creative friends, today I bring you a new, interesting and beautiful idea to make a nice gift box 🎁 using only paper.
In another opportunity I already shared with you a box I made in blue color, I also shared a golden box and, today I bring you a little rectangular box ideal for gift garments ,watch or small details, you only need paper, the color you want, the color you want, the color you have at hand and the result I'm sure you will like , I show you how I did it:

MATERIALES
Papel
Tijera
Regla
Cinta decorativas
MATERIALS
Paper
Scissors
Ruler
Decorative tape
PREPARACIÓN
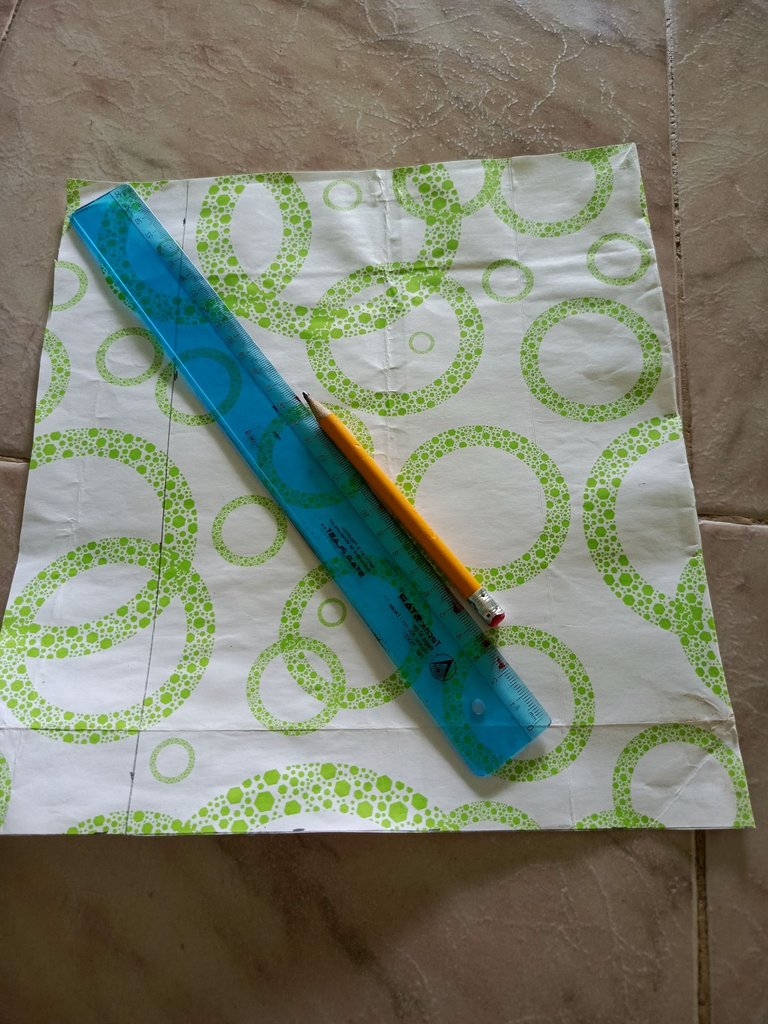
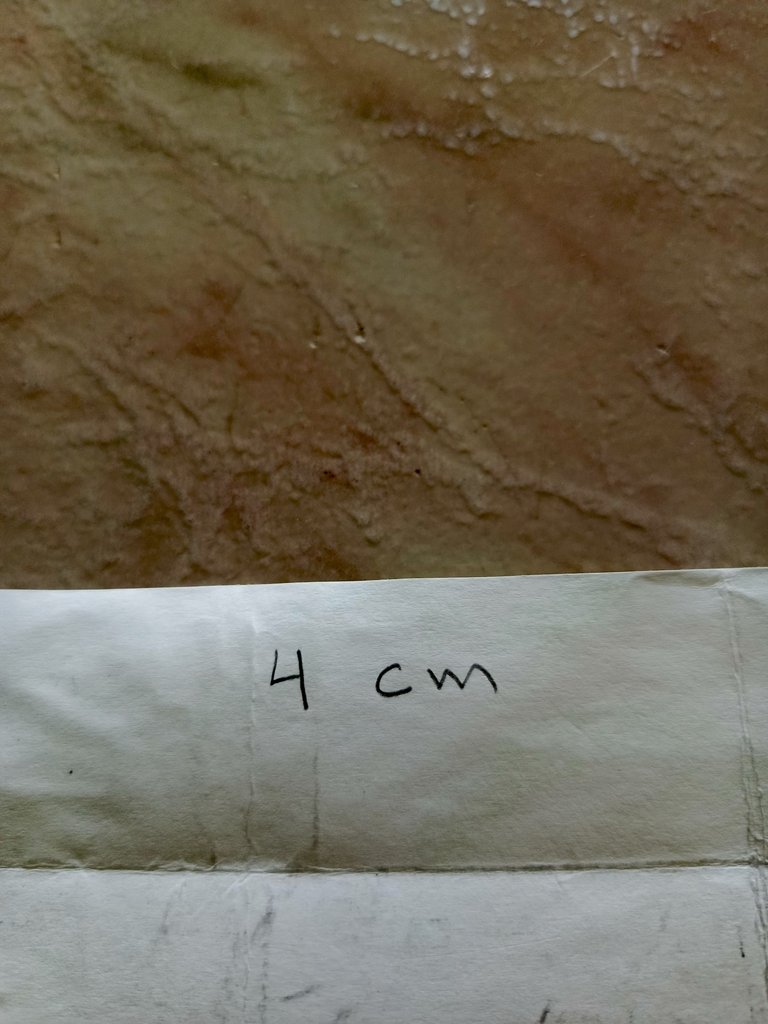
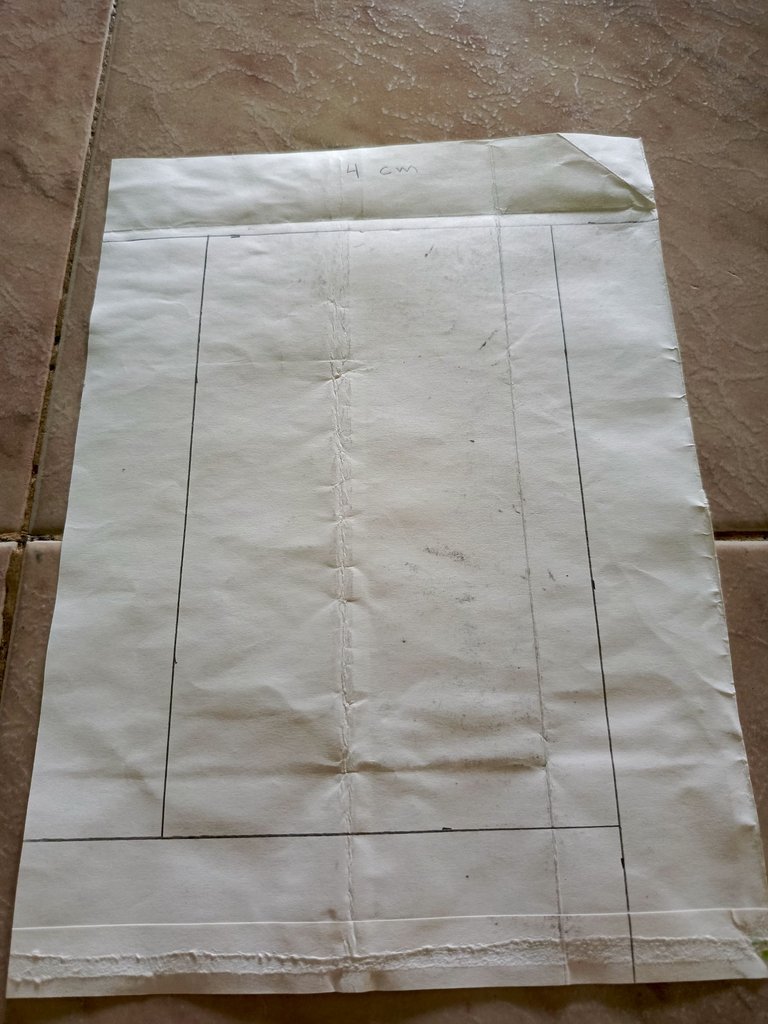
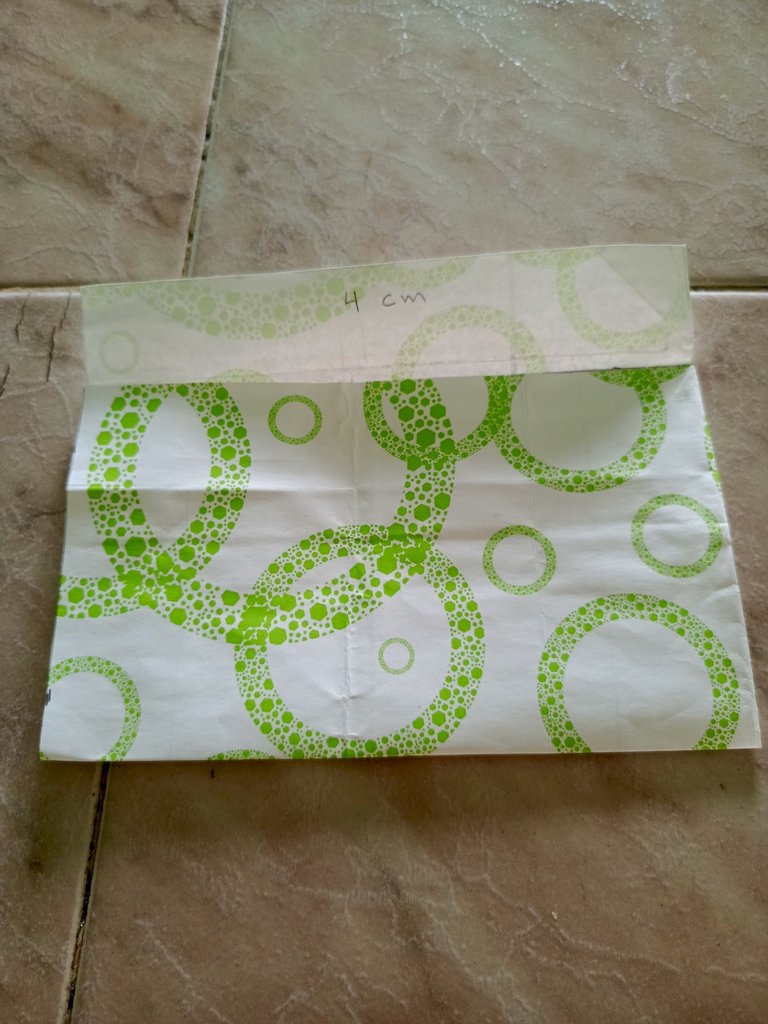
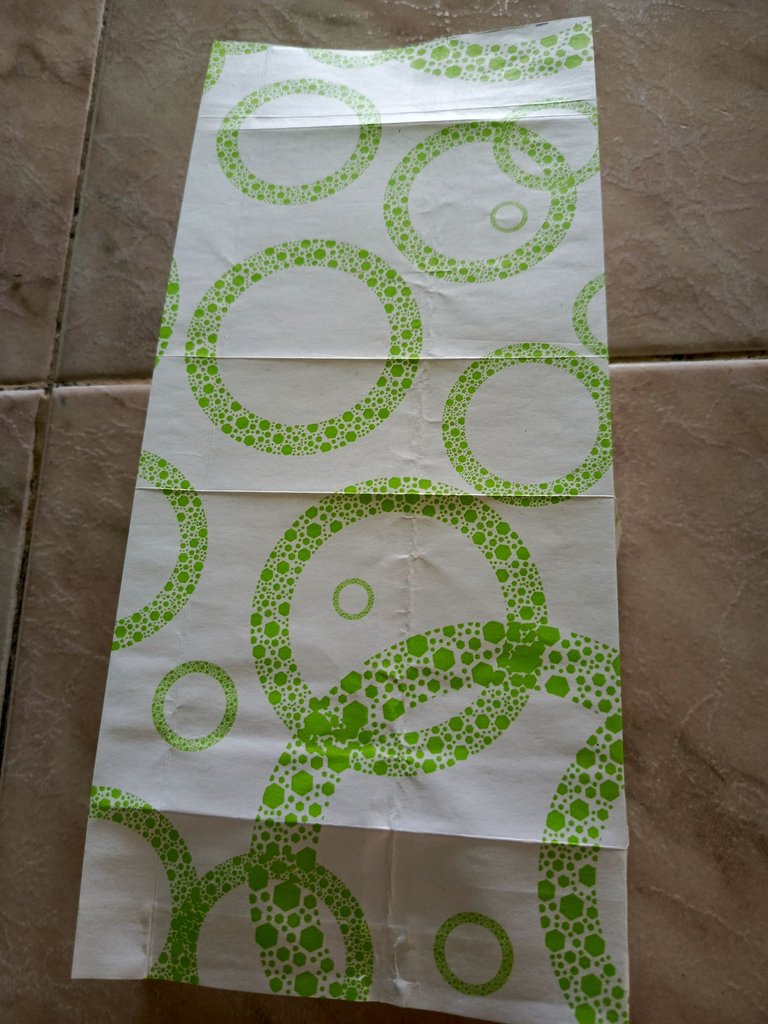
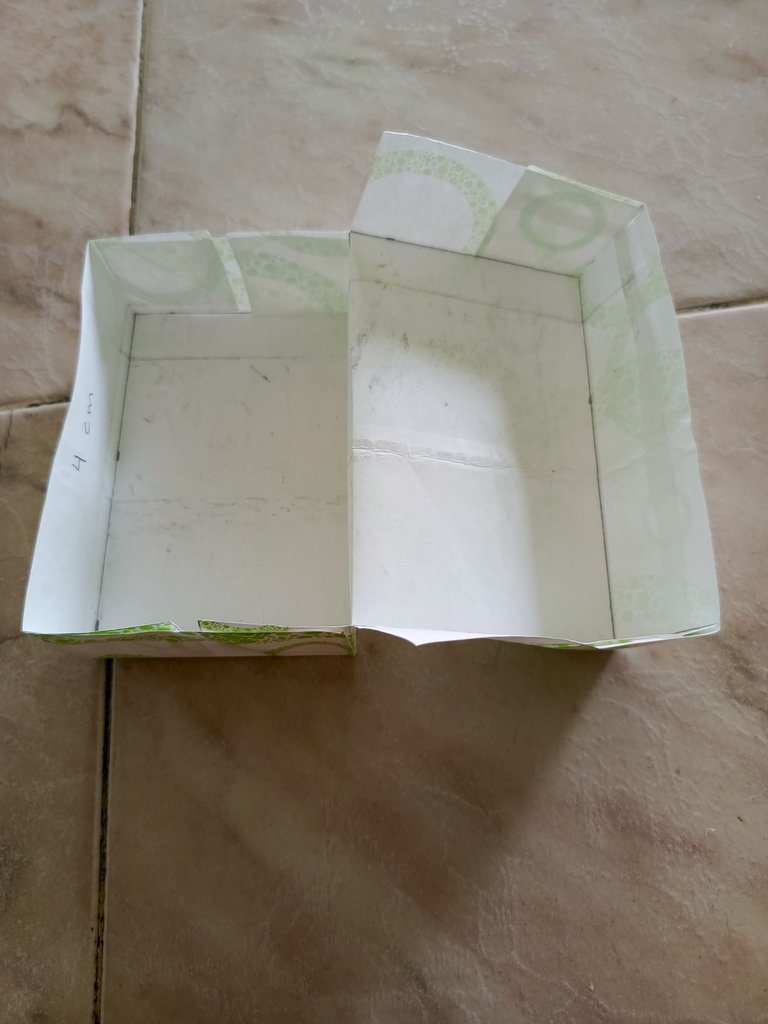
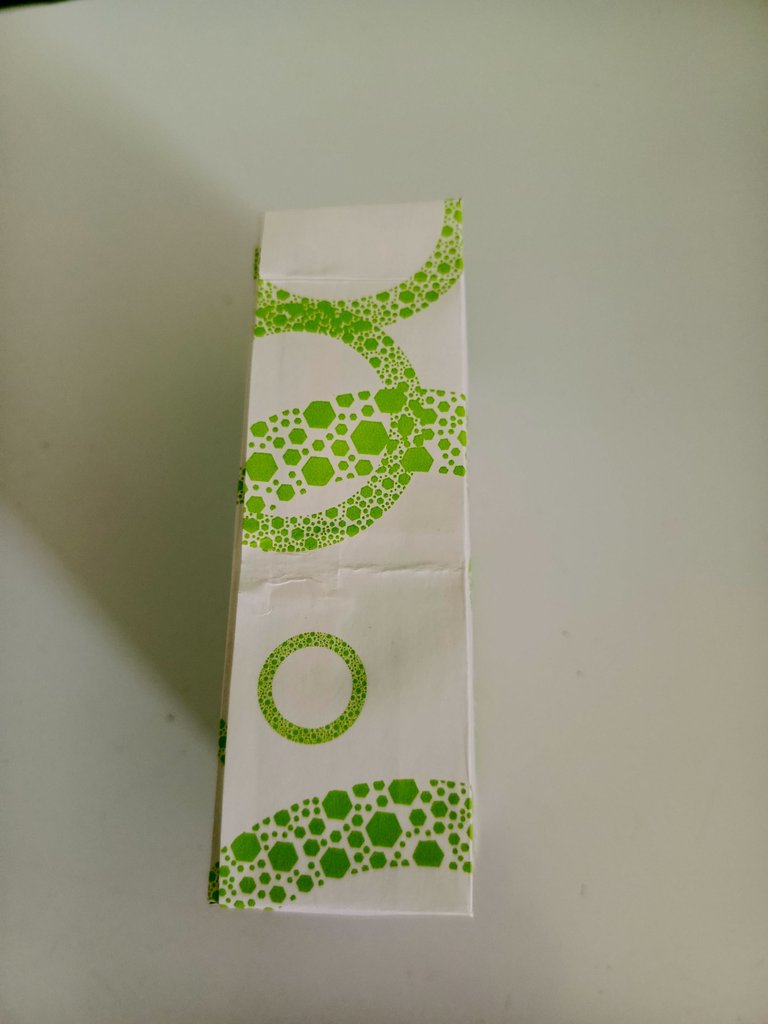
Utilizando la regla se marca en el papel que se va a utilizar; yo utilicé uno con decoraciones verdes, un rectángulo de 21 * 29 cm, luego en cada borde marcamos 4 cm .
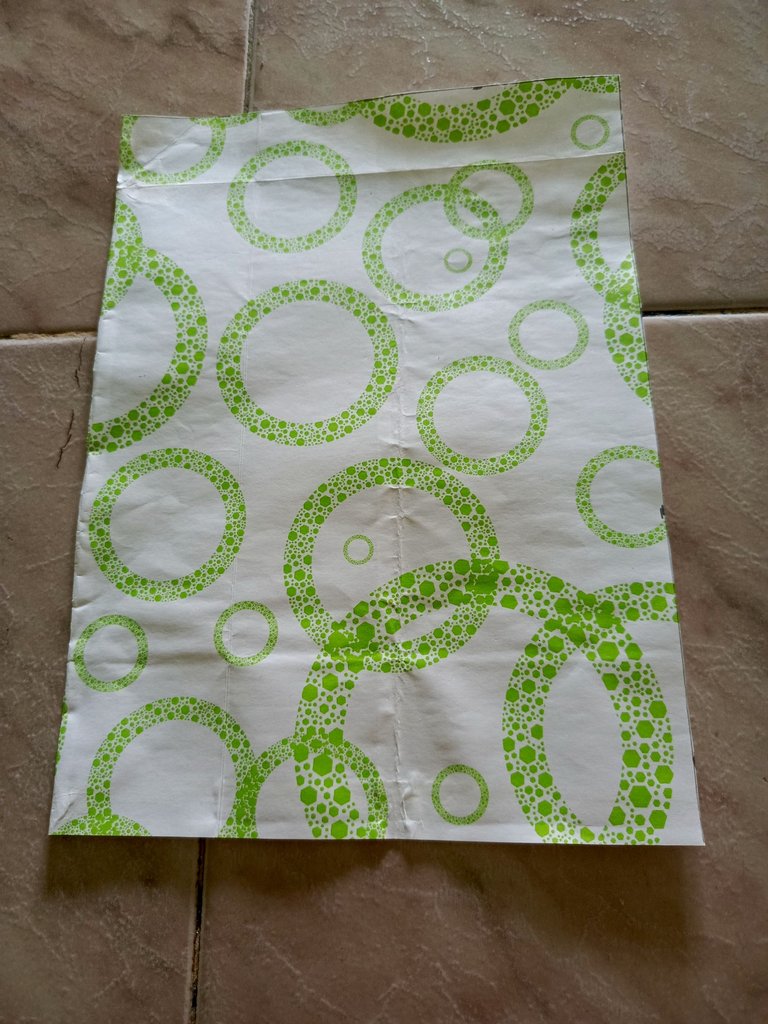
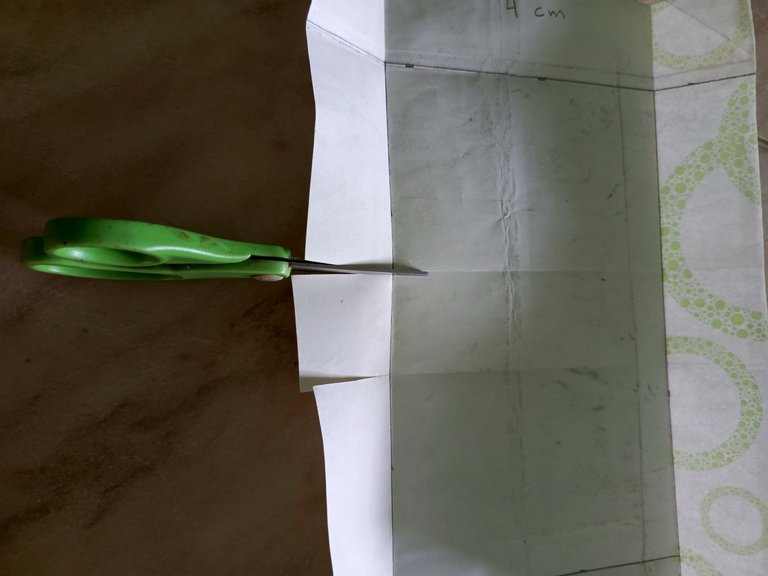
Una vez que esté marcado, procedemos a hacer los doblez; podemos hacerlos ayudándonos con la regla ,en cada una de las marcas comenzando por el borde superior que sería la parte más larga es decir el de 29 cm colocamos en forma vertical, colocamos el extremo inferior, doblamos hacia adentro que coincida con la línea que marcamos de los 4 cm, hacemos un doblez desdoblamos; y luego tomamos el otro extremo y doblamos hasta el borde de los 4 cm allí estaríamos marcando el doblez de lo que será la tapa de la caja .
Seguidamente hacemos dobleces en cada una de las líneas marcadas.
PREPARATION
Using the ruler is marked on the paper to be used; I used one with green decorations, a rectangle of 21 * 29 cm, then mark 4 cm on each edge.
Once it is marked, we proceed to make the folds; we can make them with the help of the ruler, in each of the marks starting with the top edge that would be the longest part, that is the 29 cm, we place vertically, we place the lower end, fold inward to match the line that we marked the 4 cm, we make a fold unfold, and then take the other end and fold to the edge of the 4 cm there we would be marking the fold of what will be the lid of the box.
Then we make folds on each of the marked lines.
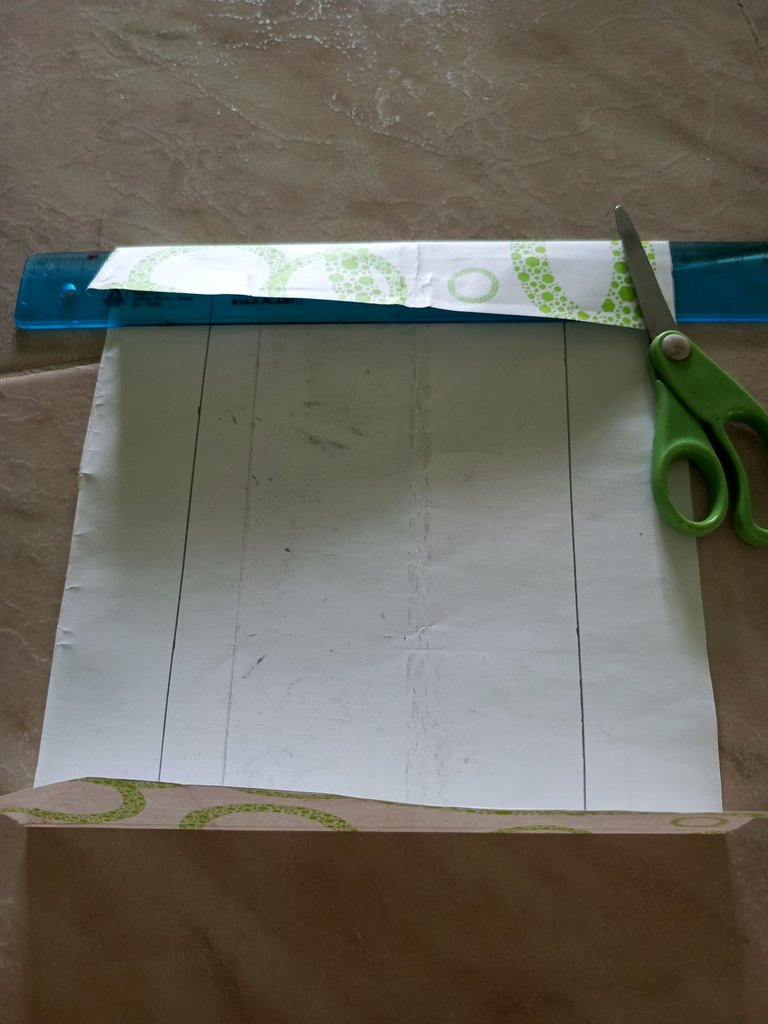

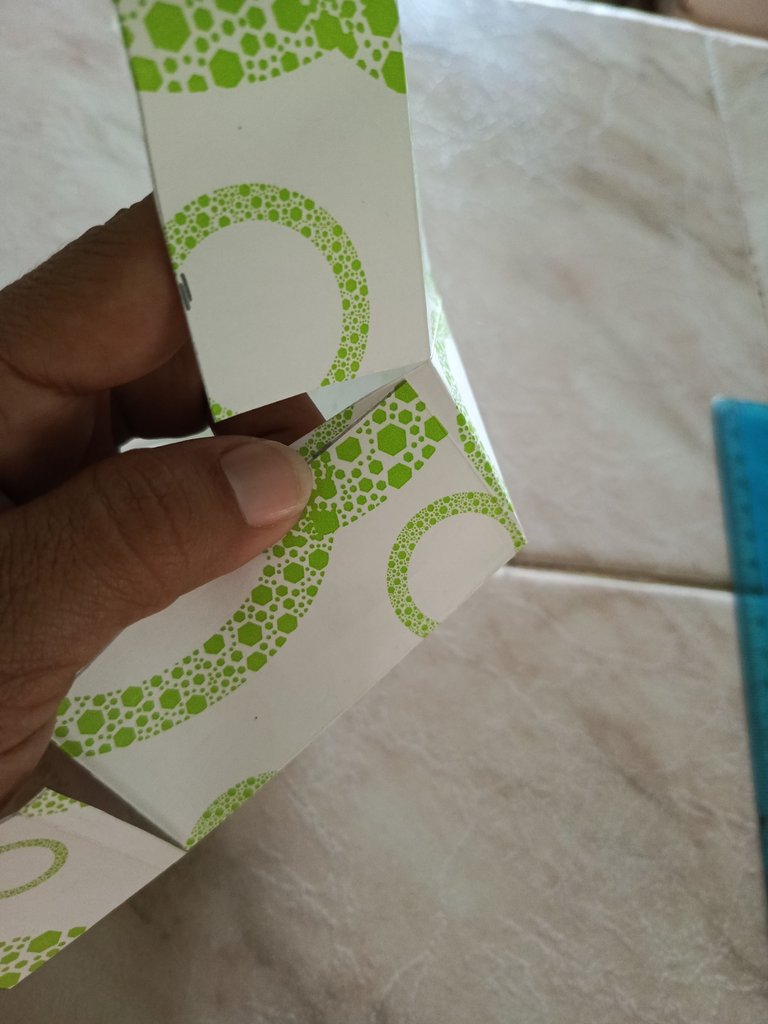
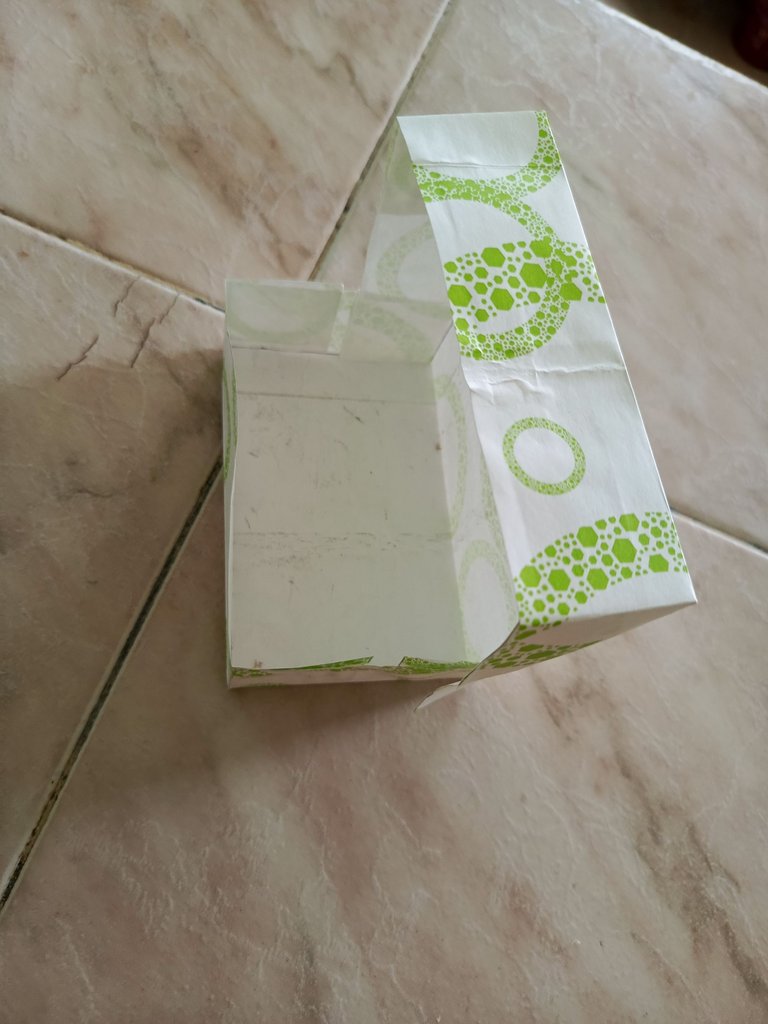
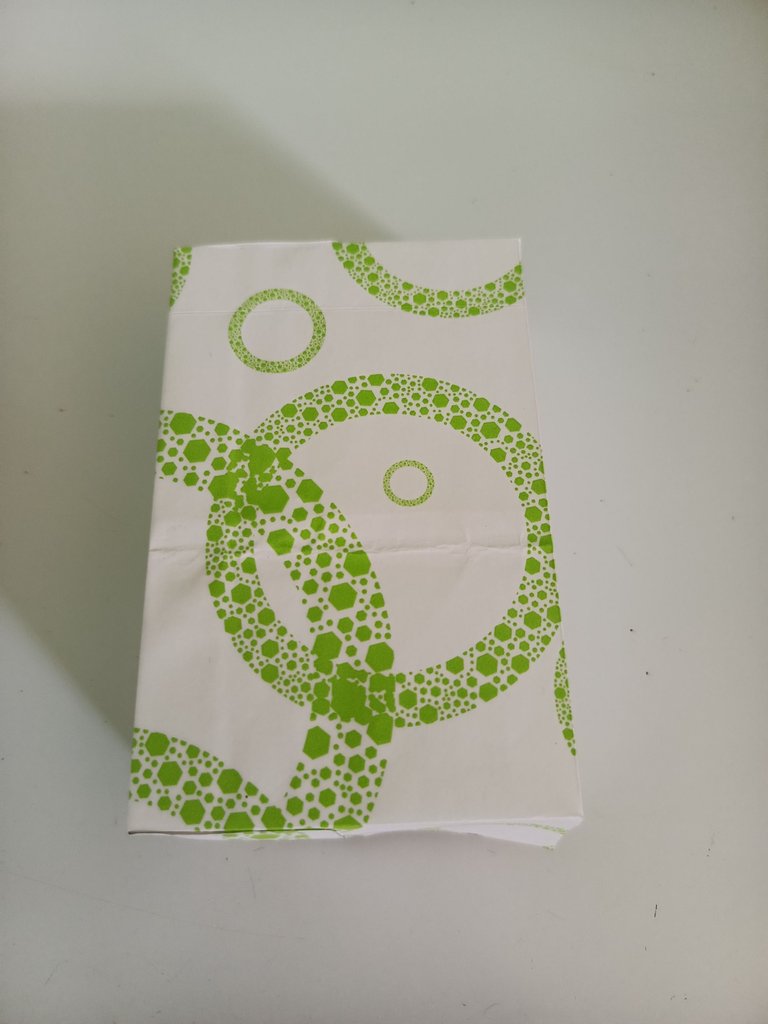
Ahora utilizando la tijera hacemos cortes en las marcas de los dobles, donde será la tapa de la caja, y en los bordes inferior y superior ,cuidando de llegar solamente hasta los 4 cm, que se marcaron ;luego utilizando pega o silicón se procede a pegar las pestañas así como se muestra en la figura para dar forma a lo que es la base de la caja y la tapa.
Now using the scissors we make cuts in the marks of the doubles, where it will be the lid of the box, and in the lower and upper edges, taking care to reach only up to 4 cm, which were marked, then using glue or silicone we proceed to glue the tabs as shown in the figure to give shape to what is the base of the box and the lid.
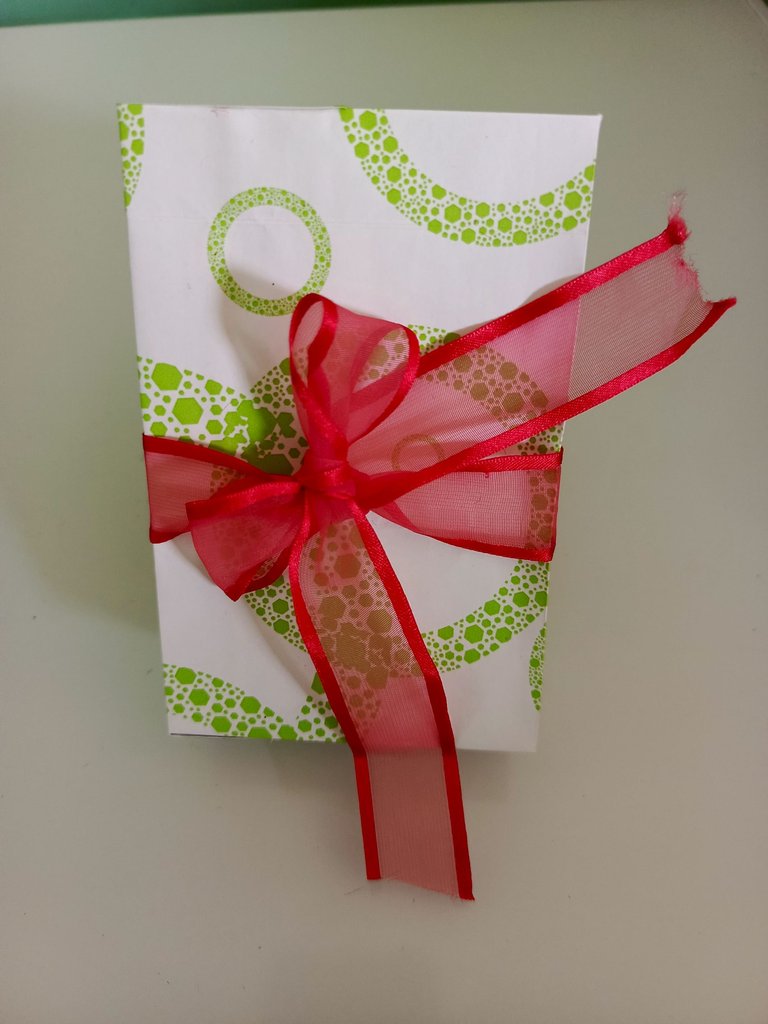
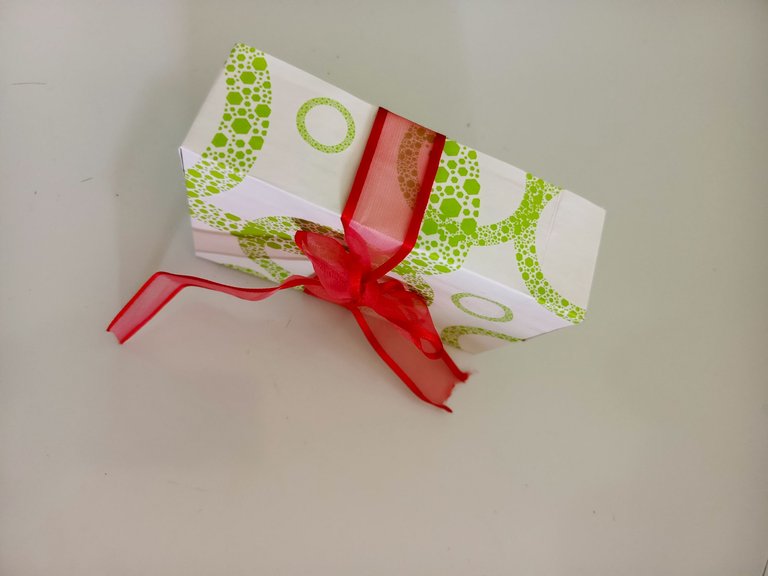
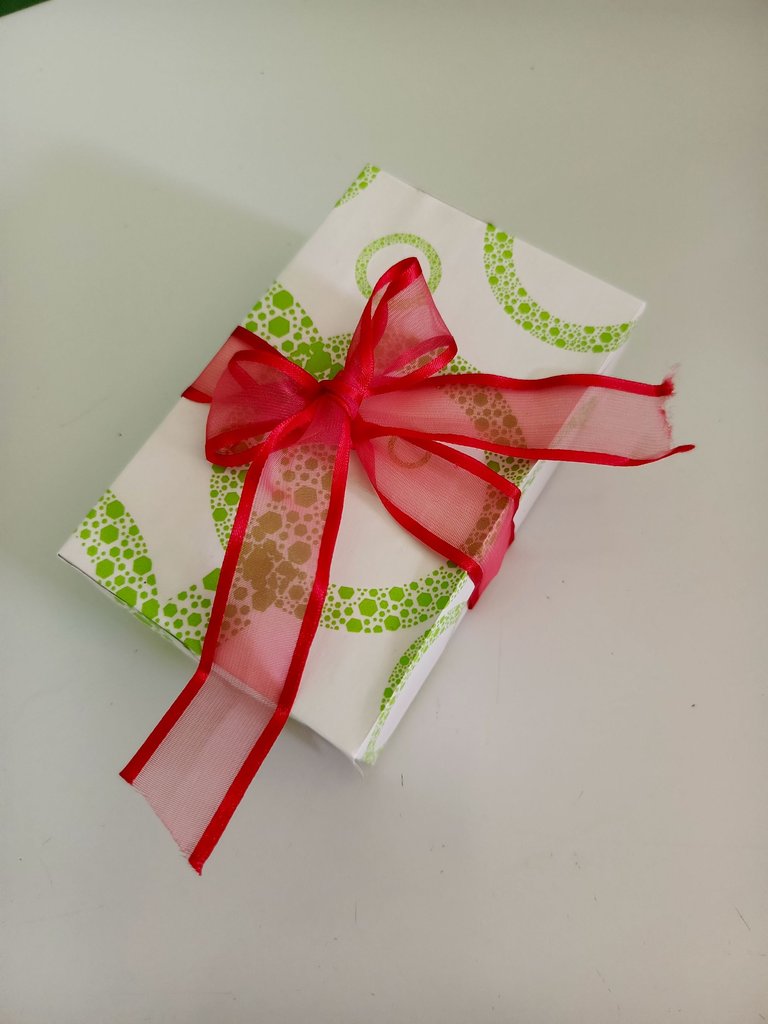
Ya está lista nuestra caja, solo resta guardar allí lo que se va a regalar, tapar y para darle un toque más elegante se puede colocar una cinta decorativa; yo utilicé una cinta roja que había en casa y así quedó lista la caja.
Espero te sirva en el momento en que la necesites, nos vemos en la próxima entrega.
Our box is ready, it only remains to keep there what is going to be given as a gift, cover it and to give it a more elegant touch you can place a decorative ribbon; I used a red ribbon that I had at home and that's how the box was ready.
I hope it will be useful when you need it, see you in the next installment.
Translated with https://www.deepl.com/translator
     Todas las imágenes son de mi autoría

         All images are my own
This is a beautifully decorated gift box. Thank you for sharing this lovely idea. The box is quite pretty. It's a pleasure to have your content in our community.
selected by @dayadam
En verdad es muy práctca y fácil de hacer.
Agradezco el apoyo a mi contenido.
The box is beautiful, simple but still attractive
Thanks You!
que lindo, está bonito para un detalle
how cute, it's nice for a detail
Muchas gracias.