Hello dear creative friends!!! I hope you are all very well and of course creating beautiful things.
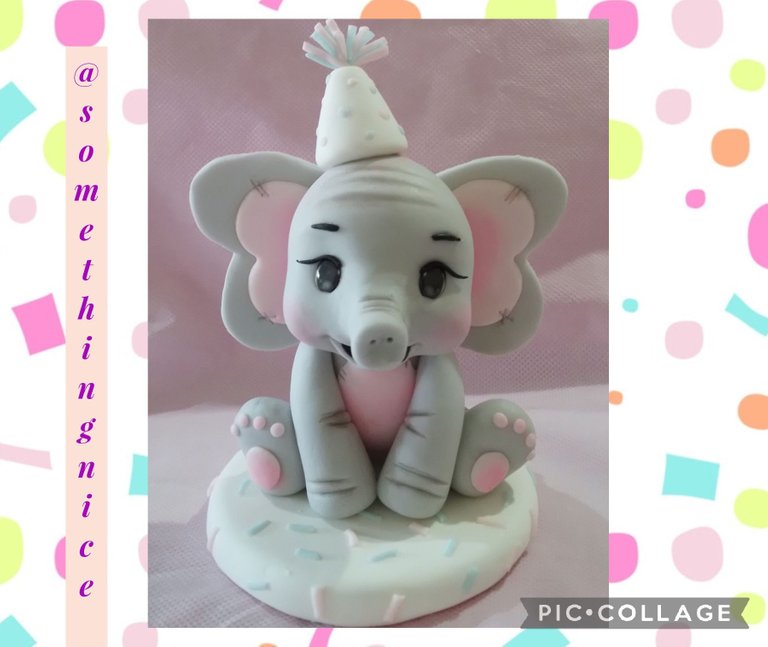
On this occasion I am going to share the step by step of how to make a nice elephant in this opportunity for a cake decoration but of course you can apply it to make it in souvenir size.
Hola queridos amigos creativos!!! Espero que estén todos muy bien y por supuesto creando cosas bellas.
En esta ocasión les voy a compartir el paso a paso de como hacer un simpático elefante en esta oportunidad para un adorno de torta pero por supuesto que lo pueden aplicar para hacerlo en tamaño souvenir.
I made this project with several images from Pinterest.
Este proyecto lo hice con varias imágenes de Pinterest.

Materials
🐘 cold porcelain
🐘 vinyl glue
🐘 steks
🐘 rolling pin
🐘 styrofoam spheres
🐘 styrofoam cover
🐘 cutting heart
🐘 self-adhesive eyes
Materiales
🐘 porcelana fria
🐘 cola vinilica
🐘 estecas
🐘 palo de amasar
🐘 esferas de telgopor
🐘 tapa de telgopor
🐘 cortante de corazón
🐘 ojos autoadhesivos
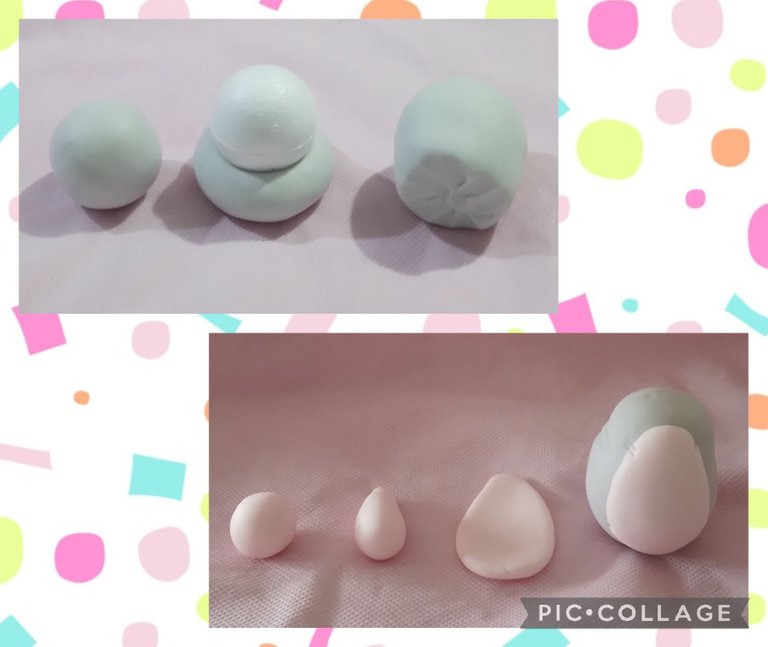
As always we use two sizes of styrofoam spheres.
For the body, make a ball of dough with the same volume as the smaller sphere, insert it, close and bring the dough upwards so that it has an extension, shape it into a pear and erase the marks with the palm of your hand.
With another color of cold porcelain, make a ball, give it a teardrop shape, flatten it and stick it on the chest. We can make some lines on the sides to simulate the folds of the elephant's skin.
Como siempre utilizamos dos tamaños de esferas de telgopor.
Para el cuerpo hacer una bolita de masa del mismo volumen de la esfera más pequeña, introducir la misma, cerrar y llevar la masa hacia arriba para que tenga prolongación, dar forma de pera y borrar las marcas con la palma de la mano.
Con otro color de porcelana fria hacer una bolita,dar forma de lágrima, aplanar y pegar en el pecho. Podemos hacer unas líneas en los costados para simular los pliegues de la piel del elefante.
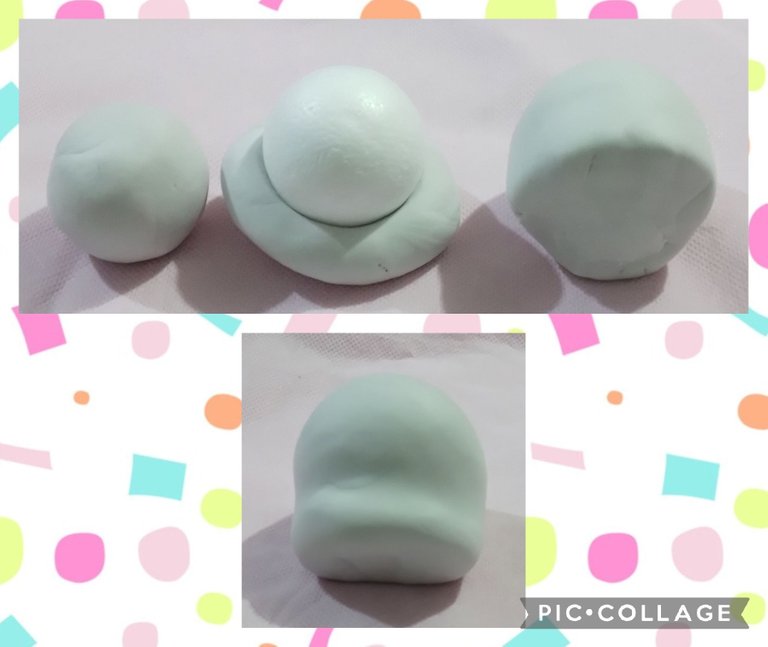
For the head, make a small ball the same size as the sphere, insert it, close, erase the marks, round off.
Mark the separation of the face and forehead.
Para la cabeza hacer una bolita del mismo tamaño de la esfera, introducir la misma, cerrar, borrar las marcas, redondear.
Marcar la separación de la cara y la frente.
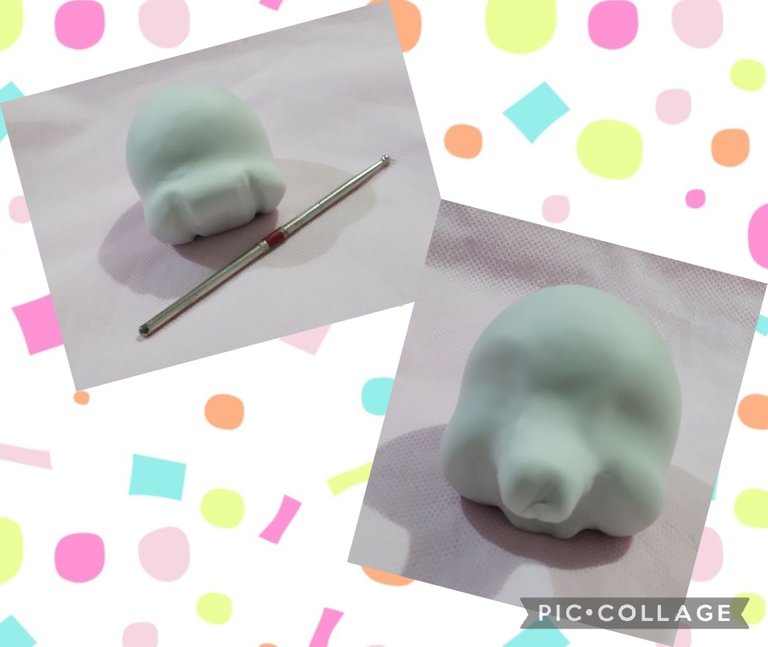
With a round stick, divide the nose into three parts, in the central portion carry the dough upwards to make the trunk and with the portion on the sides form the cheeks.
Gently define the eye socket.
Con una esteca redonda dividir en tres partes el morro, en la porción central ir llevando la masa hacia arriba para hacer la trompa y con la porción de los laterales formar los cachetes.
Definir suavemente la cuenca de los ojos.
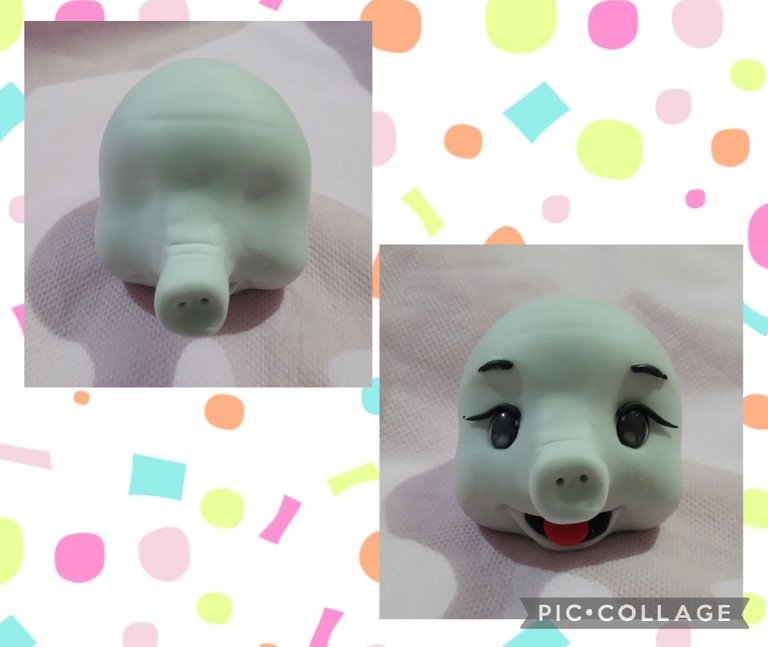
Make lines on the trunk to simulate the folds, make two holes at the tip.
Just below the trunk mark the mouth, open, fill with a little black dough and with pink dough make the tongue. Glue the self-adhesive eyes, stretch very very thin black mass and make the eyebrows and eyelashes.
Hacer líneas en la trompa para simular los pliegues, hacer dos orificios en la punta.
Apenas abajo de la trompa marcar la boca, abrir, rellenar con un poco de masa negra y con masa rosada hacer la lengua. Pegar los ojos autoadhesivos, estirar masa negra muy muy fina y hacer las cejas y pestañas.
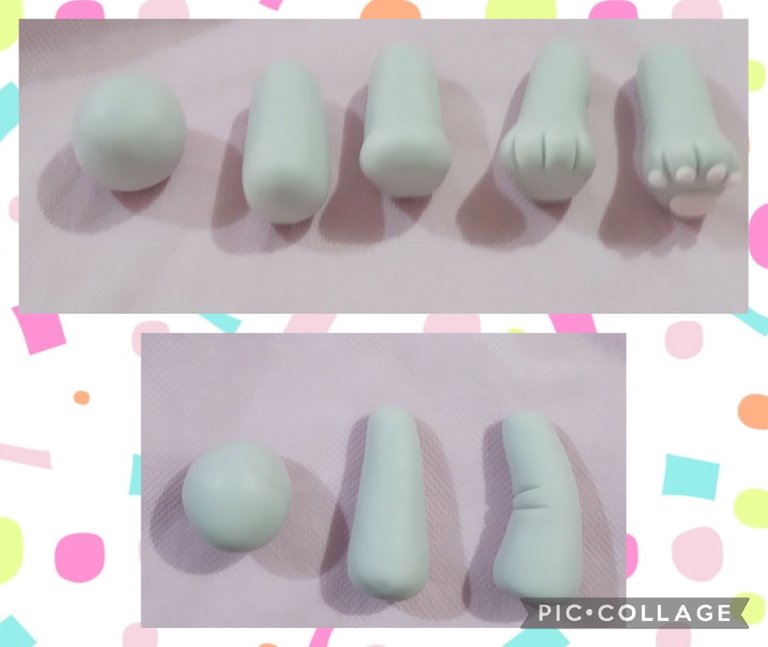
For the hind legs, make two equal balls, stretch, leaving a thicker end, shape it flat at the base, mark the toes, with the same color that we used for the chest, make the footprints.
For the front legs, make two equal but smaller balls, stretch them and give them a curved shape and mark the folds.
Para las patas traseras hacer dos bolitas iguales, estirar dejando un extremo más grueso, dar forma plana en la base, marcar los dedos, con el mismo color que usamos para el pecho hacer las huellas.
Para las patas delanteras hacer dos bolitas iguales pero más pequeñas, estirar y dar forma curva y marcar los pliegues.
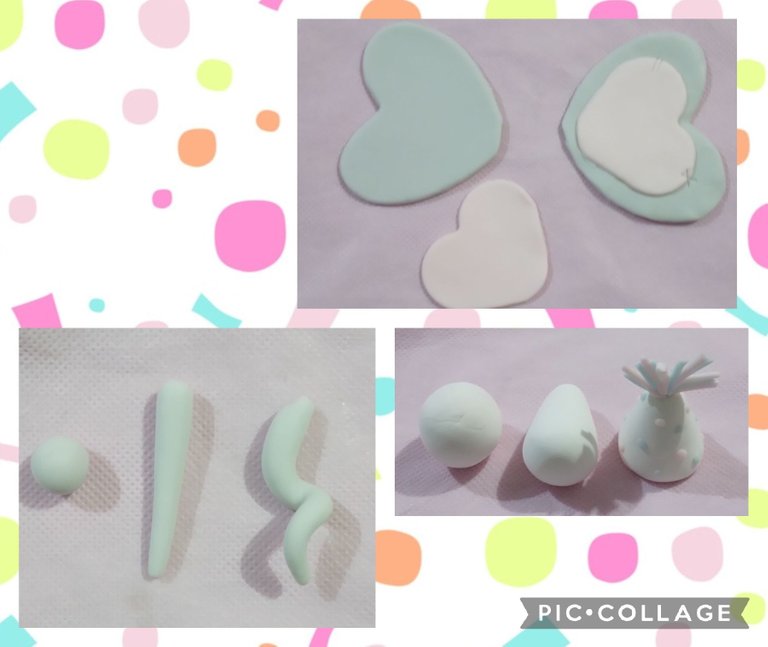
For the ears, stretch out dough, use heart cutters of two sizes, glue overlapping.
For the tail, make a ball, stretch it in the shape of an elongated teardrop and make a curl at the tip.
For the bonnet, make a ball, shape it into a drop, flatten the bottom and decorate with dough of different colors.
Para las orejas estirar masa, utilizar cortante de corazón de dos tamaños, pegar superponiendo.
Para la cola hacer una bolita, estirar en forma de lágrima alargada y hacer un rulito en la punta.
Para el bonete hacer una bolita, dar forma de gota, aplanar en la parte inferior y decorar con masa de diferentes colores.
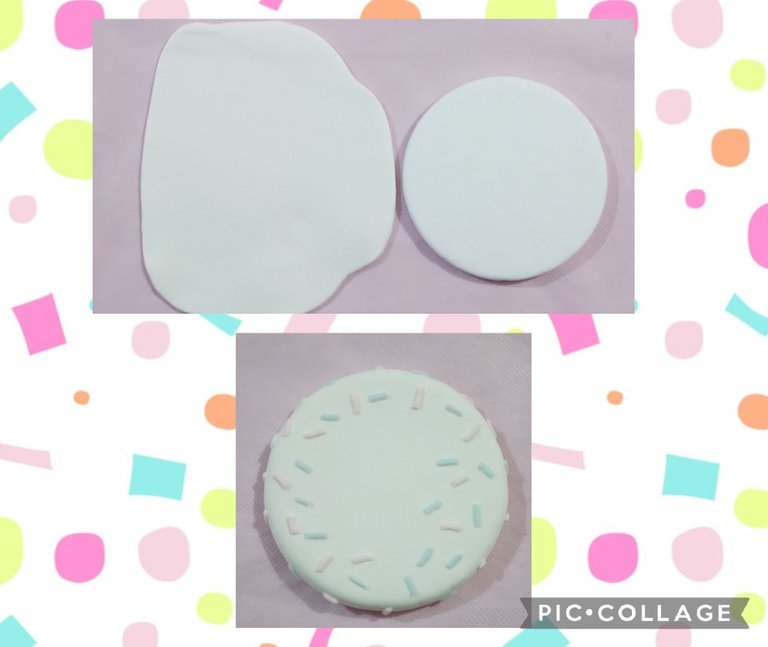
For the base, stretch white dough, on one side of the lid put vinyl glue and paste, remove the excess. Repeat the process on the other side. Decorate by cutting small strips of different colors.
Para la base estirar masa blanca, de un lado de la tapa poner cola vinilica y pegar, quitar el excedente. Repetir el proceso del otro lado. Decorar cortando pequeñas tiras de diferentes colores.
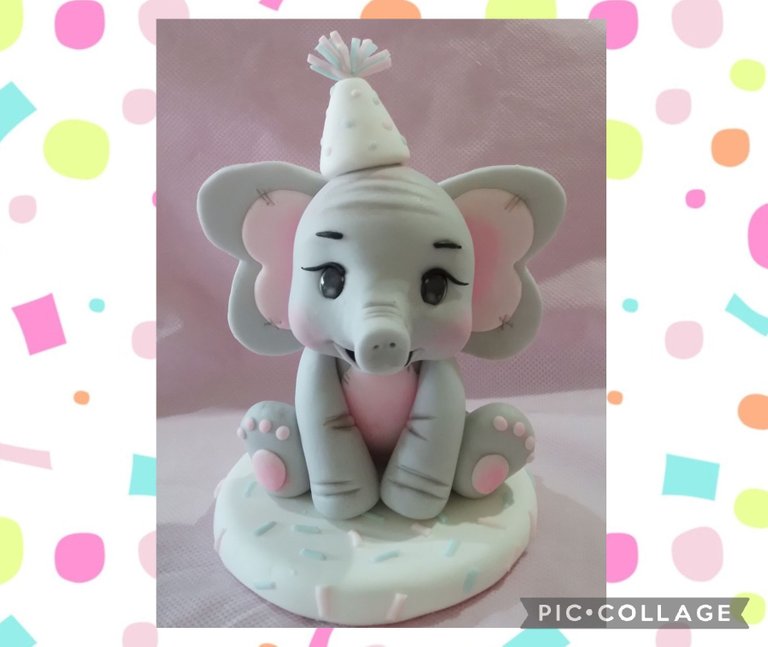
Join all the pieces with vinyl glue. Make up the folds with a dark color and the cheeks with a pink color.
For this post I took photos with my Samsung Galaxy A03 cell phone and used the PicCollage app and Google translate.
I hope you liked this simple but beautiful work. Regards. Andrea💜💜💜
Unir todas las piezas con cola vinilica. Maquillar con color oscuro los pliegues y con color rosado los cachetes.
Para este post tomé fotos con mi teléfono celular Samsung Galaxy A03 y utilicé la aplicación PicCollage y el traductor de Google.
Espero que les haya gustado este trabajo tan simple pero bonito. Saludos. Andrea💜💜💜
Thank you for sharing this post in the DIYHUB Community!
Your content got selected by our fellow curator sharminmim & you just received a little thank you upvote from us for your great work! Your post will be featured in one of our recurring compilations which are aiming to offer you a stage to widen your audience within the DIY scene of Hive. Stay creative & HIVE ON!
Please vote for our hive witness <3
Que hermoso Elefante. Me he quedado maravillada en cuanto lo vi, feliciades.
Muchas gracias @lissobando18 💜😊
Saludos amiga , te quedó hermoso el elefante, me gustó el detalle del gorro, todo un cumpleañero.
Bendiciones!
Hola @belkyscabrera 👋 muchas gracias. Si, es ideal para el cumple de un bebé 🥰💜
!discovery 35
This post was shared and voted inside the discord by the curators team of discovery-it
Join our community! hive-193212
Discovery-it is also a Witness, vote for us here
Delegate to us for passive income. Check our 80% fee-back Program
que bonito elefante has presentado. Me gusta mucho!
Hola @divergente1 me alegro que te guste 😊💜
This is a beautiful job. I like the neatness of your presentation. You have a wonderful gift in your hands.
Hello @chaodietas 👋 thank you very much for such nice words 😊💜
😃
Cute. @tipu curate 6
Upvoted 👌 (Mana: 0/55) Liquid rewards.
Hi @sharminmim thank you 😊💜
You're welcome :)
So cute.
Thank you @honeyflow 💜
Amiga que lindo quedé enamorada yo adoro los elefantes este se ve tan tierno Dios bendiga tus manos
🤗✨✨✨🤗🌹❤️❤️❤️♥️✨😊😍😍😊✨🤗🌹✨😚☺️☺️😍✨
Hola @yraimadiaz 👋 que bueno que te guste. Muchas gracias 😊