Berlin by Night
For a few years now, I've been meaning to take timelapse shots. However, it's boring as hell and very time-consuming. But a few days ago I finally got round to it. I bought a slider and it absolutely had to be tested.
For the 22-second video in this post, I took 539 individual images with an interval of 10 seconds. 539 * 10 = 5390 seconds = 1.5 hours + 20 minutes to set up the camera and set up the slider and software. And, as always, I forgot to take a folding chair with me. But I had packed a bottle of beer so I wouldn't die of thirst.
Seit einigen Jahren nehme ich mir immer wieder vor, Timelapse Aufnahmen zu machen. Allerdings ist das stinkelangweilig und sehr zeitaufwändig. Aber vor einigen Tagen konnte ich mich endlich dazu durchringen. Ich habe einen Slider gekauft, und dieser musste unbedingt getestet werden.
Für das 22 Sekunden lange Video in diesem Beitrag habe ich 539 Einzelbilder mit einem Intervall von 10 Sekunden aufgenommen. 539 * 10 = 5390 Sekunden = 1,5 Stunden + 20 Minuten für das Aufbauen der Kamera und das Einrichten des Sliders und der Software. Und, wie immer, habe ich vergessen einen Klappstuhl mitzunehmen. Aber eine Flasche Bier hatte ich eingepackt damit ich nicht verdurste.
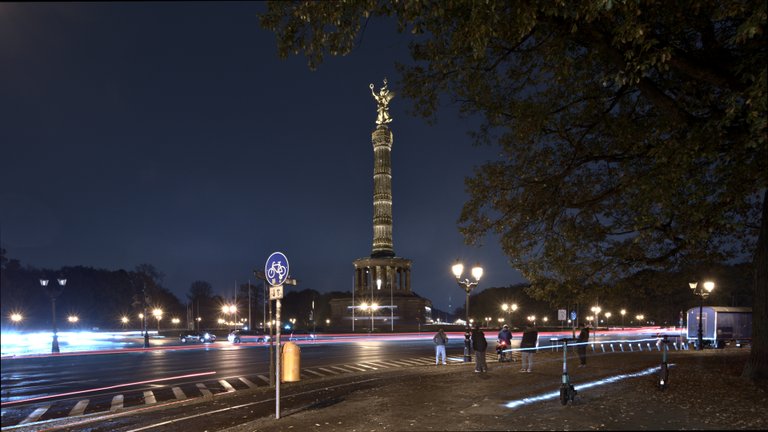
I actually wanted to upload the videos to 3Speak. The upload via Ecency don't work. When I tried to log in directly to 3Speak, I got an error message. So I had to create a YouTube channel and upload the videos there.
Eigentlich wollte ich die Videos bei 3Speak hochladen. Der Upload über Ecency funktioniert nicht. Als ich mich auf direkt bei 3Speak einloggen wollte, bekam ich ein Fehlermeldung. Also musste ich einen Youtube Kanal erstellen und die Videos dort hochladen.

How to capture Timelapse
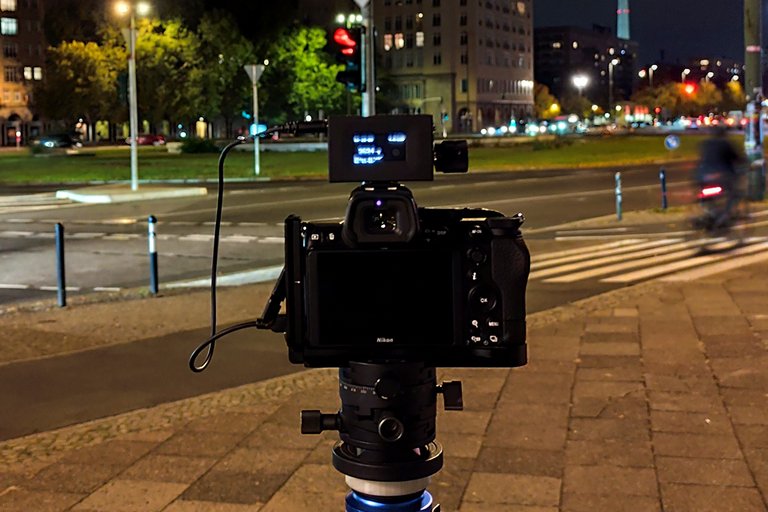
In the picture above you can see my favourite method, controlling with an interval trigger. In this case with the LRTimelapse Timer from Gunther Wegner. You will hardly find a better interval trigger. Using the rotary knob, you first select the mode, in this case timelapse, set the interval and, if required, you can set the number of shots. However, I usually select "open end" here. The timer then starts recording the images by clicking on the rotary knob. All information is shown on the display.
Im Bild oben seht ihr meine bevorzugte Methode, die Steuerung mit einem Intervall-Auslöser. In diesem Fall mit dem LRTimelapse Timer von Gunther Wegner. Einen besseren Intervall-Auslöser wird man wohl kaum finden. Mit dem Drehknopf wählt man zuerst den Modus, in diesem Fall Timelapse, stellt das Intervall ein und bei Bedarf kann man die Anzahl der Aufnahmen einstellen. Ich wähle hier allerdings meist "open end". Mit einem Klick auf den Drehknopf startet der Timer dann mit der Aufnahme der Bilder. Im Display werden alle Informationen angezeigt.
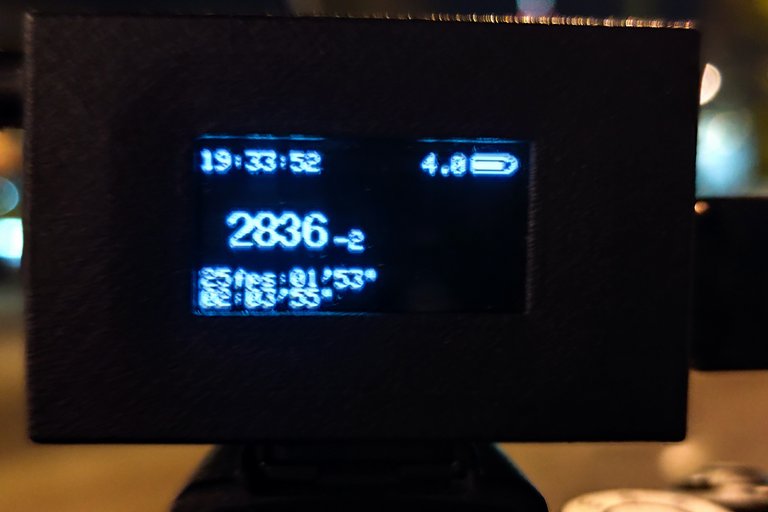
Time, interval (4.0), battery charge level, number of images, followed by the time until the next shutter release (-2), length of the video at the selected fps (25) and at the bottom you can see how long you have been standing in the cold. I apologise for the miserable picture quality. An OLED display does not like to be photographed.
Uhrzeit, Intervall (4.0) Ladestand des Akkus, Anzahl der Bilder, dahinter die Zeit bis zur nächsten Auslösung (-2), Länge des Videos bei den gewählten fps(25) und ganz unten sieht man wie lange man schon in der Kälte steht. Ich bitte die miserable Bildqualität zu entschuldigen. Ein OLED Display will nicht so gerne fotografiert werden.
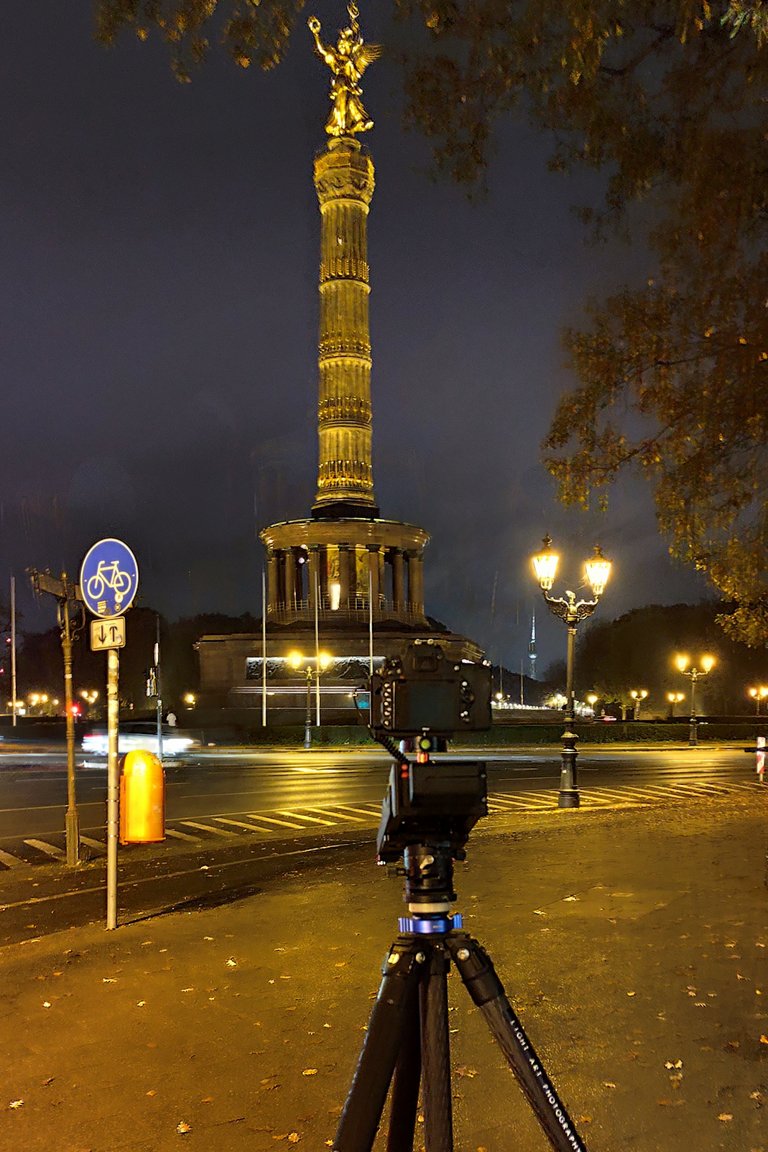
Another method is to control the recordings with the slider. This ensures that the camera is not triggered while the slider is moving. First set the interval and the number of shots. The next step is to programme the movement. This is very simple with this slider. You move the camera to the starting point with your hand, click on keyframe A in the display, then move the camera to the end point and click on keyframe B, confirm this and after pressing the start button, the slider starts recording. You don't need an app for this or have to perform the movements laboriously using any buttons. But if you want, you can of course also do all this via the app.
Eine weitere Methode besteht darin, die Aufnahmen mit dem Slider (Shark Slider Nano) zu steuern. Dadurch ist sichergestellt, dass die Kamera nicht während der Bewegung des Sliders ausgelöst wird. Man stellt zuerst das Intervall und die Anzahl der Aufnahmen ein. Im nächsten Schritt wird dann die Bewegung programmiert. Das ist bei diesem Slider denkbar einfach. Man bewegt die Kamera mit der Hand an den Startpunkt, klickt im Display auf Keyframe A, bewegt dann die Kamera an den Endpunkt und klickt auf Keyframe B, bestätigt das und nach dem Betätigen der Starttaste fängt der Slider an die Aufnahmen zu machen. Man benötigt dafür keine App oder muss die Bewegungen mühsam über irgendwelche Tasten ausführen. Aber wenn man will, kann man das alles natürlich auch über die App erledigen.

Unfortunately, this slider does not have a slave mode. This means that it cannot be used in conjunction with the LRTimelapse Timer. However, all sliders that have a slave mode are either very large, unwieldy, difficult to use, outrageously expensive or all of the above.
Leider hat dieser Slider keinen Slave Modus. Somit kann man ihn nicht in Verbindung mit dem LRTimelapse Timer benutzen. Alle Slider, die über einen Slave Modus verfügen, sind allerdings entweder sehr groß, unhandlich, schlecht zu bedienen, unverschämt teuer oder alles davon.

Many cameras, including my Nikon Z5, offer an internal function for recording timelapses. The software in the camera creates a finished video. After a short test, I have discarded this. Especially when shooting from day to night or vice versa, the results are not good.
Viele Kameras, wie auch meine Nikon Z5, bieten eine interne Funktion zur Aufnahme von Timelapse. Dabei wird von der Software in der Kamera ein fertiges Video erstellt. Nach einem kurzen Test habe ich das verworfen. Gerade bei Aufnahmen von Tag zu Nacht oder umgekehrt, sind die Ergebnisse nicht gut.

Creating the Video
For comparison, I created the video using two different methods. The video at the top is the result of the video editing software DaVinci Resolve. I generated the second video with ffmpeg. To do this, I edited the first image in Darktable (white balance, exposure, sharpening, denoising, etc.). I then applied these settings to all the images and exported the RAW images to Jpeg format. I then rendered the video from these images using the command "ffmpeg -framerate 24 -pattern_type glob -i "*.jpg" -s:v 1920:1080 -c:v libx264 -crf 17 -pix_fmt yuv420p timelapse.mp4". After 30 seconds the video was ready. The result is not bad, but with this method it is only possible to adapt the white balance to the changing light situation with a great deal of effort. With DaVinci Resolve this works quite easily and well, but the processing took much longer than 30 seconds. DaVinci Resolve is a very complex programme. It would go beyond the scope of this article if I were to go into more detail about how to produce timelapse videos with it. Although the software is not open source, it is available as a free version for Linux, MacOS and Windows.
Zum Vergleich habe ich das Video mit zwei verschiedenen Methoden erstellt. Das Video ganz oben ist das Ergebnis der Videoschnitt Software DaVinci Resolve. Das zweite Video habe ich mit ffmpeg generiert. Dazu habe ich in Darktable das erste Bild bearbeitet (Weißabgleich, Belichtung, schärfen, entrauschen usw.), diese Einstellungen dann auf alle Bilder übertragen und dann die RAW Bilder ins Jpeg Format exportiert. Aus diesen Bildern habe ich dann mit dem Befehl "ffmpeg -framerate 24 -pattern_type glob -i "*.jpg" -s:v 1920:1080 -c:v libx264 -crf 17 -pix_fmt yuv420p timelapse.mp4" das Video gerendert. Nach 30 Sekunden war das Video fertig. Das Ergebnis ist nicht schlecht, allerdings ist es mit dieser Methode nur mir sehr großem Aufwand möglich, den Weißabgleich an die sich verändernde Lichtsituation anzupassen. Mit DaVinci Resolve funktioniert das recht einfach und gut, allerdings hat die Bearbeitung wesentlich länger gedauert als 30 Sekunden. DaVinci Resolve ist ein sehr komplexes Programm. Es würde hier den Rahmen sprengen, wenn ich näher darauf eingehen würde, wie man damit Timelapse Videos produziert. Die Software ist zwar nicht quelloffen, aber es gibt sie als kostenlose Version für Linux, MacOS und Windows.

https://www.blackmagicdesign.com/products/davinciresolve



WHAT IS LIGHT PAINTING?

LICHTKUNSTFOTO
If you like my art visit www.lichtkunstfoto.de for more Light Art Photography and informations about Light Painting. Join me on Flickr Twitter


For more great Light Art Photography, Light Painting and inspiration check these light painters: @marlasinger666 @fadetoblack @fastchrisuk @dawnoner @oddballgraphics @martbarras @stepko @rod.evans.visual @yo-hoho @maxpateau @gunnarheilmann @neilru75 @maximepateau @ryuslightworks @lightstabeu @candelart @lacelight

WE ARE LIGHT PAINTERS

To help and support the LightPainters community here on Hive I would appreciate your delegation of HivePower. Any amount is appreciated. It does not require much to get started, we are happy for any gesture. @lightpainters
How to delegate?
Delegate 50HivePower, [50HP]
Delegate 250HivePower, [250HP]
Delegate 500HivePower, [500HP]
Delegate 1000HivePower, [1000HP]
All the Hive Power will help to upvote the artist's contribution as part of the LightPainters community.
Oh, da hat sich der kleine Sven ein neues Spielzeug gegönnt ... 👍
Spielzeug? Ein hochwertiges Werkzeug zum Erschaffen epochaler Kunst! 🤣
Your problem uploading to 3speak and trying to showcase it here is the same. That's why I also created some youtube channels just in case I wanted to drop a video 😆 That being said, I love that timelapse too and I appreciate that you also include some technical explanations on it as well.
Sometimes ago uploading to 3Speak works. It was quite slow but working. I will give it a try next week.
I am glad you like my timelapse. Thanks.
Congratulations @lichtkunstfoto! You have completed the following achievement on the Hive blockchain And have been rewarded with New badge(s)
Your next target is to reach 38000 upvotes.
You can view your badges on your board and compare yourself to others in the Ranking
If you no longer want to receive notifications, reply to this comment with the word
STOPCheck out our last posts:
!LOLZ