

¡Hola gente guapa! de #HIVEDIY, espero que todos se encuentren súper bien y que tengan un bonito día, este es mi primer post y estoy súper emocionada de poder compartir con ustedes mis creaciones y experiencia del proceso de elaboración, ya que es algo que disfruto muchísimo.
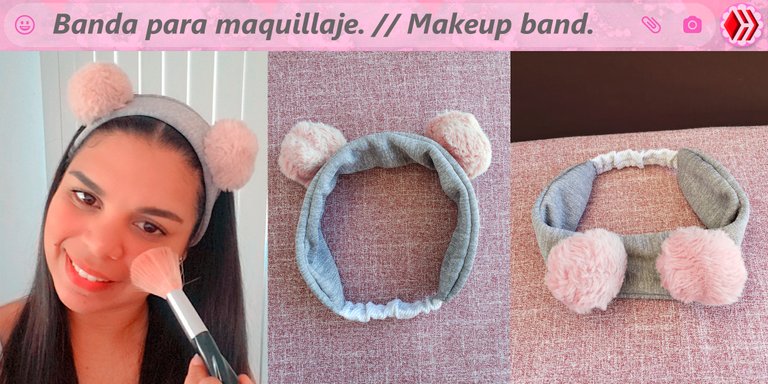
En este primer post me inspire en la mujer y sus coqueterías, con esta genial banda de maquillaje, para todas las mujeres que nos encanta estar coquetas a la hora de sentarnos a maquillarnos, créanme que es muy fácil de elaborar y se van a divertir tanto como yo, esta banda la realice con los retazos de tela reciclado que tengo en casa que siempre son muy útiles para poner a volar nuestra imaginación y algunos otros truquitos de costura manual.
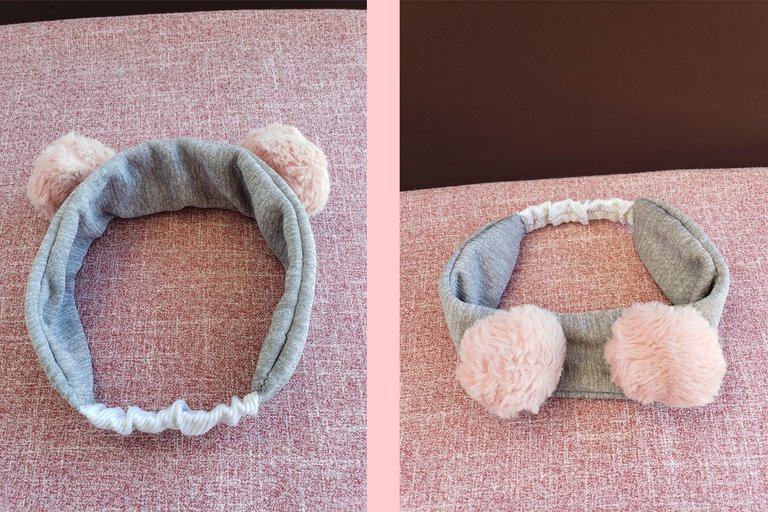
Quise hacer esta banda con dos pomponcitos porque le dan un toque muy bonito y divertido, espero que les guste este paso a paso y se animen a crear uno para ustedes, así que manos a la obra:
Materiales:
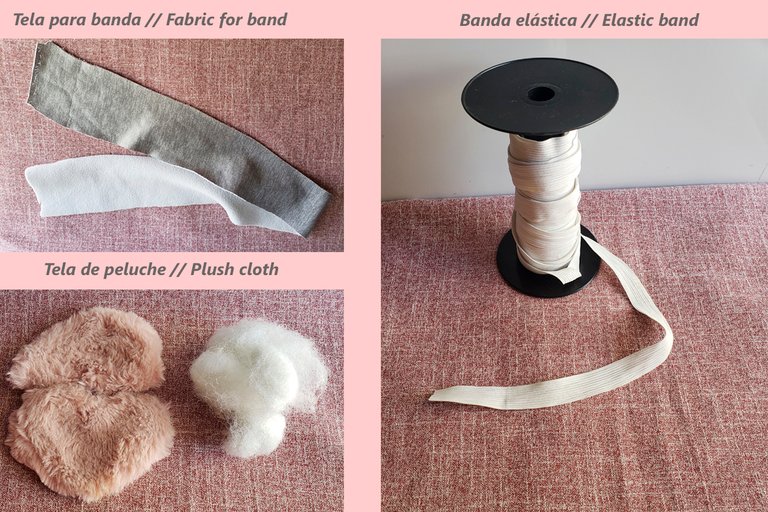
• Para la banda elástica utilicé; Tela reciclada de poliéster gruesa de color blanco y gris.
• Los pompones; utilice retazos de tela comúnmente conocida de peluche.
• 5cm Cinta elástica y tela blanca flexible para dar un efecto corrugado.
• Felpa.
• Aguja.
• Hilo.
• Tijera.
• Escuadras.
• Lápiz.
Paso 1
Doblamos la tela que usaremos para nuestra banda en dos partes iguales.
Medimos y nos aseguramos que esté totalmente pareja en sus dos caras con la ayuda de una regla.
Procuramos marcar por el lado no visible de nuestra tela.
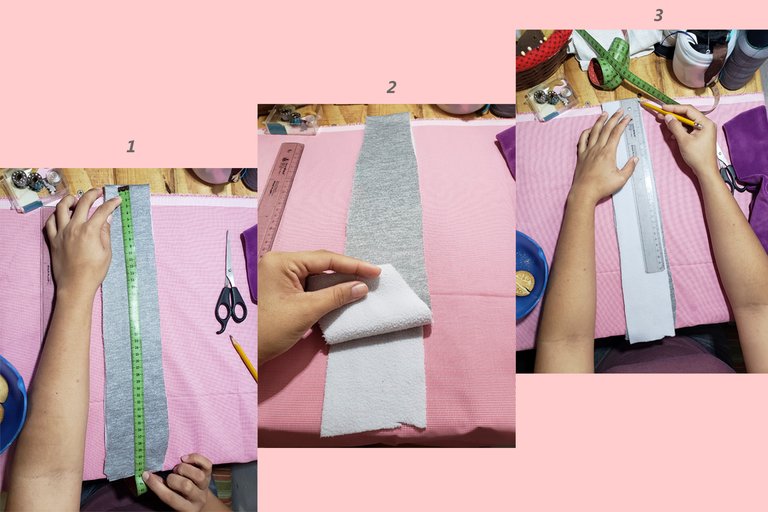
Paso 2
Cortamos los bordes marcados.
En las cuatro esquinas hacemos un corte en ángulo, para hacer la transición donde uniremos nuestra elástica.
Hacemos una segunda marca por todo el borde de la cara no visible de la tela con la ayuda de una regla, con la finalidad de tener una línea recta.
Paso 3
Cocemos por toda la línea marcada con el lápiz, esto nos dará una costura casi perfecta.
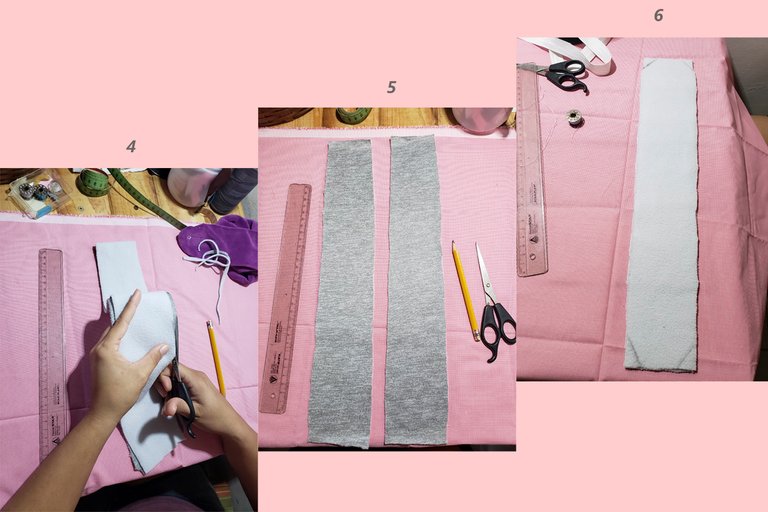
Paso 4
Rellenamos nuestros pompones con felpa, dándole la forma y el tamaño deseado.
Luego cocemos los pompones.
Paso 5
Ubicamos los pompones en la banda, marcamos y cocemos.
La separación de nuestros pompones es a criterio individual. Yo lo quise dar bastante separación ya que para mí le da un toque más tierno.
Paso 6
Doblamos nuestra banda con las caras visibles hacia adentro, quedando los pompones en el interior.
Cocemos el otro borde de la banda y desenfundamos dándole vuelta de adentro hacia afuera para así dejar libres nuestros pompones.
Paso 7
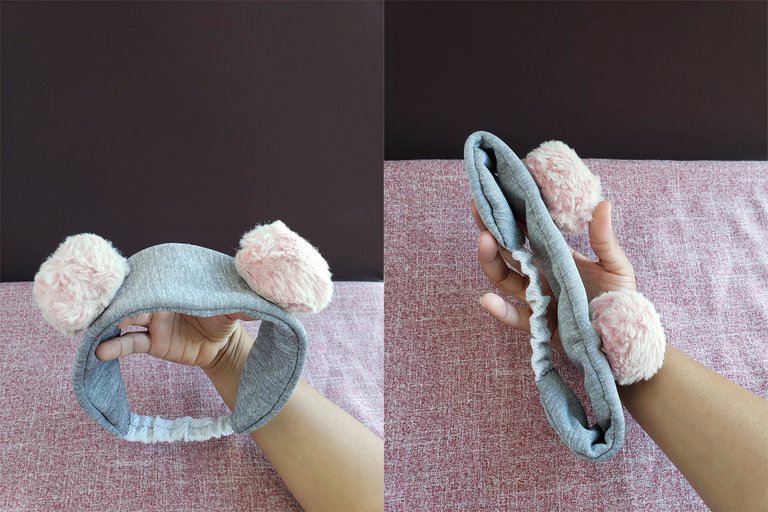
La elástica, la cubrimos con tela blanca para darle ese efecto de arruche.
Cocemos los dos extremos de la elástica a nuestra banda y listo queda terminada nuestra adorable banda de maquillaje.
Buenos gente bella, muchísimas gracias por leerme, espero les haya gustado lo hice con mucho cariño, estaré leyendo sus comentarios, nos vemos en mi siguiente post, saluditos a todos chao chao.

Hello beautiful people! from #HIVEDIY, I hope everyone is super well and have a nice day, this is my first post and I am super excited to be able to share with you my creations and experience of the elaboration process, because it is something that I really enjoy.
In this first post I was inspired by women and their flirtatiousness, with this great makeup band, for all the women who love to be flirtatious when sitting down to put on makeup, believe me it is very easy to make and you are going to have so much fun Like me, I made this band with the scraps of recycled fabric that I have at home, which are always very useful to let our imagination fly and some other manual sewing tricks.
I wanted to make this band with two pom poms because they give it a very nice and fun touch, I hope you like this step by step and are encouraged to create one for yourselves, so get to work:
Materials:
• For the elastic band I used; White and gray thick recycled polyester fabric.
• Pompoms; use scraps of fabric commonly known as stuffed animals.
• 5cm Elastic ribbon and flexible white fabric to give a corrugated effect.
• Plush.
• Needle.
• Thread.
• Scissors.
• Squares.
• Pencil.
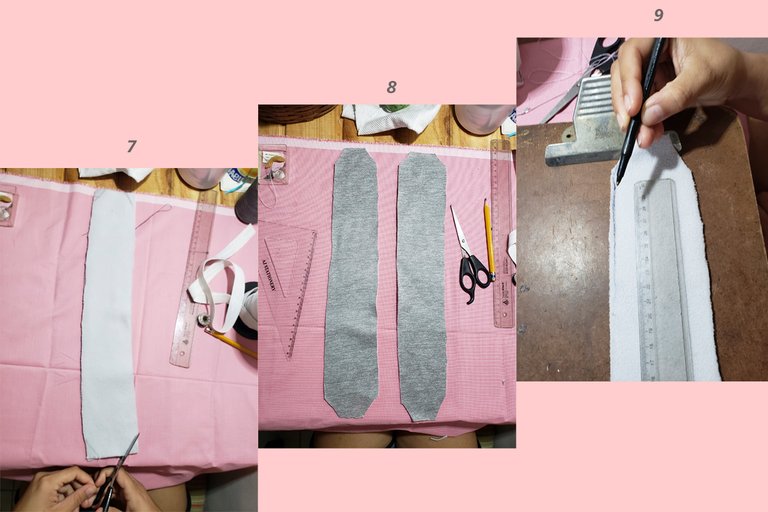
Step 1
We fold the fabric that we will use for our band in two equal parts.
We measure and make sure that it is completely even on both sides with the help of a ruler.
We try to mark on the non-visible side of our fabric.
Step 2
We cut the marked edges.
In the four corners we make a cut at an angle, to make the transition where we will attach our elastic.
We make a second mark along the edge of the non-visible face of the fabric with the help of a ruler, in order to have a straight line.
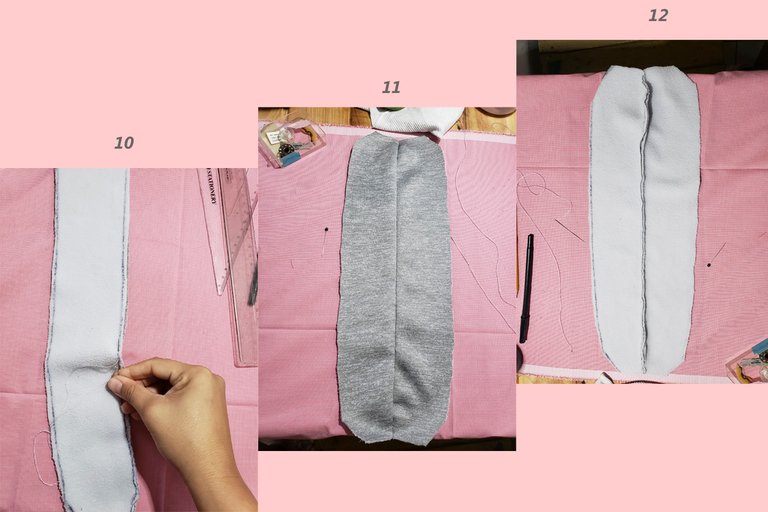
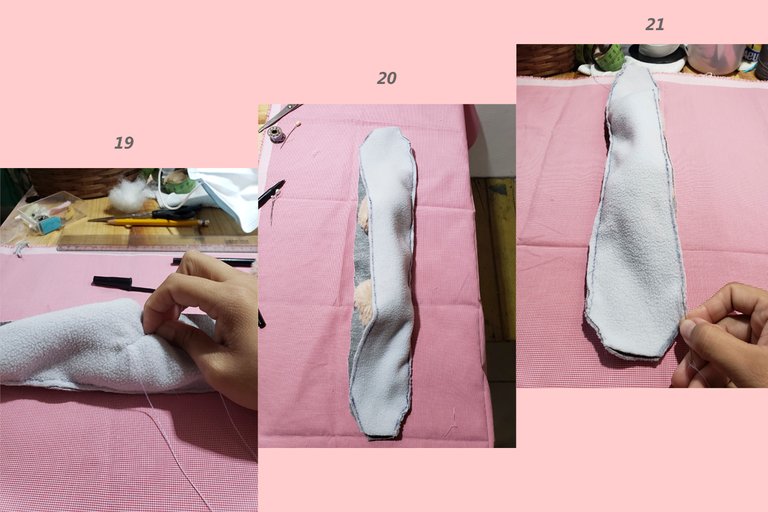
Step 3
We sew along the entire line marked with the pencil, this will give us an almost perfect seam.
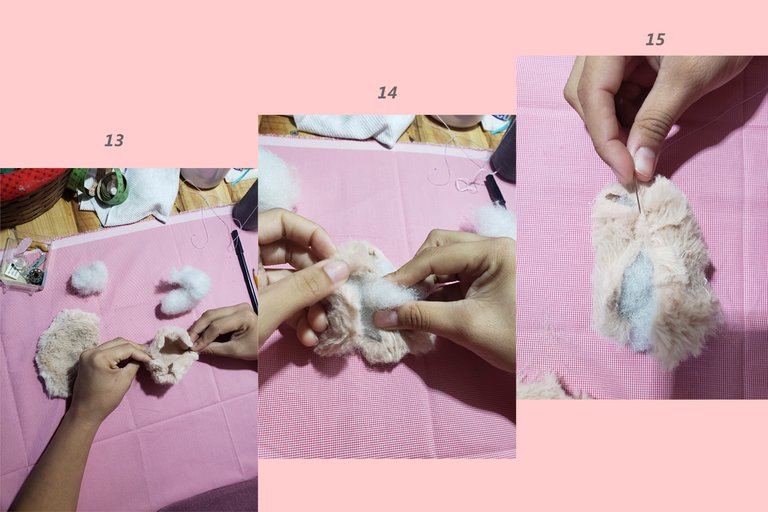
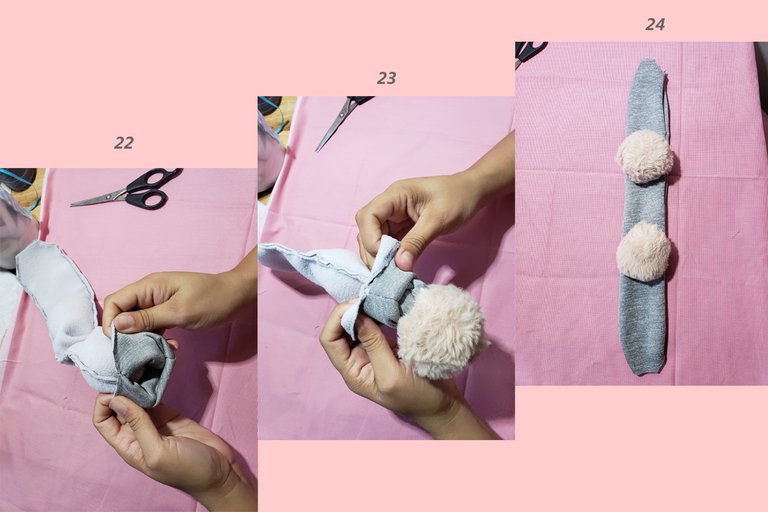
Step 4
We fill our pompoms with plush, giving it the desired shape and size.
Then we sew the pom-poms.
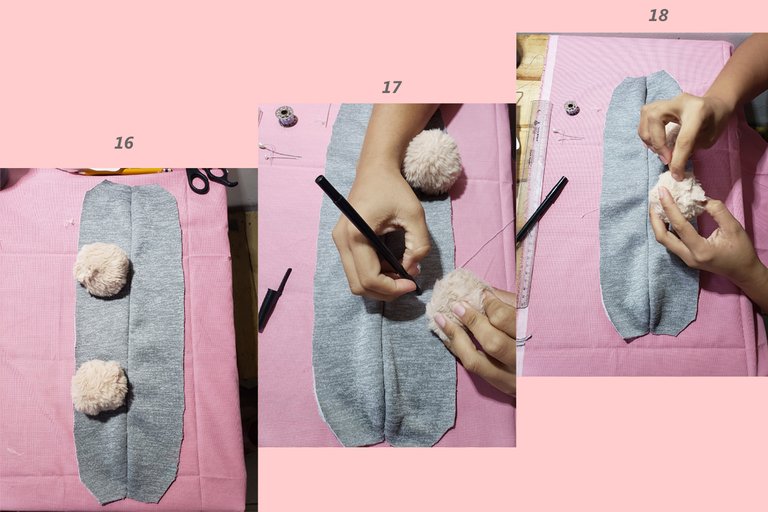
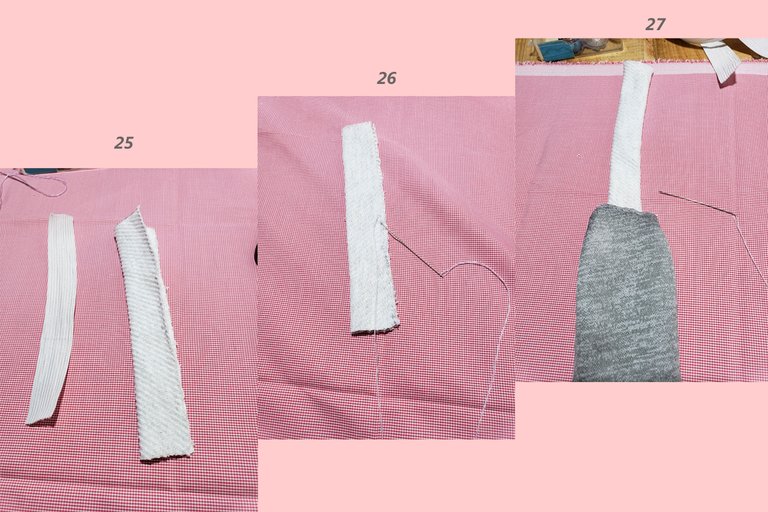
Step 5
We place the pompoms on the band, mark and sew.
The separation of our pom poms is at individual discretion. I wanted to give it a lot of separation since for me it gives it a more tender touch.
Step 6
We fold our band with the visible faces inside, leaving the pompoms inside.
We sew the other edge of the band and uncover it by turning it inside out to leave our pompoms free.
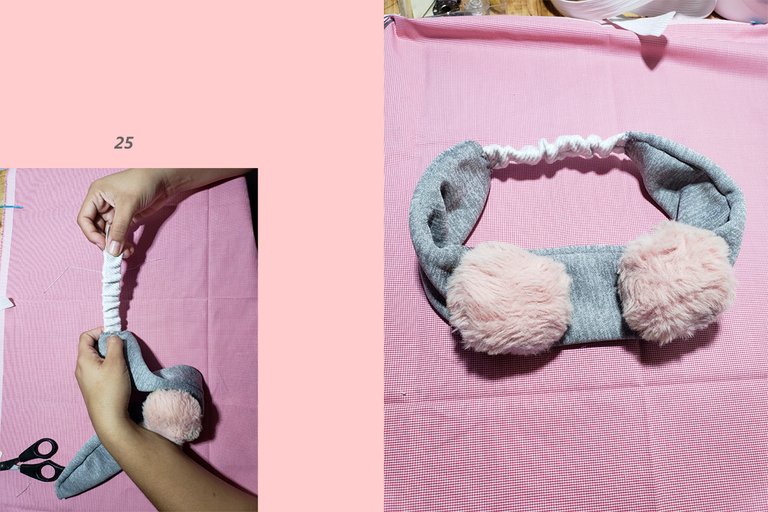
Step 7
The elastic, we cover it with white fabric to give it that cuddle effect.
We sew the two ends of the elastic to our band and that's it, our adorable makeup band is finished.
Good beautiful people, thank you very much for reading me, I hope you liked it, I did it with love, I will be reading your comments, see you in my next post, hello to all bye bye.
Recursos:
Todas las imágenes son de mi propiedad.
Fueron editadas por psp 6
Imágenes tomadas por Samsun A20
Traducido por traductor de google.
Means:
All images are my property.
They were edited by psp 6
Pictures taken by Samsun A20
Translated by google translator.
ooooooh!! que hermoso. me encanto. ciertamente es ideal para maquillarnos mientras nos consentimos con coqueterias como esta. gracias por compartir. ❤️❤️❤️❤️❤️❤️
Muy util y original para las chicas que le encanta el maquillaje 👍🙋♀️
Congratulations @cutiepink26! You have completed the following achievement on the Hive blockchain and have been rewarded with new badge(s):
Your next target is to reach 200 upvotes.
You can view your badges on your board and compare yourself to others in the Ranking
If you no longer want to receive notifications, reply to this comment with the word
STOPCheck out the last post from @hivebuzz:
Support the HiveBuzz project. Vote for our proposal!
Muchísimas gracias a @blue1701ocean y a @leidys01, por comentar, me hace muy feliz que les haya gustado, besitos y abrazos ❤️🤗