I wrote a report on HTML4 in middle school (~2003). I figured it was time to start an HTML5 series for you lovely people. As all posts are only monetized for 7 days, I think I may eventually transfer to an ad-supported blog. But, for now, this will have to do.
HTML is a form of XML designed for hyperlinked documents. In short, XML is an attempt to store data which is both human and machine readable -- it's easy to code with and it's easy to read with the eyes. Hyperlinked documents are documents which point to other documents. This is why the Internet is called the World Wide Web (documents reference and link to each other, forming a web) and why webserver URLs traditionally started with WWW, while other services offered by a domain had their own subdomains.
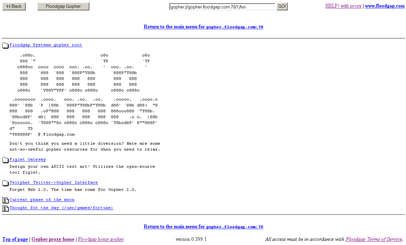
An early precursor to the WWW was the Gophernet. The Gophernet presented documents in a tree format, like modern day computer folders. To change documents within a site, you simply opened the tree menu and chose the document you wanted from the site. Text via gophernet was static (it didn't change) and you could link to other gopher sites from your own.
Let's get started. This is a VERY BASIC HTML5 document.
<!DOCTYPE html>
<html>
    <head>
    </head>
    <body>
    </body>
    <footer>
    </footer>
</html>
XML demands that data be stored in a hierarchy with opening tags and closing tags.
An opening tag looks like this:
<tagName>
A closing tag for the same field looks like this:
</tagName>
Think of your tags as hamburger buns -- you need a top and a bottom. And the top and bottom belong in a specific place.
<tagName>
</tagName>
Tags can be nested within each other to better sort data:
<Name>
    <First>Bob</First>
    <Last>Smith</Last>
</Name>
Now onto breaking our basic page down:
<!DOCTYPE html>
The web has moved a long way since static text was the golden standard. There are now languages which integrate with webservers besides HTML. You can run PHP documents and Python code. All of these tiny improvements require tiny bits of data to let a server and browser know what types of documents they're dealing with. The <!DOCTYPE> tag tells your browser what type of HTML it is dealing with: HTML5. There will not be an HTML6 as 5 has been declared a living-standard.
<html>
</html>
This tag allows any machine fetching the website to know it's reading HTML and not downloading a file or some other XML (Like RSS or ATOM which are also formatted in XML).
The body tag is what you actually see in your web browser. Anything that's in your body tag, will show up as part of the website itself.
<!DOCTYPE html>
<html>
    <body>
        This will show up on your webpage.
    </body>
</html>
The head tag is where information your browser needs to render the page, is stored. An example would be title tags. The information in your title tags shows up as the text on the tabs of your users.
<!DOCTYPE html>
<html>
    <head>
        <title>This is your Website!</title>
    </head>
    <body>
        This will show up on your webpage.
    </body>
</html>
And lastly, is your footer tag. Footer tags are placed inside of other tags to keep important information (Author, Publisher, Copyright, etc). Because this information isn't in the body, it will not show up on your website. I like to link to external resources in the footer. As a website fetches outside sources, it stops loading the page to get those sources. To keep this "stop" from happening, we put all our external fetches at the bottom of the page.
<!DOCTYPE html>
<html>
    <head>
        <title>This is your Website!</title>
    </head>
    <body>
        This will show up on your webpage.
    </body>
    <footer>
        fetch external javascript library.
        fetch external css stylesheet.
    </footer>
</html>
Congratulations. You made it! Hope it wasn't too boring.