TABLE OF CONTENTS
- Introduction
- Ending Overview
- Intro Slides
- Government Slides
- Determinants for Rebellion Slides
- Rebellion Slides (without Pierre)
- Rebellion Slides (with Pierre)
- Red Rabies Slides
- Diesel Slides
- Pantagruel Slides
- Green Diamond Slides
- Evidence for the Court
- Court Slides
- Not Included in the Ending
This article was written under Jagged Alliance 3 Game Version: Larry (1.5.1)
Please note that much of the information in this article is based on anecdotal evidence and a lot of trial and error. I have not had the opportunity to delve into the actual source code, but I am happy to make any corrections if more accurate information is discovered. If you have any comments, you can either post here or e-mail me at: [email protected]
1. INTRODUCTION
WARNING!!!
This article contains major SPOILERS for Jagged Alliance 3. This guide is mainly intended for players who have already finished the game once and want to better understand what the various outcomes could be if they had played the game differently. It is NOT intended for new players who have not played through the game yet.
At the end of the game, you receive various ending slides based on how you resolved various quests and decision points. This guide aims to catalog the various ending scenarios and to document how to achieve those specific endings.
2. ENDING OVERVIEW
Please note that the only required quests are the Ernie Island quests at the beginning of the game, the three big quests involving the Major, the Colonel, and Corazon Santiago, and resolving the President quest. All the other quests (including Red Rabies, Diesel and Landsbach, Chimurenga and Pantagruel, Biff and the Green Diamond, and gathering evidence about the conspiracy) are optional.
Most story-related achievements are unlocked immediately when you meet the conditions such as Unlockdown, Diesel Power, Love Cats, Green Diamond, Saw It Coming, and Apocalypse Later. Proven Innocent is different in that you do need to complete the game to unlock it.
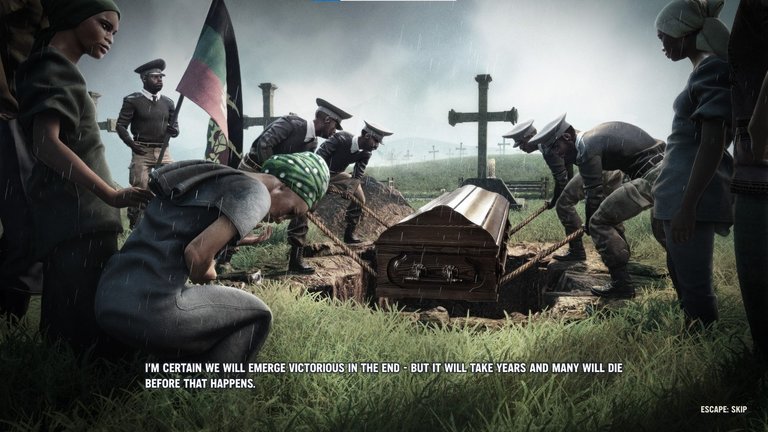
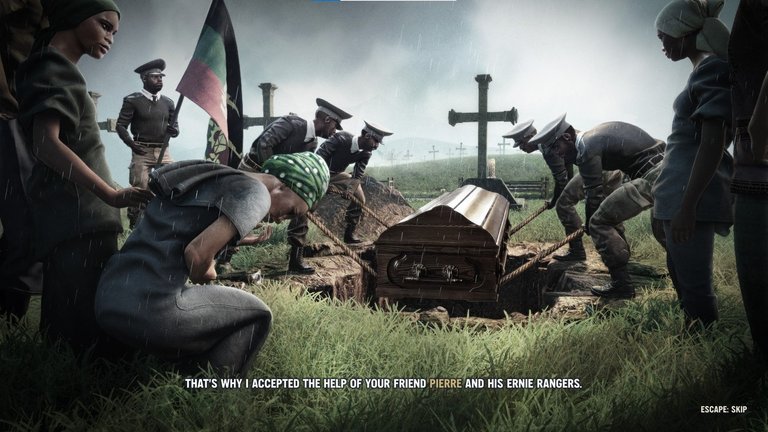
At the end of the game, you will see the following series of ending slides:
The exact same 2 Intro slides are always shown.
2-3 Government slides depending on whether the President was rescued and whether the Colonel was killed.
3-4 Rebellion slides detailing the status of any civil war and rebel forces. Also covers the fate of Pierre and the Major. This depends on 4 factors - in addition to whether the President was rescued and whether the Colonel was killed, it also depends on whether you spared Pierre and what you decide to do with the Major.
2-4 Red Rabies slides depending on how you resolved the Red Rabies quest. The best ending also requires you to rescue the President and kill the Colonel, or send Dr. Gruselheim to the Sanatorium.
2-3 Diesel slides depending on how you resolved the Diesel quest. It's possible for the Diesel slides to be omitted.
3 Pantagruel slides depending on whether Chimurenga and Maman Lilliane get together. The best ending also requires you to rescue the President and kill the Colonel.
2-4 Green Diamond slides depending on what happens to the Green Diamond.
4 Court slides depending on how much Conspiracy evidence you acquired.
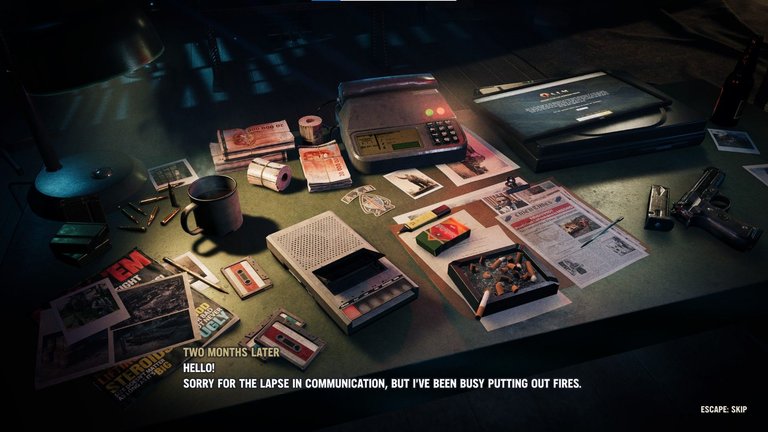
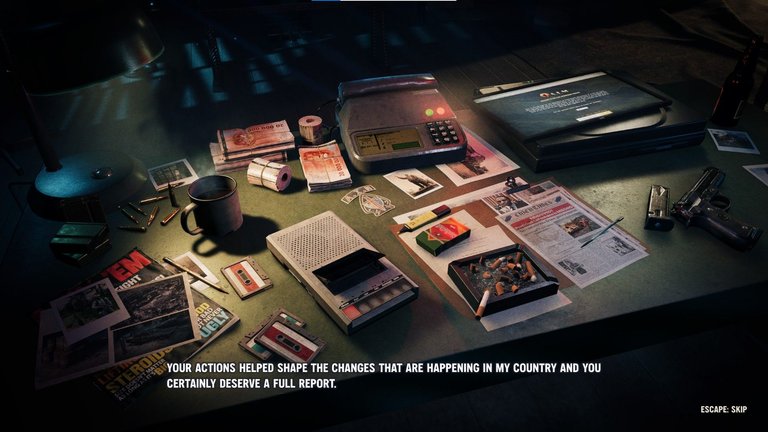
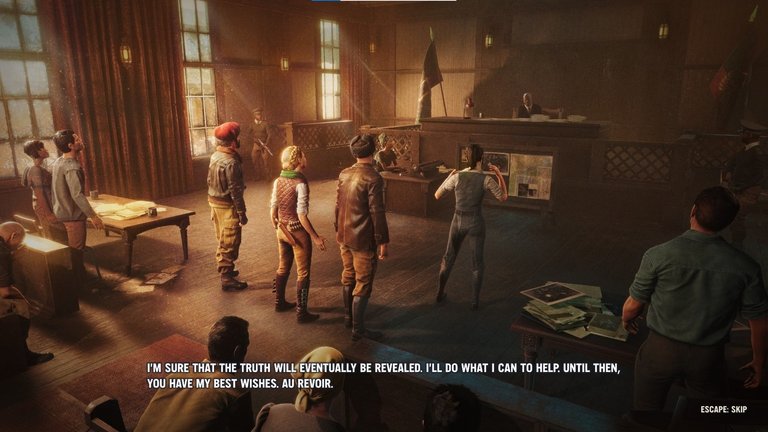
3. INTRO SLIDES
The exact same two Intro Slides are always shown:
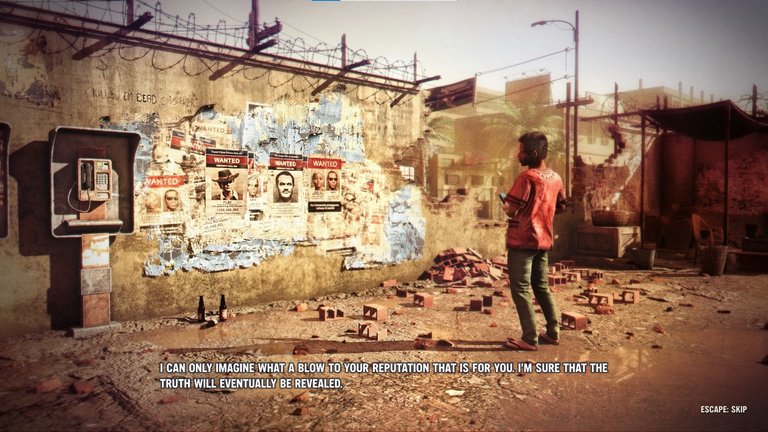
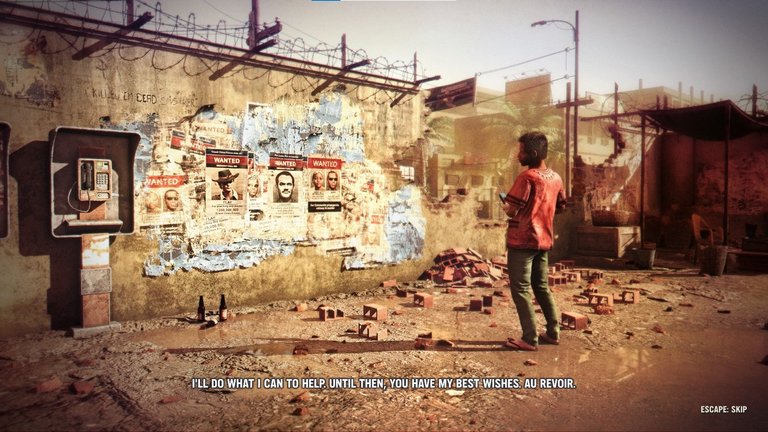
Since the ending is narrated by Emma Lafontaine, it makes you wonder if it is possible for her to die. That does not seem possible. If you go to Port Cacao City, you can free aim attack her but she is immortal and can't be killed no matter how many times you shoot her. In theory, it could be an interesting way to accumulate inflicted damage for raising Marksmanship and Strength, or to accumulate bandaged damage for raising Medical. If Port Cacao City is taken by enemy forces, Emma does not die. She leaves Port Cacao and the Museum of the Adjani quest fails.
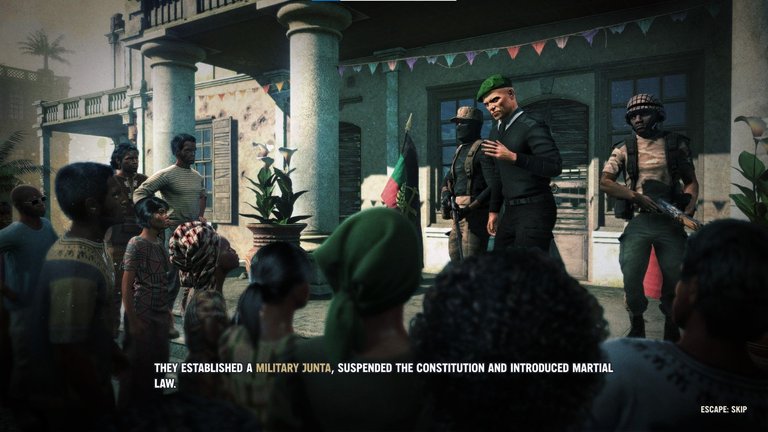
4. GOVERNMENT SLIDES
There are 4 possible ending scenarios for the status of the Grand Chien government depending on whether President Lafontaine was rescued or killed and whether Colonel Faucheux was killed or escaped (one ending for each of the 4 combinations).
To rescue the President, he must be alive at the end of the Eagle's Nest battle.
For him to be dead, either the Legion has to kill him or you can kill him yourself by attacking him via free aim attacks.

For the Colonel to be dead, he needs to be killed during the battle at Fort Brigand near the end of the game. The Colonel cannot be killed prior to the Refugee Camp massacre - he is immortal at Fort Brigand during the first half of the game and he also cannot be killed at the Refugee Camp.
For the Colonel to escape, he needs to be wounded, which then triggers him calling for his boat to be prepared for evac. The Colonel then needs to travel to where his boat is at the docks (see the above screenshot). Sometimes the AI behavior can get glitched and he refuses to flee. I have had several games where the Colonel is Almost Dead but keeps hanging around his office. It can also get glitched if you trigger his evac text, kill most of the soldiers, flee the map, and then return. I find it harder to get him to flee when I attack from the underground tunnels or from the east. I have found more success when I position my mercs closer to the docks (thus the Colonel moves towards the docks to attack my squad). Then I try to move some of my mercs behind the Colonel (coming from the underground tunnels and his office) to flank him and "herd" him towards the docks. In my solo run, attacking from the tunnels caused him to stay near his office even after he was wounded and called for evac. What I ended up doing was luring him towards the dock and only wounding him after he was close to the dock.
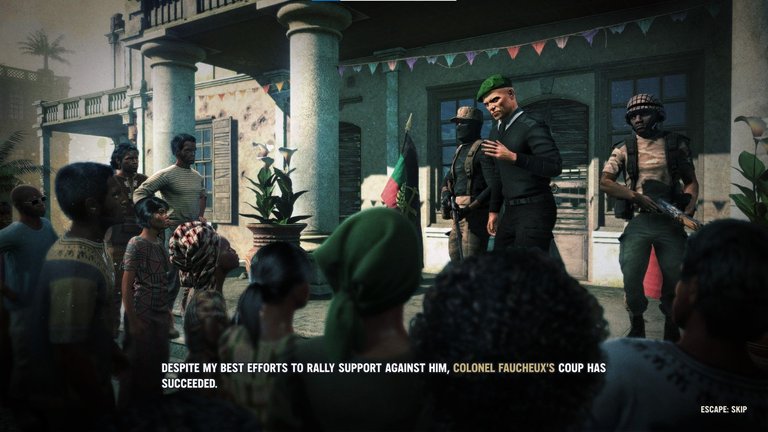
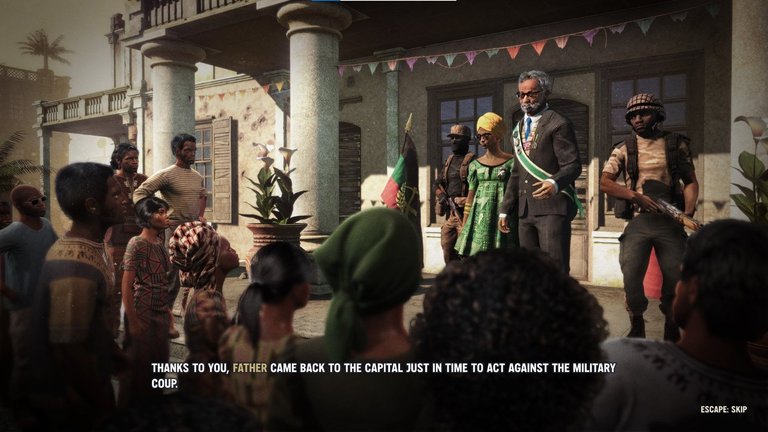
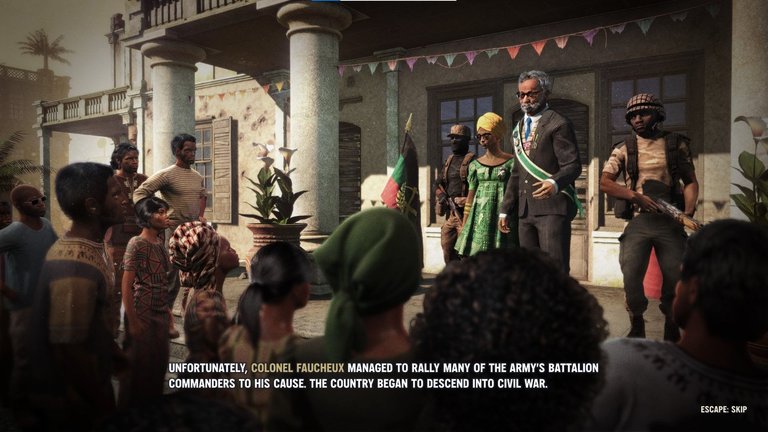
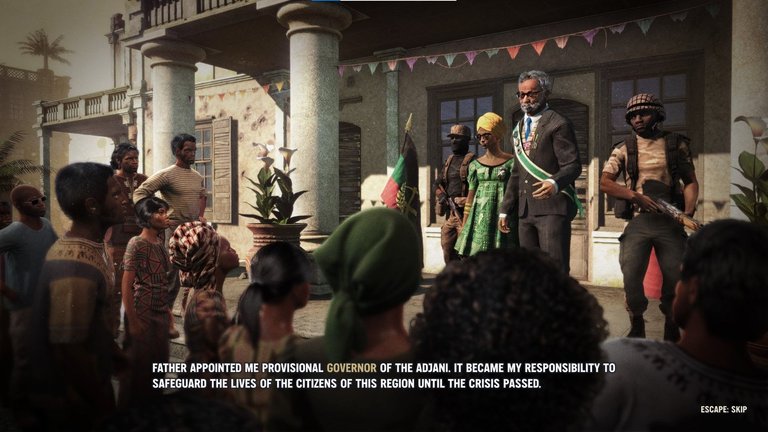
A. Colonel's Coup Succeeds
Required conditions:
President is DEAD
Colonel ESCAPES

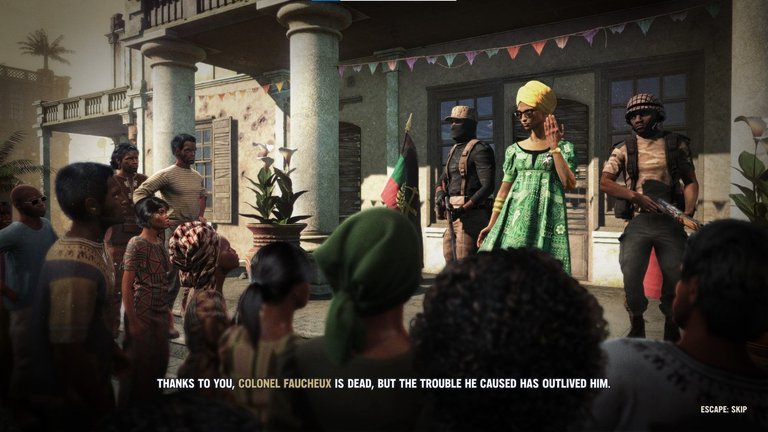
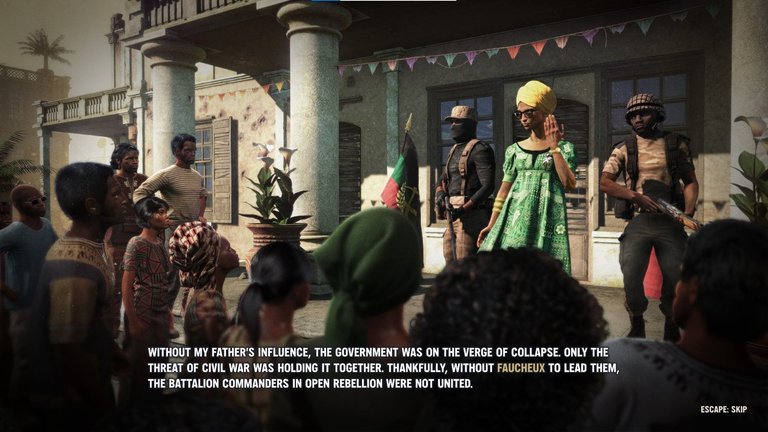
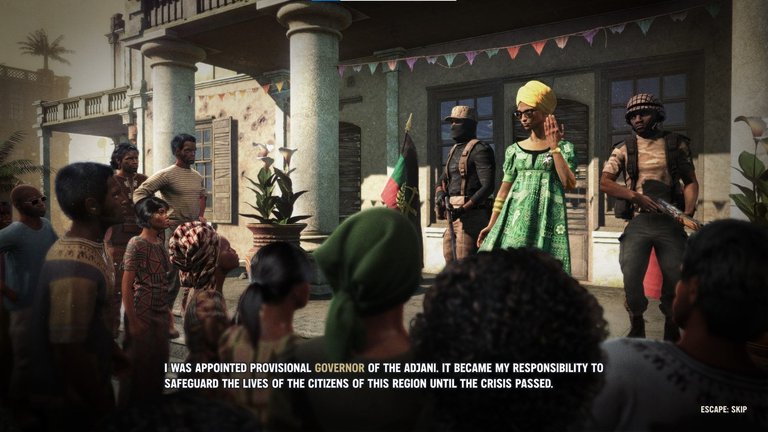
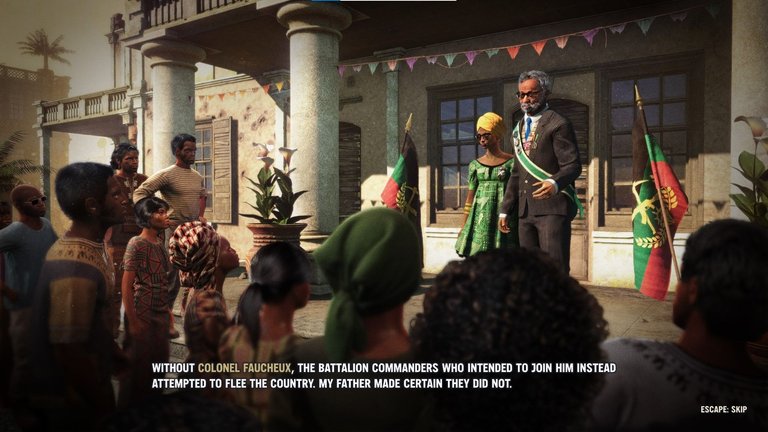
B. Provisional Government
Required conditions:
President is DEAD
Colonel is DEAD
C. Civil War
Required conditions:
President is RESCUED
Colonel ESCAPES
D. Government In Control
Required conditions:
President is RESCUED
Colonel is DEAD
This is the "best" ending. To get the best Red Rabies and Pantagruel ending slides, you need to achieve this result.

5. DETERMINANTS FOR REBELLION SLIDES
The Rebellion ending slides detail the state of any civil war, such as any remaining Legion, militia, or army forces. They also cover the fate of Pierre and in some cases, the fate of the Major.
Out of all the categories of ending slides, this one has the most variety. There are 6 possible endings if you executed Pierre and 5 possible endings if you spared Pierre. There is roughly 1 overlap, so that yields around 10 different endings. I did group together variants - if you count every single variant as a different ending, you could have 16 different endings (9 if you execute Pierre and 7 if you spare him).
There are 4 factors that determine which ending you get:
#1. Was the President rescued or killed?
#2. Was the Colonel killed or did he escape?
(See the previous section on Government Slides for more details on these conditions).
Think of the President being rescued and the Colonel being killed as the "good" outcomes, and the President being killed and the Colonel escaping as the "bad" outcomes.
The Rebellion endings vary depending on whether you got both bad outcomes, one good and one bad outcome, or two good outcomes.
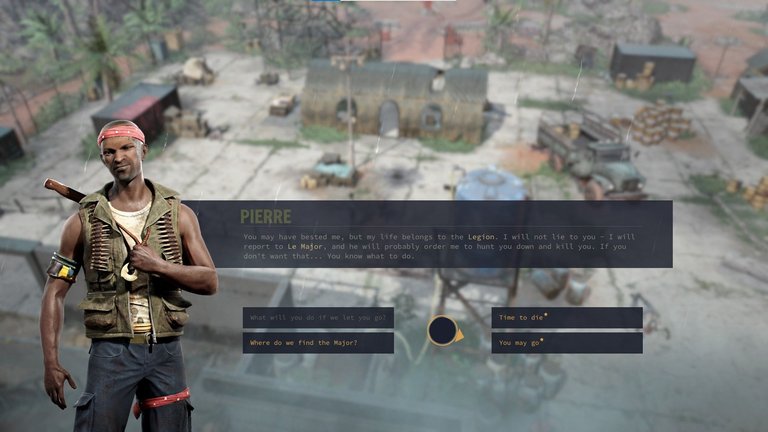
- #3. Did you execute or spare/recruit Pierre at Fort Leau Bleu?
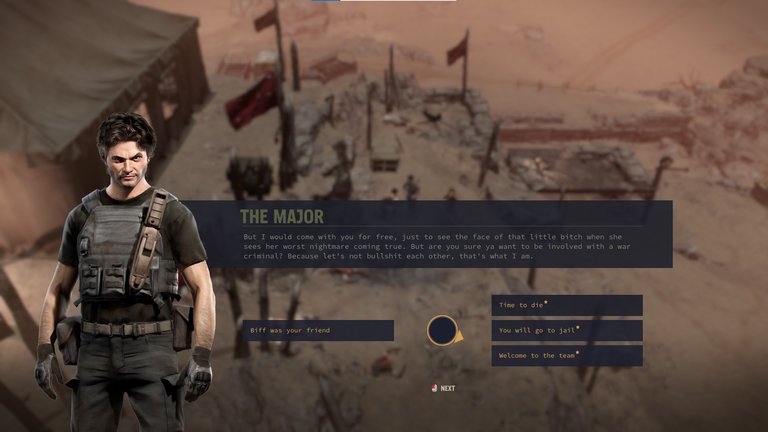
- #4. After defeating the Major at the Eagle's Nest, did you execute him, send him to prison, or recruit him?
If you choose to recruit the Major, you will immediately unlock the Apocalypse Later achievement. You do not need to complete the game (which could involve defeating the Colonel and Corazon Santiago if you have not done so yet) to get the achievement.
The game seems to focus on the decision you made for Pierre and the Major and NOT about their actual game state at the end of the game. For example, if you spare and recruit Pierre and recruit the Major, but then they both die during the course of the game, the ending slides can still have Pierre hunting down the Major or Pierre visiting the Major in prison. I intentionally killed both of them (having them step on landmines) to test this.
I don't know if there is a difference between sparing Pierre and recruiting him versus sparing Pierre and leaving him at the camp or having him go home to Ernie. But based on how the game doesn't care about their actual game state for being alive/dead, I suspect it doesn't change anything.
6. REBELLION SLIDES (WITHOUT PIERRE)
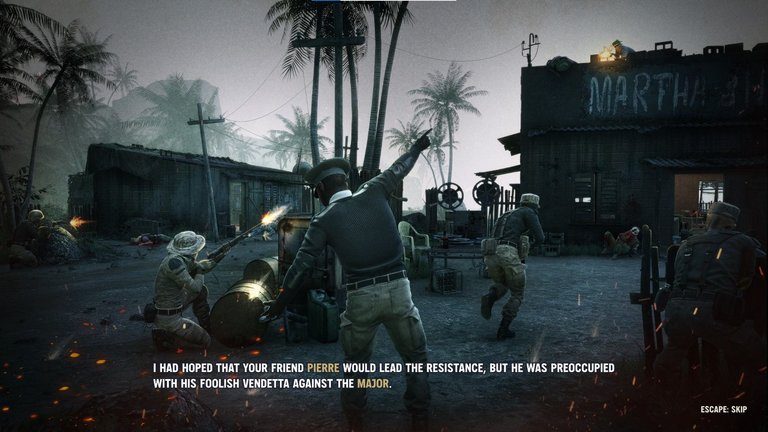
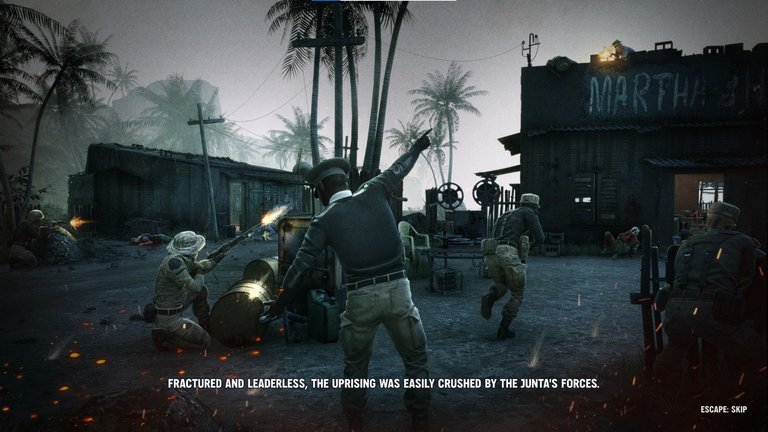
If you executed Pierre, then the more unique and interesting endings happen if you send the Major to prison. From a story perspective, the best outcomes for Grand Chien also come from the prison option.
A. Junta crushes rebels
Required conditions:
President is DEAD
Colonel ESCAPES
Pierre is EXECUTED
Major is EXECUTED or RECRUITED
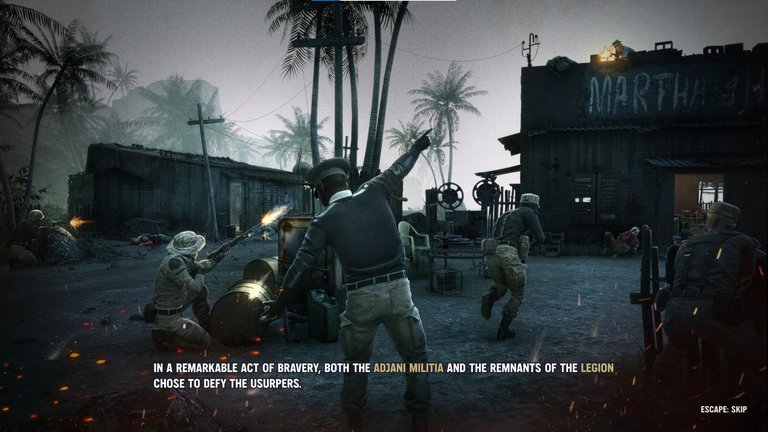
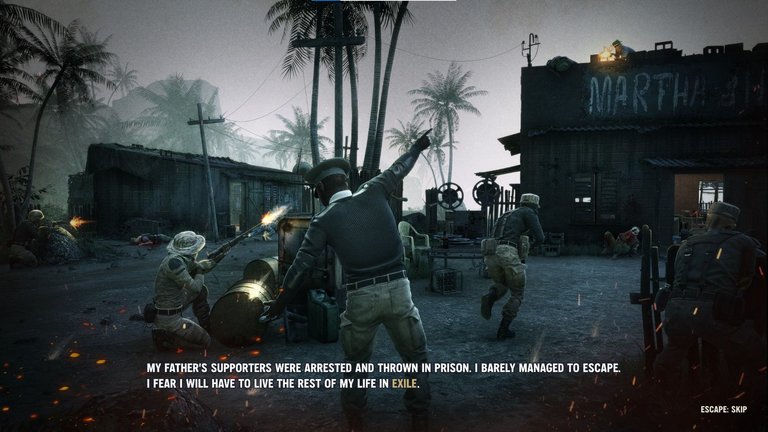
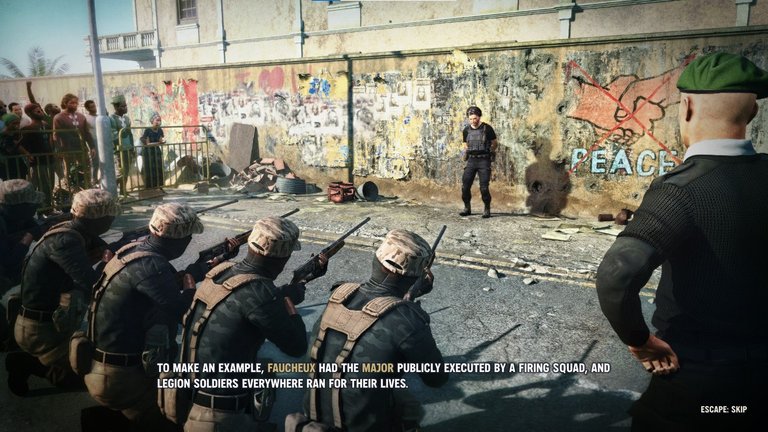
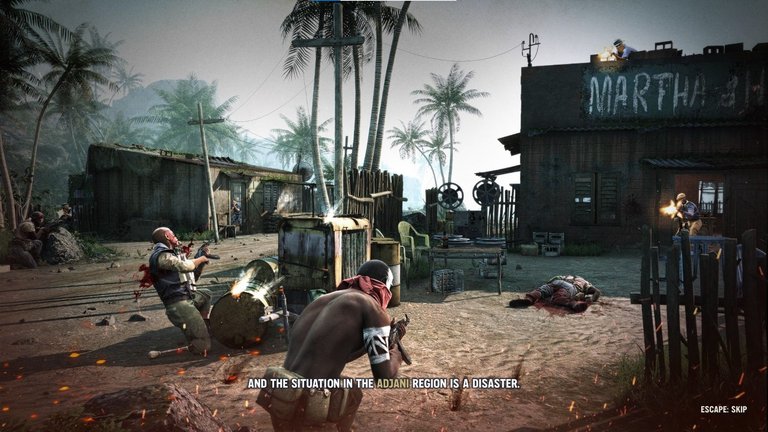
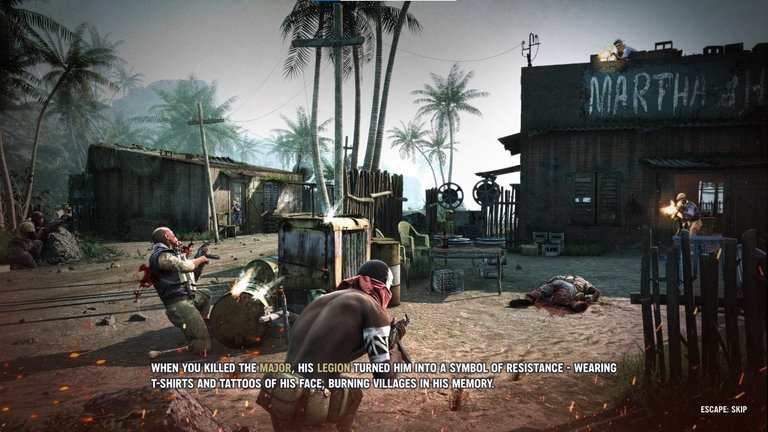
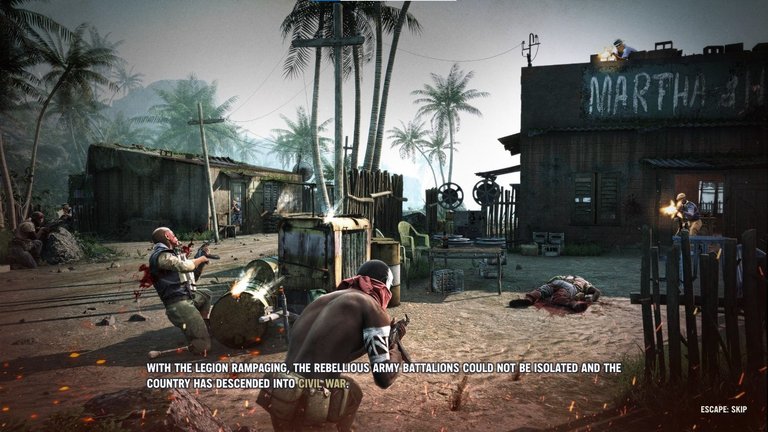
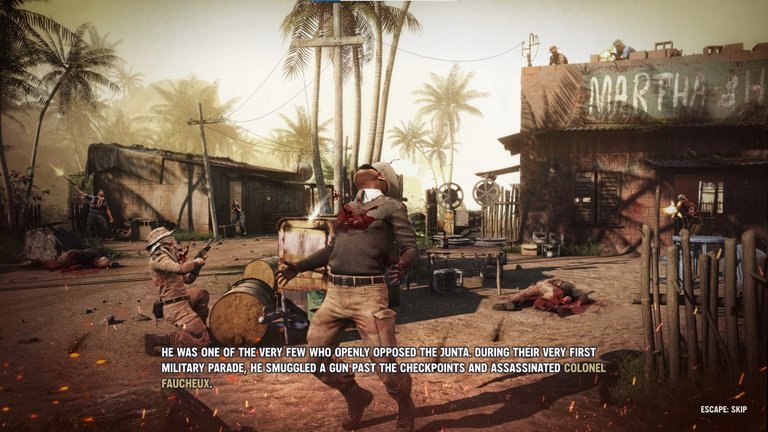
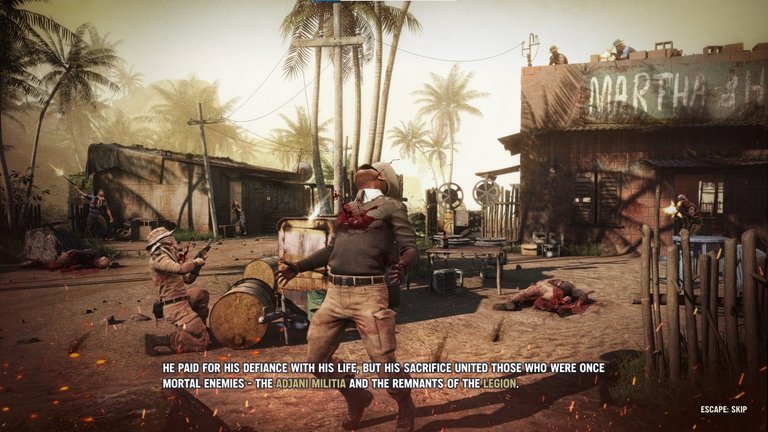
In this ending, the Adjani Militia and the Legion try to defy the military junta but are crushed. The first and last slides are the same but the middle slides (that explain why the uprising fails) vary.
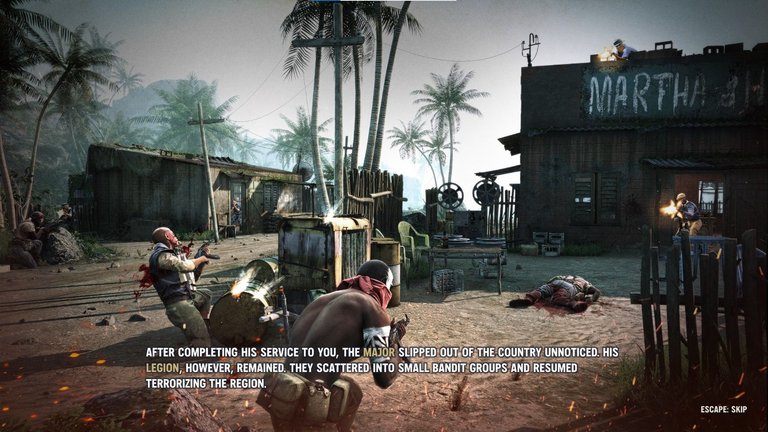
If you executed Pierre and Colonel Faucheux's coup succeeds, then the uprising might fail because the major was dead (if you executed him) or the major slipped out of the country (if you recruited him).

Here is the alternate middle slide if you recruited him:

There is a similar variant if the Colonel's coup succeeds and you recruited both Pierre and the Major. In that case, there are two middle slides that explain how the uprising fails because Pierre was pursuing his vendetta against the Major.
B. Junta executes the Major
Required conditions:
President is DEAD
Colonel ESCAPES
Pierre is EXECUTED
Major is in PRISON


C. Civil war against the Legion and army
Required conditions:
President is DEAD
Colonel is DEAD
Pierre is EXECUTED
Major is EXECUTED or RECRUITED
OR
President is RESCUED
Colonel ESCAPES
Pierre is EXECUTED
Major is EXECUTED or RECRUITED
This is the ending if you executed Pierre, either execute or recruit the Major, and you get one bad and one good outcome for the President and the Colonel.
If you executed the Major:

If instead you recruited the Major, then the two middle slides are different but the first and the fourth slide remain the same.

D. Major is pardoned and dies a hero
Required conditions:
President is DEAD
Colonel is DEAD
Pierre is EXECUTED
Major is in PRISON
OR
President is RESCUED
Colonel ESCAPES
Pierre is EXECUTED
Major is in PRISON
This is the ending if you executed Pierre, sent the Major to prison, and you get one bad and one good outcome for the President and the Colonel.


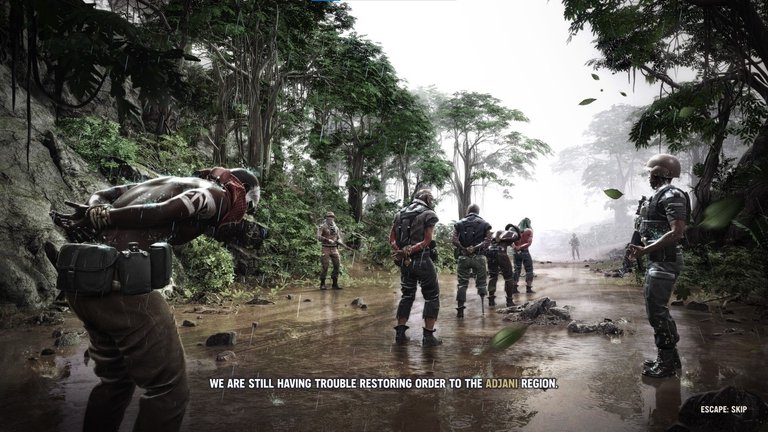
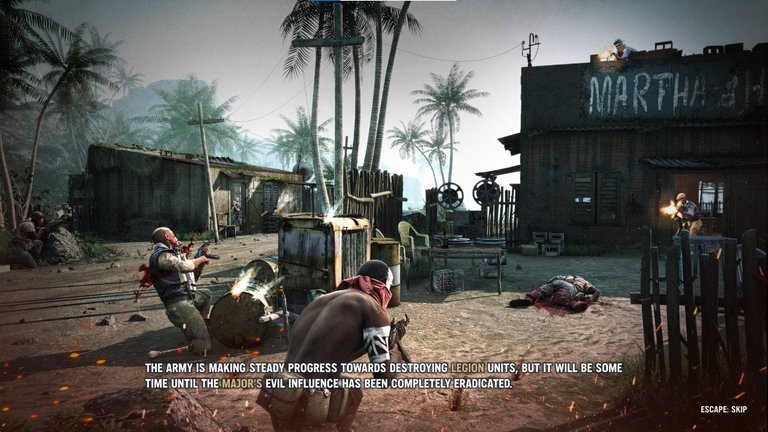
E. Army making steady progress against the Legion
Required conditions:
President is RESCUED
Colonel is DEAD
Pierre is EXECUTED
Major is EXECUTED or RECRUITED
There are two variants of this with different backgrounds and contexts. The situation in the Adjani region is bad (but not a complete disaster) but the army is making steady progress.
If you executed the Major:

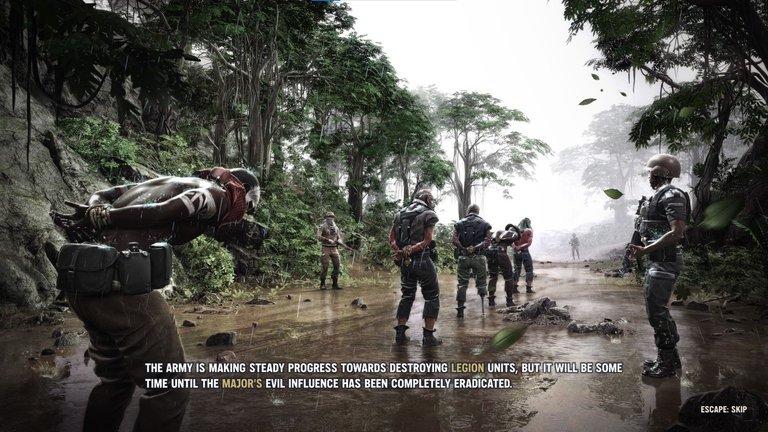
If you recruited the Major:

F. Major commits suicide in prison and order is restored
Required conditions:
President is RESCUED
Colonel is DEAD
Pierre is EXECUTED
Major is in PRISON


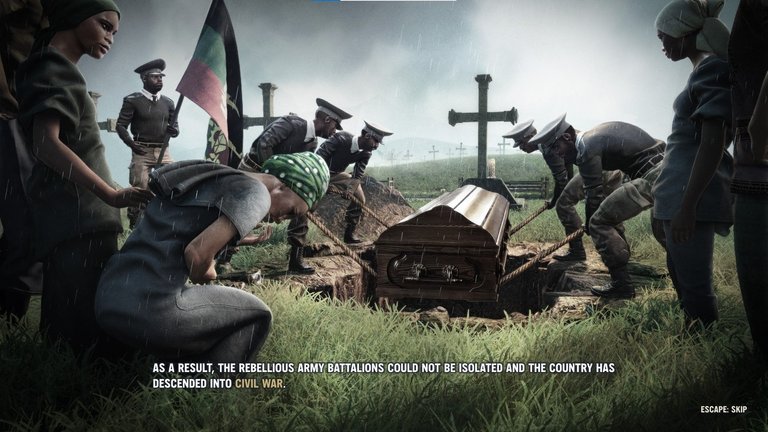
7. REBELLION SLIDES (WITH PIERRE)
If you spare Pierre and recruit him, then several of the ending scenarios are dependent on whether or not you recruit the Major. If you rescue the President and kill the Colonel, then Pierre comes to terms with the Major but other combinations will result in Pierre pursuing vengeance against the Major, to the detriment of Grand Chien. Also, these slides focus more on Pierre and less on the Major so in several cases it doesn't differentiate between executing the Major and sending him to prison.
A. Junta crushes rebels
Required conditions:
President is DEAD
Colonel ESCAPES
Pierre is RECRUITED
Major is RECRUITED
This is a variant of one of the bad endings you can also get if you executed Pierre and the Colonel's coup succeeds. In those cases, the uprising fails because the Major is dead or the Major slipped away. Here the uprising fails because the Pierre is busy with the Major.
The first and the last slides are the same but this variant has 2 middle slides explaining the failure (instead of 1 middle slide that the other 2 variants have).
B. Civil war continues because Pierre is busy hunting the Major
Required conditions:
President is DEAD
Colonel is DEAD
Pierre is RECRUITED
Major is RECRUITED
OR
President is RESCUED
Colonel ESCAPES
Pierre is RECRUITED
Major is RECRUITED
Suppose you recruit both Pierre and the Major, then:
If you get both bad outcomes you get "A. Junta crushes rebels."
If you get one good outcome and one bad outcome you get "B. Civil war continues because Pierre is busy hunting the Major."
And if you get both good outcomes you get "E. Pierre enlisted as special military advisor."

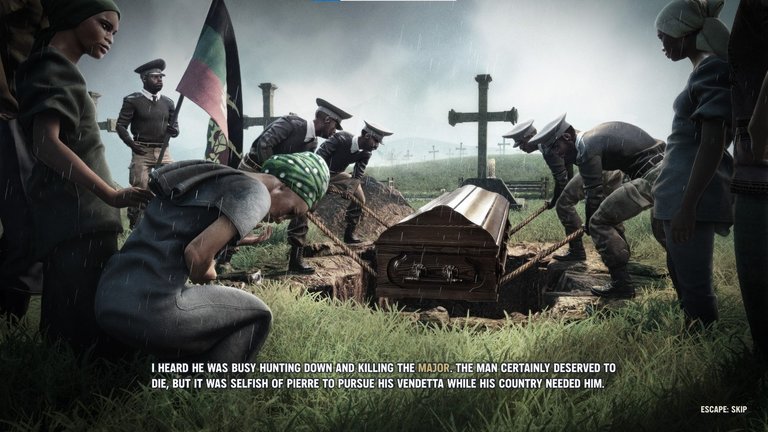
C. Pierre dies a hero after assassinating the Colonel
Required conditions:
President is DEAD
Colonel ESCAPES
Pierre is RECRUITED
Major is EXECUTED or in PRISON
This ending doesn't mention the Major so it doesn't matter if you executed him or sent him to prison. (If you recruited him, you'll instead get "A. Junta crushes rebels.")
This ending requires both bad outcomes for the President and the Colonel.


D. Pierre dies a hero defeating the rebels
Required conditions:
President is DEAD
Colonel is DEAD
Pierre is RECRUITED
Major is EXECUTED or in PRISON
OR
President is RESCUED
Colonel ESCAPES
Pierre is RECRUITED
Major is EXECUTED or in PRISON
This ending has one good outcome and one bad outcome for the President and Colonel.
This ending doesn't mention the Major so it doesn't matter if you executed him or sent him to prison. (If you recruited him, you'll instead get "B. Civil war continues because Pierre is busy hunting the Major" which also involves getting one good and one bad outcome.)


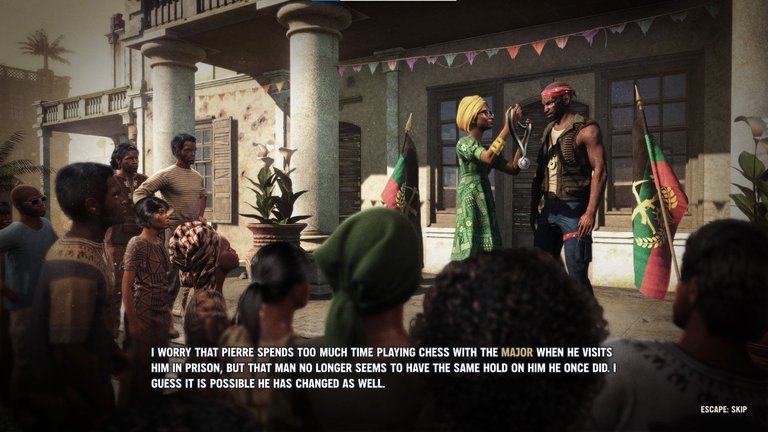
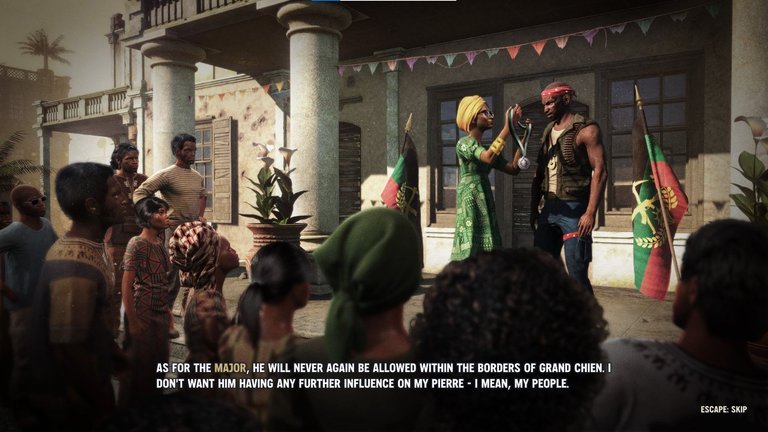
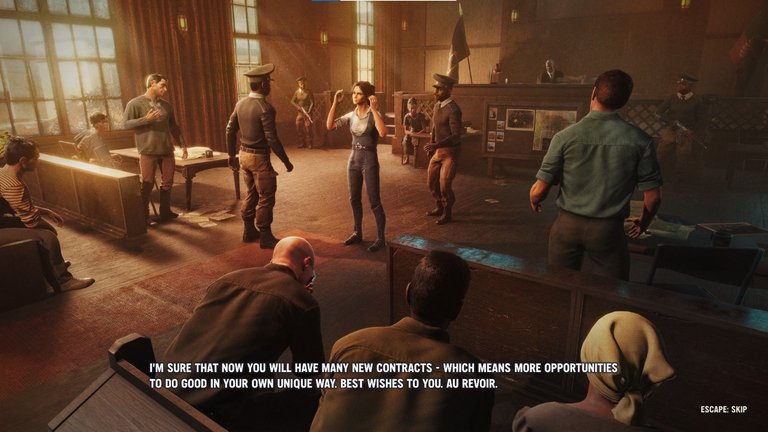
E. Pierre enlisted as special military advisor
Required conditions:
President is RESCUED
Colonel is DEAD
Pierre is RECRUITED
This is the best ending for Pierre - he is recruited by the President and it is implied that he has a romantic relationship with Emma. It requires both of the good outcomes for the President and Colonel. If you meet these conditions you will first get 3 fixed slides:
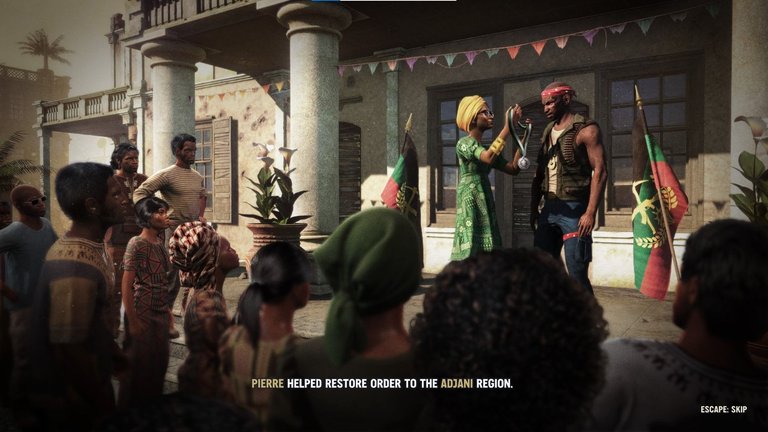

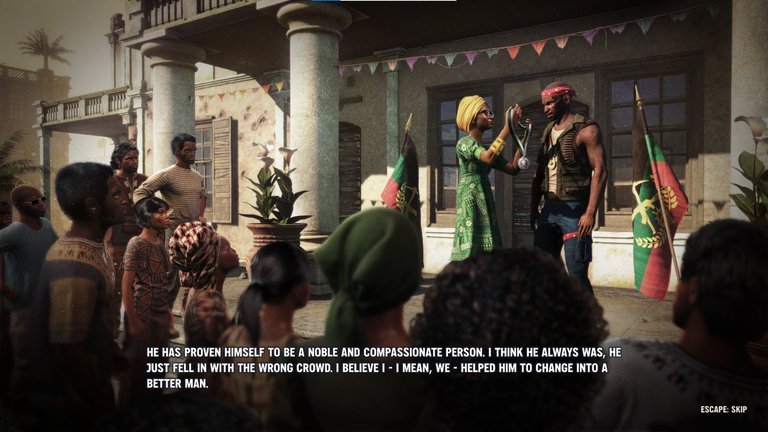
And then you will get a 4th slide which varies depending on whether the Major was executed, sent to prison, or recruited:

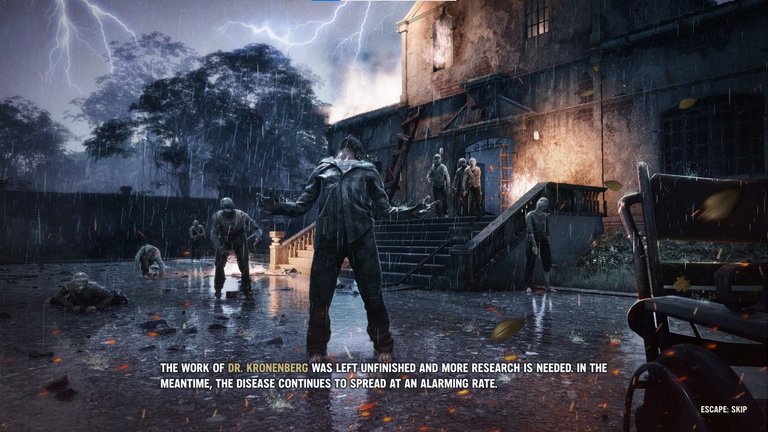
8. RED RABIES SLIDES
These slides are mainly dependent on whether or not you helped develop a cure for the Red Rabies.
However, the best ending also requires both good outcomes (President being rescued and Colonel being killed). Alternatively, you can send Dr. Gruselheim to the Sanatorium to get the best ending.
You will unlock the Unlockdown achievement as soon as you complete the Red Rabies quest for Dr. Kronenberg - you do not need to complete the game to get the achievement. Version Wolf (1.4.1) had a bug in that completing the Outbreak quest by sending Dr. Gruselheim to the Sanatorium did not unlock the Unlockdown achievement. Unfortunately there is no easy way to determine if this has been fixed for Version 1.5.1.
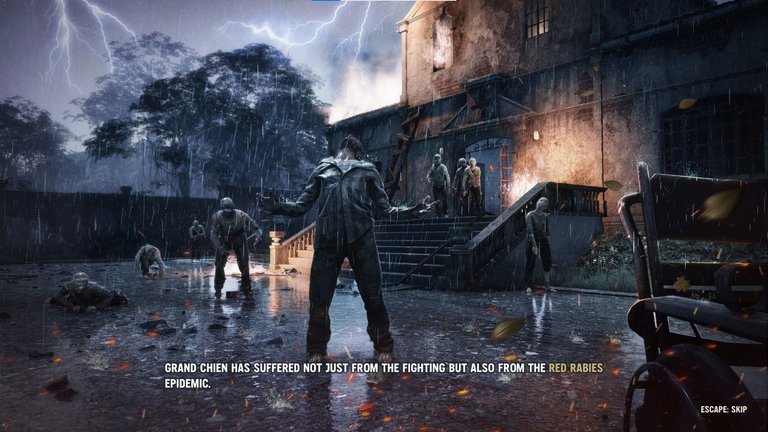
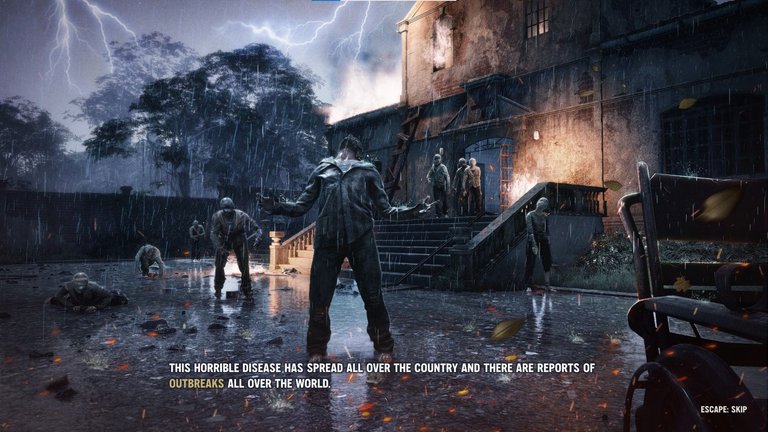
A. Red rabies becomes a pandemic
Required conditions:
Completely skip the Red Rabies quest
OR
Fail the Red Rabies quest by killing Dr. Kronenberg

B. Red rabies partially contained
Required conditions:
Complete the Red Rabies quest (i.e. Dr. Kronenberg finishes her research but dies)
AND
Either President dies and/or Colonel escapes (one good and one bad outcome or both bad outcomes)

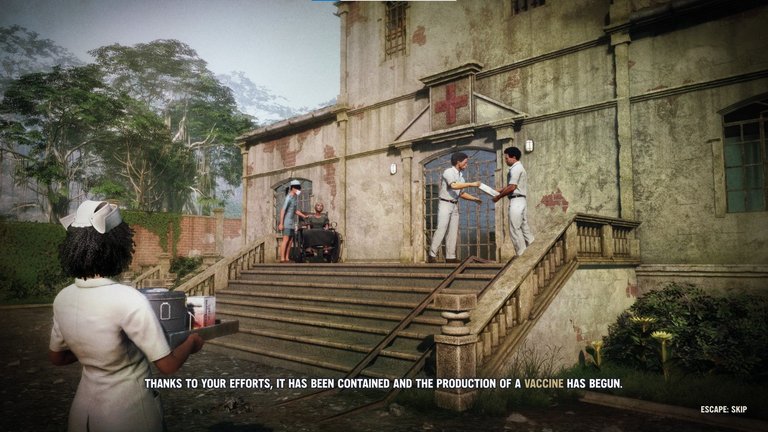
C. Red rabies fully contained
Required conditions:
Complete the Red Rabies quest (i.e. Dr. Kronenberg finishes her research but dies)
AND
President is RESCUED
AND
Colonel is DEAD
OR
Complete the U-Bahn quest and send Dr. Gruselheim to the Sanatorium
This is the best ending for the Red Rabies. It requires both good outcomes for the President and the Colonel. One way to think about it is that only a functioning government has the resources to finish and produce the vaccine. If the junta is in control (both bad outcomes) or there is a civil war (one good and one bad outcome), Grand Chien doesn't have the resources to fully contain the Red Rabies.
Alternatively, you can complete the U-Bahn quest and send Dr. Gruselheim to the Sanatorium. In order to even have this appear as an option, you need to have already visited the Sanatorium, exposed Dr. Kronenberg's experiments, and begun the quest to gather samples for her. If you then send Dr. Gruselheim to the Sanatorium, he will develop a cure for the Red Rabies and save Dr. Kronenberg (though she disappears from the sector and you can no longer interact with her). Completing the Outbreak quest this way guarantees you will get the good Red Rabies ending (even if the President dies or the Colonel escapes). However, you will just get the first 2 slides (the third slide about Dr. Kronenberg being awarded a posthumous medallion will be omitted since her life is saved).


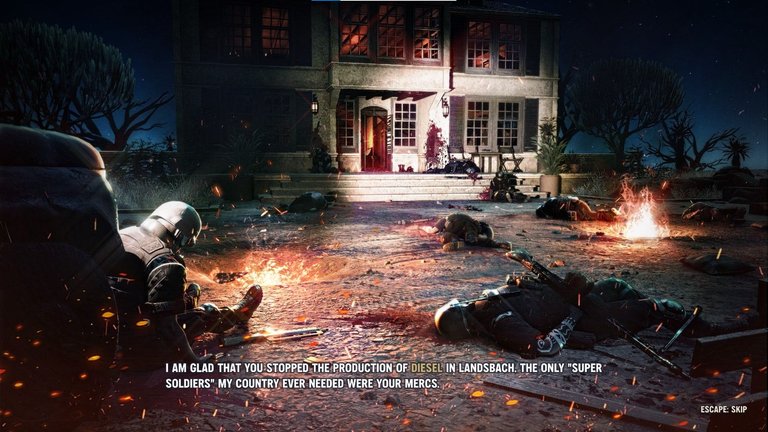
9. DIESEL SLIDES
These slides are dependent on how you resolved the Landsbach quest with Siegfried and Bounce.
You will unlock the Diesel Power achievement as soon as you uncover enough clues to discover the secret of Diesel. You do not need to complete the Landsbach quest or complete the game to get the achievement.
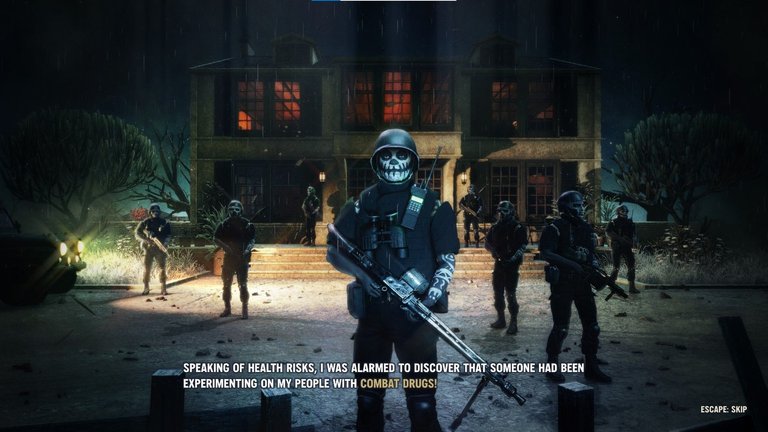
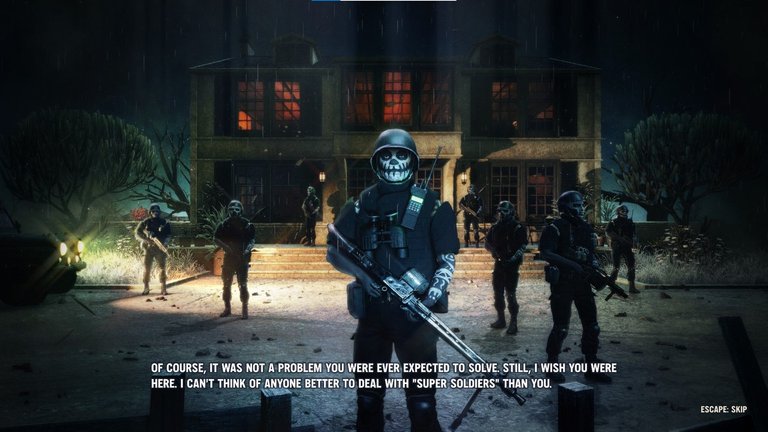
A. Super soldiers in Landsbach
Required conditions:
Completely ignore Landsbach
OR
Side with Siegfried (after learning the secret of Diesel) and then defeating Bounce
OR
(Other possibilities likely lead to this ending)
I suspect that this is just the default ending for Landsbach and that unlike Red Rabies, there isn't a partial success ending.
In one game, I completely ignored Landsbach and never visited it. Landsbach only appeared in my Notes log because a villager mentioned that people were talking about diesel. After completing the game, I got this ending.
In another playthrough, I learned the secret of Diesel but sided with Siegfried and defeated Bounce. I did not complete the U-Bahn quest and thus did not kill Siegfried. I still got this ending.

B. No mention of Landsbach (slides omitted)
Required conditions:
Completely ignore Landsbach but complete the U-Bahn quest and killing Siegfried
OR
(Other possibilities likely lead to this ending)
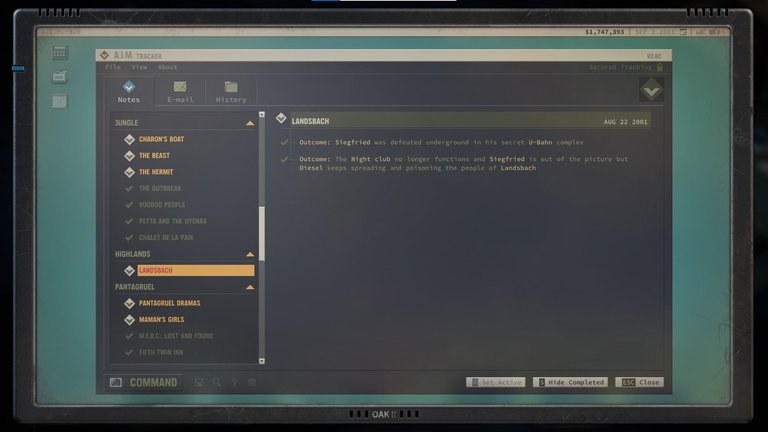
In one playthrough, I completely ignored Landsbach and never visited it. Landsbach only appeared in my Notes log because a villager mentioned that people were talking about diesel. I did however complete the U-Bahn quest and killed Siegfried. When I killed Siegfried, the Landsbach quest failed (became red) with the updates of: "Outcome: Siegfried was defeated underground in his secret U-Bahn complex" and "Outcome: The Night club no longer functions and Siegfried is out of the picture but Diesel keeps spreading and poisoning the people of Landsbach". If I later visited Landsbach, I immediately got control of the city (the warehouse where the Night Club was empty and Bounce was nowhere in sight). And if I visited Drachenberg Mine, I would need to fight Siegfried's guards in the sector before taking control of the mine.
So skipping Landsbach but then killing Siegfried led to the omission of any ending slides dealing with Landsbach, Diesel, or super soldiers. I would surmise that less optimal ways of resolving the Landsbach quest but then killing Siegfried would also lead to the omission of these ending slides.
C. Diesel production is stopped
Required conditions:
Complete Landsbach quest
AND
Stop Siegfried
AND
Kill Bounce
AND
Learn the secret of diesel

Work In Progress: Need to explore the non-optimal endings by siding with Siegfried but then killing him later in U-Bahn, by siding with Bounce, by killing both Siegfried and Bounce but without learning the secret of Diesel, and by sending Dr. Gruselheim to Landsbach.
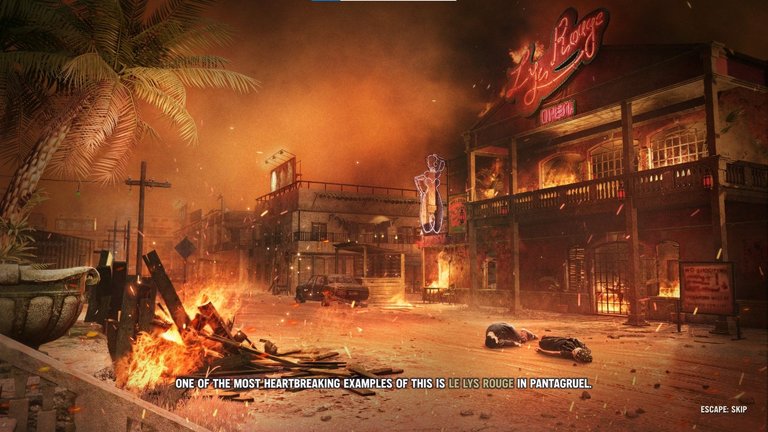
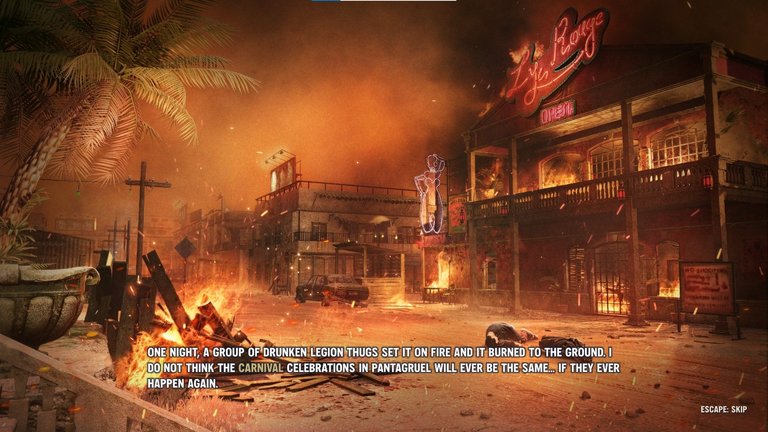
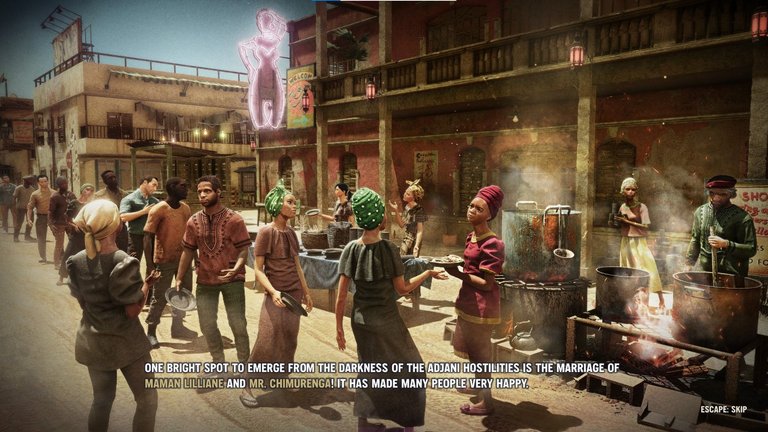
10. PANTAGRUEL SLIDES
The Pantagruel slides seem to mainly depend on whether or not Chimurenga gets together with Maman Lilliane.
However, the best ending also requires both good outcomes (President being rescued and Colonel being killed).
You will unlock the Love Cats achievement as soon as Chimurenga leaves for Le Lys Rouge to be with Maman Lilliane. You do not need to complete the game to get the achievement.
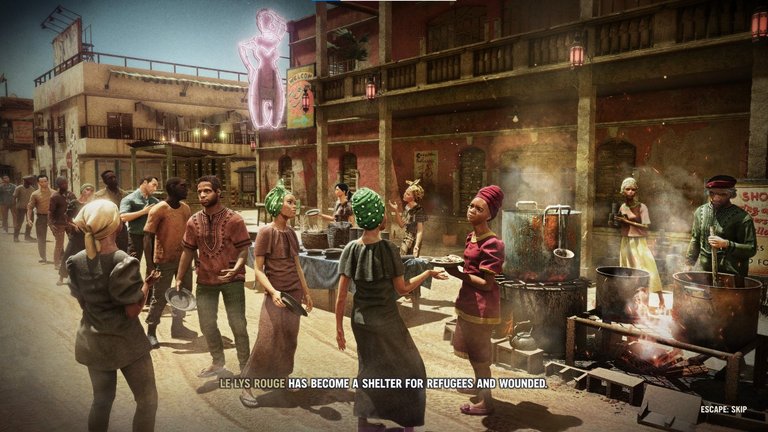
A. Le Lys Rouge is burned
Required conditions:
It seems like this is the default ending if Maman Lilliane and Chimurenga do NOT get together.
I made enemies with the Maquis by forcibly taking Fosse Noire and then I defeated Chimurenga and his soldiers in Pantagruel Downtown. Yet if I chose to kill Chimurenga, exiled him, or didn't resolve this (i.e. didn't talk to him after defeating him) I still got this same ending.

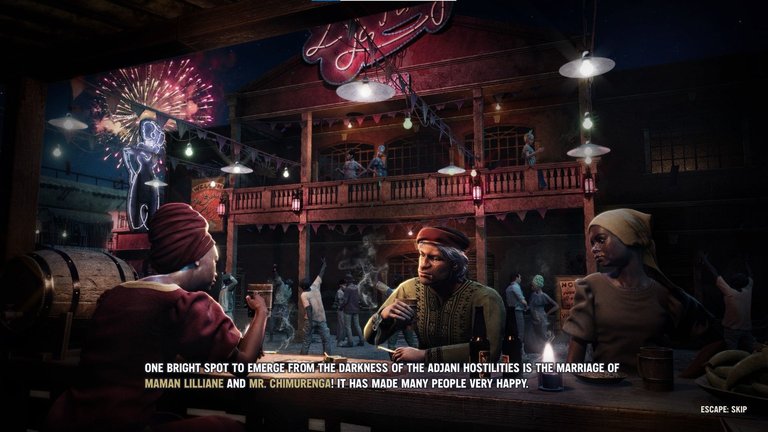
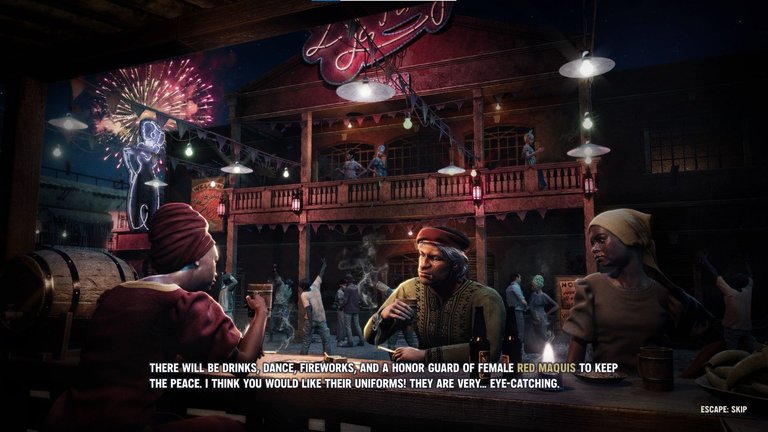
B. Maman Lilliane and Chimurenga get married. Pantagruel becomes a free city.
Required conditions:
Chimurenga joins Maman Lilliane at Le Lys Rouge
AND
Either President dies and/or Colonel escapes (one good and one bad outcome or both bad outcomes)
In one game, I helped Chimurenga spread the manifesto, reached 100% loyalty with Pantagruel and Chimurenga gave me control of the Maquis and went to join Maman Lilliane. That resulted in this ending.
In another game, I made enemies with the Maquis by forcibly taking Fosse Noire and then I defeated Chimurenga and his soldiers in Pantagruel Downtown. I spared Chimurenga and convinced him to join Maman Lilliane. That also resulted in this ending. So I suspect it doesn't really matter what your interactions with the Maquis are and the only thing that matters is how the Pantagruel Dramas quest is resolved and whether or not Chimurenga gets together with Maman Lilliane.
I have seen YouTube playthroughs which got a variant of this slide except that the character of Chimurenga is missing in the background. It still had the same text and voiceover though. I am not completely sure how to get that variant.

C. Maman Lilliane and Chimurenga get married and are organizing next year's Carnival
Required conditions:
Reach 100% loyalty with Pantagruel, Chimurenga gives you control of the Maquis and goes to join Maman Lilliane
AND
President RESCUED
AND
Colonel is DEAD
This is the best ending for Pantagruel. It requires both good outcomes for the President and the Colonel. One way to think about it is that only with a functioning government does Pantagruel remain part of Grand Chien. If the junta is in control (both bad outcomes) or there is a civil war (one good and one bad outcome), then Pantagruel becomes a free city instead.

Work In Progress: Need to finish exploring the interactions with Chimurenga and the Maquis at Hill Station.
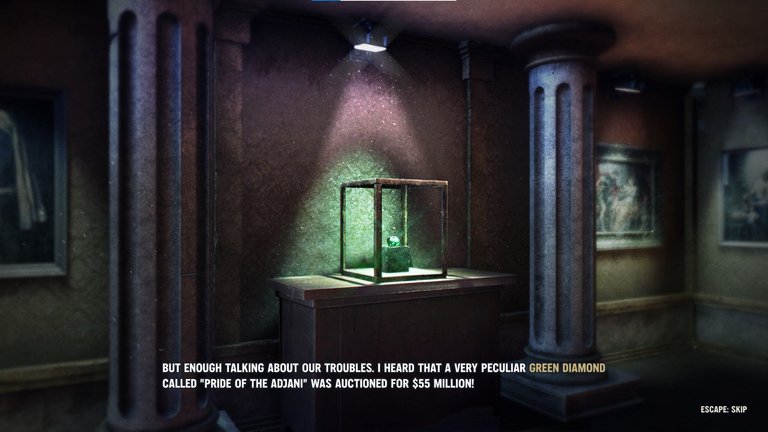
11. GREEN DIAMOND SLIDES
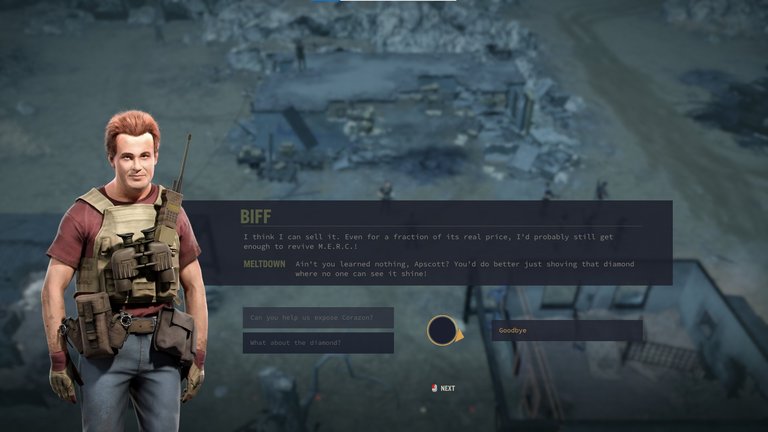
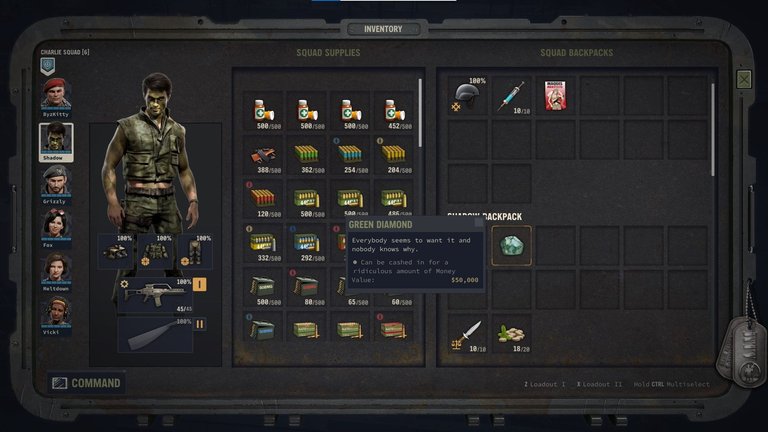
These ending slides depend entirely on what happens with the Green Diamond that Biff Apscott found at Diamond Red.
If you convince Biff to give you the Green Diamond or forcibly take it from him, you will immediately unlock the Green Diamond achievement. You do not need to complete the game to get the achievement.
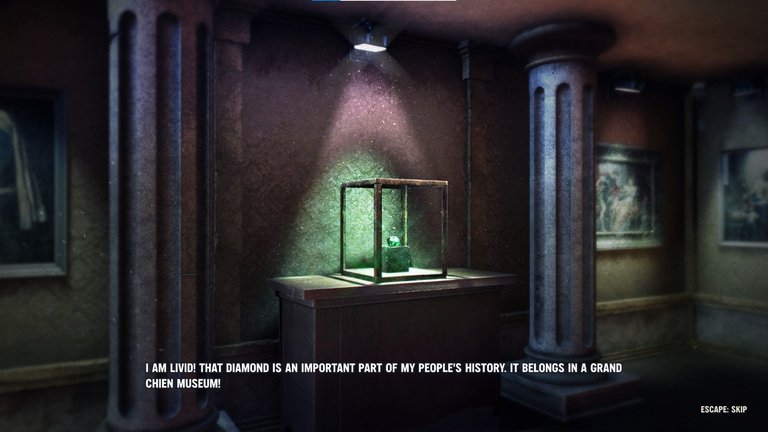
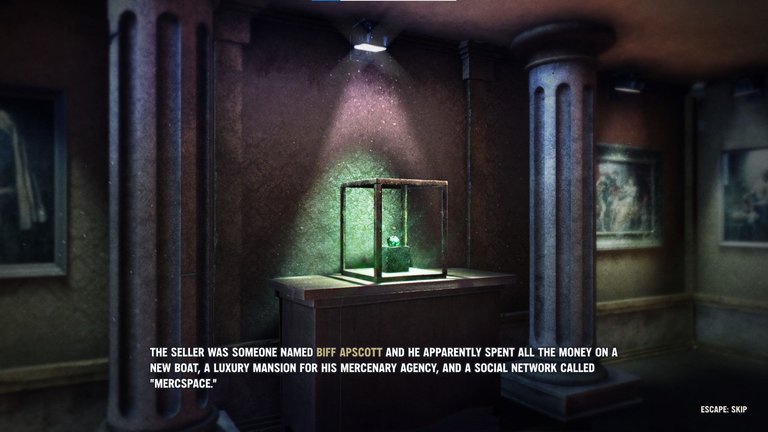
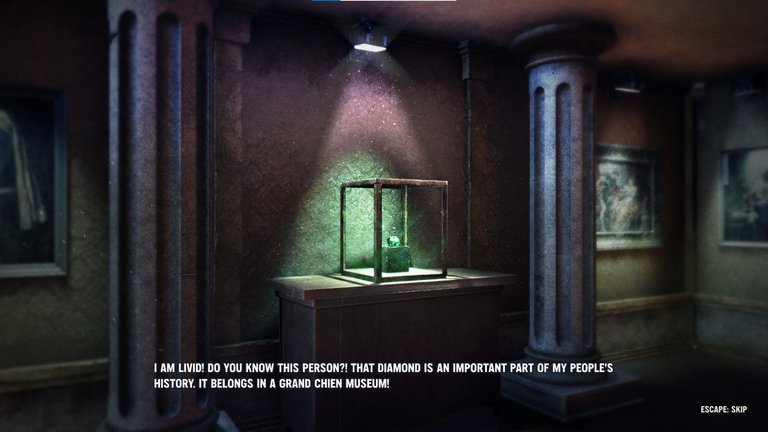
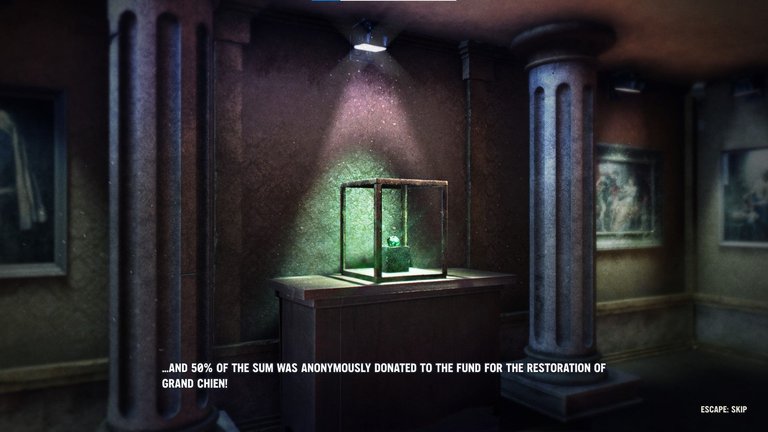
A. Green diamond auctioned for $55 million. Emma is livid.
This is the default (bad) ending. There are several different ways to get this ending such as any one of these possible conditions:
- The Legion kills Biff and gets the Green Diamond
- You cash in the Green Diamond
- The Green Diamond is left in sector stash
- The Green Diamond is dropped as loot on a map
B. Green diamond auctioned for $55 million by Biff.
Required conditions:
You saved Biff from the Legion
AND
You let Biff leave with the Green Diamond
C. Green diamond auctioned for $55 million and half is donated.
Required conditions:
You saved Biff from the Legion
AND
You convinced Biff to give you the Green Diamond (with either Smiley and/or detoxed Larry) OR you killed Biff for the Green Diamond (a la Smeagol killing Deagol)
AND
You have the Green Diamond in the inventory of one of your mercs at the end of the game.

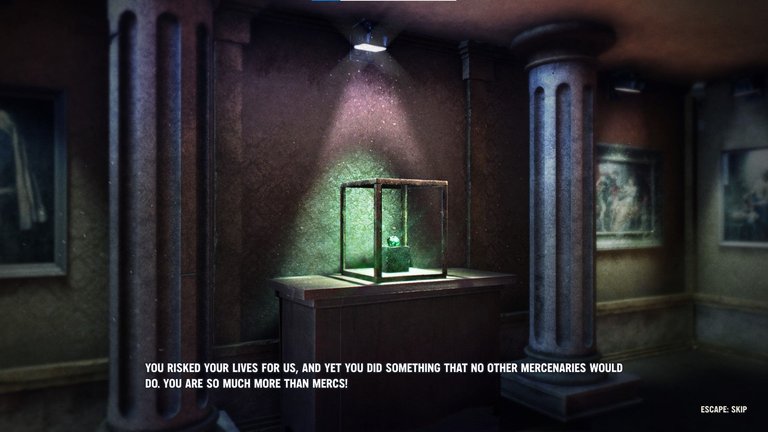
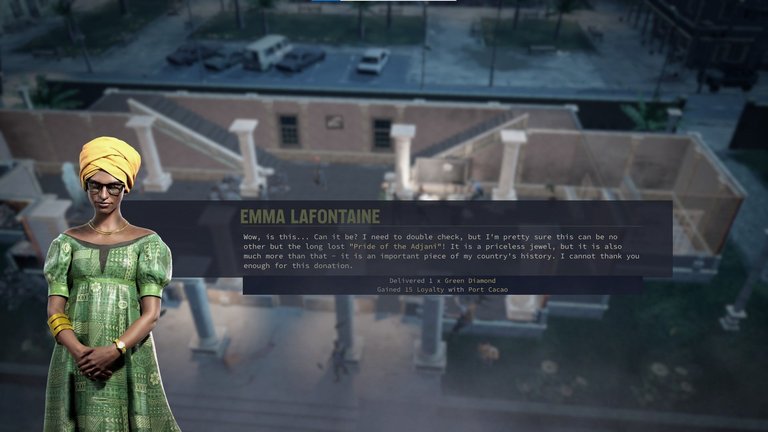
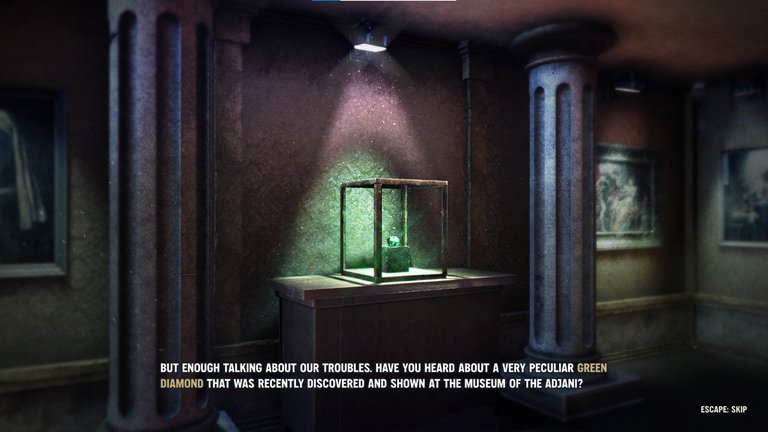
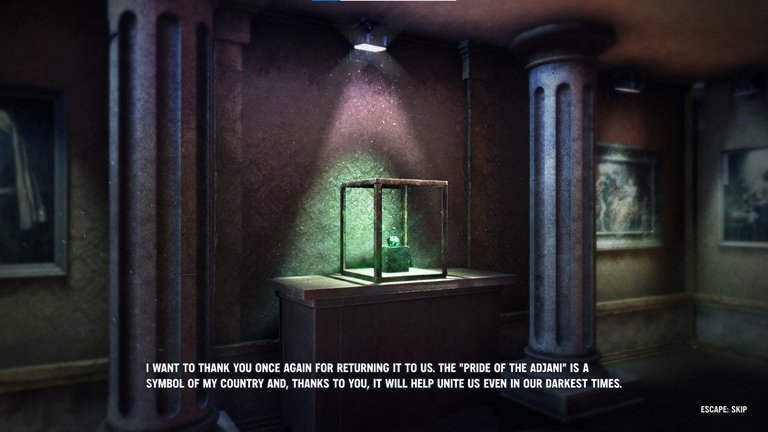
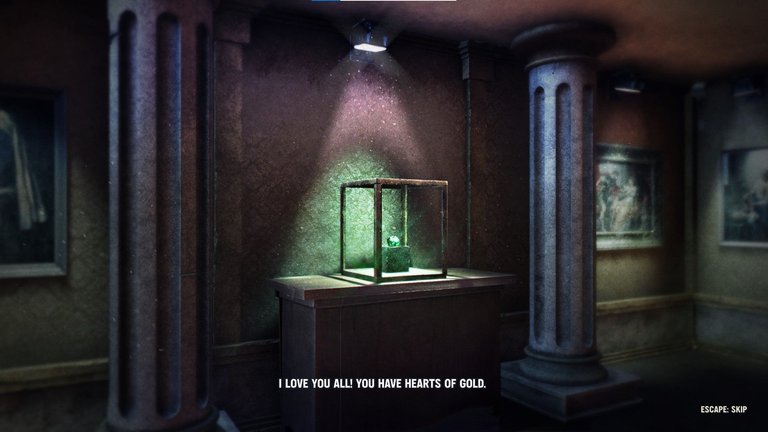
D. Green diamond is shown at the museum
Required conditions:
You saved Biff from the Legion
AND
You convinced Biff to give you the Green Diamond (with either Smiley and/or detoxed Larry) OR you killed Biff for the Green Diamond (a la Smeagol killing Deagol)
AND
You donated the Green Diamond to Emma for the museum
This needs to be done BEFORE you defeat the Major since Emma leaves for the capital after that happens. Also note that Emma will leave if Port Cacao is taken by enemy forces so if you want this ending you will need to defend Port Cacao until you donate the Green Diamond.
12. EVIDENCE FOR THE COURT
There are 6 pieces of evidence that you can get for the Conspiracy? quest. At the end of the game, the amount of evidence that you obtain determines which of the 3 court endings you get.
This section will explain how to get each of the pieces of evidence and then the next section will cover the various ending slides.

It seems like each of the pieces of evidence is weighted the same, so you only need to count how many you have and it doesn't matter which specific ones you have.
The pieces of evidence are:
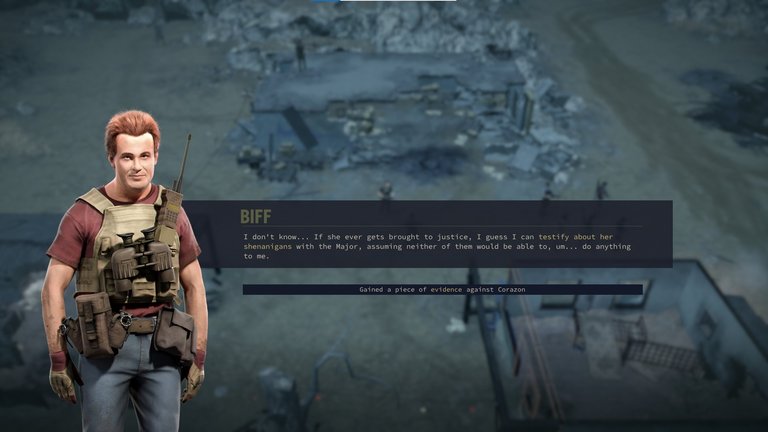
- #1. Biff Apscott's testimony
After you rescue Biff, talk to him and he will agree to testify on your behalf.
It is possible to miss this piece of evidence if Biff is killed by the Legion or you let him leave without asking for his help.
- #2. Proof that Col. Faucheux was behind the atrocities at the Refugee Camp
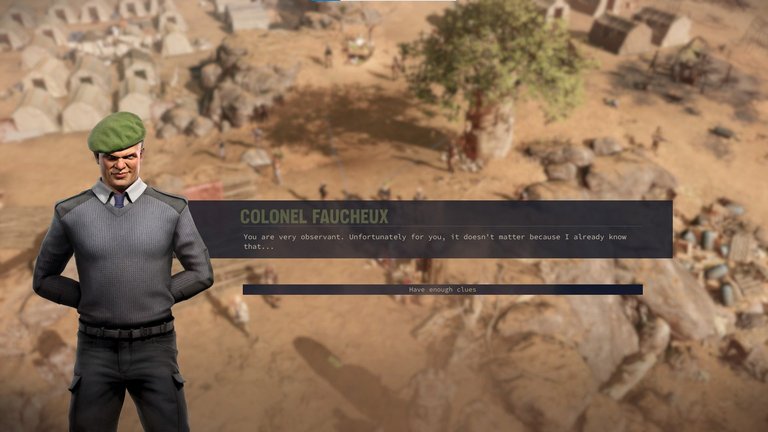
When Corazon Santiago asks to meet you at the Refugee Camp, go to the Refugee Camp and successfully complete 1 Medical, 1 Wisdom (after the Medical check is successful), and 2 Explosives checks before talking to Colonel Faucheux. Exhaust all of the dialog options and after you defeat the army troops, this will then show up as a piece of evidence.
Please note that after you defeat Corazon Santiago, this item seems to disappear from the Conspiracy? quest log. However, it still counts towards the evidence count even if it is not visible.
It is possible to miss this piece of evidence. If you do not have enough clues (i.e. not being able to complete the Medical and Explosives checks) when talking to Colonel Faucheux, then you will not receive this evidence after defeating the army soldiers. Also, if you trigger the army invasion by getting too close to the Major (Dead Animal Crossing A18, Sturmwasser Island B18, or Clifftop Overlook B20) before going to the Refugee Camp, then the army automatically gets control of the Refugee Camp and you do not have the opportunity to talk to Colonel Faucheux at the Refugee Camp.
While resolving the Refugee Camp massacre, you can unlock the Saw It Coming achievement. You do not need to complete the game to get the achievement. However, the achievement was buggy in the past so it isn't completely clear whether you always get the achievement or there are some requirements.
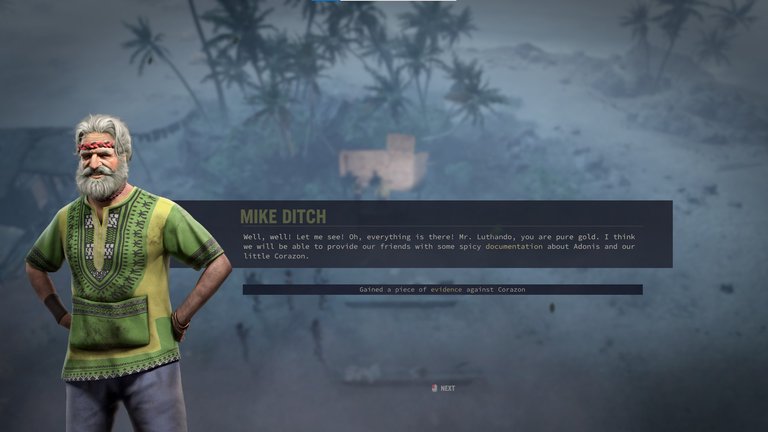
- #3. Adonis documents exposing Corazon Santiago from the Hermit
First, complete the Haunted Mansion quest by helping the Ghost Butler. Then you need to help the Hermit fight off the Legion. After talking to the Hermit you need to discover his real identity as Mike Ditch, the former Adonis CEO. Then go back to the Haunted Mansion and tell the Butler that the owner is still alive. And finally go back to the Hermit and talk to him, asking for his help.
It is possible to miss this piece of evidence if the Hermit is killed. If you lie to the Butler about the owner being dead, you can later come clean to him about lying and that Mr. Ditch is alive after all. The Butler will leave the mansion to visit Mr. Ditch in the jungle and you can still get the evidence from Mr. Ditch but you will take a morale hit when it is revealed that you lied to the Butler.
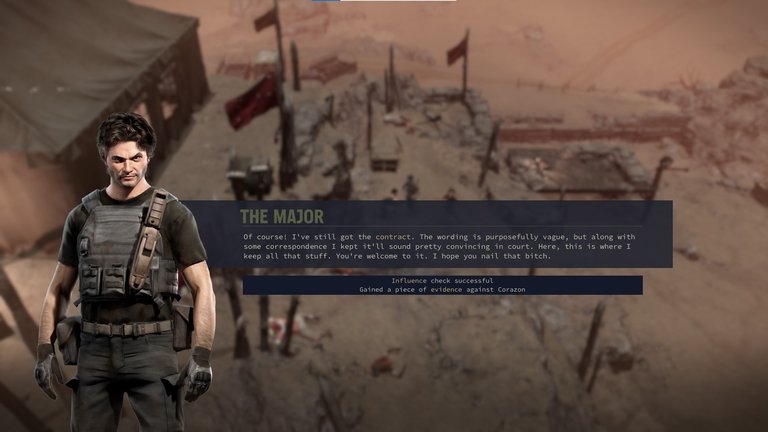
- #4. Corazon Santiago's correspondence with the Major and his mercenary contract
After defeating the Major and his forces at Eagle's Nest, you can ask the Major for these documents using the dialogue option: "Do you have any evidence against Corazon?". If you pass an influence check, the Major gladly hands over the evidence.
It is possible to miss this piece of evidence if you don't ask for it or if you don't have sufficient influence with the Major. The influence threshold for this check is much lower than the threshold needed to recruit the Major, so you have to do really poorly for the Major to NOT be willing to give you the evidence.
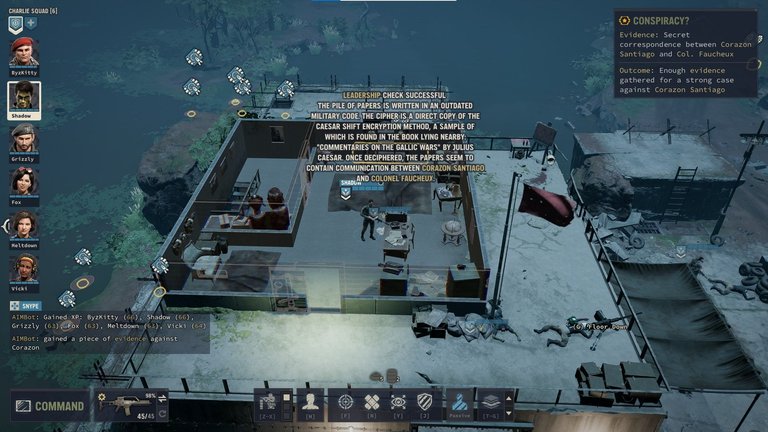
- #5. Secret correspondence between Corazon Santiago and Col. Faucheux
After defeating the Colonel and his forces at Fort Brigand, if you go to Colonel Faucheux's office you can examine his desk. Passing a Leadership check will give you this piece of evidence.
It is possible to miss this piece of evidence if you don't examine the Colonel's desk or if you don't have sufficient Leadership.
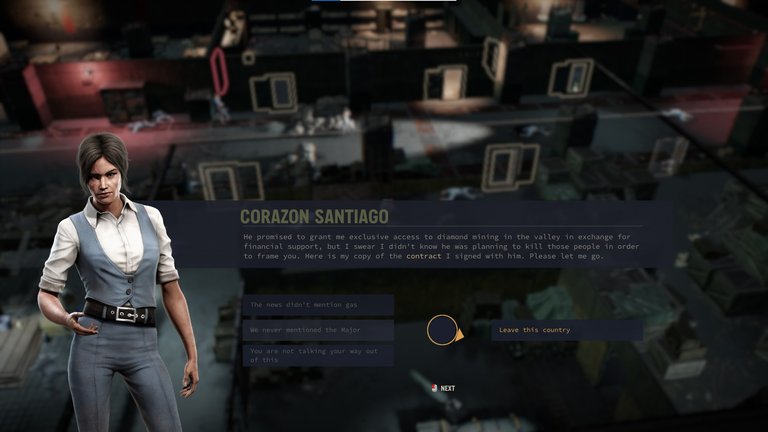
- #6. Contract for the concession of diamond mining rights
After defeating Corazon Santiago at Ernie Island, you can talk to her and get her to reveal "the truth."
If you do really poorly on the story points (haven't defeated the Major or Colonel and didn't have enough clues to figure out who was behind the Refugee Camp massacre), then you have the dialogue option of "You promised to explain everything" which gives you intel for sectors H16 and K16 but you don't even have the option of asking for money or the truth.
Otherwise, you have two chances to get something from her so it is possible to get money from her and also the evidence. First with "You are involved in all this" and later with "Start talking. Now!" (but it needs to be done in that order). Once you choose "Leave this country" the conversation will end.
Normally when you choose "You are involved in all this" your options are:
- Money (gain $30,000)
- Information (gain intel for Wetlands H16 and Fort Brigand K16)
- You will answer in court (requires a Leadership check. It's not clear what you get from this choice)
On rare occasions, you can get "the truth" as an option (which gives you the evidence). But most of the time, you can only get "the truth" after you select "Start talking. Now!" which is an option that shows up later (and replaces the opportunity to say "You are involved in all this").
In order to have "Start talking. Now!" as an option, you need to satisfy one of three conditions:
#1. Already defeated Colonel Faucheux AND have someone with the Scoundrel perk or high Wisdom
You will first have the option to say "Faucheux is dead." After that you can say "The news didn't mention gas." If you have a Scoundrel or can pass a Wisdom check, you will then have the option to select "Start talking. Now!"
If you have not defeated the Colonel yet, the dialogue option is simply "Faucheux is next" which is not sufficient to get the evidence.
#2. Already defeated the Major AND gotten the Major's mercenary contract AND have someone with the Negotiator perk or high Wisdom
You will first have the option to say "Is this your signature on this contract?" After that you can say "We never mentioned the Major." If you have a Negotiator or can pass a Wisdom check, you will then have the option to select "Start talking. Now!"
If you have not defeated the Major yet, the dialogue option is simply "What about the Major?" which is not sufficient to get the evidence.
#3. Have someone with the Psycho perk
You will first have the option to say "This is not about the money." After that you can say "You are not talking your way out of this." If you have a Psycho, you will then have the option to select "Start talking. Now!"
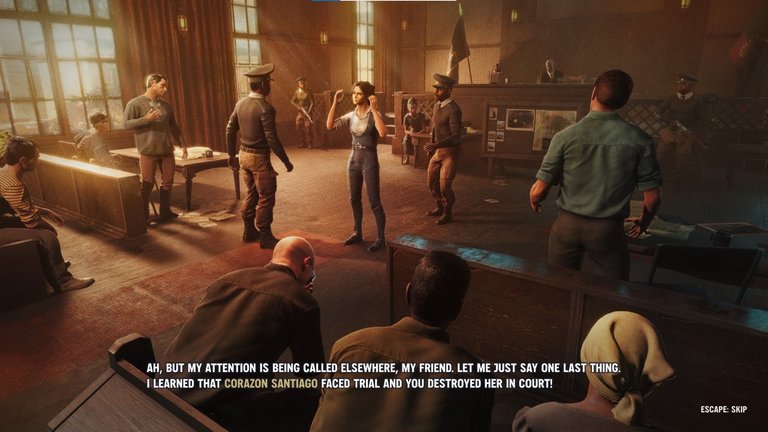
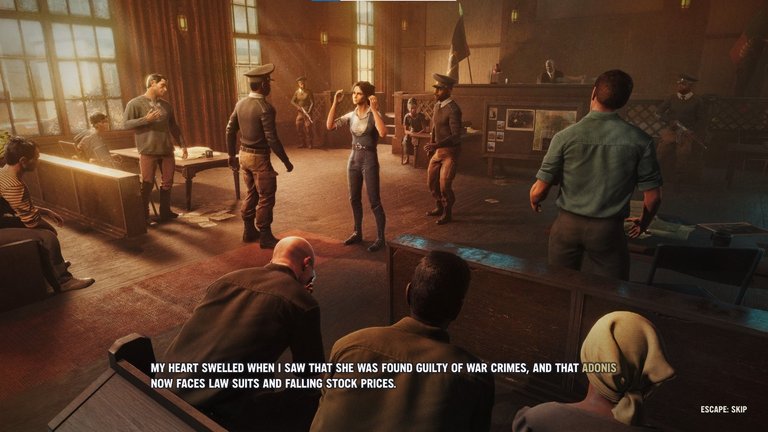
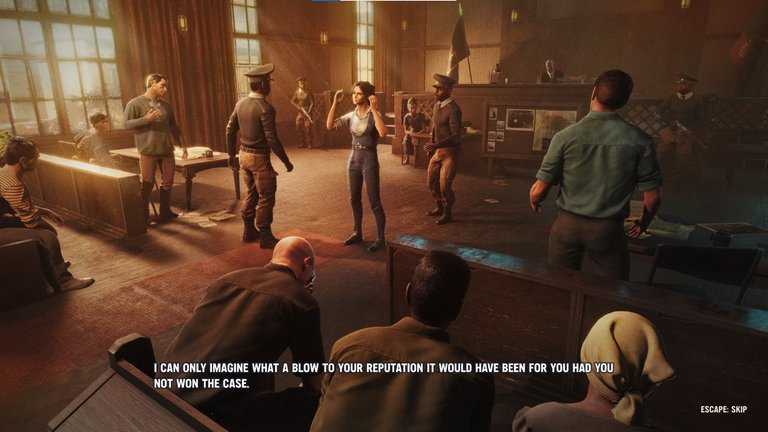
13. COURT SLIDES
A. Not enough evidence to expose Corazon Santiago
Required conditions:
Have between 0 to 3 pieces of evidence (out of the 6 possible).


B. Exposed Corazon Santiago in court
Required conditions:
Have exactly 4 pieces of evidence.
This is the minimum threshold to clear your name and unlock the Proven Innocent achievement. While most of the other story-related achievements are unlocked immediately when you meet the criteria, this achievement actually requires you to finish the game so that the court case actually happens.

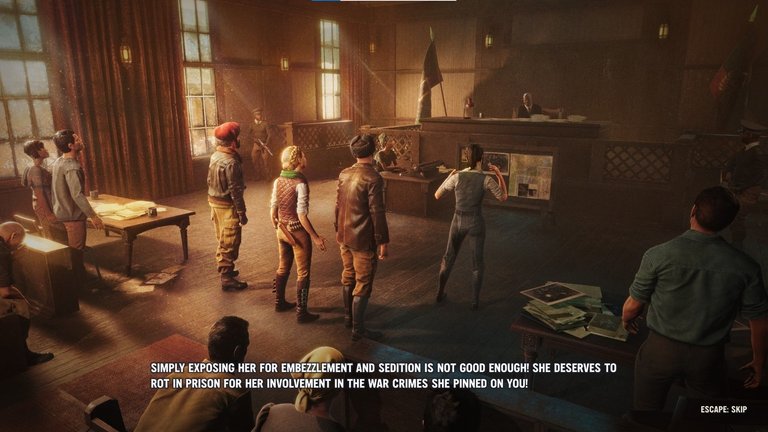

C. Destroyed Corazon Santiago in court
Required conditions:
Have 5 or 6 pieces of evidence.
Once you have enough evidence, the Conspiracy? quest will be updated with "Outcome: Enough evidence gathered for a strong case against Corazon Santiago."
14. NOT INCLUDED IN THE ENDING
As of Game Version Larry (1.5.1), the following decision points, characters, and quests are not represented in the end game slides:
- Smiley / Mollie / Boss Blaubert
- Flay
- Larry
- Bastien / Graaf / Jackhammer / Elliot
- Butler / Hermit
- Luc / Herman / Martha
- N-Night and the Coffee Beans
- The Dump
- Petta
- Twin Manors
- The Beast
- Dr. Gruselheim
- Biff (other than the scenario where Biff gets the Green Diamond)
Updated March 16th, 2024:
Finished my second playthrough (this time executing Pierre) and got screenshots of the remaining endings.
#1. I moved discussion of the determining factors that were previously in "Rebellion Slides (with Pierre)" and put them in a new section called "Determinants for Rebellion Slides." I then thoroughly fleshed out the "Rebellion Slides (without Pierre)" section, included screenshots of all the endings, and detailed what the required conditions are to achieve those endings. I then made some minor revisions to "Rebellion Slides (with Pierre)."
#2. In "Diesel Slides" I added screenshots of the default bad ending and elaborated more on scenarios that result in that ending. I also removed the placeholder for a partial success, since I haven't been able to find one yet.
#3. In "Pantagruel Slides" I added screenshots of the default bad ending and elaborated more on scenarios that result in that ending.
#4. I moved the stuff about the evidence from "Court Slides" into a new section titled "Evidence for the Court." Added a few minor details.
#5. Added a few minor things to "Not Included in the Ending."
#6. Based on feedback from a Steam user, I made it clearer that most of the quests are optional. I also added a mention of various story-related achievements and made it clear that most of those are unlocked immediately and do not require completing the game.
#7. Updated the Red Rabies section to explain what happens if you send Dr. Gruselheim to the Sanatorium.
#8. Updated the Diesel section to explain how to get the scenario whereby the Landsbach ending slides are omitted.