
Don’t forget to read:
- How to Register your KAPU V.2.0 Delegate, as you will need the passphrase of your delegate wallet later on in this installation
- Set up your second passphrase as soon as possible. Your node will have your first passphrase and if it should get hacked, your funds will be exposed.
Minimum requirements for running KAPU node (active nodes):
- at least 1 DEDICATED CPU core (no shared ones), x86 or x64 architecture (the higher the CPU clock speed, the better, recommendation 2 CPUs+)
- 4 GB RAM (the more the better, recommendation 8GB+),
- Linux — Ubuntu 18.04 (this is optimal, and this guide is written for it)
- 520GB free space (we recommend SSD/m.2, as opposed to traditional HDD drives, recommendation 100GB+)
Recommended VPS/Cloud providers:
For this guide, we’ll use ScaleWay, you can get a START1-M VPS for €7.99/month ( 4 X86 64bit cores, 4Gb Ram, 100Gb SSD, 300 Mbit/s unmetered transfer) But all providers have similar deals.
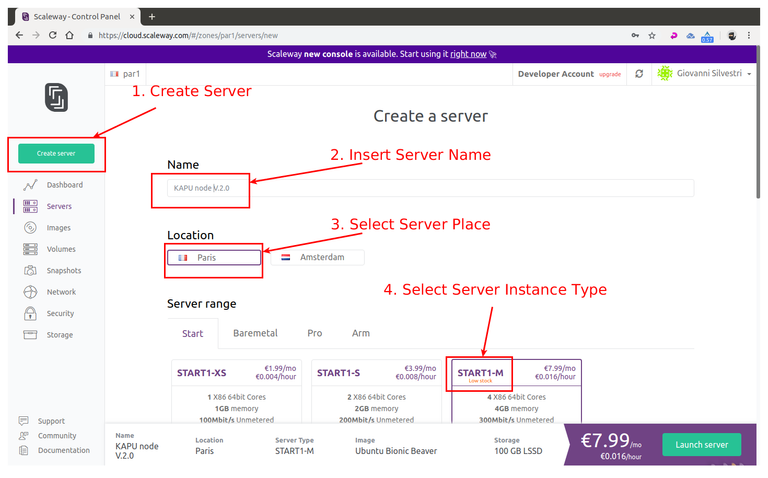
1. Get yourself a server for your node
(for our guide we’ll use ScaleWay)
We will create a VPS via ScaleWay interface, for the Linux distro we will use a START1-M vps in the Paris installation:
Select Ubuntu 18.04 x64 - Bionic Beaver as operating system instance
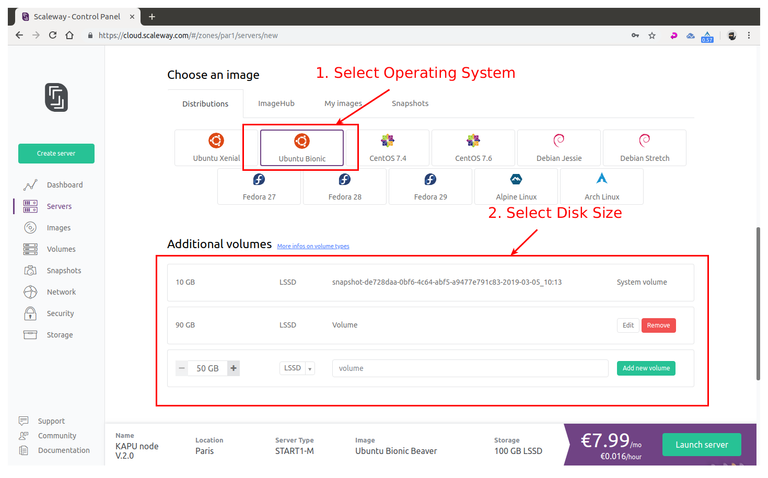
Select disk size and click Launch Server
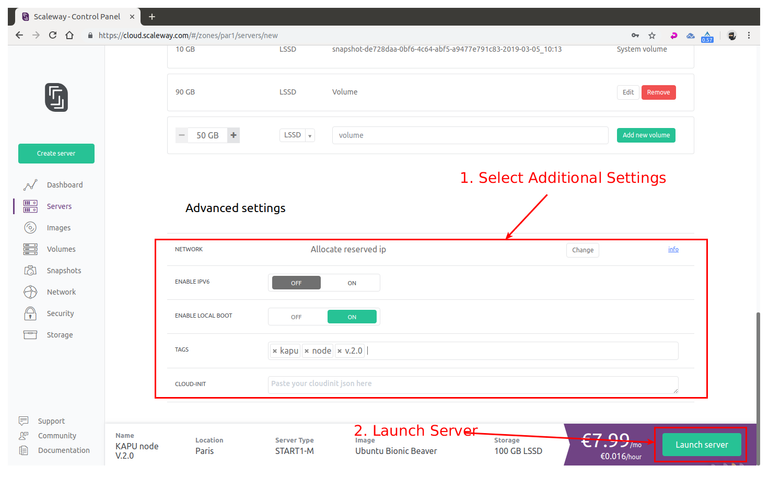
Once your server instance is ready, you will see all the login info into the server instance page:
username: root
password: none
IP: xxx.xxx.xxx.xxx indicated into the server page
SSH port: 22 (this is default)
2. Connect to your newly created server instance via SSH
Windows: you can use any SSH client. For our example we will use Putty (an open-source client you can download here: PUTTY DOWNLOAD)
MAC OS: open Terminal ( To start Terminal, go to your Mac’s Applications folder => click on the Utilities folder => then click on Terminal).
Linux: depending on your distribution, you can usually also open it by pressing a combination of “Ctrl + Alt + T” keys.
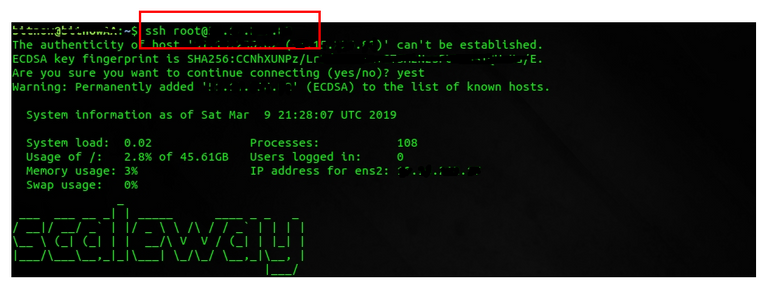
For terminal in Linux / MAC OS you can connect with this command:
ssh user@<server-ip>
example for our instance of server in Linux / MAC OS would be:
ssh [email protected]
For our guide we’ll use Terminal (Ubuntu) — start it up:
Now the command line will be shown, asking you to provide the username that you checked in the ScaleWay control panel you need to install the SUDO tool as the ScaleWay VPS does not come with this tool installed: use the command apt install sudo to install it:
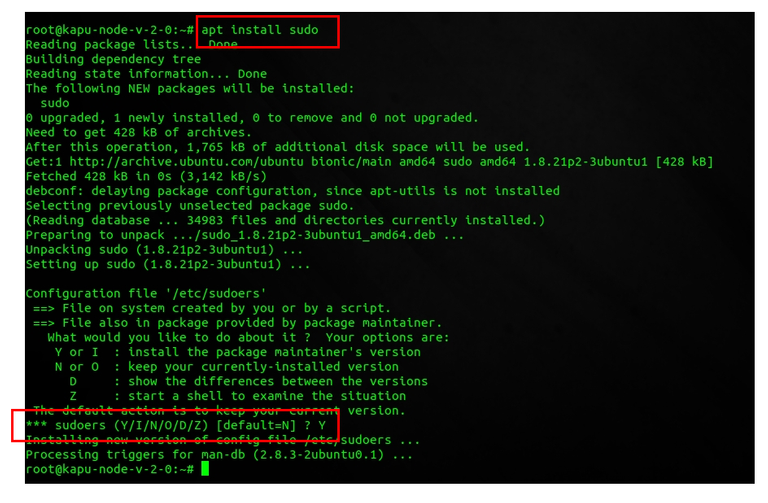
3. Setting Up Regular User With Sudo Privileges
Now that we successfully connected and changed the password for root it is time to create a new regular user with sudo privileges (sudo privileges allow a user to run programs with the security privileges of another user).
How to add new regular user:
adduser < yourusername >
our example: adduser kapu
Enter a new password, enter it again, and press [enter] 6 times to accept all of the default values.
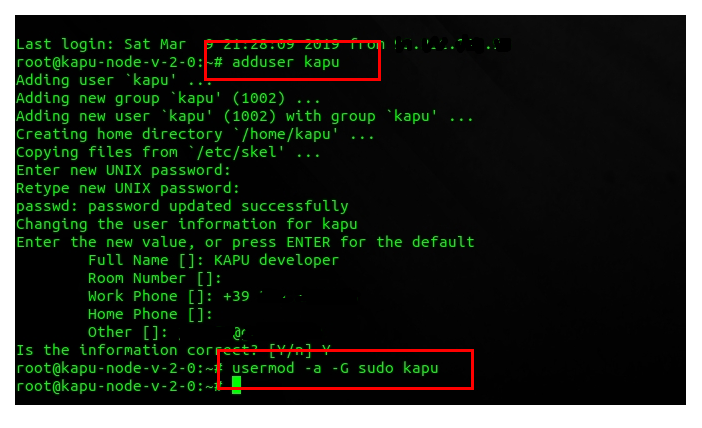
Now that we have successfully created user with the username kapu (you can choose whatever username you want except root of course), it is time to assign this regular user sudo privileges.
How to add sudo privileges to our newly created regular user:
usermod -a -G sudo < yourusername >
our example: usermod -a -G sudo kapu
Now it is time to disconnect and reconnect as the newly created user (in our case ripa and not as root. Type exit and press [enter]. Your SSH session will close.
4. Connecting Using Your New User
Connect to your server, but now instead of logging in as root, we will login with new user. Type your username and press enter, followed by the password of that user:
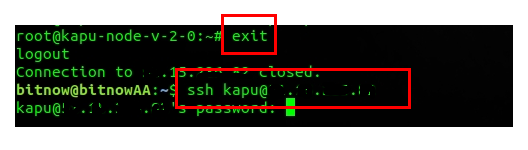
For terminal in Linux / MAC OS you can connect with this command:
ssh yourusername@<server-ip>
example for our instance of server in Linux / MAC OS would be:
ssh [email protected]
5. Installing the KAPU Node
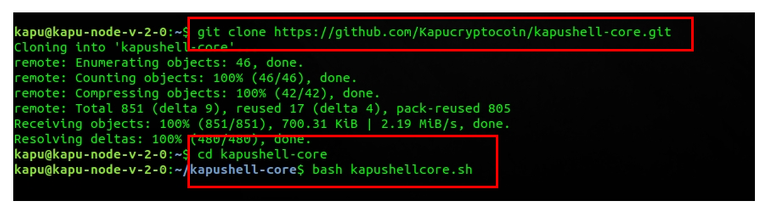
Now that we have our node ready, it is time to install KAPU. First we will download the KAPU installer called “kapushell-core” simply by executing these commands:
Download kapushell-core:
git clone https://github.com/Kapucryptocoin/kapushell-core.gitExecute the file:
cd kapushell-core
bash kapushellcore.sh
Now the kapushell-core installation script will open. At the first step, you will need to provide your user’s password (in our example, the password for user kapu).

Since this is your first time running this installer, it will check for all of the dependencies and updates the RIPA node needs to run — press [enter] to continue and be patient. It might take a while, so do not interrupt the process.
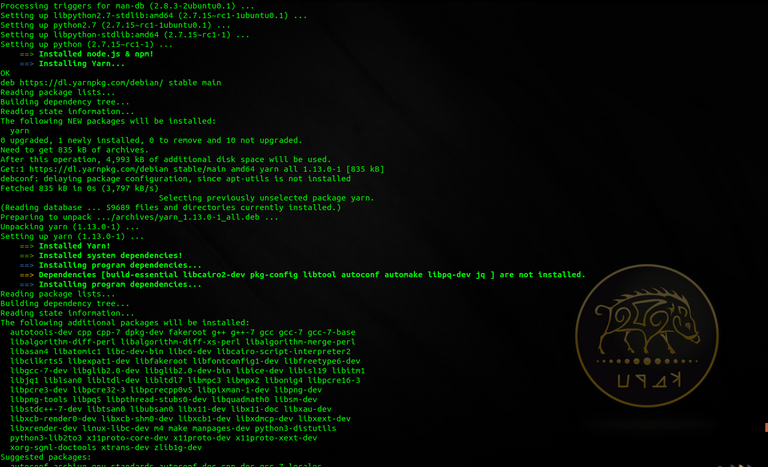
(installing prerequisites — don’t interrupt)
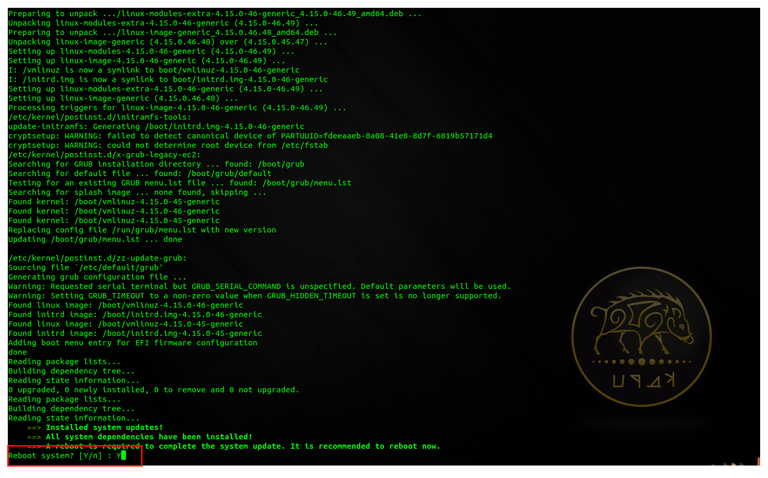
After this process finishes you will be asked to reboot your server — execute with the command: Y
After the node has rebooted reconnect to the node with your user, and execute :
cd kapushell-core
bash kapushellcore.sh
Provide your password if asked to enter the menu.

You will now enter into kapushell-core menu: there are a lot of options, and since this is our first installation, you will input letter I and press [enter] to execute the Install KAPU process. Now the KAPU node installation will start follow the instructions on screen to configure your node as you like:
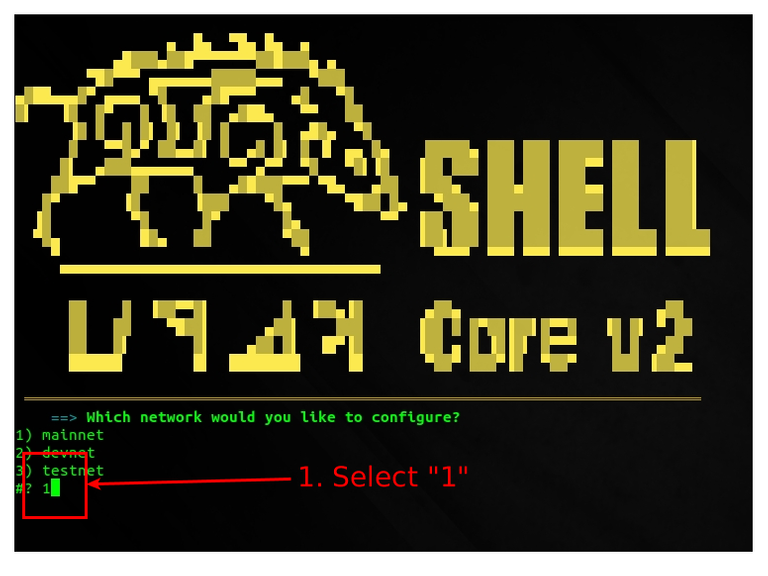
Figure 1: configure network
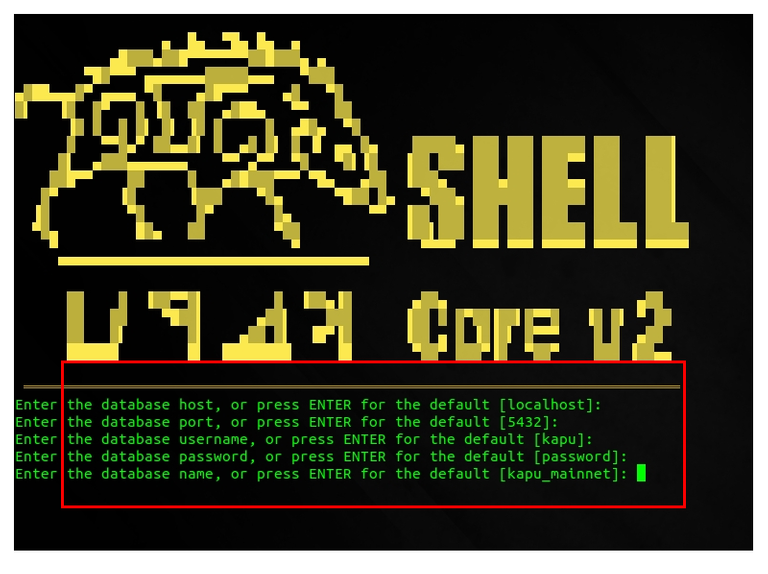
Figure 2: configure database
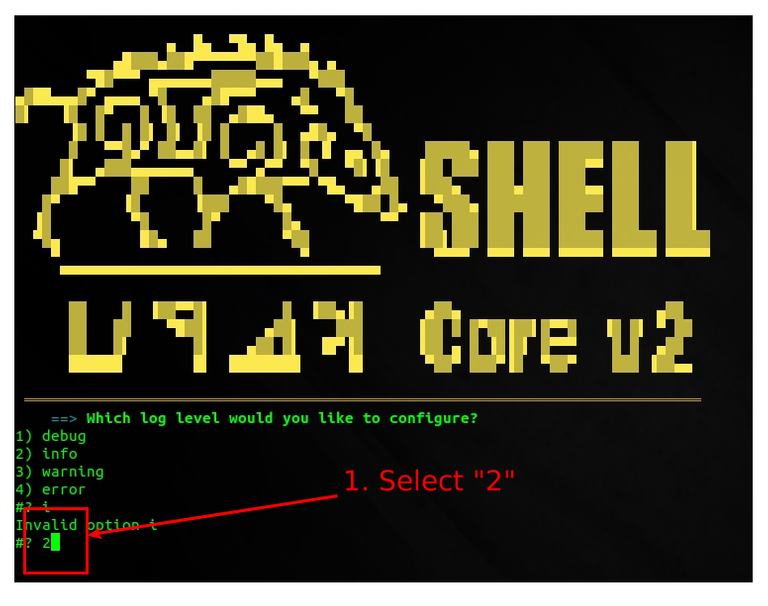
Figure 3: configure log
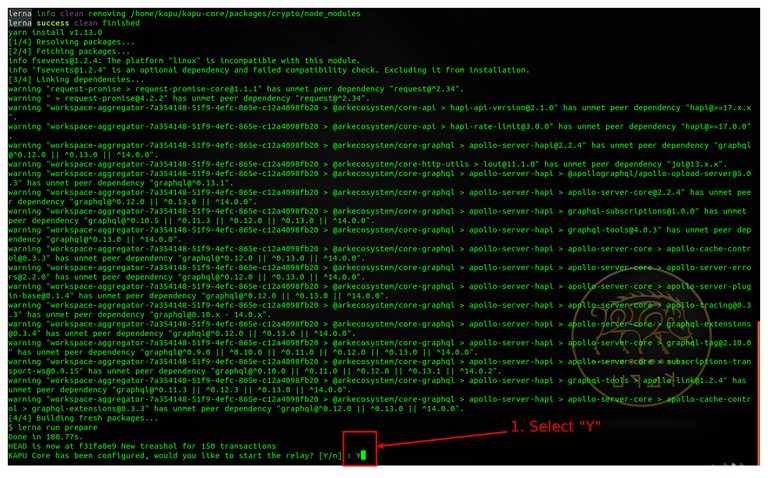
After configuration has been performed the node will be downloaded, configured, compiled: do not interrupt this process. At the end you will be asked to start the relay node: choose "Y" to this question
6. Checking KAPU Node Status
Now you can use option "L" or "P" from the kapushell-core main menu to check the LOGs of your node or to check the processes in execution:
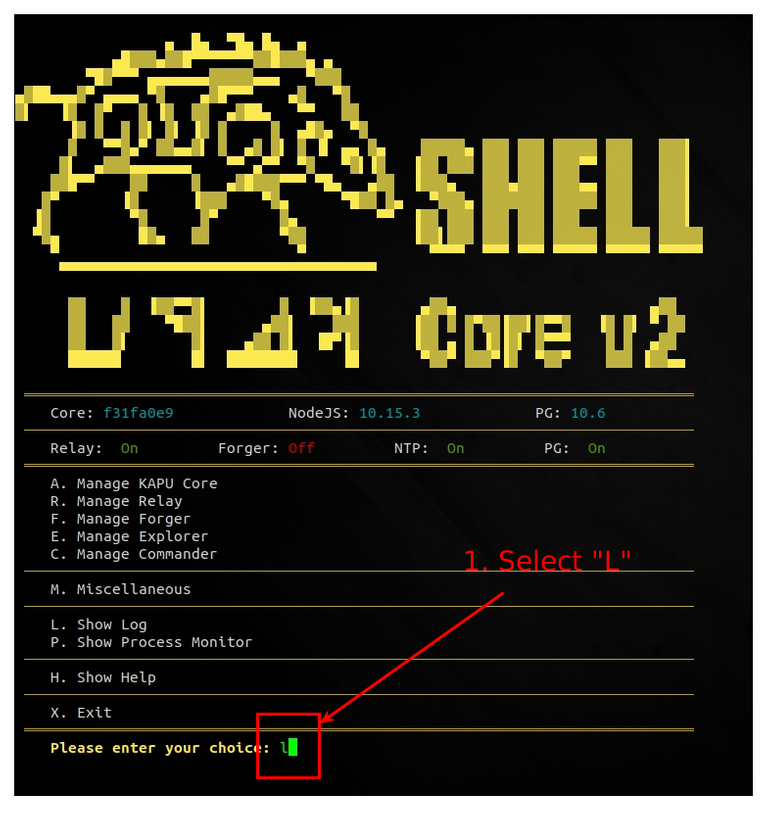
Figure 1: check node logs
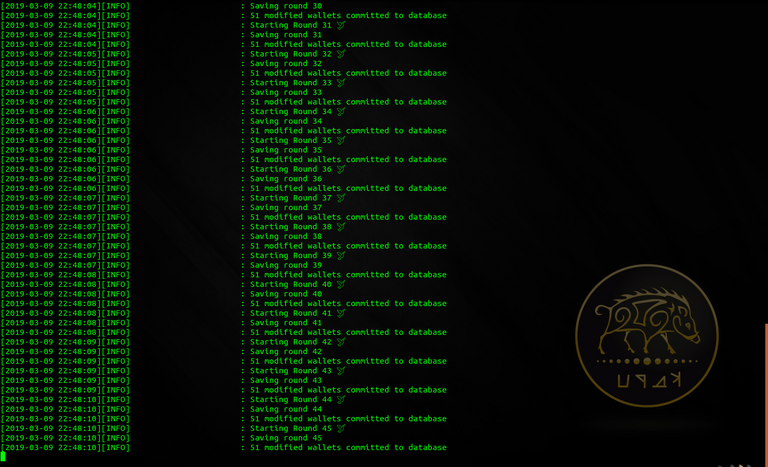
Figure 2: node logs
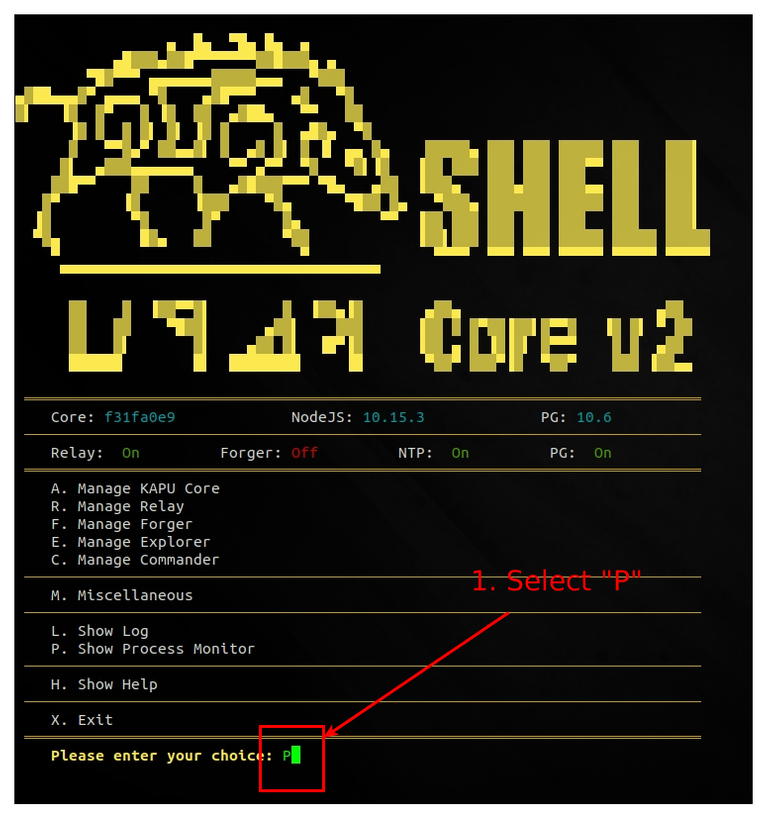
Figure 3: check node processes
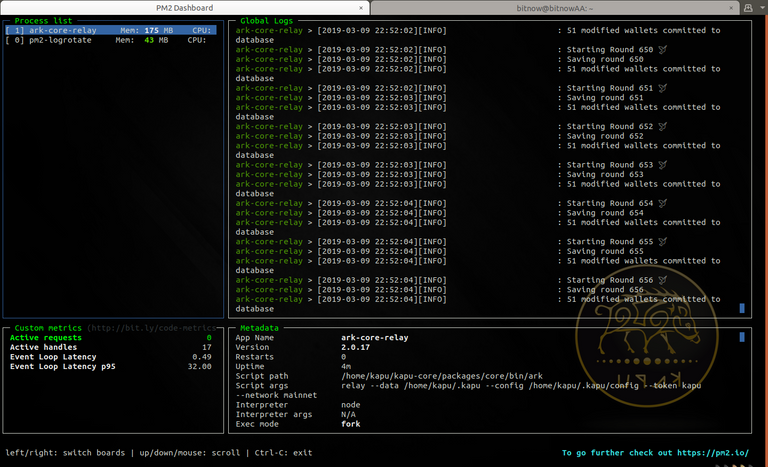
Figure 4: node processes
CONGRATULATIONS: you have successfully installed your KAPU Relay Node V.2.0
Follow our guides to register a delegate and start a forger to get some KAPUs as reward of your dedications to the DPOS ecosystem!!
How To Set Up a KAPU V.2.0 FORGER node 2/2
Remember to connect to us...
Website: www.kapu.one
Bitcointalk ANN: bitcointalk.org/index.php?topic=2035561.0
Whitepaper: kapu.one/WP_EN.pdf
Facebook: www.facebook.com/kapucoin
Twitter: twitter.com/kapucoin
GitHub: github.com/kapucryptocoin
Medium: medium.com/kapucoin