In Germany, it is usual that your internet provider changes your IP-address every 24 hours. That’s because your internet provider want you to subscribe to a more expensive tariff if you want a static IP-address. I’m quite sure that a similar model can be found in other countries too.
Knowing your IP address at home when you’re on the road can be very useful when you want to access your home-server, NAS or any kind of IoT device which is connected to your local (W)LAN.
In this tutorial I will show you how to set up Pythonic to get get an automated E-Mail when your internet provider has changed your IP-address.
To get the IP address that your DSL router is currently assigned to, we use the service of ipify.
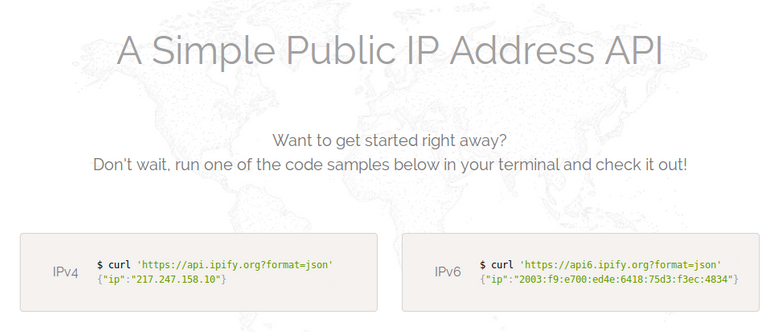
We will use the IPv4 REST query. When you open the address in your browser:
https://api.ipify.org?format=json
You will receive a string in JSON format:

The output tells me that my DSL router is available at 217.247.158.10 from the internet.
Now we setup Pythonic to do the same query automatically:
Place a HTML (GET) element right after the starting timer element and copy the ipify URL.
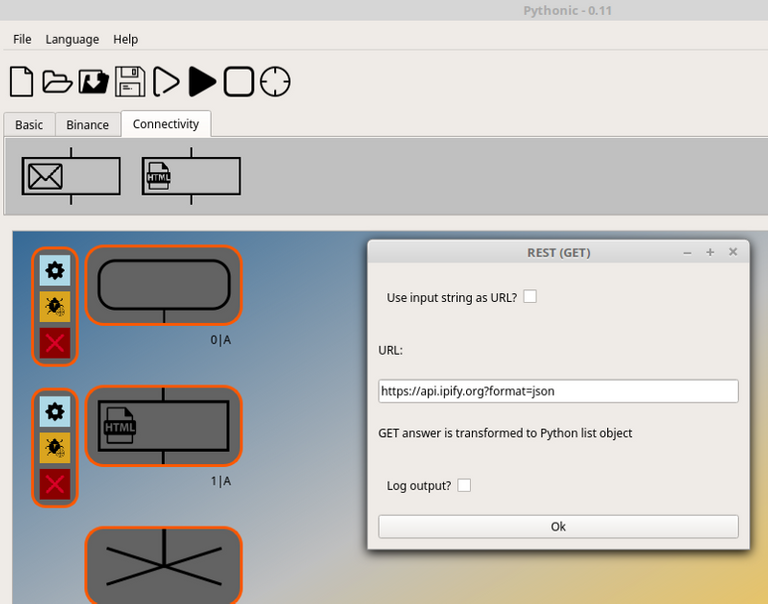
Step 1: Call ipify API within Pythonic
We want to compare the currently received IP-address with an address which we received earlier. Therefore, we use the stack element to save data persistent on the hard-drive. The maximum number of list-elements in this case is 2, because we only want to compare 2 IP-addresses with each other.
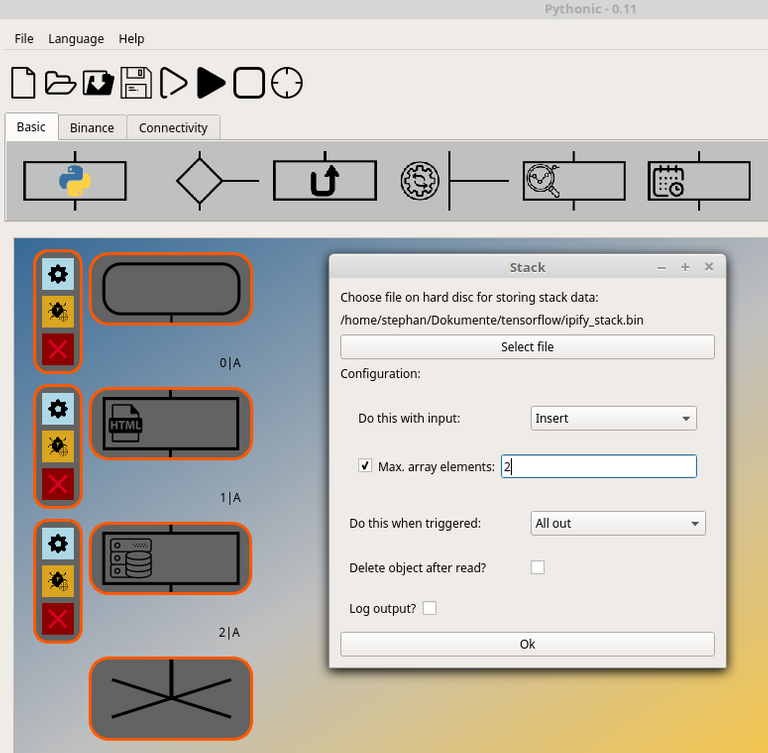
Step 2: Configuring the stack element
After executing in quick succession you can see, that the stack will fill with two dict-elements containing the same IP-address after the keyword ip.
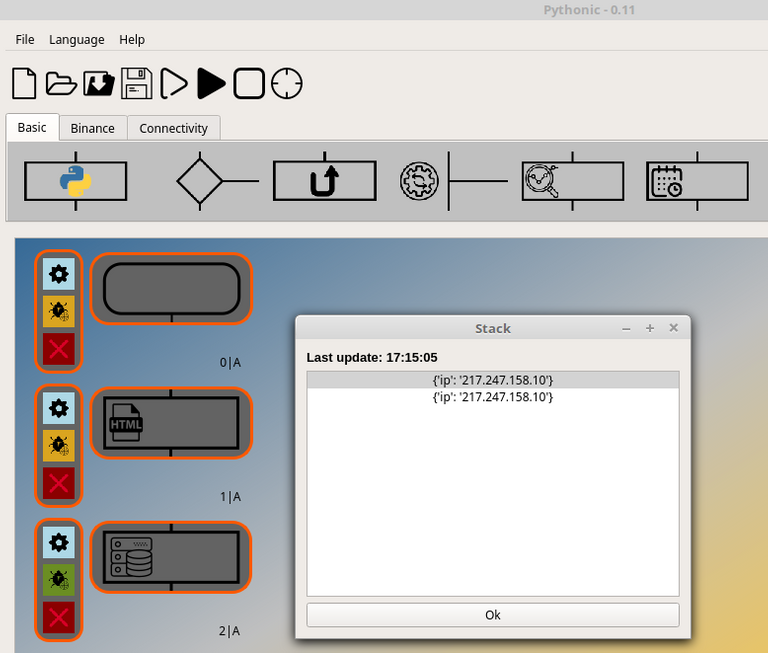
Step 3: Check the stack
Because we pass the whole stack to the subsequent element
(see step 2: All out), we are able to compare the current IP address (which is at position 0, because we selected insert at step 2) with the old IP-address, which is at position 1:
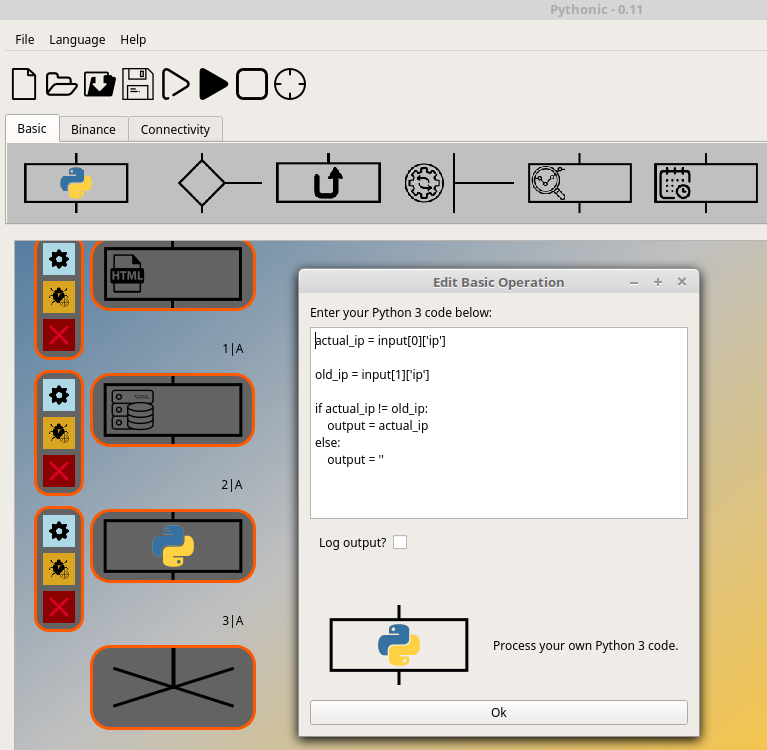
Step 4: comparing IP-addresses
We compare the current IP-address with the old one. In the case they are equal, we output an empty string, if they are not equal, we output the current IP-address.
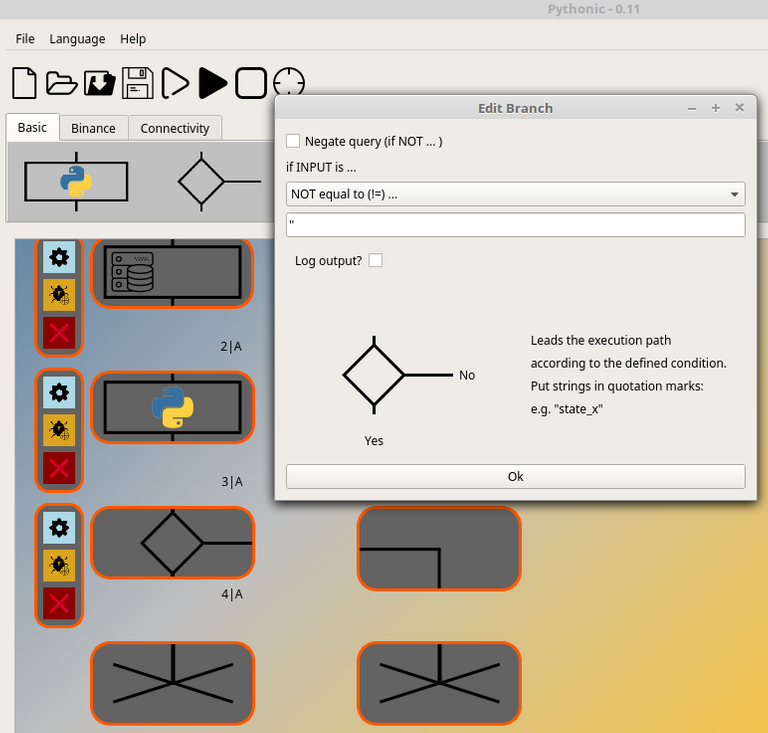
Step 5: Branch configuration
Now we can add a branch element and connect an E-Mail element to the Yes-branch of it. When the incoming string is not equal to an empty one, then follow the Yes-branch.
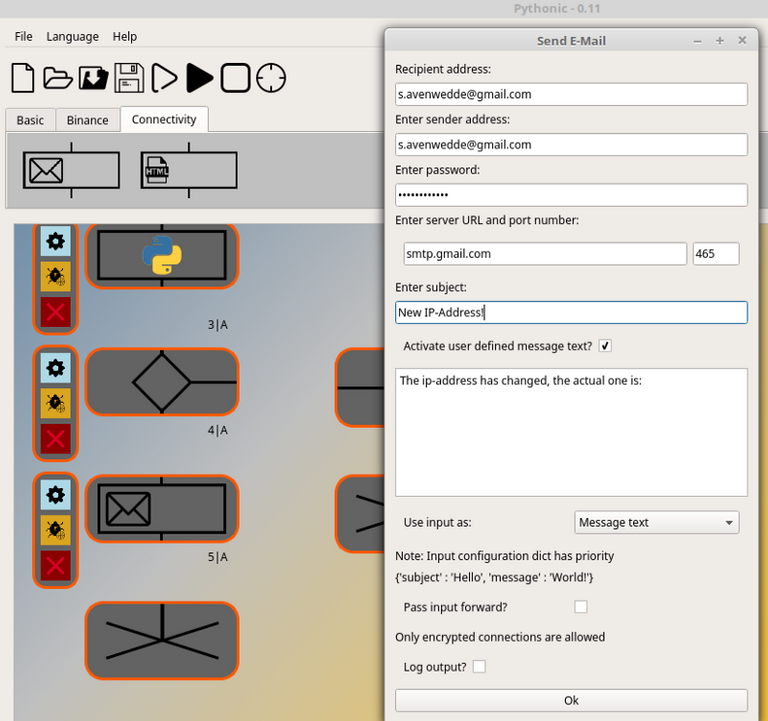
Step 6: Configuring the E-Mail
With the raw IP-Address text as input, we configure the E-Mail element to use the the address after the self defined text.
The E-Mail now will look like this:
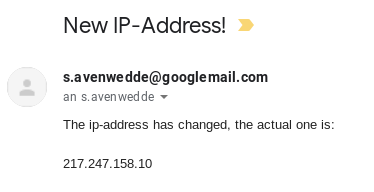
E-Mail by Pythonic
In the final step, we configure the very first element in terms of the interval in which the entire code is executed:
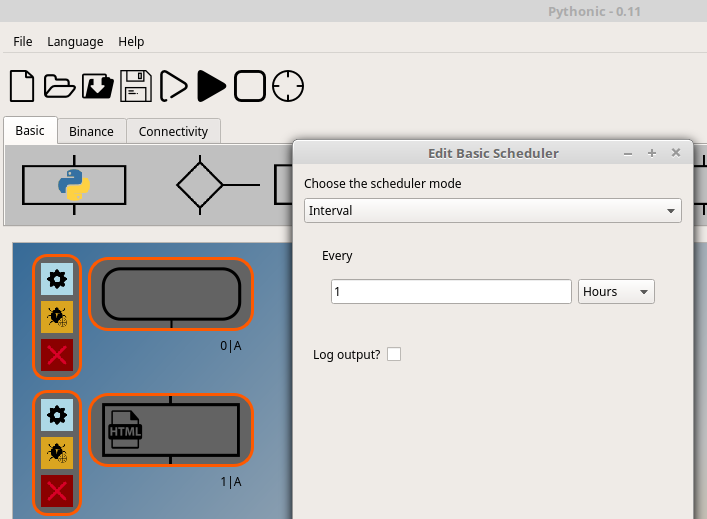
Step 7: Configuring the scheduler
In my opinion, once an hour is sufficient. I would not recommend querying in a high frequence (like 1/s), maybe your IP-address is then getting banned from the service.