Introduction
Every time you create a new cryptocurrency wallet you are presented with a 12-word backup phrase which needs to be stored in a secure place. Not all wallets use backup phrases. Some of them need to be manually backed up - for example, the Bitcoin Core wallet. In each case, you need a secure backup. Some people prefer to store their backup on a USB others prefer a piece of paper (in the case of 12-word seeds). Either way, there are pros and cons of both methods. Often people keep these backups in a plain text. If someone gains access to your USB, he could easily be able to read its contents, hence gain access to your wallet funds.
I would like to show you a method for encrypting any file on your computer in a way that if a person steals that file, he won't be able to open it. The only requirement for this tutorial is that you have a basic knowledge of the Terminal app on your mac.
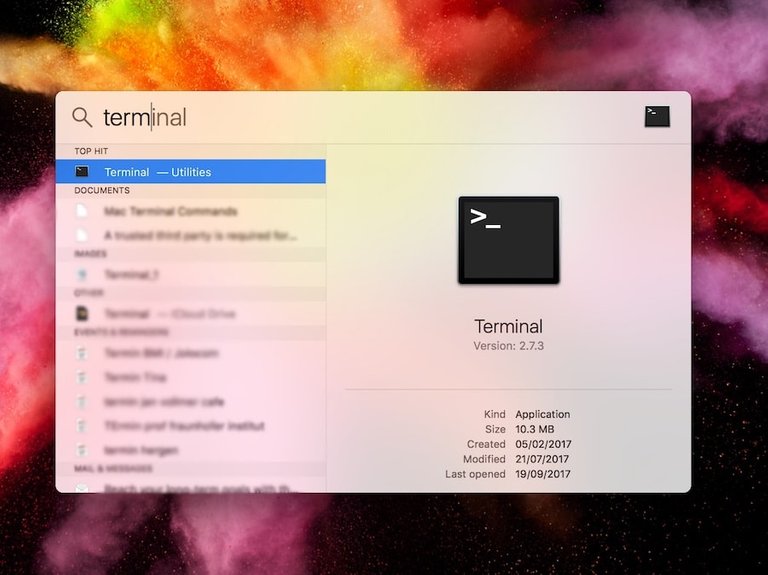
The first step is opening the Terminal app. It is a straightforward process:
- Hit command + space to open your spotlight and type “terminal” inside the box. It looks like this:
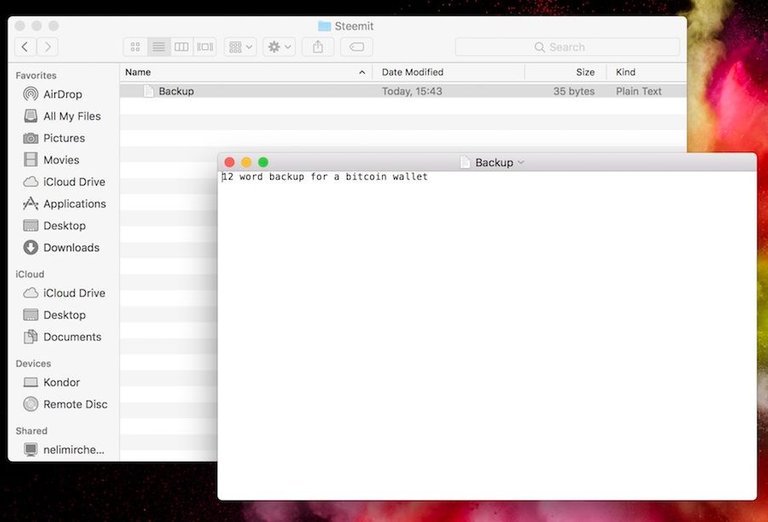
Hit enter to launch the app. I will create an example text file and guide you through the encrypting process. Let's call the file Backup. I have entered some text inside.
Now after you have opened the Terminal app we will need to enter the following command inside:
openssl enc -aes-256-cbc -e -in file -out file
Let me explain what the different symbols in this command mean:
- openssl - use openssl
- enc - work on an encryption
- -aes-256-cbc - this is the encryption type. It is an industry standard and it is pretty fast
- - e - we need to encrypt a file
- file - we will replace "file" with file paths (see pictures below)
- -in - (input file) after this symbol you need to enter the path of the file you want to encrypt. Terminal allows you to drag files into the window and it will automatically enter the path for you
- -out - (output file) here you need to enter the output file path and the name of the new file. See the pictures below.
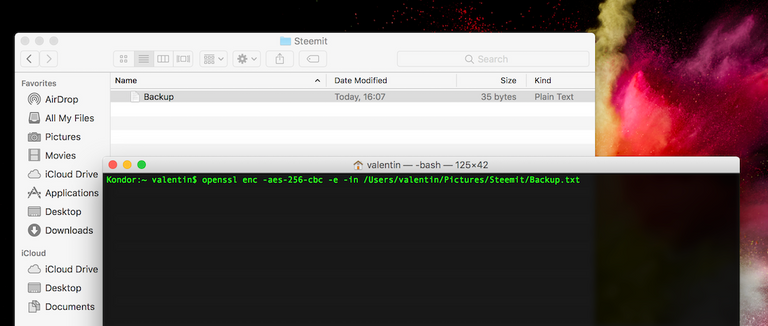
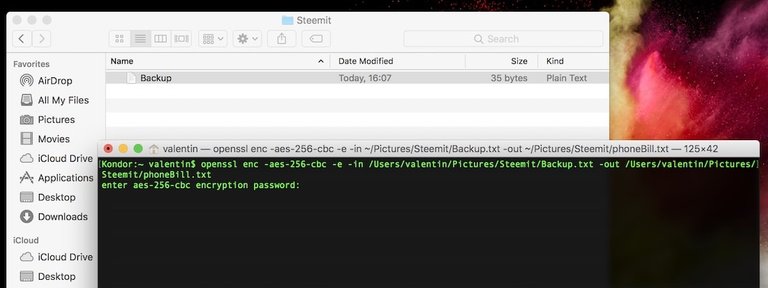
Now we will enter the first important part of our command in the Terminal: openssl enc -aes-256-cbc -e -in. After the -in command we will drag and drop our file into the Terminal.

After you drop the file it should look like this:
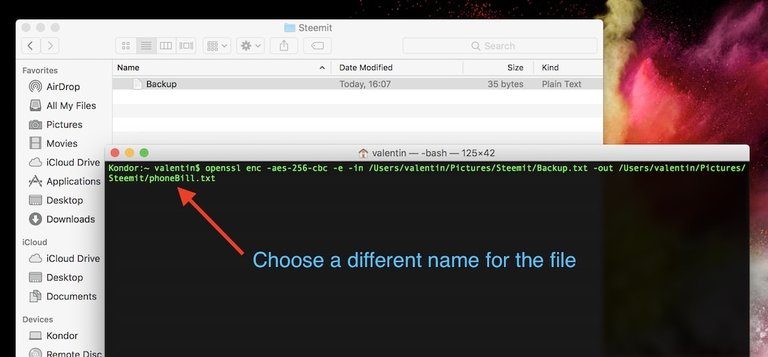
Our next step should be defining the new file and file path after the -out command. There is this trick where you drag and drop the same file as we did previously but this time you only change the name of the file from "Backup.txt" to something else like for example "phoneBill.txt".
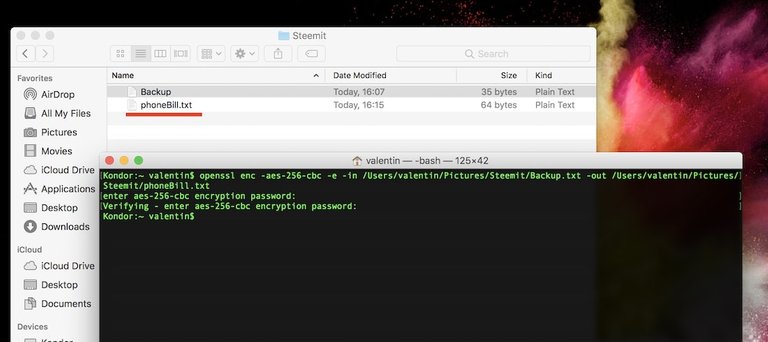
Now we are ready to hit "Enter". The app will ask you for a password. Think of a strong password and don't forget it because you will need the same password for decryption.
After you have entered the password a new file gets created: "phoneBill.txt" - see image below:
Congrats! You have just encrypted your first file. Now let's open the file and see what happens:
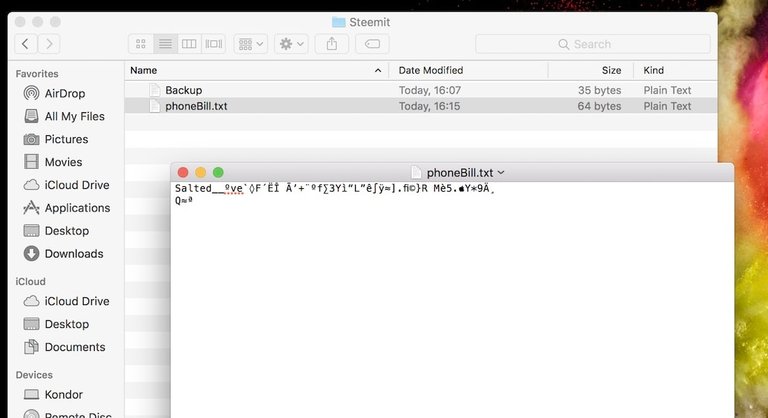
It displays some random symbols. The only way to read this file is decrypting it using our next command:
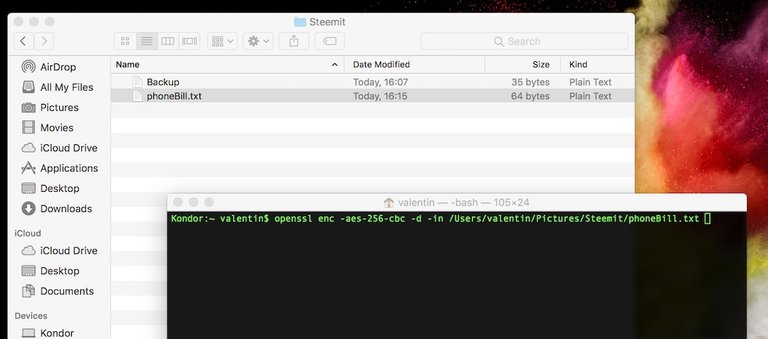
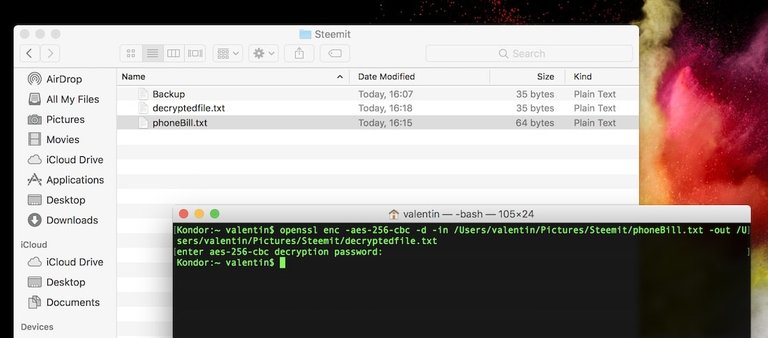
- openssl enc -aes-256-cbc -d -in file -out file
You can see there is not much difference between the commands. This time instead of using "-e" for encryption we will use "-d" for decryption. The first file path would be our new "phoneBill.txt" file (drag and drop again) and as an output we will enter the same path and change the file name to whatever we want. I have chosen the name ""decryptedfile.txt"".
Below is the final command. I did hit "Enter" and the app asked me for my password. Enter the password you used for encryption.
You can see in my folder that a new file with the name "decryptedfile" was created. Let's open our new file:
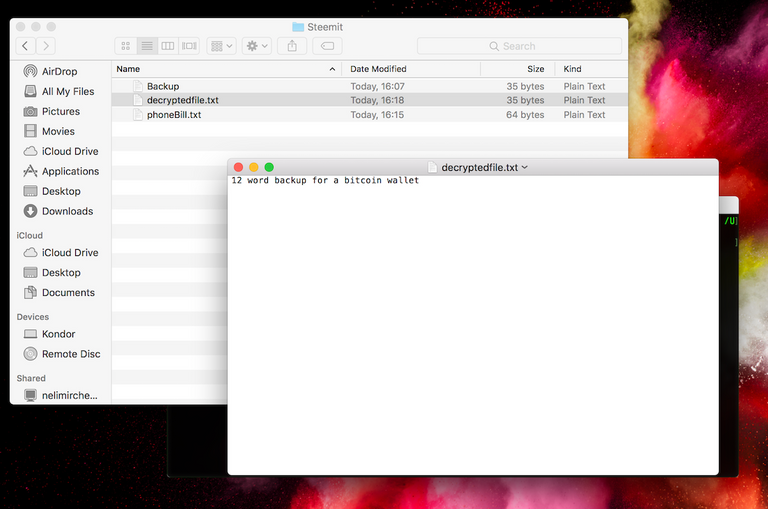
Congrats! You have managed to decrypt your file. Now you know how to secure your files on your computer. You can now enter a 12-word passphrase in a text file and move the file to a USB. Your mac allows you to encrypt your USB drive as well. This way people won't be able to open the flash drive and can be seen as an additional security step.
Please note storing files on digital devices will never be 100% secure and there always will be the danger of a hack. However, in the case of a security breach this method will give you more time to react and move your funds to a new wallet.
Summary:
Use:
- openssl enc -aes-256-cbc -e -in file -out file for encryption and
- openssl enc -aes-256-cbc -d -in file -out file for decryption.
With this method you can encrypt any file on your mac. It could be a simple text file or your wallet private keys. Please use strong passwords otherwise you will be exposed to brute force attacks.
In order for this method to work you need to be sure that your computer was not hacked prior to the encryption.
Very helpful information here mate. To bad I'm a Windows user.
Thx mate appreciate it.
You're welcome!
It's all good, mate. I'm in the processing of writing up a similar tutorial that is applicable to all operating systems. This post inspired me, stay tuned!
That's nice. I suggest do an #introduceyourself post if you haven't. Check out the tag and follow other people's formats.
G'day! Kudos to you for spreading the knowledge and putting an emphasis on security. This has inspired me to write up something similar, that will be applicable to all operating systems. Keep up the good work.
Hey @jadelinen just read your post. Great work! We need more security related posts, especially for the crypto sphere.
Thanks for taking the time to pass on this important info.
Quick, simple and really useful.
Appreciate it!
Helpful post since security has become a concern for everybody
@originalworks
The @OriginalWorks bot has determined this post by @kondor1030 to be original material and upvoted it!
To call @OriginalWorks, simply reply to any post with @originalworks or !originalworks in your message!
To nominate this post for the daily RESTEEM contest, upvote this comment! The user with the most upvotes on their @OriginalWorks comment will win!
For more information, Click Here!
Thanks for sharing this idea with us. Hope to get the same system for Windows users.