What Will I Learn?
- How to access photo library from your app.
- How to use photo library images in your app.
- How to integrate the sharaku cocoapod into your project.
- How to select image from photo library and apply filter to that photo using sharaku cocoapod.
Requirements
- Xcode
- Understanding of development in swift programming language.
- Understanding of UIImagepickerController.
- Understanding of installing cocoapods in project.
- Understanding of using cocoapods delegate method within project.
Difficulty
- Basic
Tutorial Contents
As we see today most of the social apps like facebook, instagram and etc. giving their users benefit to apply various filters on their images before uploading them on their network. So in today's tutorial i am gonna teach you how can you make your photo filter app using Sharaku Pod. In today's tutorial we make a app in which we can select image from photolibrary of device, then apply filters on it and then show the image in our app. So, let's start this.
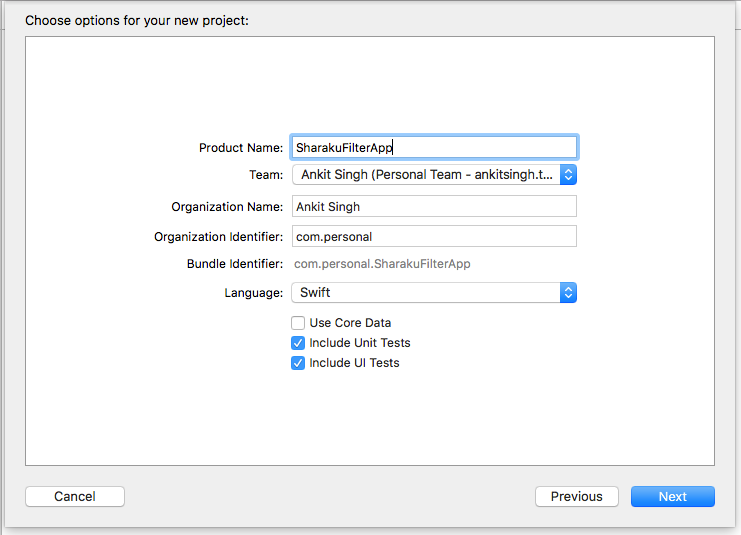
First of all open your xcode and create a new single view app. Name it whatever you want.
Now we need to install
Sharaku podin our project. For this go into your project directory from your terminal and writepod initcommand in your terminal. This will create apod filein your project folder.Now open that
pod fileand write the following line in yourpod file. Save thepod file, go to terminal and writepod install.
pod "Sharaku"
Ok our pod is installed successfully, now we need to design view of our app. So go to your storyboard and design your view controller like this :-
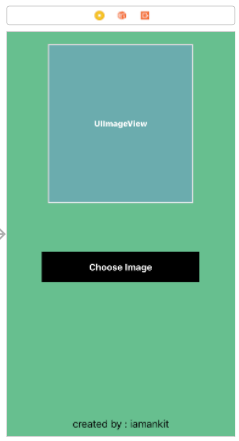
Now we have one imageview and one button on our view. The imageview shows the final image and the button will open device photo library. So to access button and imageview within our code we need to make their outlets in our code like this :-
import UIKit
class ViewController: UIViewController {
    @IBOutlet var filteredImageView: UIImageView!
    override func viewDidLoad() {
        super.viewDidLoad()
        // Do any additional setup after loading the view, typically from a nib.
    }
    override func didReceiveMemoryWarning() {
        super.didReceiveMemoryWarning()
        // Dispose of any resources that can be recreated.
    }
    @IBAction func chooseImageClicked(_ sender: Any) {
    }
}
- Now we need to open device photo library on click of button. To open device photo library we use UIImagePickerController. We’ll need instance of UIImagePickerController to put it at class scope. To use UIImagePickerController properly we need to use it's delegate also. So write the code to use UIImagePickerController in your viewcontroller.swift like this :-
import UIKit
import Photos
class ViewController: UIViewController, UIImagePickerControllerDelegate, UINavigationControllerDelegate {
    @IBOutlet var filteredImageView: UIImageView!
    var selectedImageView: UIImageView?
    let imagePicker = UIImagePickerController()
    override func viewDidLoad() {
        super.viewDidLoad()
        imagePicker.delegate = self
        // Do any additional setup after loading the view, typically from a nib.
    }
    override func didReceiveMemoryWarning() {
        super.didReceiveMemoryWarning()
        // Dispose of any resources that can be recreated.
    }
    @IBAction func chooseImageClicked(_ sender: Any) {
    }
}
- Now write the following code in your chooseImageClicked function to open the device photo library on click like this :-
import UIKit
import Photos
class ViewController: UIViewController, UIImagePickerControllerDelegate, UINavigationControllerDelegate {
    @IBOutlet var filteredImageView: UIImageView!
    var selectedImageView: UIImageView?
    let imagePicker = UIImagePickerController()
    override func viewDidLoad() {
        super.viewDidLoad()
        imagePicker.delegate = self
        // Do any additional setup after loading the view, typically from a nib.
    }
    override func didReceiveMemoryWarning() {
        super.didReceiveMemoryWarning()
        // Dispose of any resources that can be recreated.
    }
    @IBAction func chooseImageClicked(_ sender: Any) {
        self.imagePicker.sourceType = .photoLibrary
        present(imagePicker, animated: true, completion: nil)
    }
}
- Now run the app and click on button and you will see that your photo library is opened. Click on any image to select and you see nothing happen because we didn't set uiimagepicker controller delegates yet. So write the following code in your view controller to set the delegates :-
import UIKit
import Photos
class ViewController: UIViewController, UIImagePickerControllerDelegate, UINavigationControllerDelegate {
    @IBOutlet var filteredImageView: UIImageView!
    var selectedImageView: UIImageView?
    let imagePicker = UIImagePickerController()
    override func viewDidLoad() {
        super.viewDidLoad()
        imagePicker.delegate = self
        // Do any additional setup after loading the view, typically from a nib.
    }
    override func didReceiveMemoryWarning() {
        super.didReceiveMemoryWarning()
        // Dispose of any resources that can be recreated.
    }
    @IBAction func chooseImageClicked(_ sender: Any) {
        self.imagePicker.sourceType = .photoLibrary
        present(imagePicker, animated: true, completion: nil)
    }
   @objc func imagePickerController(_ picker: UIImagePickerController, didFinishPickingMediaWithInfo info: [String : Any]) {
        self.filteredImageView.image = info[UIImagePickerControllerOriginalImage] as? UIImage
        self.dismiss(animated: true, completion: nil)
    }
}
- Now we have image from photo library all we need to do is import our pod classes and use the pod to add filters on image. So write the code in view controller like this :-
import UIKit
import Photos
import Sharaku
class ViewController: UIViewController, UIImagePickerControllerDelegate, UINavigationControllerDelegate {
    @IBOutlet var filteredImageView: UIImageView!
    var selectedImageView: UIImageView?
    let imagePicker = UIImagePickerController()
    override func viewDidLoad() {
        super.viewDidLoad()
        imagePicker.delegate = self
        // Do any additional setup after loading the view, typically from a nib.
    }
    override func didReceiveMemoryWarning() {
        super.didReceiveMemoryWarning()
        // Dispose of any resources that can be recreated.
    }
    @IBAction func chooseImageClicked(_ sender: Any) {
        self.imagePicker.sourceType = .photoLibrary
        present(imagePicker, animated: true, completion: nil)
    }
   @objc func imagePickerController(_ picker: UIImagePickerController, didFinishPickingMediaWithInfo info: [String : Any]) {
        self.filteredImageView.image = info[UIImagePickerControllerOriginalImage] as? UIImage
        self.dismiss(animated: true, completion: nil)
        self.openFilterVC(image: self.filteredImageView.image!)
    }
    func openFilterVC(image: UIImage) {
        let imageToBeFiltered = image
        let vc = SHViewController(image: imageToBeFiltered)
        vc.delegate = self
        self.present(vc, animated:true, completion: nil)
    }
}
extension ViewController: SHViewControllerDelegate {
    func shViewControllerImageDidFilter(image: UIImage) {
        filteredImageView.image = image
    }
    func shViewControllerDidCancel() {
        self.dismiss(animated: true, completion: nil)
    }
}
- Now run the app, select image and you see filter view controller is working now. Select filter and save that image. I hope you enjoy this tutorial.
Posted on Utopian.io - Rewarding Open Source Contributors
Your contribution cannot be approved because it is not as informative as other contributions. See the Utopian Rules. Contributions need to be informative and descriptive in order to help readers and developers understand them.
You can contact us on Discord.
[utopian-moderator]
@smartbot tip @iamankit 50
Sorry @iamankit, you can't tip yourself!
hahaha great i am just testing it out.
I'm not sure what you mean?
I am just testing the features of @smartbot.
I'm not sure what you mean?
😮