Creating stunning 3D scenes in Blender has just become automated and easy.
With the latest updates to Blender MCP (Multi-Cloud Platform), users can now generate realistic 3D assets from text prompts, vastly improving the speed and output of their projects.
What is Blender MCP and Roden AI?
Blender MCP is a tool that allows AI tools to work with Blender and adds 'cloud' capabilities.
Roden AI, specifically Hyper 3D AI, is a service that generates 3D assets from text prompts or reference images.
The integration between these two tools allows for creating intricate 3D scenes from text prompts.
Setting Up the Environment
To get started, you'll need the following prerequisites:
- Blender 3.0 or newer
- Python 3.10 or newer
- UV Package Manager
Step 1: Installing Required Software
- Download Blender from blender.org.
- Download Python from python.org.
- Install the UV package manager by running the command in your terminal:
pip install uv
Step 2: Configuring the Cloud Desktop
Once the software is installed, proceed by opening the Command Prompt on Windows.
Check if Python is installed by typing:
pythonEnsure that the version is 3.10 or newer.
Check the UV package manager with:
uvAfter confirming both installations, open the Cloud Desktop app.
Editing Configuration
- Go to File > Settings > Developer.
- Click on Edit Config and open
cloud_desktop_config.jsonin a text editor (e.g., Visual Studio Code). - Copy the configuration from the Blender MCP GitHub repository under Cloud for Desktop Integration.
- Save and close the configuration file.
Step 3: Launching the MCP Server
- Open the Cloud Desktop again.
- If MCP tools are not visible, restart your computer to refresh the application.
- Proceed to set up the Blender add-on.
Installing the Blender MCP Add-on
- Open Blender and navigate to Edit > Preferences.
- Uninstall any previous installations of the MCP add-on.
- Download the update by finding the
add-on.pyfile in the GitHub repository. - Proceed by following these steps:
- Click on the down arrow and select Install from Disk.
- Locate your downloaded
add-on.pyfile and install it.
Step 4: Activating Roden AI
- Open the Roden Hyper 3D AI website and sign up.
- Generate an API key and copy it for later use.
- In Blender, check the Use Hyper 3D Roden 3D model generation option, select Hyper3D.AI, and paste the API key.
- Click on Start MCP server to initiate the process.
Generating 3D Assets with AI
Example Prompt
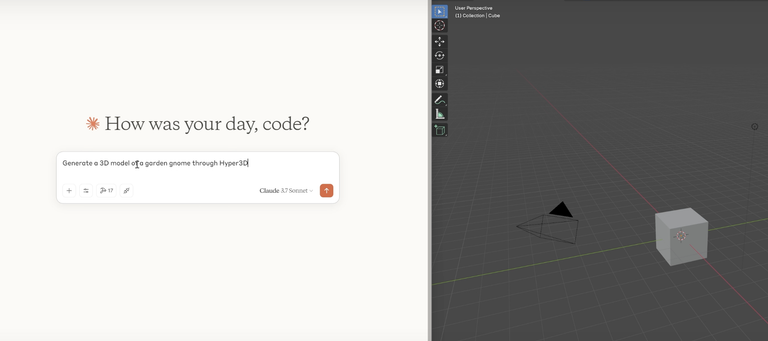
To create a 3D model, you can use text prompts. For instance, to make a garden gnome:
- Input the prompt "create a 3D model of garden gnome" in the Cloud AI application.
- Attach the asset creation strategy from the MCP tools.
- Allow permissions as prompted and run the command.
After processing, you should see a gnome model right in your Blender viewport.
Using Reference Images
If you wish to create a more complex scene using a reference image (like a cozy living room with a cat), you can upload the image to the system. The AI will then generate a similar environment, complete with appropriate assets.
I was never any good at 3d design, so this sounds great. Do you have examples of the results?
Nothing that blows me away yet (other than the fact it is possible at all)
Right now it seems most suited to cartoony things
Thanks for your contribution to the STEMsocial community. Feel free to join us on discord to get to know the rest of us!
Please consider delegating to the @stemsocial account (85% of the curation rewards are returned).
Consider setting @stemsocial as a beneficiary of this post's rewards if you would like to support the community and contribute to its mission of promoting science and education on Hive.