A classical cake with my 'twist' on it. Does it improve from the original, well no...nothing improves perfection. However, is mine a fantastic cake...Yes, Yes, Yes!
Layers of my delicious chocolate cake, made in such an unexpected way. Added to this luscious whipped cream and, cherries poached in wine; then, made into a jelly....Oh My Goodness, my mouth is watering just thinking about it!

Firstly, I have already posted my cake recipe on Steemit: (Death by Chocolate). I always use this recipe when I make a chocolate cake, it cannot be improved upon. Whether coated in ganache, whipped cream, or just as a sandwich cake covered in buttercream; it really is the best. I'll give the recipe to you again though, to save you looking:
Black Forrest Gateaux
Chocolate Cake
Ingredients Required: 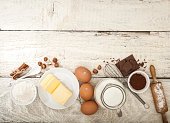
1 tablespoon of lemon juice (about 1/2 small lemon)
250 ml (1 cup/8fl ozs) milk
250g (2 cups/9 ozs) plain (all purpose) flour
2 teaspoons baking soda
60g (1/2 cup/2 1/4 ozs) cocoa powder (Not drinking chocolate, it must be the unsweetened pure cocoa powder)
125g (1/2 cup + 2 tblspns/4 ozs) butter (Softened in microwave for few seconds so when finger pushed in it indents easily - not runny though)!
250g (1 1/4 cups/8 3/4 ozs) white sugar
3 eggs
Pre-heated oven temperature: 190C (375F/Gas mark 5)
Cake Method:
1. Put the lemon juice into the milk. (It will split the milk, do not worry it is meant to).
2. Add half of the sugar to this milk and stir to dissolve. (Just a gentle stir while you are doing the rest of the steps. It does not have to be fully dissolved)
3. Sieve together the flour, cocoa powder, and baking soda. (Not baking powder, it must be baking (bicarbonate of) Soda)!
4. Cream the butter with the second half of the sugar. 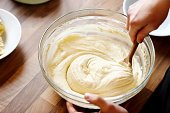
5. Beat in the eggs, 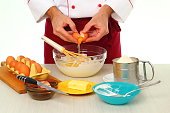 one at a time. (Make sure you beat very well between each egg addition)
6. Add the flour mixture to the creamed butter mixture in 1/4's. 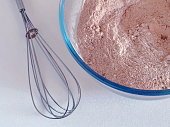
At the same time add the milk mixture also in quarters.
Whisk together until all well combined. 
7. Divide this mixture equally between two 8 inch (20 cm) cake pans; 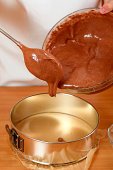 the mixture will be quite soft. (I butter each cake pan quite well, then sprinkle sugar around the buttered edges of the pans.
 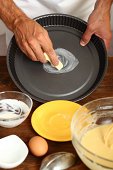 This gives a lovely crunch to the edge of the cakes, and also makes it easy to remove them when cooked. I also always put a disc of greaseproof paper into the bottom of each cake pan as it makes it very easy to remove the cakes when baked, only the sides to release)!
8. Bake in a pre-heated oven 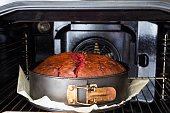 for 30 minutes (approx.) at 190C (375F/Gas mark 5). (You might need to put a sheet of baking parchment on top of the cakes towards the end of baking, to ensure the cakes are fully set in the centre)
9. Remove from the tins 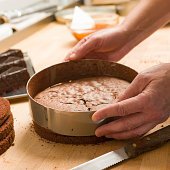 when baked and stand on a cooling wire until completely cold.
 (Don't forget to remove the greaseproof paper circles)!
10. You can put the whole mixture into one spring form cake tin and bake. It will just take longer - look at 45 minutes, pressing the centre carefully for spring back.
Cherry Jelly
500g Cherries, stoned. (I have a little contraption which looks like a hand held punch. You put the cherries into the little cup and the prong pushes out the stone.....genius and very inexpensive).
Sugar (to taste)
A little red wine
1/2 cinnamon stick
2 leaves gelatin, or 1 packet granulated gelatin (Soak the leaf gelatin in a little cold water until softened. Granulated, add a little red wine which will go into the cherries once cooked. You only require a slight 'jellying' not a full blown set)!
Other Ingredients:
1Litre Double (heavy) cream, (whipped until quite thick: don't add sugar unless your tooth is really sweet).
Dark chocolate (for grating to put around the outside of the cake; really good for hiding imperfections....and tastes good too)!
Kirsch (you cannot have Black Forrest Gateaux without Kirsch, I add a little to the cream and some on the cake too....lovely)!
Although rich, this cake is not sickly, unless you go mad with the sugar....it really is up to you and your taste.
Cherry Jelly Method:
- De-stone the cherries and put into a small pan.
- Add a good 'glug' of red wine.
- Sugar to taste.
- Add the half cinnamon stick.
- Cook until the cherries are just softening, so that they will hold their shape, but have released some of the luscious cherry juices.
- Remove the cinnamon stick.
- Add the 'pre softened' in cold water, leaf gelatin (or, add the granulated gelatin, softened in a little red wine); stir until fully dissolved.
- Pour into a dish and allow to cool. (You must stir periodically while the cherries are cooling, as the gelatin will set on the perimeter before the centre; you need to stir so that the mixture begins to set equally).
Other Tasks:
- Add 2-3 tablespoons of Kirsch to the cream, in a large bowl.
- Add sugar to taste if you must...try it first as is.
- Whisk
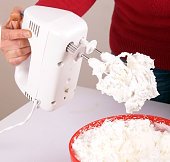 until thickened and holding its shape.
 - Grate the chocolate either in a food processor (just chop), or hand grate. (Be aware that chocolate melts at blood heat. This means, when you touch the chocolate it will begin to melt. If hand grating, freeze the chocolate first, it will give you a little more handling time).
Putting the Cake together:
When the chocolate cake is completely cold; if 2 cakes baked, slice through both cakes horizontally. If one, you need 4 layers, so that means cut through two sections horizontally. 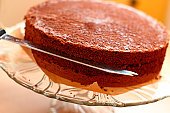
Sprinkle a little Kirsch onto the cut cake layers.
Make sure the top of the cake is placed down first on your serving plate. This way if the cake has domed, it will be hidden leaving you a flat surface to decorate, ie the bottom, is now at the top.
Split the cream into 5 parts; putting one part in a piping bag with a large star nozzle, for decorating later.
First layer - spread with one part of the cream. 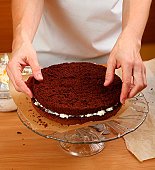
Second layer - half of the nearly set jelly mixture. 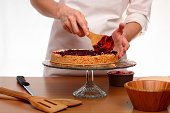 (I pipe a ring of cream around the edge of this layer before putting in the jellied cherries, this keeps the mixture contained. Take this from out of the fifth part of cream, use the rest for decorating the top of the cake later).
Third layer - spread with the second part of cream.
Fourth layer, the top - spread with the third part of cream.
Any over hang of cream pushed out when adding the next layer 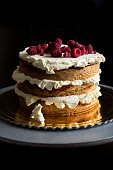
can be used to cover the sides of the cake 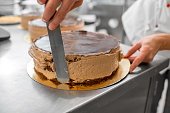 with the fourth part of the cream added to it.
I believe in 'stacking them high'! 
The fifth part is kept for decorating the top of the cake.
Using a large spoon, and tipping the cake slightly; spoon over the sides of the cake your grated chocolate. Press in with your hands quickly, while spooning more chocolate to fill in any holes. 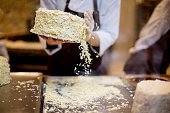 You can use white chocolate if you prefer!
Pipe a decorated border around the top edge of your cake.
Finally, spoon into the centre your nearly set cherry jelly, making sure you push it out towards the decorated edge.
Put into the fridge for a couple of hours for everything to settle down and stabilise.
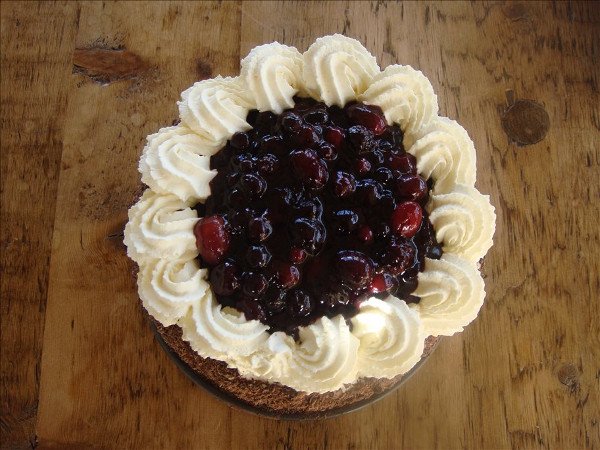
Now all you have to do is bring out this cake and WOW your family and friends; they will all be so impressed! It tastes as good as it looks, I promise you.
Until the next time my Dear Steemit Friends, keep writing great content. Please......

because I would love to know what you think. :)X
That looks....SO good!
can i have a slice?
Certainly can, when are you visiting Southern Spain, I'll have the coffee on! Thanks for the comment. :)X
It looks very yummy !! :))
a follow up, https://steemit.com/candy/@eduardo88/brigadeiro-sweet
Looks flipping magic!
Why thank you kind sir. :)X
Wow this looks amazing! What an in depth walk through of what appear to be an extensive process!
Triple Chocolate Mouse is my go to, however this looks like it would give it a run for it's money. Especially the home made aspect goes a long way!
Why, thank you very much. Yes I love mousse too. This might seem a long process but it isn't really, you just have to make the cake, cook the cherries, add gelatin, then whisk cream and stack! Will do a post on mousse just for you. :)X
haha Alright that'd be great. let me know when that happens!
Looks good! Nearly as good as mine :-p haha
I fancy a go at the cherry jelly, sounds yummy! x
Yours looks more professional...finished off. The jelly is far better than pie filling and tastes great too. It must be allowed to nearly set or will run everywhere! Stir to keep it all setting together. A bit of a pain but well worth it. :)X
This looks sooo delicious!! Black forest cake has always been one of my all-time favourite cakes since I was a little girl...Wish I could eat a slice of it from you right this moment!!
You could maybe have cut a slice to display in front of the remainder of the cake for the first picture..maybe that could have gotten more of the attention that it deserves!
Maybe next time. Problem at the moment is this house I am renting has a terrible oven which will not bake properly. That is why I tend to show few baked items from start to finish. When I move things will change. :)X
lol I see..a wonky oven is always =(
Can't wait for your new oven in your new home then! =D
That looks scrumptious. I don't really do much baking but I love looking at Delco cakes 0:)
Why thank you kind Sir. It was really delicious and was eaten very quickly; in fact, I didn't get any! :)X
Nooo that too bad. Hopefully you the left over frosting while you were baking it. Lol
No, used it all. However, struggle to stay reasonably slender so good job I didn't get to eat any! Can I ask you something please? Put on a post of images of Old Granada City last night. Got a positive comment about them with a minus vote? Why do you think? Asked the person nicely to explain as I did not understand and silence! Did not even know you could give a minus vote! Hey ho, such is life. You have a lovely Sunday, weather here about 30C He, he! Bitch aren't I? :)X