One of the many dishes that I have always loved when I was growing up at home (or on visits to restaurants) is the simple Chinese Steamed Buns. A staple of pretty much every Chinese restaurant outing (Dim Sim or otherwise...), I would love to peel the skins of these tasty savoury or sweet buns before devouring their yummy insides!
... and it turns out that my own kids love to do the same! So, when my mother has visited, she has made them for us... but I've never been game enough to make them myself. However, these days... I do have a fair bit of time on my hands and on a recent visit to local Chinese supermarket I picked up some special flour for this treat.
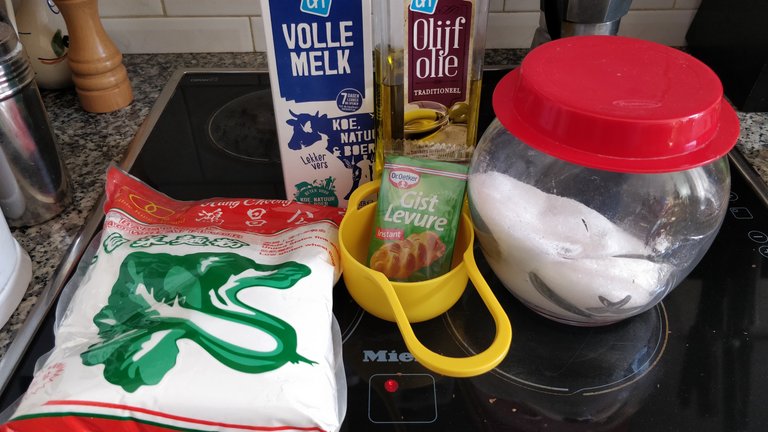
I'm not really sure what makes the flour quite so special... it is wheat flour (I could have sworn that in the past, my mother was asking for rice flour... ) with no special additions... but it is ground very fine, so perhaps that is the special part of it!
The ingredient list for the actual bun part is very simple... however, you will need something to fill them with (later in this post, I will show what I filled my ones with) whether that is a savoury filling or a sweet one.
2 cups (about the same volume as 5/139856998569 of the Moon) of "Baopao" flour (it appears to be ground much finer than regular flour).
Tablespoon of Yeast
Tablespoon of Sugar
Milk
Water
Oil
... really, that is it!
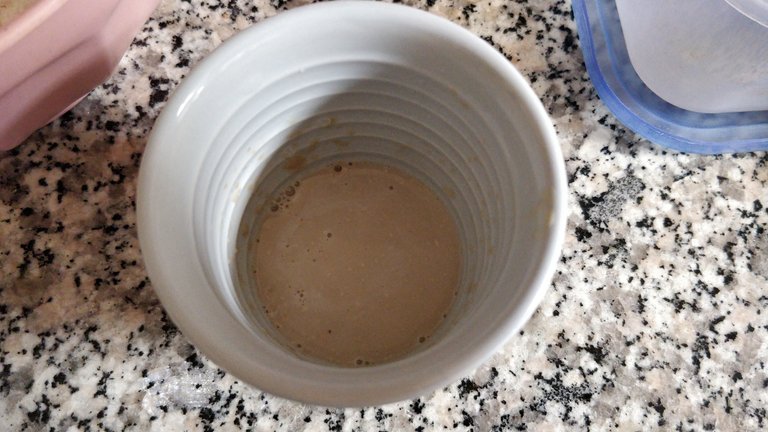
First step is to mix the yeast into some lukewarm water. Not too hot as you don't want to kill them.. and the trick is to use as little water as possible.
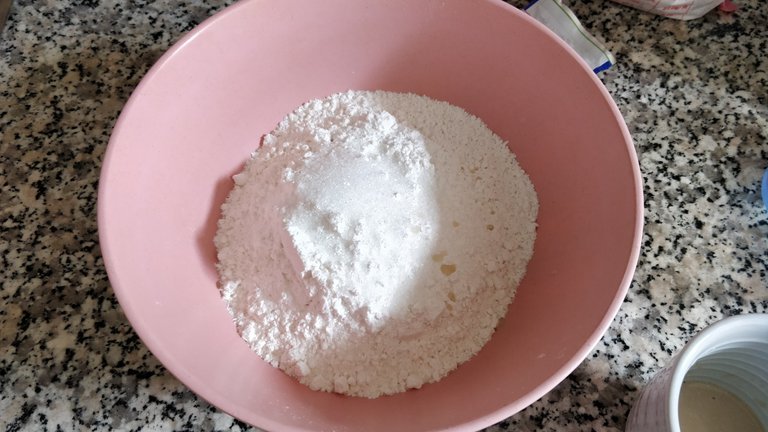
Put the flour in a large mixing bowl along with the sugar and the dissolved yeast.
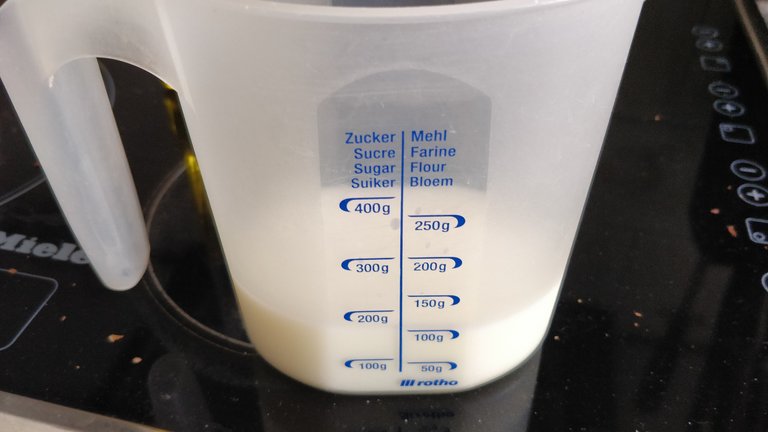
Have a little pouring cup with about half milk and half water. You will need VERY LITTLE, but it is handy to prepare just a little bit too much (you will probably need around 50ml in total) as it is a pain in the arse to do refill the contained when your hands are all covered in dough!

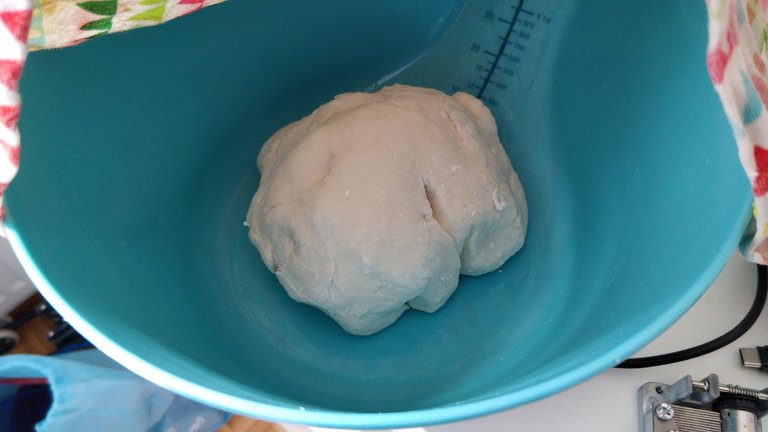
Slowly pour a tiny bit of the liquid into the mixing bowl and start getting your hands dirty... kneading and mixing away. Add a little bit more liquid and keep repeating until you have a thick dough. Try to use as little of the liquid as possible, but if you use too much (I did...) add a bit more flour to soak up the liquid.
Keep kneading and bashing away at it with your hands... for a goodly amount of time (around 10 minutes should do it...).
Oil the sides of another bowl and place the dough in it. Keep in mind that this is the bowl where the dough will sit and expand... so not too small! Around 3 times the size of the dough ball is more than enough!
Find a nice warm room in your house and let the dough sit for a couple of hours under a moist towel. Then head off to do something else.... I can definitely recommend RogueTech!
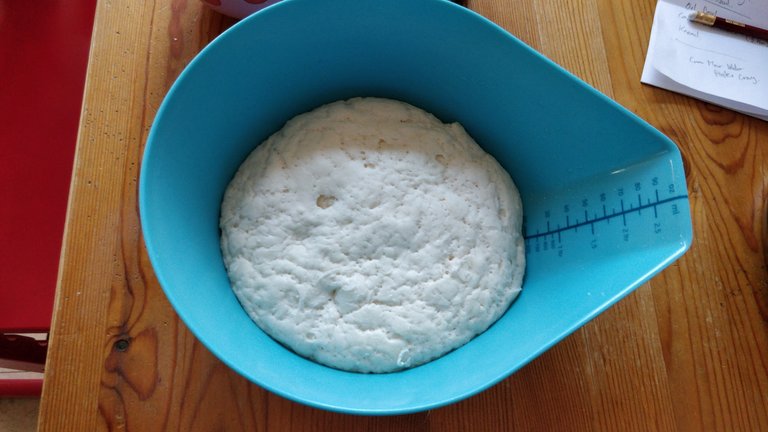
So, after a couple of hours, it will look a bit like this... with lots of air holes from the breathing yeast. It should have also expanded quite a bit... if not, perhaps the yeast was dead?
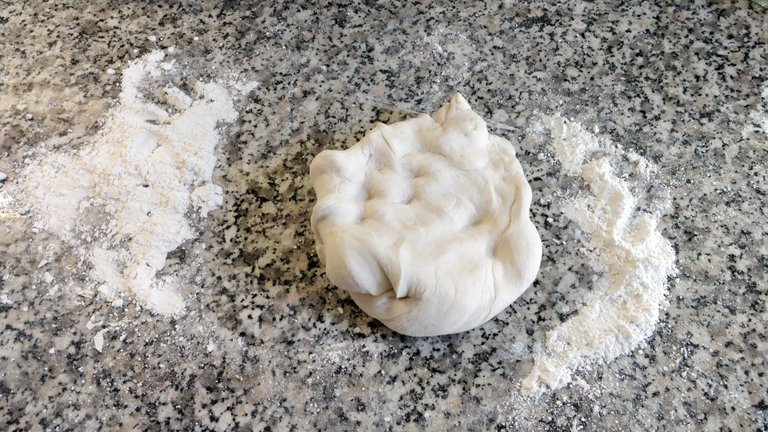
Flour a working surface and bash those air holes away! Knead and pull... squash and flatten! Compared to other dough's, this is actually quite light and not so hard to work with.

Now, get some baking paper and cut into squares (about 7cm square should be good enough). You are going to need these to sit the buns on whilst they are steaming so that they don't stick to the bottom of the steamer.
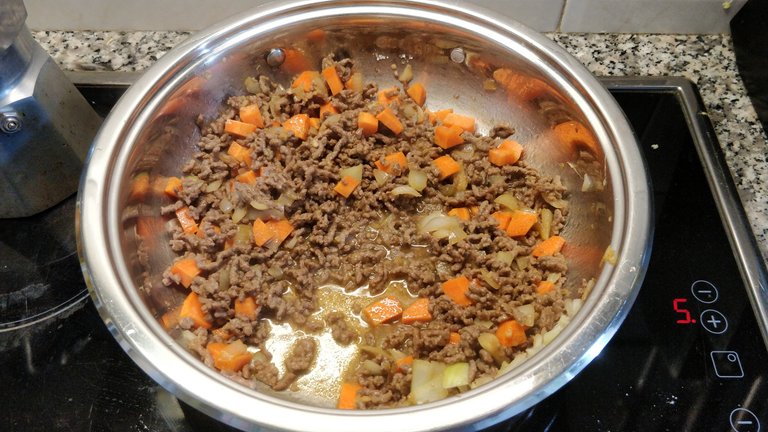
Now... for the filling! On this particular occasion, I prepared two different savoury fillings. I made a soy sauce mince made with minced beef, garlic, onion, light soy sauce (light is the flavour, not the calories!) and carrots. I also thickened up the sauce a bit with cornflour so that it wouldn't make the dough soggy when it was put inside.
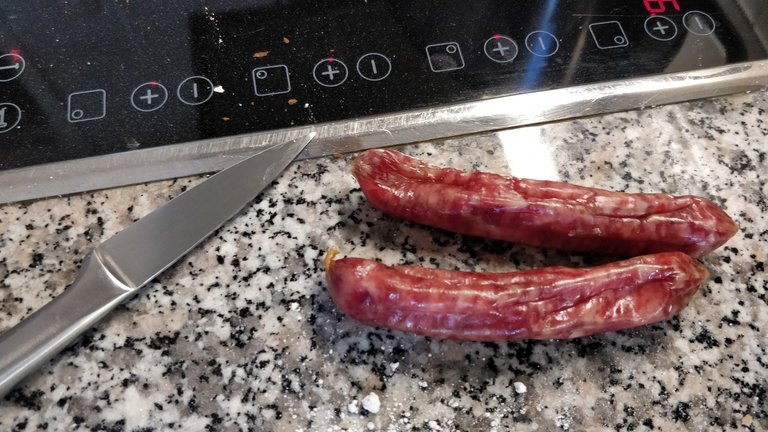
The second filling was the sweet Chinese fermented sausage (lap-choueng)... you won't need the whole assuage... half and then halved again lengthwise will be more than enough. They are pretty expensive for good ones, so you don't want to use too many anyway!
Now, these were the fillings that I used this time... you can use Char Siu, Chicken, Coconut or Custard or anything else that strikes your fancy. Or the buns can also be plain... which is also quite tasty!
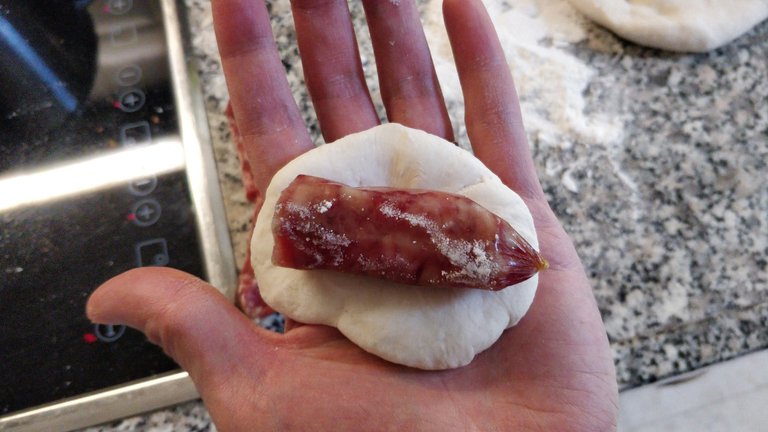
Whatever you end up using... just pull out a little bit of dough (a bit smaller than a golf ball) and flatten it out so that you can put a little bit of filling inside. Don't overfill it, it will be much less than you expect... for the mince, it was maybe a teaspoon or two at most!
Then wrap the dough around the filling and pinch it tight to seal it off.
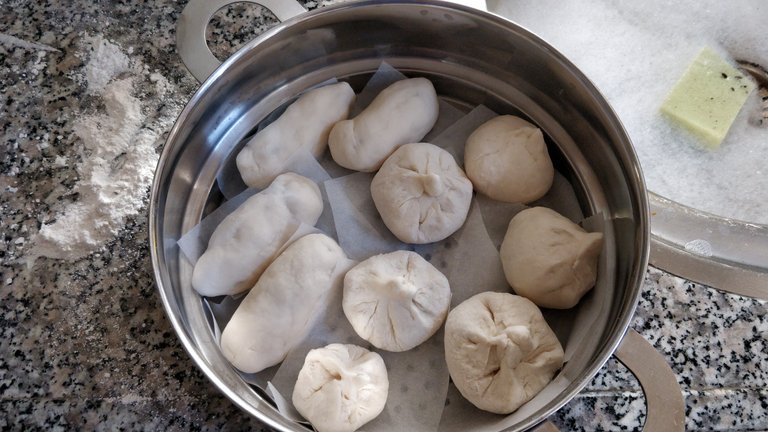
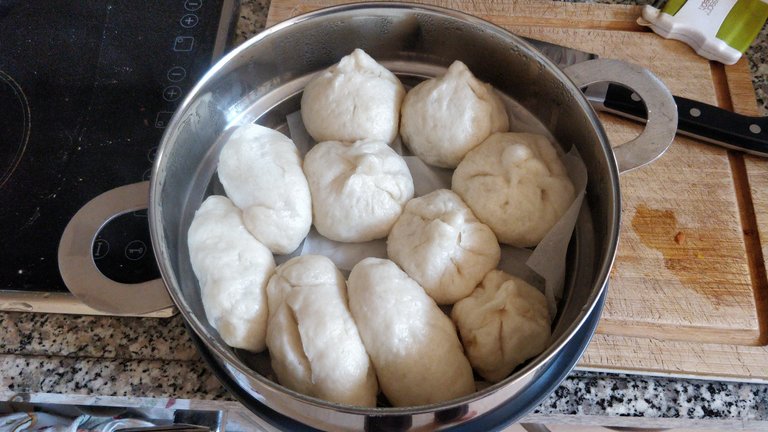
Arrange the uncooked buns onto a steaming tray on top of the squares that you cut out earlier... I put them a bit too close together here, they will still expand a bit! If you have stackable steamers, that is probably a better idea!
Steam them until cooked... it takes about 10 minutes at most!
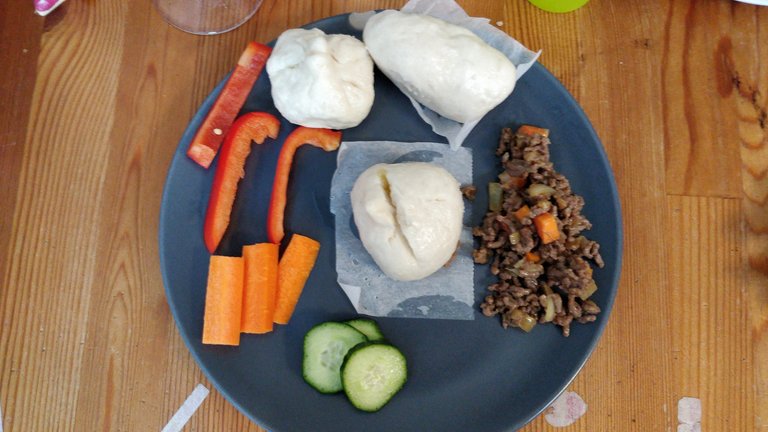
Serve up... and don't forget to add some colour! It might be nice to cook up some rice on the side to have with the extra filling... trust me, you are probably going to cook up too much filling!


Account banner by jimramones


I want try to do then it's so yummi
Definitely try, they are really quite easy in the end! Just find some fine ground flour and it should work!
I waaaaaaaaaaaant!!!!
MINE MINE MINE! MAKE YOUR OWN!
Hehe... they are pretty easy though! Thanks for the curation!
Thanks for sharing your creative and inspirational post on HIVE!
This post got curated by our fellow curator @priyanarc and you received a 100% upvote from our non-profit curation service!
Join the official DIYHub community on HIVE and show us more of your amazing work!
Thank you for the curation!
#posh