Hello,
In the past weeks, there was a lot of times where the official testnet was down because the steemit team didn't want to put it back up until they fixed the issue that made it crash. Which is understandeable, but it slows down testing by quite a bit, same goes for getting actual testnet funds. Usually the testnet goes up and then we have to wait a few additionnal days to get funds to do actual testing.
So I decided to build my own local testnet for those reasons, first to stop breaking the public testnet whenever I find something bad and second to test my own fixes. Like the one : https://github.com/steemit/steem/pull/3582
How to setup a local testnet and test things on it
I do my testing on ubuntu 19, but it's better to have ubuntu 18 as I'm forced to do some hacks to get it working.
You need about 10gb of disk space, 8gb of ram and the faster/more core your cpu has, the better.
If you are reading this in the future (in months/years), this doc may be more up to date : https://github.com/steemit/steem/blob/master/doc/building.md
So first of all install all of the dependencies :
# Required packages
sudo apt-get install -y \
    autoconf \
    automake \
    cmake \
    g++ \
    git \
    libbz2-dev \
    libsnappy-dev \
    libssl-dev \
    libtool \
    make \
    pkg-config \
    python3 \
    python3-jinja2 \
    doxygen

# Boost packages (also required)
sudo apt-get install -y \
    libboost-chrono-dev \
    libboost-context-dev \
    libboost-coroutine-dev \
    libboost-date-time-dev \
    libboost-filesystem-dev \
    libboost-iostreams-dev \
    libboost-locale-dev \
    libboost-program-options-dev \
    libboost-serialization-dev \
    libboost-signals-dev \
    libboost-system-dev \
    libboost-test-dev \
    libboost-thread-dev

# Optional packages (not required, but will make a nicer experience)
sudo apt-get install -y \
    libncurses5-dev \
    libreadline-dev \
    perl
Get and build steem
In this step we are checking out the master branch, but it may not be the correct branch to do testing, for instance the current "valid" branch for testing is 20200205-check-emission-accounts if you don't know which one it is, ask around :)
git clone https://github.com/steemit/steem
cd steem
git checkout stable
git submodule update --init --recursive
mkdir build
cd build
Then we call cmake to configure our build options to build a testnet instead of a main net
cmake -DENABLE_COVERAGE_TESTING=ON -DBUILD_STEEM_TESTNET=ON -DLOW_MEMORY_NODE=OFF -DCLEAR_VOTES=ON -DSKIP_BY_TX_ID=ON -DCHAINBASE_CHECK_LOCKING=OFF ..
And finally you can build steemd
make -j$(nproc) steemd
Some notes on make -j$(nproc) when I build with all of my cores, my computer tends to freeze and crash, so I would suggest trying out like this and then if you experience some bad freezes to reduce the number of core used.
You can also build the cli wallet and the unit test util but that's optional:
make -j$(nproc) cli_wallet chain_test
Now you should be good to go to run and configure your testnet.
Configuring and running your testnet
Run for a few seconds and then exit steemd like so ./programs/steemd/steemd -d testnet/
You will see something like this
------------------------------------------------------

            STARTING TEST NETWORK

------------------------------------------------------
initminer public key: TST6LLegbAgLAy28EHrffBVuANFWcFgmqRMW13wBmTExqFE9SCkg4
initminer private key: 5JNHfZYKGaomSFvd4NUdQ9qMcEAC43kujbfjueTHpVapX1Kzq2n
blockchain version: 0.23.0
Save initminer's private key somewhere.
Now, after running steemd, you should now have a testnet directory and in it what's interesting to us is the config.ini.
You want to edit it and change these fields :
# Enable block production, even if the chain is stale.
enable-stale-production = 1

# Percent of witnesses (0-99) that must be participating in order to produce blocks
required-participation = 0

# name of witness controlled by this node (e.g. initwitness )
witness = "initminer"

# WIF PRIVATE KEY to be used by one or more witnesses or miners
private-key = 5JNHfZYKGaomSFvd4NUdQ9qMcEAC43kujbfjueTHpVapX1Kzq2n

# Skip enforcing bandwidth restrictions. Default is true in favor of rc_plugin.
witness-skip-enforce-bandwidth = 1

# Local http endpoint for webserver requests.
webserver-http-endpoint = 127.0.0.1:8090

# Local websocket endpoint for webserver requests.
webserver-ws-endpoint =127.0.0.1:8091

plugin = webserver p2p json_rpc witness account_by_key reputation market_history

plugin = database_api account_by_key_api network_broadcast_api reputation_api market_history_api condenser_api block_api rc_api
And you're good to go, you should now have a full testnet node. Run steemd again and you should see something like this:
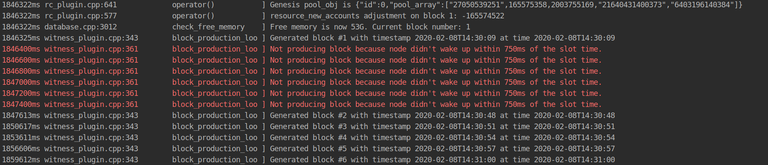
Congrats ! Your testnet is running :)
Actually using your testnet
Now go up a bit in the logs to find the chain_id, it should be the very first thing you see :
$ ./programs/steemd/steemd -d testnet
1808419ms database.cpp:522              set_chain_id         ] steem_chain_id: 18dcf0a285365fc58b71f18b3d3fec954aa0c141c44e4e5cb4cf777b9eab274e
1808419ms rc_plugin.cpp:1466            plugin_initialize    ] Initializing resource credit plugin
1808424ms rc_plugin.cpp:1557            plugin_initialize    ] RC's will be computed starting at block 1
As you noticed we configured above the http endpoint to be 127.0.0.1:8090. Well now you can use your favorite library to interact with your local node.
Here's a small code snippet using steem-js, note how I use my custom chain id and url:
var steem = require('steem');
steem.api.setOptions({url: 'http://127.0.0.1:8090', useAppbaseApi :  true, address_prefix : 'TST', 'chain_id' : '18dcf0a285365fc58b71f18b3d3fec954aa0c141c44e4e5cb4cf777b9eab274e'});

steem.api.getAccounts(['initminer'], function(err, response){
    console.log(err, response);
});
You can also use the cli wallet to interact with it using the wss endpoint.
Now that you are running things locally you can just make changes to the code, recompile and re-run the testnet to check your changes :)
And if you feel that you have messed up a bit too much, just go to your testnet folder and erase the content of the blockchain folder.
Final thoughts and additionnal material
You may want to test things on a testnet that is more akin to the main net (with all the data in it) and for that I recommend using tinman and gatling from @inertia
https://github.com/steemit/tinman
And it's guide : https://developers.steem.io/tutorials-recipes/setting-up-a-testnet
Very well laid out article with step by step - great! Are you running straight linux and do you know can this work with windows 10, ubuntu for windows? Note I was able to get eosio running well on windows 10 with ubuntu for windows so I was just wondering. Thanks
I'm running straight linux. On windows I am not sure that this is possible as I haven't tried it myself, but this whole process is doable with docker so if you were working on windows. I would use docker instead.
I did eosio with ubuntu for windows 10. Not Bash for windows but ubuntu. The bash won't work because it is too low a compiler version and ubuntu version is higher and allows for c++17 and cmake highest version, etc. Use ubuntu and you get the correct version of bash without a separate bash which is the wrong version of linux. Have to go into Windows 10 settings and allow for, that is turn on enable developer mode. Then go to Windows store and download/install ubuntu for windows and then all the fine high quality developer packages
Instead of making too much testing and continue to put a delay, I believe it is about time to make it happen.
If anyone else than @howo and @eonwarped had been doing testing, then we might have been in a place now where it would be responsible to launch the next hard fork.
But as it is, we still have some chain-brekaing bugs that have not been fixed, and no way to know for sure if there are many more potential problems, as the complexity and sheer number of weird actions people can try to do is so large.
So if you want faster progress, then demand witnesses you vote for to participate in testing.
This.
I agree but pushing a hard fork that might crash or worse force us to rollback would be much worse than delays.
Is there a way to test that for non developers ?
Excellent question ! And the answer is...Not really. Right now too many steps include coding at some point to get things done.
Thanks for keeping up the good work.
Thank you for keeping supporting me :)
곰돌이가 @jaydih님의 소중한 댓글에 시세변동을 감안하여 $0.004을 보팅해서 $0.038을 지켜드리고 가요. 곰돌이가 지금까지 총 7346번 $94.323을 보팅해서 $99.118을 구했습니다. @gomdory 곰도뤼~
Big labor, respect !
Thanks for sharing !
Thanks
I wish i could learn about this kind of thing. Im not understand but i think it must be important to steem.
Thanks for sharing !
hola como estan
amazing inputs
thanks for information
each and every step is understandable thanks
wow this is really very detailed, thanks for great work
Great work, this should be referenced in official portal as additional resources...
This is amazing
Posted using Partiko Android
Awesome
Brelent