Introduction
Solving a Rubix Cube can seem like a daunting task, especially if you mean to go about it the traditional way of treating it like a puzzle and problem solving your way through it. In that case it can begin to feel impossible. Many people give up after only completing the first layer when they go about it this way, if they even get that far.
Most people who solve a Rubix Cube don't actually problem solve it though. Instead they use a series of algorithms. This greatly simplifys the task by converting it to an activity that relies on memory, rather than problem solving ability. The individual only has to remember a series of 7-8 steps, which actually makes it a lot easier. Using algorithms really makes it possible for anyone to solve the cube, sometimes in lightning speed or even blindfolded. All it takes is a little practice.
In this post I'm going to show you how to solve the cube using the beginners algorithms. I'll begin with some basic concepts that you will need to know and then work you through the steps of implementing the algorithms. Feel free to skip ahead if you are already familiar with the cube basics or to the very end if you just want the algorithms.
Now let's get started.
The Basics
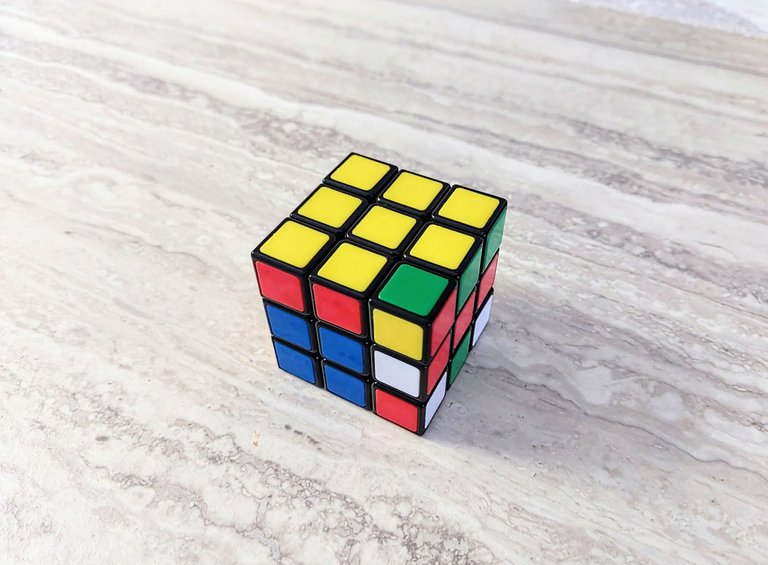
The first thing that you need to know is that the cube is divided into three different layers. The 1st layer consists of the top portion of the cube, the 2nd layer the middle portion, and the 3rd layer the bottom portion.
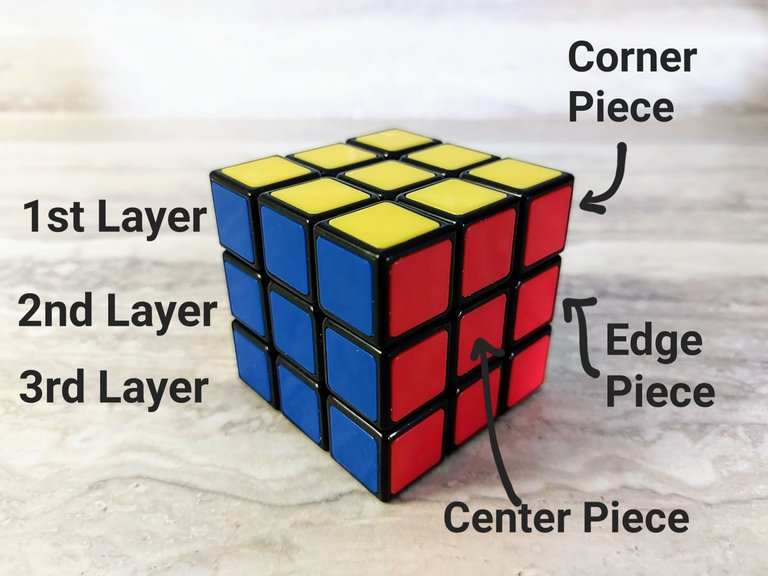
Along with having three distinct layers, the cube is also made up of three different types of pieces, including center pieces that do not move from their face location, corner pieces located on each corner of the cube and edge pieces that are adjacent to the center and between the corners.
Note: the center piece tells you the color of the face and it always remains opposite to its specific counterpart. For example, there are six faces of the cube: a red one, a blue, a white, orange, yellow and green. The white face is always opposite to the yellow, blue is always opposite of green and red is opposite of the orange face.
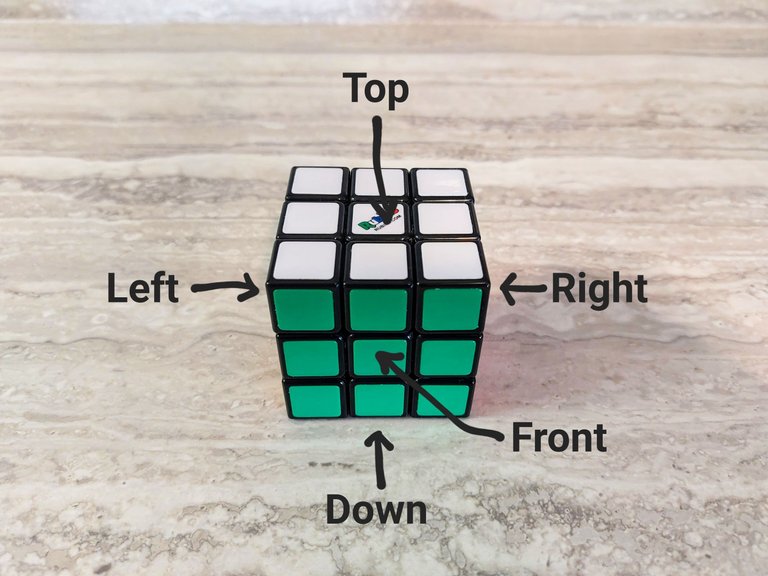
Similar to having six different faces, the cube also has six different notations which are as follows: Up, Down, Left, Right, Front and Back.
Note: You can ignore the Back notation because we aren't going to use it here.
The notations are represented by a letter which is used for the algorithms. They are as follows:
• Up = U
• Down = D
• Front = F
• Right = R
• Left = L
The cube always remains in a fixed position with the white face at the top (or Up notation) and a face moves in a clockwise rotation.
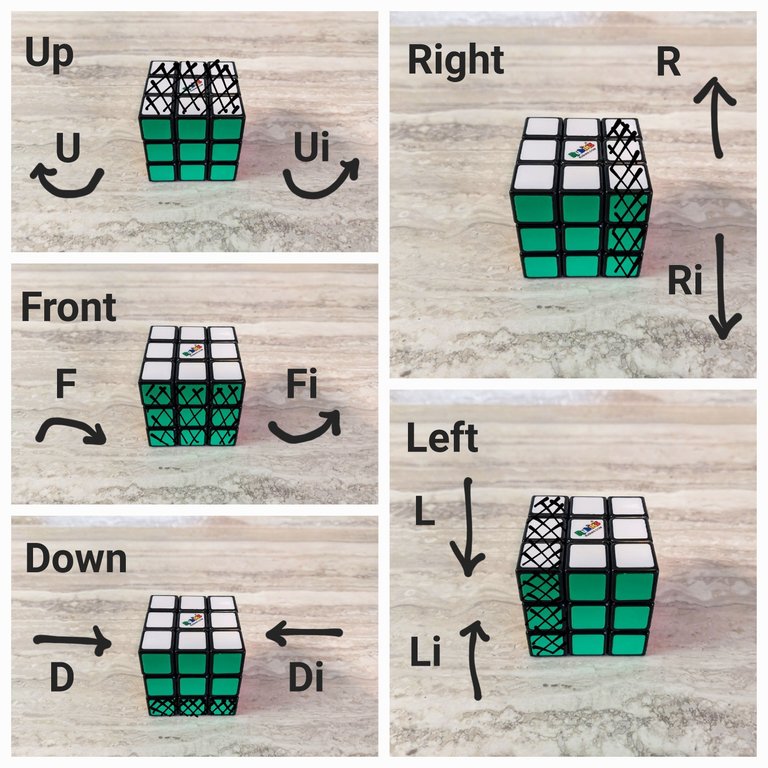
When an algorithm calls for a face to move in a counter clockwise rotation it is called an inverse and is generally depicted with an "i" letter as follows:
• Up Inverse = Ui
• Down Inverse = Di
• Front Inverse = Fi
• Right Inverse = Ri
• Left Inverse = Li
Note: You may see other online sources use a ' symbol (ex. U') to depict an inverse or a ² symbol (ex. U²) but for this tutorial I will be using a small case i as noted above.
Now that you know the basics of the cube we are ready to learn the algorithms and to start solving.
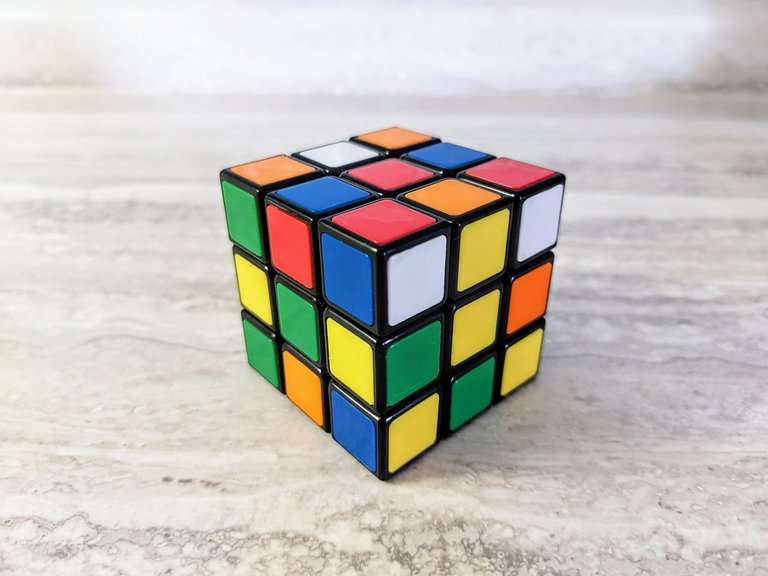
But first we need to mix up the cube. Queue the video of fast forwarding a cassette noises and speedy hands mixing up the cube.
The White Cross
Start by orienting the cube so that the white face is in the Up position.
Tip: As a beginner you always want to start solving the cube in the same way to make the memorization process easier.
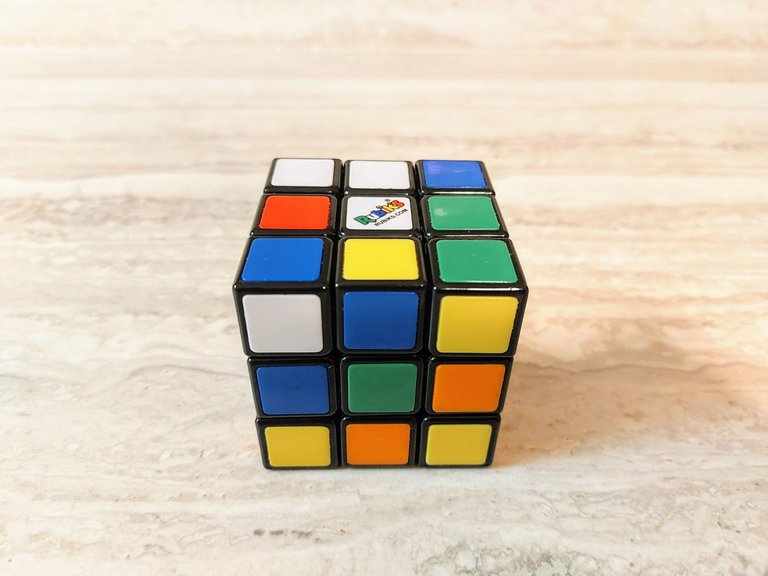
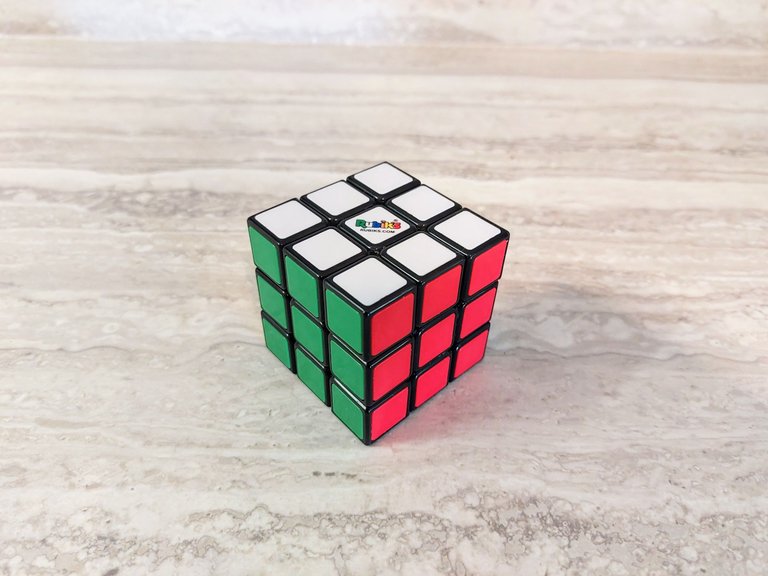
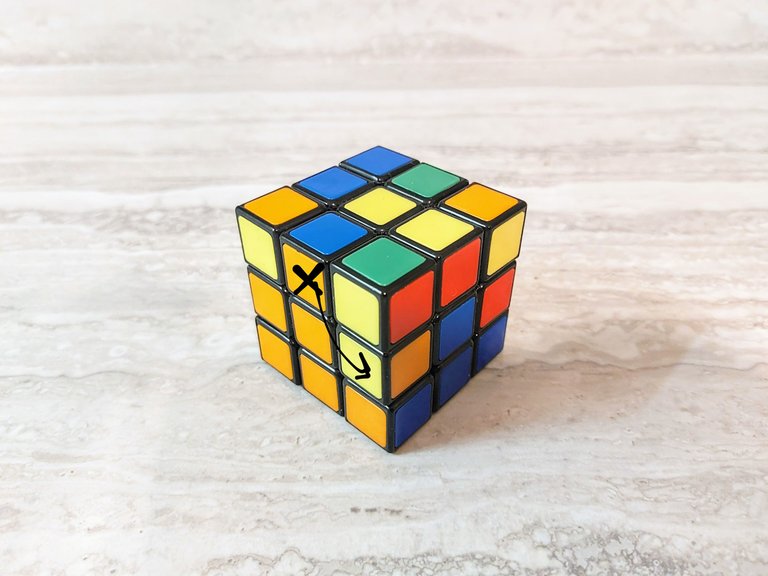
You can usually create a white cross without using an algorith just by messing around with the cube for a while, but at a minimum in order to use the first algorithm you will need to orient the edge pieces to their correct location: i.e. the green/white edge piece goes to the green face, the red/white edge to the red face and so on.
Tip: You can use the 3rd layer to rotate pieces around the cube without messing up the 1st or 2nd layer. Do this by moving pieces from the 1st layer to the 3rd by rotating the face from Up to Down, then rotating the 3rd layer as needed and bringing the piece back to the top. It will make more sense once you begin to practice.
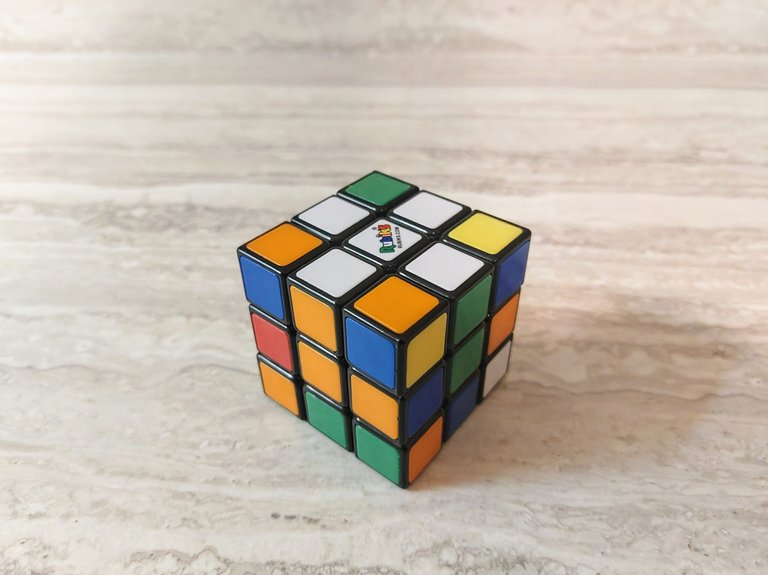
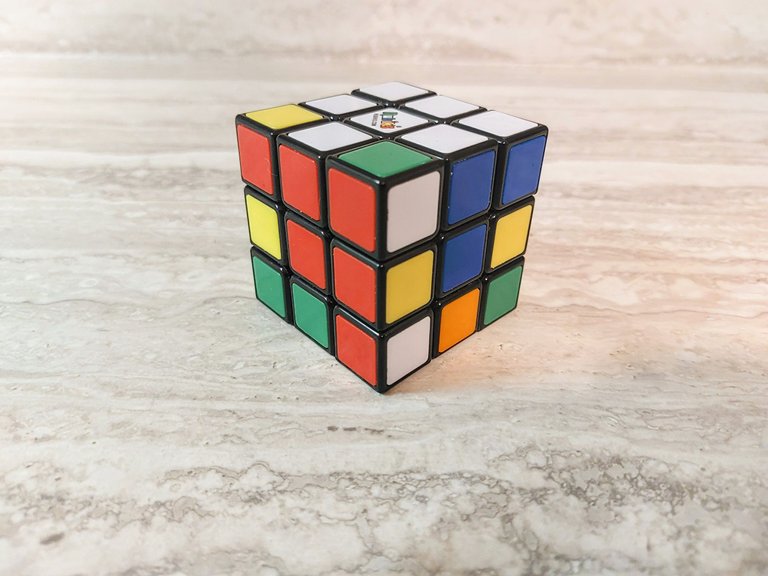
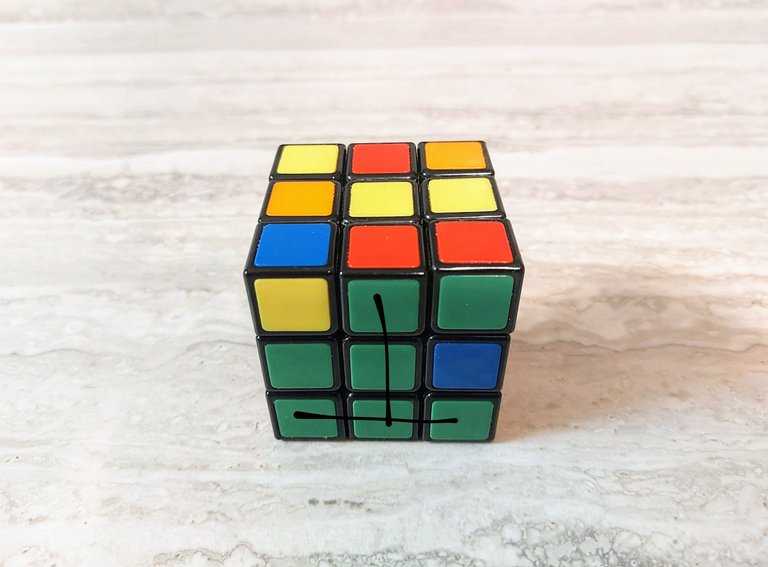
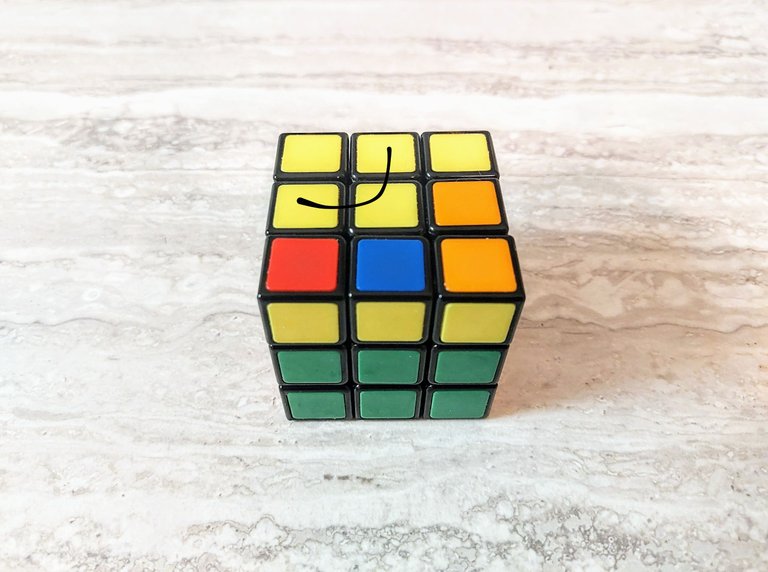
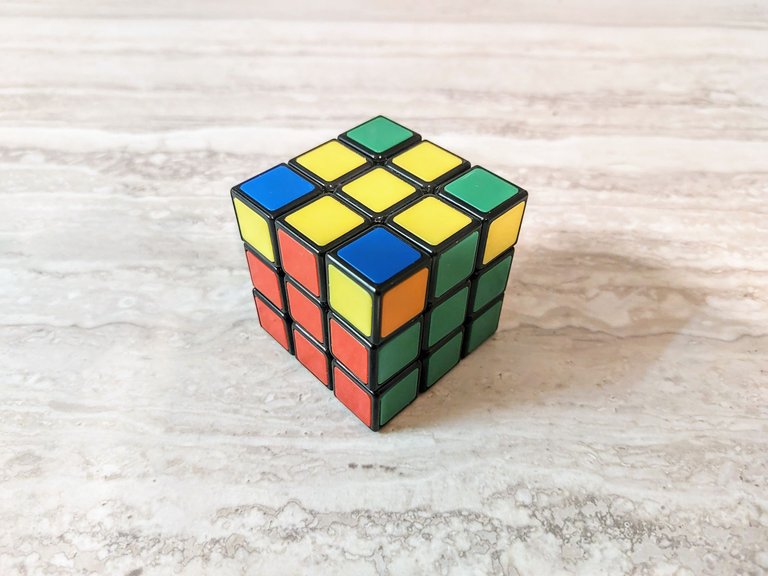
Some of the pieces may be oriented correctly at this point or they may not. If not (see above image) than do the white cross algorithm as follows. This will orient the piece to the correct position.
Fi U Li Ui
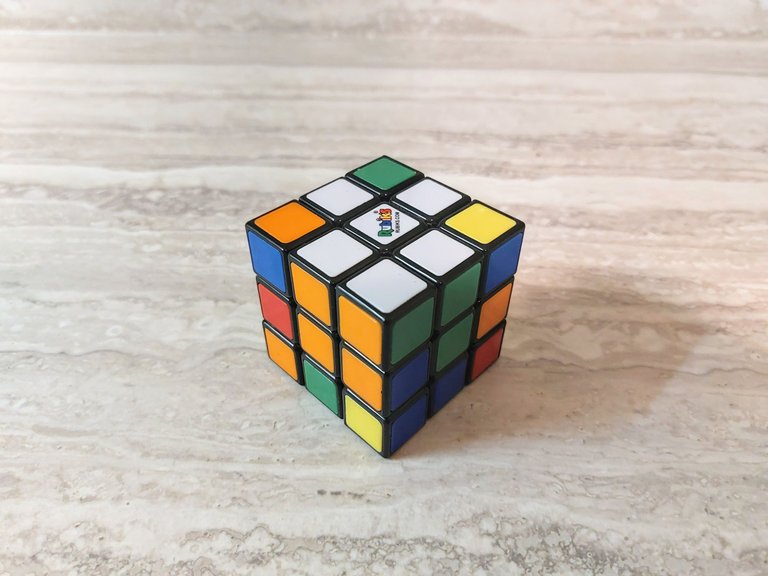
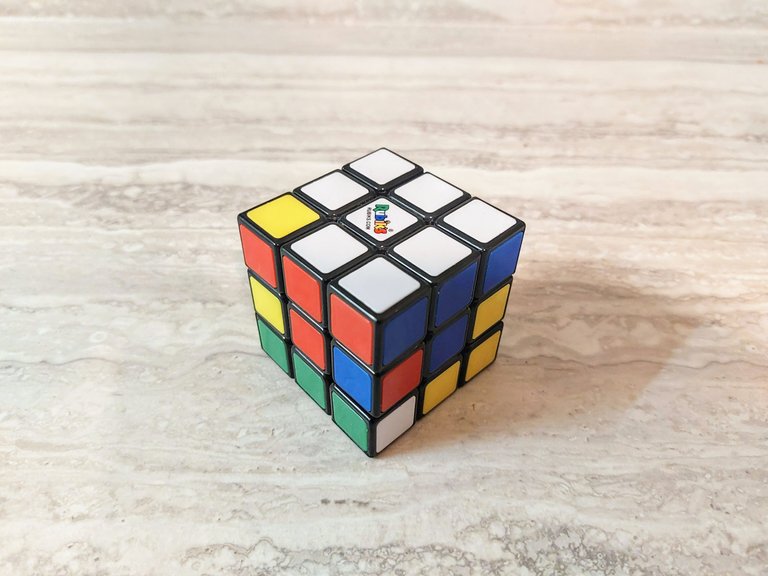
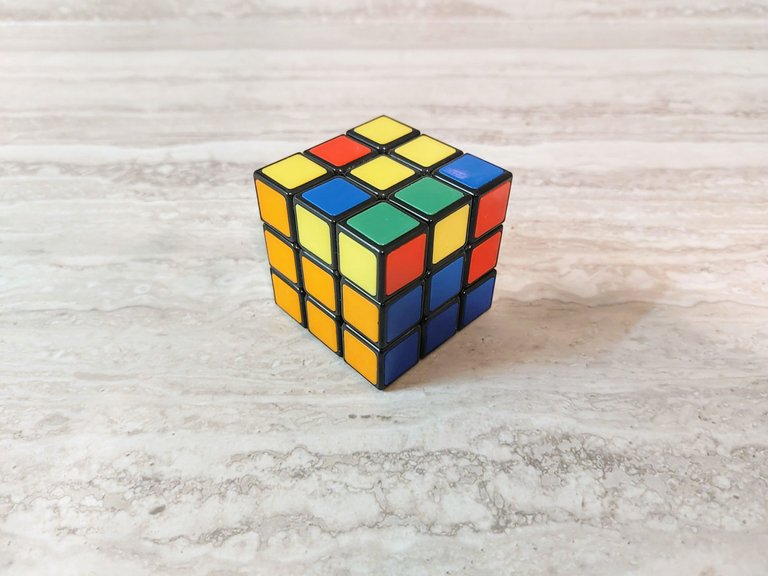
Rotate the cube in your hand so that the next edge piece is in the front location and do the same algorithm. Do this until all of the edge pieces are in the correct position and the correct orientation.
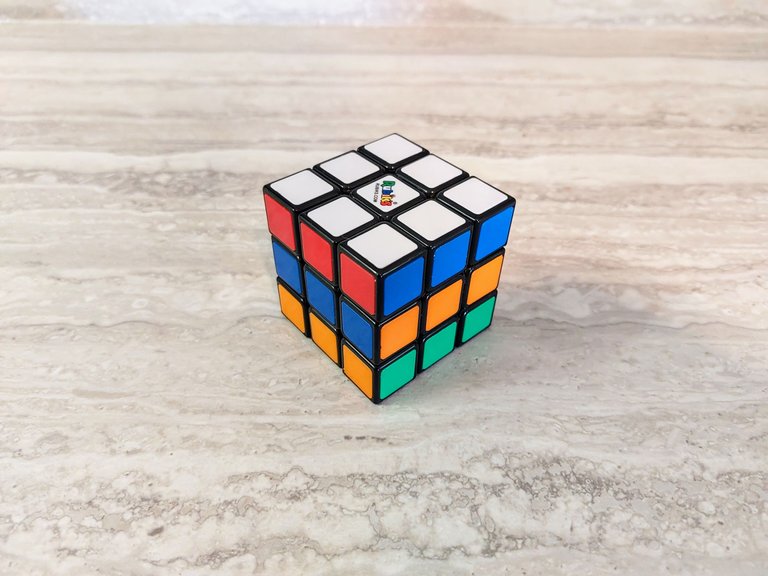
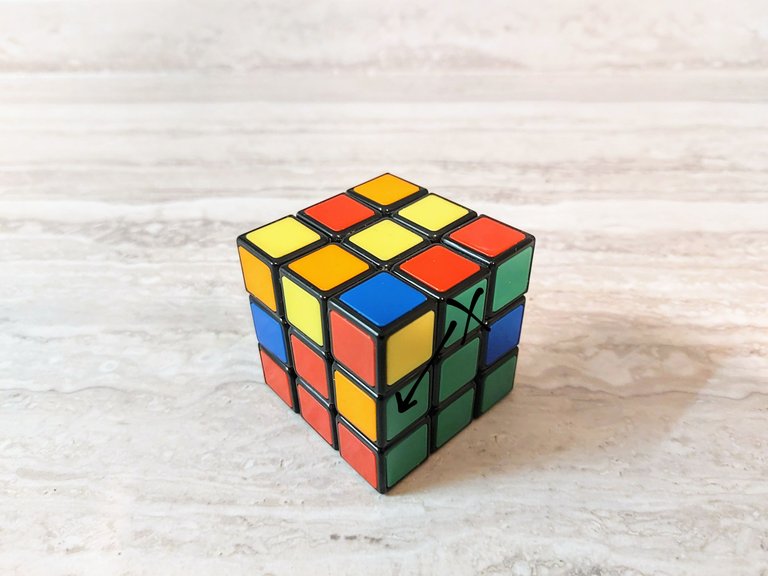
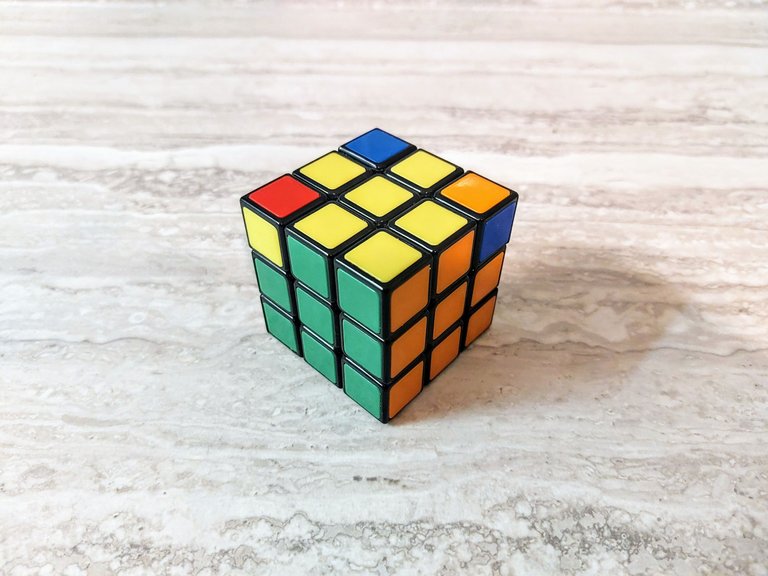
At this point you should see a white cross at the top of the cube and all of the edge pieces should be aligned in the correct position relative to the appropriate center piece color, as shown above.
White Corner Pieces
Next you will want to begin working on the white corner pieces. The algorithm for this stage is as follows:
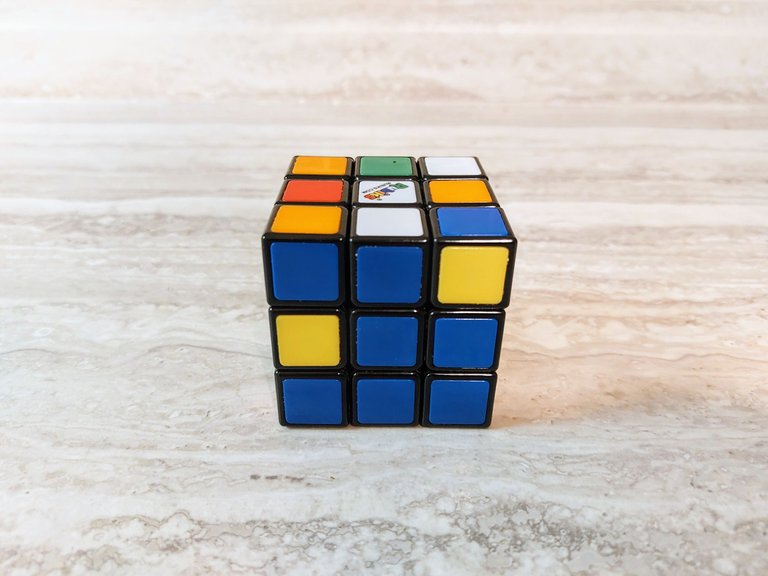
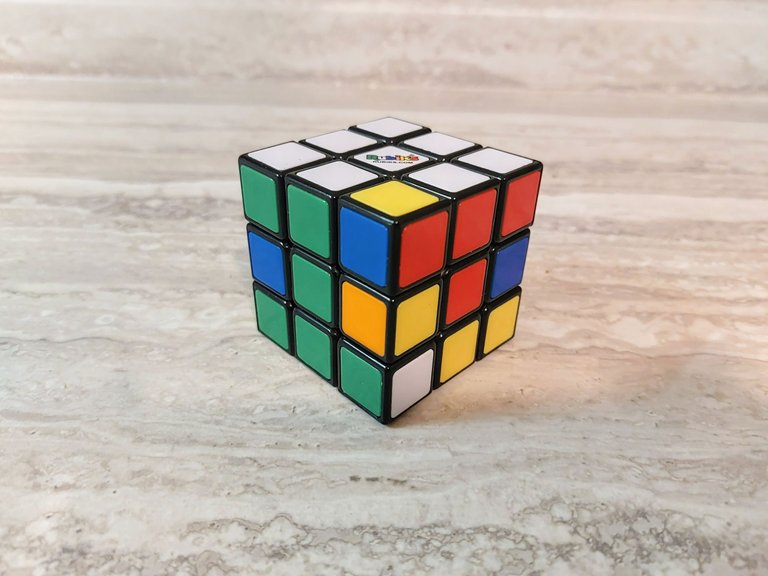
Di Ri D R
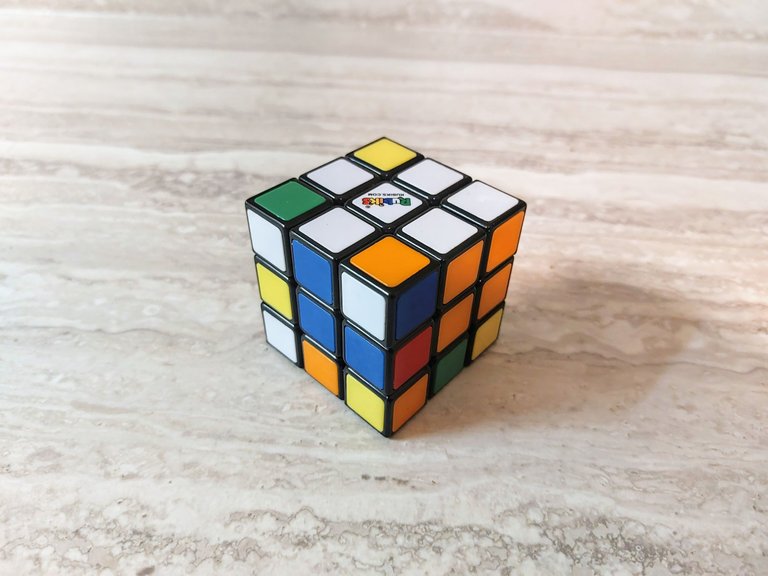
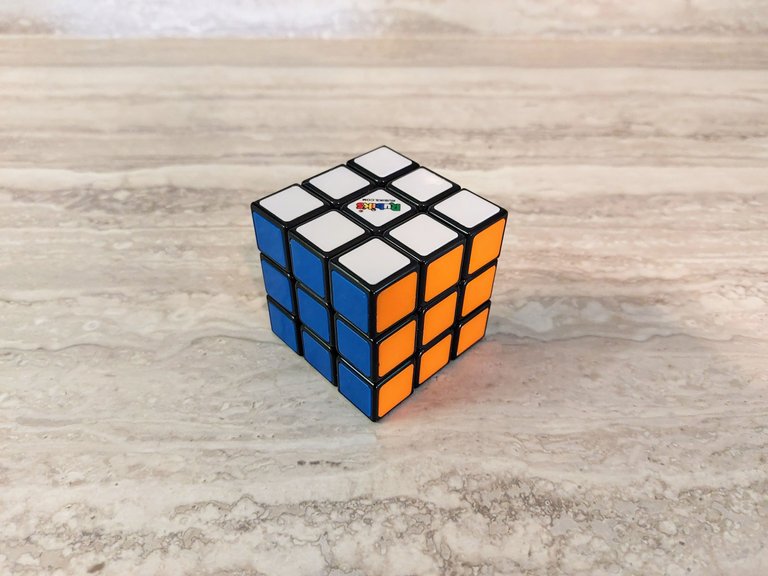
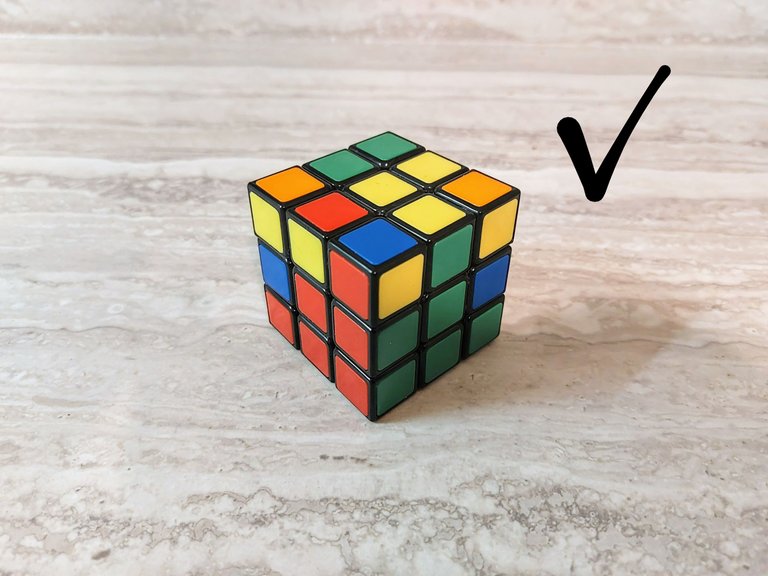
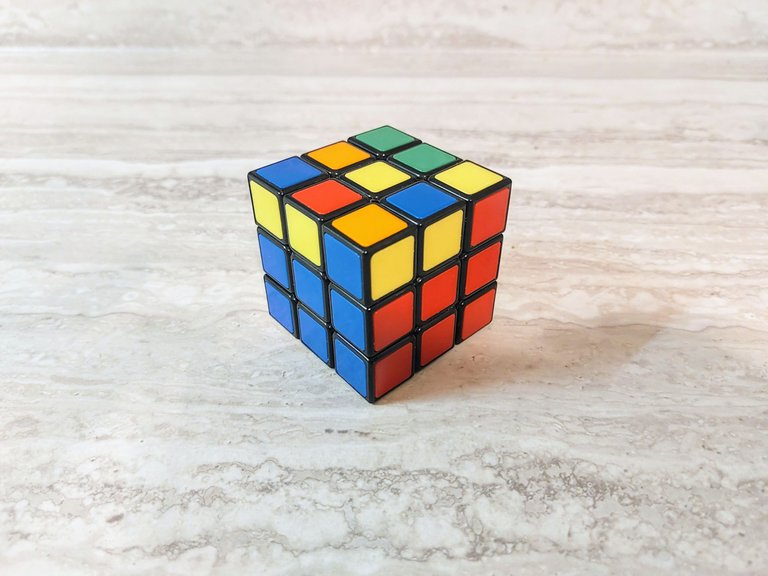
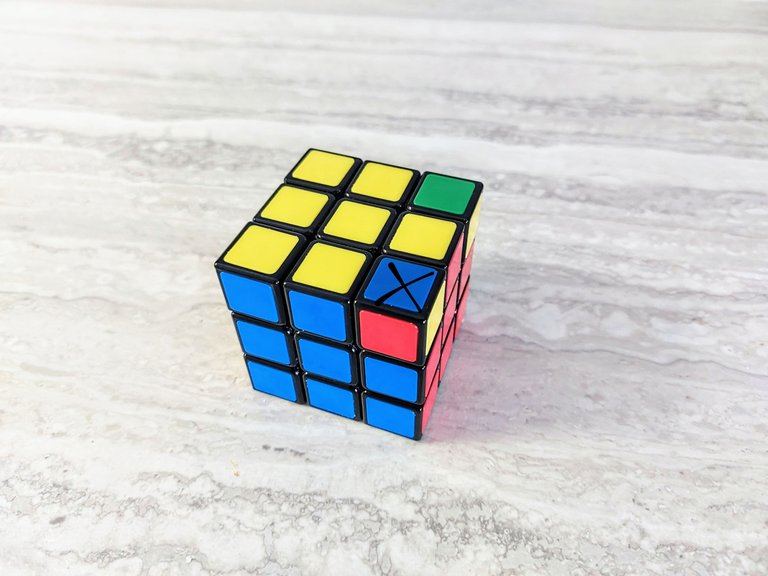
The trick here is that you want to start with the correct corner piece on the right side of the cube in either the top position or bottom, whichever occurs naturally. In the photo above you can see that I'm working on the white, blue and orange piece. Once you get the piece to either of those places you can go ahead and implement the algorithms. Do it as many times as it takes to orient the piece correctly.
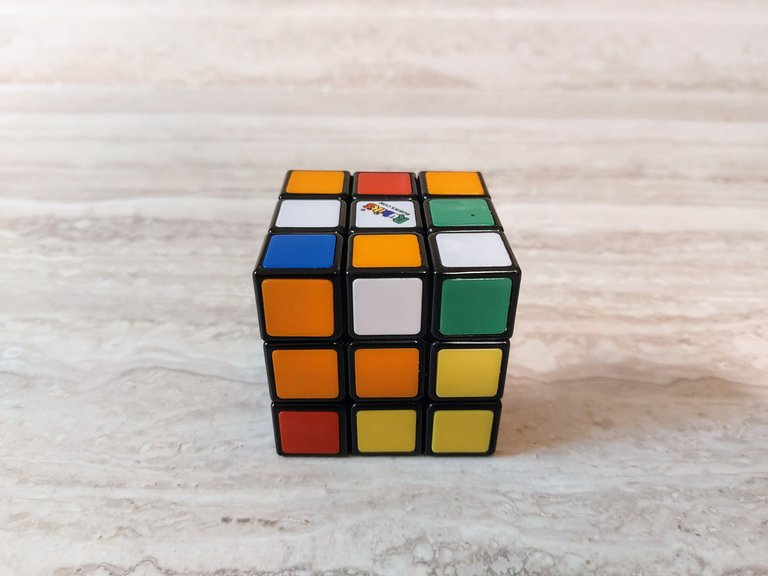
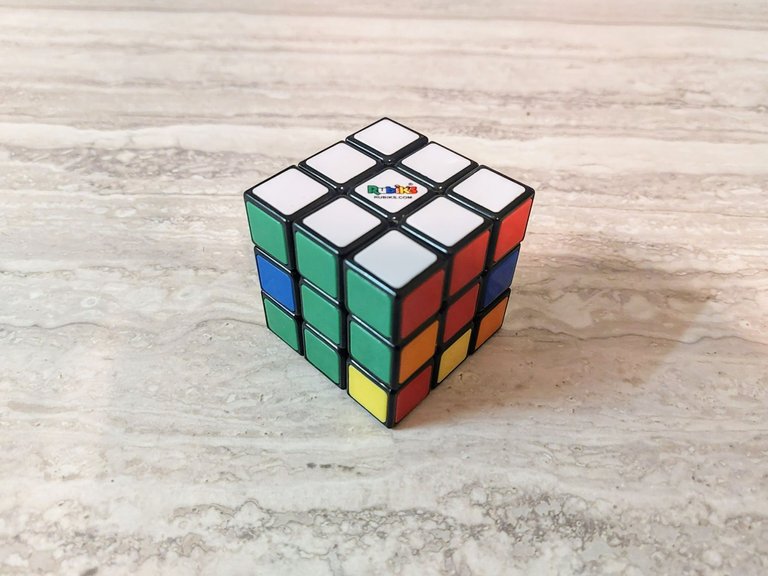
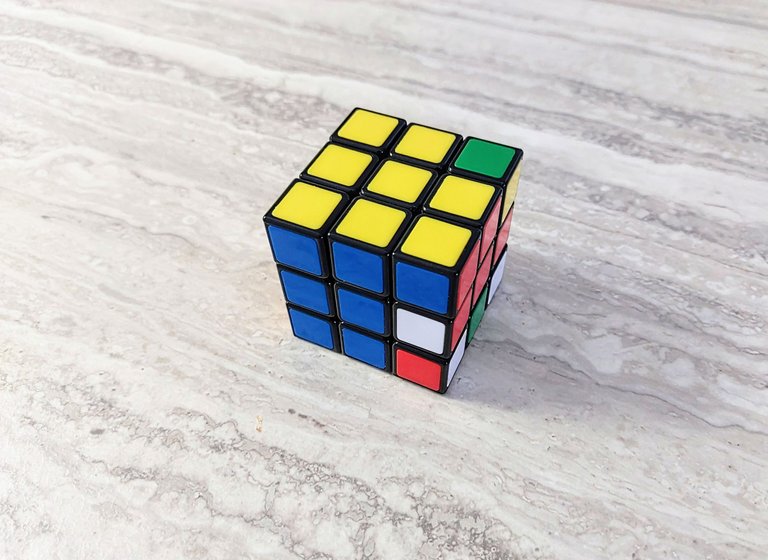
The next photo (below) is slightly deceiving. Here I am working on the white, red and blue piece at the bottom right of the cube not the white, green and red piece at the top.
Here it is completed, after working the algorithm (see below).
The last piece is the green, white, and red corner. I'll have to rotate it until it's in the correct bottom right location and then implement the algorithm.
At this point we have solved the entire first layer of the cube.
2nd Layer Edge Pieces
This next part is slightly more tricky because it involves two very similar, but reversed, algorithms and they are both much longer than the previous ones. Which algorithm you use depends on the position of the edge piece and whether it needs to go to the right edge location or the left. The Right and Left algorithms are as follows
Right: U R Ui Ri Ui Fi U F
Left: Ui Li U L U F Ui Fi
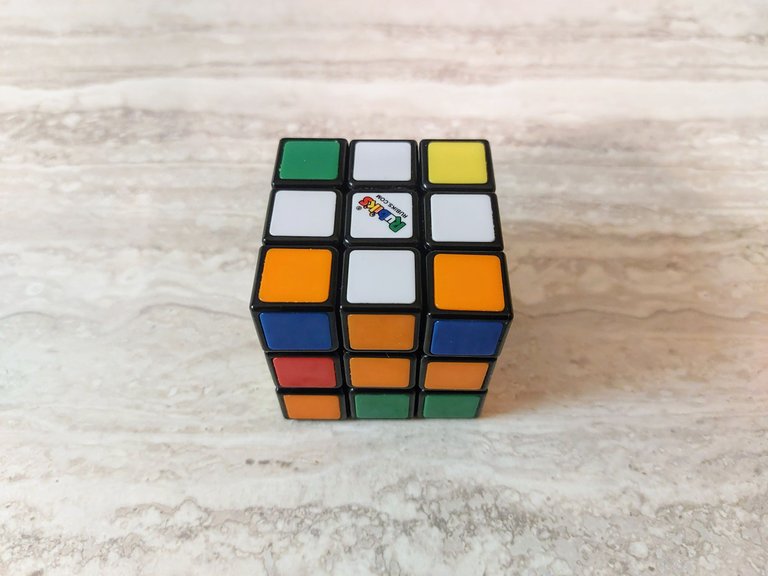
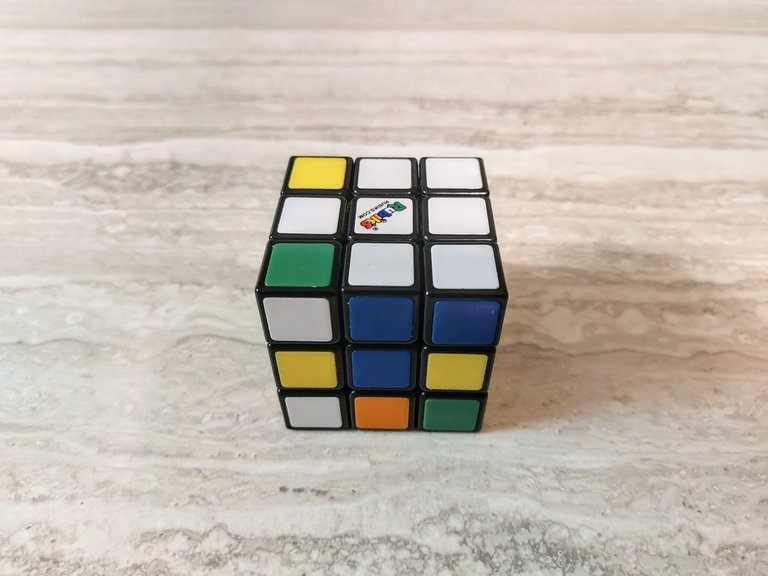
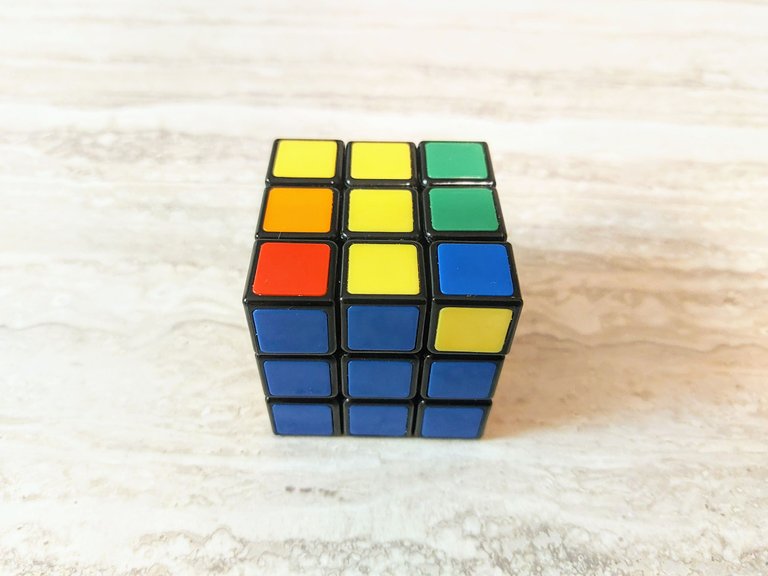
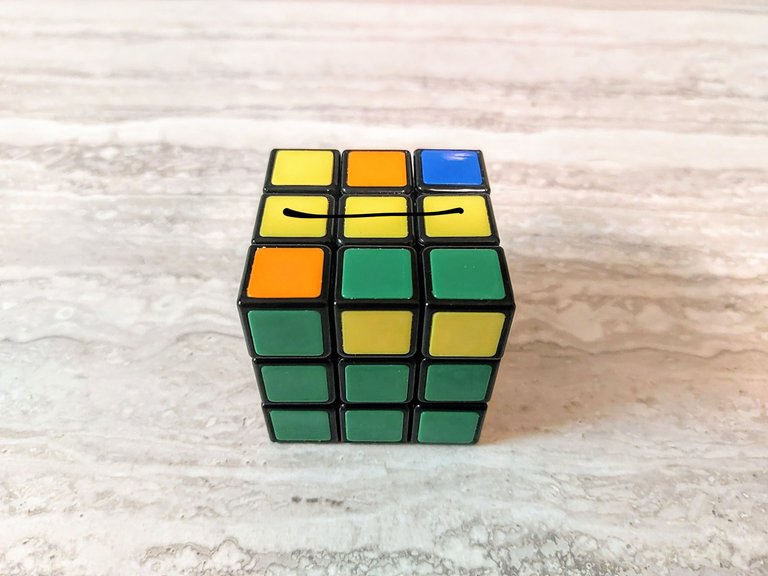
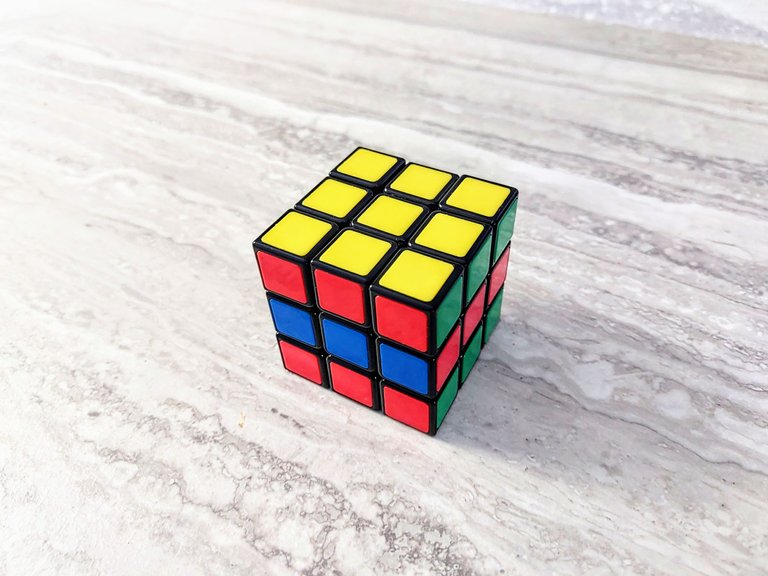
First you want to start by flipping the cube upside down so that the white face is on the bottom and the yellow face is at the top. You want to orient the edge piece to the middle location so that it is in line with the correct face color. You will notice an upside down "T" shape here (see photo above).
Here you see that the red and green piece needs to go to the left edge of the cube so implement the left side algorithm.
Often times you run into a situation like the one below where the piece is already in the correct location but oriented incorrectly. In this case you are unable to make the upside down "T" formation. It's simple enough to solve though. All you have to do is remove that piece and switch it with another. Do this by implementing one of the algorithms, in this case the Right side algorithm.
Now you can implement the same algorithm to put the piece back in the same location but oriented correctly.
You may have noticed this already, but basically you just did the same algorithm twice.
Repeat this process until the entire 2nd layer of the cube is complete.
Yellow Cross
Next we need to work on creating a yellow cross on the top face. We are just looking for a cross though, the pieces do not have to be in the correct orientation.
To do this we use the following algorithm:
F R U Ri Ui Fi
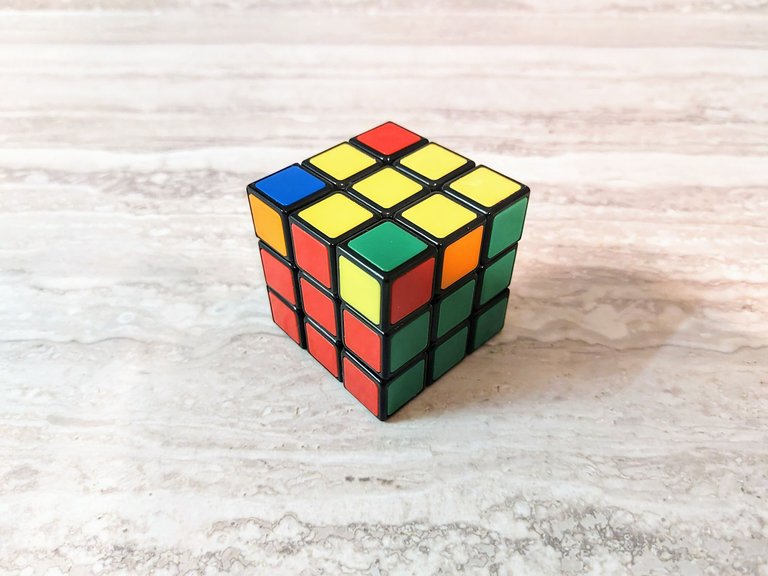
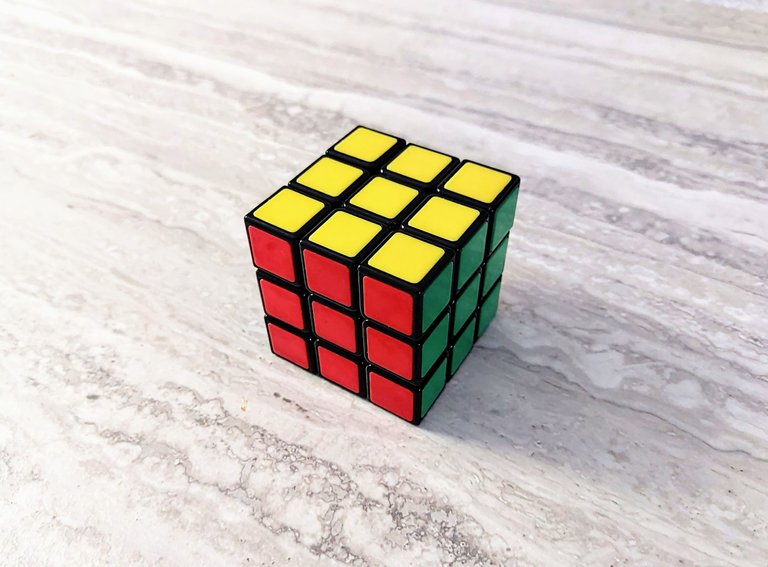
As you are doing the algorithm, you want to look for two different patterns. The first is a backwards "L" shape. When you see this, orient the cube as seen in the photo below and do the algorithm twice more.
The other pattern is a horizontal line across the cube. If you see this, orient the cube as seen below and do the algorithm once.
At this point you should have a yellow cross on the top layer, though the pieces may not be oriented correctly. To orient them, we need another algorithm.
3rd layer Edge Pieces
Now that we have the cross we need to orient the edge piece correctly. To do this we use the following algorithm:
R U Ri U R U U Ri U
Do this as many times as it takes to get all of the edge pieces in their correct position.

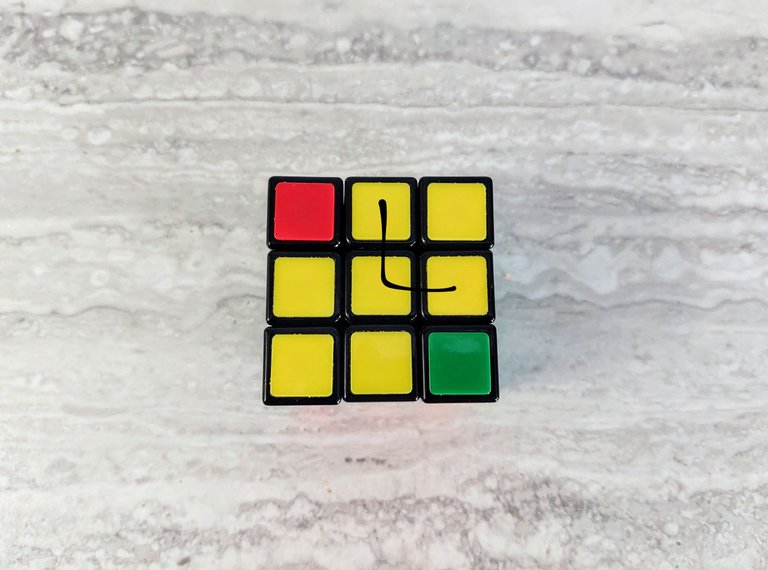
Note: if you have two pieces in the correct position and orientation, than move the cube in your hand so that they create an "L" shape, as seen below, and do the algorithm again until all of the pieces are correct.
Once all of the edge pieces are correctly oriented you can move onto the corner pieces.
3rd layer Corner Pieces
To put the corner pieces in the correct location you need to use the following algorithm:
U R Ui Li U Ri Ui L
To start you will need to find a piece that is in the correct location, though it does not have to be oriented correctly. The photos above and below are two examples of this. The photo above shows a piece in the correct position and orientation, and the photo below shows a piece that is only in the correct position. Both are fine here.
Note: if there is no piece in the correct position than do the algorithm once or until one ends up correctly.

When you have a piece in the correct position, orient the cube in your hand so that that particular piece is in the right front corner. Once it is there, do the algorithm until all of the corner pieces are in the correct position. They do not have to be oriented correctly - that will be accomplished with our last algorithm.
Note: this step may even solve the Cube. In that case you are done.
Solving the Cube
The final stage is the most confusing part and the scariest. You have come this far and you are now about to mess everything up (literally) so really pay attention here.
The algorithm for this stage is as follows:
Ri Di R D
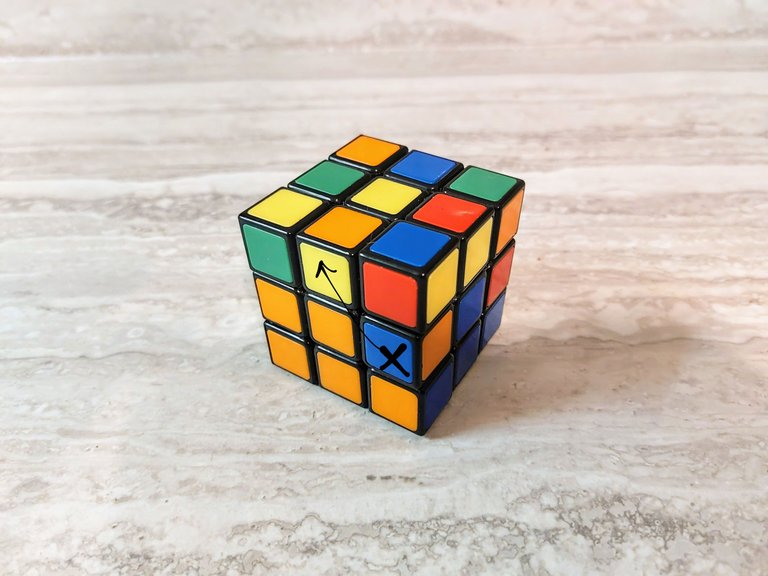
Orient the cube so that the piece that you want to solve is in the front bottom right corner of the cube and do the algorithm until its orientation is correct. It will look like you are messing up everything that you previously worked for, but that's okay, it will correct itself later.
Next, turn the 1st layer in a clockwise motion until the next pice is in the front bottom right corner and do the algorithm again as many times as it takes to be correct.
Below are the same photos as above with some added visuals for clarity. Note where the green piece is moved to and that the 2nd and 3rd layers remain stagnant.
Note: Do not rotate the cube in your hand.
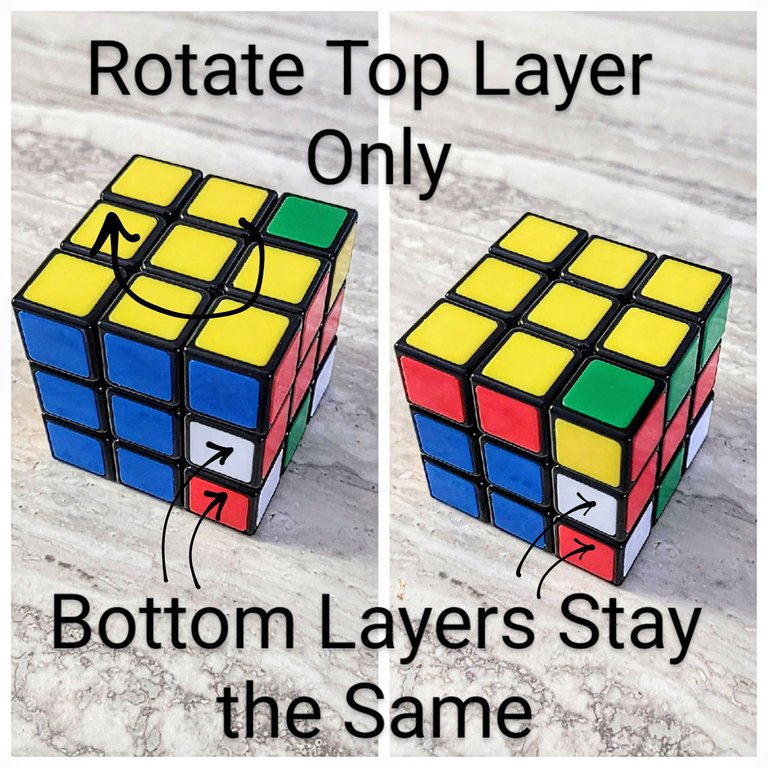
Continue the process of solving the piece with the algorithm and then rotating the 1st layer so that the next corner piece is in the front bottom right corner, until the cube is solved.
Congratulations. You solved the Rubix Cube!!!
List of the Algorithms
| Description | Algorithm |
|---|---|
| 1. White Cross | Fi U Li Ui |
| 2. White Corners | Di Ri D R |
| 3. 2nd Layer Edges | |
| Right Side | U R Ui Ri Ui Fi U F |
| Left Side | Ui Li U L U F Ui Fi |
| 4. Yellow Cross | F R U Ri Ui Fi |
| 5. 3rd Layer Edges | R U Ri U R U U Ri U |
| 6. 3rd Layer Corners | U R Ui Li U Ri Ui L |
| 7. Solving the Cube | Ri Di R D |
Wow dude super impressed, I just feel that you wanted to rubi-flex a little 😃
I had no idea there was a whole technique, it does make sense...It still super impressive...
Now that I know that you enjoy ROP, and solve Rubixcube I have a much better profile in case you turn serial killer.
Oh damn...The rubixcube killer, he leaves an unsolved rubixcube at the crime scene and if you decode with algorithm the cube, you can find the hidden sentence which gives clue for his next victim.
Lmao 😂 how high were you when you wrote that?
It's a good story idea.
The post was inspired by another Hiver who needed to solve the cube for their kid. It was unclear to me at the time if they knew how to do it or not so I said I'd do a post on it. I think they did know how already, but I had already said I'd make the post so I felt that I should follow through on it. Lol
It's a good 5 minute meditation though knowing the algorithms by memory.
Hahaha 🤣 maybe I was indeed.
I can see the meditative aspect, also good for firing neurons through synapses, a good brain gymnastic, probably similar to doing scales with a metronome while zoning out
yes exactly 👍
Yes 🤓
😂
My niece is a real fan and master at solving Rubik's cube. She has a bunch of them, in different shapes, it's a pity I don't have now any pictures to show her collection. She learned the algorithm so basically, it is solving without almost even watching the cube 😅
I had one when I was a child, never liked it as I didn't know how to solve it 🤣
Some of the cubes are very complex. They look way to challenging for me even knowing that there are algorithms to beat them haha.
It's definitely funner when you can beat it. I hated Rubix Cubes until I learned how to solve it haha
Holy fucking shit! You did it and a proper good one too! I am going to go through this at length and will return with a real comment as I am out in the car!
Haha yeah. Remind me never to do a post like this again. I figured it would be a quick post of the algorithms but then I realized that some explanation was required for true beginners.
2000 words and however many edited photos later and I'm like "why am I doing this again?" 🤣
Actually it was fun and I needed to jog my memory on how to solve the cube so it was worth it.
No rush or obligation to read it, but hopefully it's helpful.
It's the same way! Almost.
I have just gone through it and we do it the same way although the names of the algorithms are different but they are the same ones. Also when I do it I start with a "Daisy" yellow in middle with white petals thing sometimes. But aye! Magic man, I am impressed at your explaining power. This took some graft!
Yeah there are a lot of different algorithms but I think the beginners ones are mostly the same. I've heard of people doing the daisy method but have never tried it myself.
I read once that it took the person who invented the cube over a month to solve his own creation. I thought that was hilarious 😂. I guess the algorithms hadn't been discovered at that point 🤣
Hahahah, can you imagine how frustrating that would be to create something then be flummoxed by it. He needed a cocky 12 year old nearby to pick it up for ten minutes and just start solving it behind his back or something!
Lmao 😂
That's so true.
Given the R U R U memories of first solving it, right now I average around 13 seconds. Great post and very very well explained.
Holy crap 13 seconds! That's crazy fast.it takes me about 5 minutes.
So are you using these same algorithms or different ones? I suspect that they are different
No problem just a week of work could take it to 1 minute or less. No, I use a different method named CFOP, it has more, and different algorithms than the normal method. If we consider solving the last layer with CFOP, it consists of 78 algorithms.
Wow 78 just for the last layer! More algorithms and still you can beat it so much faster. That's impressive.
Hehe! I had so many of these puzzles as a kid and I could solve it in less the 5 minutes. I figured it out completely. Sadly, if my life depended on solving one now I would be dead.
I'll be sure to save this post, and maybe if I check my storage I'll find a cube somewhere.
Enjoy your meditation.
Namaste 🙏
I'm impressed that you could solve it as a kid - is that without using any algorithms and just problem solving it?
It would take me months to do it that way if I ever was able to solve it lol
Haha! Yeah, just problem-solving it so that my uncles and friends would not mock me for not being able to line up the colors.
I was a little trickster so I would not be able to live down not being able to solve a puzzle.
I used to have several of those cubes and pretend to be at a circus juggling them like balls and solving them in seconds. 🤣
I was over the moon when I first figured it out as a child.
Now I would have to use the algorithms:)
I see. Well thats very impressive. My hats off to you
🤹♂️
🤣🙏
I still have my original cube from years ago and still can't do it. When I get back from my holidays I will have another go!
Yeah try it using the algorithms and you will get it for sure. Than if you keep practicing, eventually you can do it in about 5 minutes from memory. For a while I was doing it once a day as a sort of meditation.
I will have a go. I want to crack it.
Good luck 👍
Practice = patience. Me != patience.
My other half and my boy both love to solve Rubix cubes. You can see them go for hours with more complex ones. So they have got the algorithm right.
I love problem-solving, I do this for a living, but I'm not too fond of Rubix's cube. I will pass on the above, but it is a very comprehensive tutorial and gave me some insight into the methodology.
The more complex ones are crazy lol. I've never tried one and doubt I ever will. The simple 3x3 cube is hard enough even knowing the algorithms haha
haha, never say never!
I can't believe it takes this much time to get it done, naturally am not a fan but now that have been educated on how to get it solved, I sure will try it out soon.
Yeah it can take a long time to solve but the algorithms definitely make it easier. They are the way to go!
This post has been manually curated by @steemflow from Indiaunited community. Join us on our Discord Server.
Do you know that you can earn a passive income by delegating to @indiaunited. We share 100 % of the curation rewards with the delegators.
Here are some handy links for delegations: 100HP, 250HP, 500HP, 1000HP.
Read our latest announcement post to get more information.
Please contribute to the community by upvoting this comment and posts made by @indiaunited.
Thanks for the support. I appreciate it 😁
😃Great tutorial and clear photos. My son enjoys solving the cube. He studied the steps, uses a timer in an effort to improve on speed.
His mother is yet to give it a shot. Thanks for the tips. Lol
Well now you can learn in secret and memorize the algorithms and then one day solve it in front of him to impress him.
Oh yeah!!!!
This has never been easy , even with the correct algoritm it doesnt make it easy either hahaha i gues it s just matter of practice! as everything in life
Yeah it definitely requires practice indeed. But with the algorithms it is definitely solvable
Congratulations @leaky20! You have completed the following achievement on the Hive blockchain and have been rewarded with new badge(s):
Your next target is to reach 15000 comments.
You can view your badges on your board and compare yourself to others in the Ranking
If you no longer want to receive notifications, reply to this comment with the word
STOPTo support your work, I also upvoted your post!
Check out the last post from @hivebuzz:
Support the HiveBuzz project. Vote for our proposal!